Page 35 of 444
33
Passenger's
airbag systemfixed in the seat belt
and passenger's front
airbag warning lamps
display.The control switch, located in the glove
box, has been placed in the "ON"
position.
The passenger's front airbag is activated.
In this case, do not install a rear ward
facing child seat.Move the control switch to the "OFF" position to
deactivate the passenger's front airbag.
In this case, you can install a rear ward facing child
seat.
Stop & Star t fixed. When the vehicle stops (red lights, traffic
jams,
...) the Stop & Start system has put
the engine into STOP mode. The warning lamp goes off and the engine restarts
automatically in START mode, as soon as you want to
move off.
flashes for a
few
seconds, then
goes off. STOP mode is temporarily
unavailable.
or
START mode is invoked
automatically. For more information on special cases with STOP
mode and START mode, refer to the "Stop & Start"
section.
Warning
/indicator lampis on Cause Action/Observations
Monitoring
Page 43 of 444
41
Lighting dimmer
Permits manual adjustment of the brightness of
the instruments and controls to suit the ambient
light level. Only operates when the vehicle
lighting is on in night mode.
Activation
F Press this button to change the brightness of the instruments and controls.
F
W
hen the lighting reaches the minimum
setting, release this button, then press
again to increase it.
or
F
W
hen the lighting reaches the maximum
setting, release this button, then press
again to reduce it.
F
W
hen the lighting reaches the level of
brightness required, release this button.
This indicator and the lighting
value appear in the middle of the
instrument panel during adjustment
to show the setting from the 16 levels
available.
deactivation
When the vehicle lighting is off, or in day mode
(daytime running lamps on), pressing the button
does not have any effect.
Monitoring
Page 44 of 444

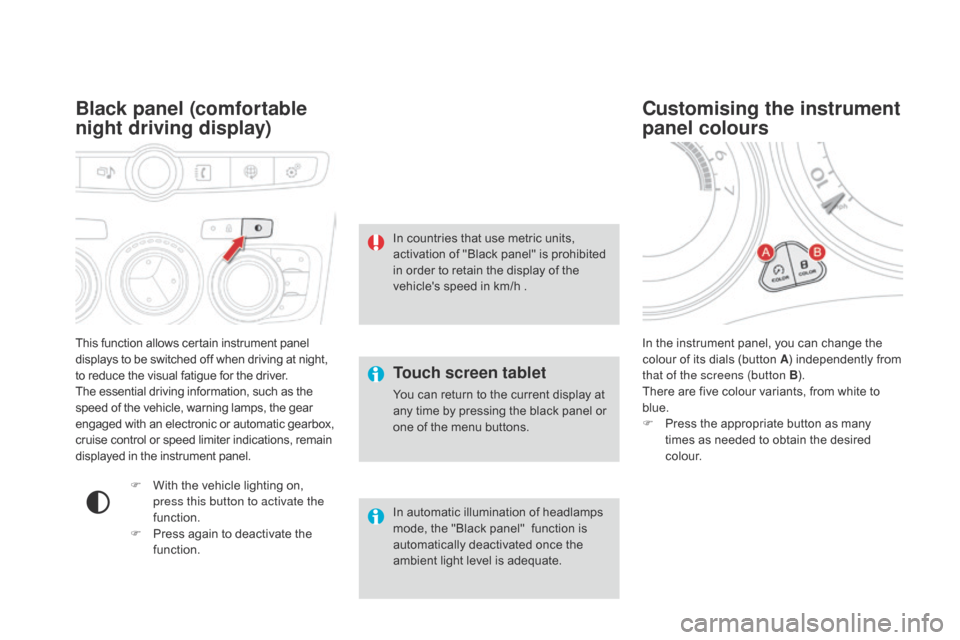
This function allows certain instrument panel
displays to be switched off when driving at night,
to reduce the visual fatigue for the driver.
The essential driving information, such as the
speed of the vehicle, warning lamps, the gear
engaged with an electronic or automatic gearbox,
cruise control or speed limiter indications, remain
displayed in the instrument panel.
Black panel (comfortable
night driving display)
F With the vehicle lighting on, press this button to activate the
function.
F
P
ress again to deactivate the
function. In the instrument panel, you can change the
colour of its dials (button A
) independently from
that of the screens (button B ).
There are five colour variants, from white to
blue.
F
P
ress the appropriate button as many
times as needed to obtain the desired
c o l o u r.
Customising the instrument
panel colours
Touch screen tablet
You can return to the current display at
any time by pressing the black panel or
one of the menu buttons.
In automatic illumination of headlamps
mode, the "Black panel"
function is
automatically deactivated once the
ambient light level is adequate. In countries that use metric units,
activation of "Black panel" is prohibited
in order to retain the display of the
vehicle's speed in km/h .
Page 47 of 444

45
Define the vehicle parameters
- "Driving assistance":● " Parking brake automatic" (Automatic
electric parking brake; see the "Driving"
section),
●
"
Rear wipe in reverse gear" (Rear
wiper coupled to reverse gear; see the
"Visibility" section),
●
"
Speeds memorised" (Memorising
speeds; see the "Driving" section).
-
"
Vehicle lighting" (see the " Visibility"
section):
●
"
Directional headlamps" (Main /
additional directional lighting),
-
"
Interior lighting" (see the " Visibility"
section:
●
"
Follow-me-home headlamps"
(Automatic operation of headlamps after
switching off the ignition),
●
"
Welcome lighting" (Exterior and interior
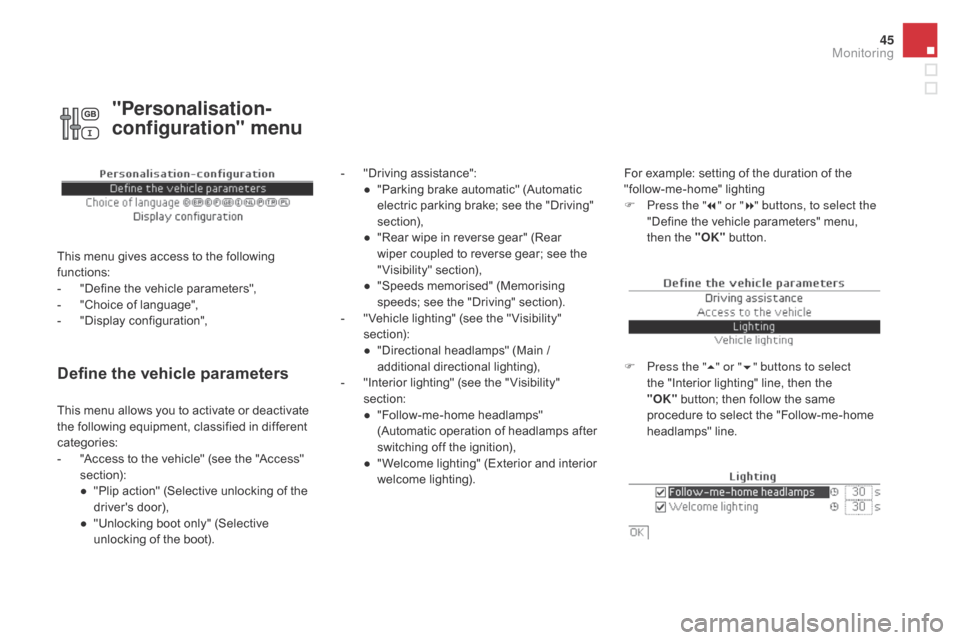
welcome lighting). For example: setting of the duration of the
"follow-me-home" lighting
F
P
ress the "7" or " 8" buttons, to select the
"Define the vehicle parameters" menu,
then the " OK" button.
F
P
ress the "5" or " 6" buttons to select
the "Interior lighting" line, then the
"OK"
button; then follow the same
procedure to select the "Follow-me-home
headlamps" line.
This menu allows you to activate or deactivate
the following equipment, classified in different
categories:
-
"
Access to the vehicle" (see the "Access"
section):
●
"
Plip action" (Selective unlocking of the
driver's door),
●
"
Unlocking boot only" (Selective
unlocking of the boot).
"Personalisation-
configuration" menu
This menu gives access to the following
functions:
-
"
Define the vehicle parameters",
-
"
Choice of language",
-
"
Display configuration",
Monitoring
Page 49 of 444

47
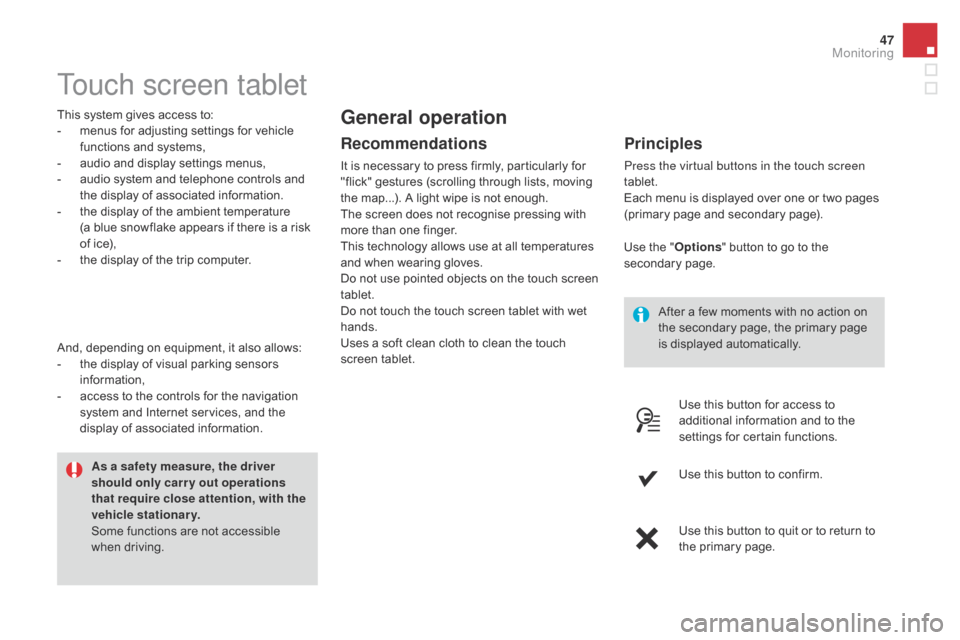
Touch screen tablet
This system gives access to:
- m enus for adjusting settings for vehicle
functions and systems,
-
a
udio and display settings menus,
-
a
udio system and telephone controls and
the display of associated information.
-
t
he display of the ambient temperature
(a
blue snowflake appears if there is a risk
of ice),
-
t
he display of the trip computer.
Recommendations
It is necessary to press firmly, particularly for
"flick" gestures (scrolling through lists, moving
the map...). A light wipe is not enough.
The screen does not recognise pressing with
more than one finger.
This technology allows use at all temperatures
and when wearing gloves.
Do not use pointed objects on the touch screen
tablet.
Do not touch the touch screen tablet with wet
hands.
Uses a soft clean cloth to clean the touch
screen tablet.
General operation
Principles
Press the virtual buttons in the touch screen
tablet.
Each menu is displayed over one or two pages
(primary page and secondary page).
As a safety measure, the driver
should only carr y out operations
that require close attention, with the
vehicle stationary.
Some functions are not accessible
when driving.
And, depending on equipment, it also allows:
-
t
he display of visual parking sensors
information,
-
a
ccess to the controls for the navigation
system and Internet services, and the
display of associated information. After a few moments with no action on
the secondary page, the primary page
is displayed automatically.
Use the "
Options" button to go to the
secondary page.
Use this button for access to
additional information and to the
settings for certain functions.
Use this button to confirm.
Use this button to quit or to return to
the primary page.
Monitoring
Page 51 of 444

49
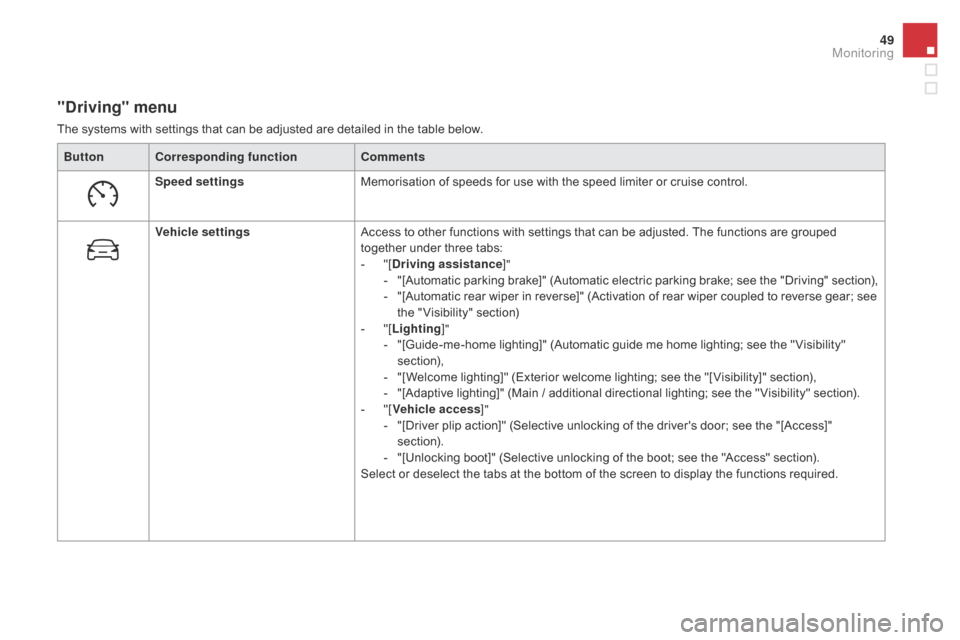
"driving" menu
The systems with settings that can be adjusted are detailed in the table below.Button Corresponding function Comments
Speed settings Memorisation of speeds for use with the speed limiter or cruise control.
Vehicle settings Access to other functions with settings that can be adjusted. The functions are grouped
together under three tabs:
-
"
[
dr
iving assistance]"
-
"
[Automatic parking brake]" (Automatic electric parking brake; see the "Driving" section),
-
"
[Automatic rear wiper in reverse]" (Activation of rear wiper coupled to reverse gear; see
the " Visibility" section)
-
"
[Lighting ]"
-
"
[Guide-me-home lighting]" (Automatic guide me home lighting; see the " Visibility"
section),
-
"
[Welcome lighting]" (Exterior welcome lighting; see the "[ Visibility]" section),
-
"
[Adaptive lighting]" (Main / additional directional lighting; see the " Visibility" section).
-
"
[Vehicle access ]"
-
"
[Driver plip action]" (Selective unlocking of the driver's door; see the "[Access]"
section).
-
"
[Unlocking boot]" (Selective unlocking of the boot; see the "Access" section).
Select or deselect the tabs at the bottom of the screen to display the functions required.
Monitoring
Page 63 of 444
61
Unlocking using the key
F Turn the key for wards in the driver's door lock to unlock the vehicle completely.
Selective unlocking of the boot
F Press the central button on the remote control to unlock the
boot. The doors remain locked.
If selective unlocking of the boot is deactivated,
pressing this button also unlocks the doors.
Don't forget to lock the boot again by
pressing the closed padlock button.
The direction indicators flash for a
few
seconds.
The spotlamps in the door mirrors
come on.
Depending on version, the door mirrors
unfold, the welcome lighting comes on,
the alarm is deactivated. The complete or selective boot
unlocking parameter is set via the
vehicle configuration menu.
Selective unlocking of the boot is
activated by default.
Access
Page 65 of 444
63
deadlocking using the remote
control
F Turn the key to the rear in the driver's door lock to lock the vehicle completely.
F
T
urn the key to the rear again within five
seconds to deadlock the vehicle. Deadlocking renders the exterior and
interior door controls inoperative.
It also deactivates the central locking
control button.
Therefore, never leave anyone inside
the vehicle when it is deadlocked.
F
P
ress the closed padlock to lock
the vehicle completely.
F
P
ress the closed padlock again within five
seconds to deadlock the vehicle.
deadlocking using the key
Deadlocking is confirmed by fixed lighting
of the direction indicators for approximately
two
seconds.
According to version, the door mirrors fold at
the same time.
In low light, deadlocking also brings on the
guide-me-home lighting (see the " Visibility"
section).
Access