Page 142 of 268

Fuel
140
FILLING WITH FUEL
Low fuel level
Filling
The fuel tank must be fi lled with the
engine off .
- Open the fuel fi ller fl ap.
- Insert the key, then turn it a quarter turn.
- Remove the cap and hook it onto the clip located on the inside of the
fl ap.
When fi lling with fuel, a
mechanical system prevents
opening of the left-hand side door.
When the fuel fi ller fl ap is open, ensure
that no one tries to slide this door.
Once the fl ap has been closed, the
sliding side door may jam, push the
door to close it then open it.
When the minimum fuel tank
level is reached, this warning
light comes on.
You then have
approximately 8 litres of
fuel remaining. Fill up without delay to
avoid running out of fuel.
Never risk driving until you run out of
fuel as this may damage the emissions
control and injection systems. A label affi xed to the inside of the fl ap
reminds you of the type of fuel to be
used.
You must fi ll with at least 5 litres of fuel
for it to be registered by the fuel gauge.
When the fuel fi ller cap is opened,
there may be a slight air suction noise.
This vacuum is entirely normal and is
due to the sealing of the fuel circuit.
When fi lling the fuel tank, do not
continue after the 3
rd cut-off of the
nozzle. This could cause malfunctions.
The capacity of the fuel tank is
approximately 60 litres.
- After fi lling the fuel tank, lock the cap and close the fl ap.
Quality of the fuel used for
petrol engines
The petrol engines are perfectly
compatible with E10 or E24 type petrol
biofuels (containing 10 % or 24 %
ethanol), conforming to European
standards EN 228 and EN 15376.
E85 type fuels (containing up to
85 % ethanol) are reserved exclusively
for vehicles marketed for the use of
this type of fuel (BioFlex vehicles). The
quality of the ethanol must comply with
European standard EN 15293.
For Brazil only, special vehicles are
marketed to run on fuels containing up
to 100 % ethanol (E100 type).
Page 143 of 268

DIESEL
Fuel
141
CHECKS
6
FUEL CUT-OFF
In a serious collision, a mechanism
automatically prevents fuel from
reaching the engine. The fl ashing of this warning
lamp is accompanied by a
message in the screen.
Check that there is no odour or
leakage of fuel outside the vehicle and
re-establish the fuel supply:
- switch off the ignition (STOP position),
- remove the key,
- put the key back in the ignition,
- switch on the ignition and start.
DIESEL PRIMING PUMP
If you should run out of fuel, it is
necessary to prime the fuel circuit:
- fi ll the fuel tank with at least fi ve litres of Diesel,
- squeeze and release the manual priming pump, under the bonnet
under the protective cover,
- operate the starter until the engine starts.
Refer to the "Under the bonnet"
section of chapter 6.
Quality of the fuel used for
Diesel engines
The Diesel engines are perfectly
compatible with biofuels which conform
to current and future European
standards (Diesel fuel which complies
with standard EN 590 mixed with a
biofuel which complies with standard
EN 14214) available at the pumps
(containing up to 7 % Fatty Acid Methyl
Ester).
The B30 biofuel can be used in certain
Diesel engines; however, this use
is subject to strict application of the
special servicing conditions. Contact
a CITROËN dealer or a qualifi ed
workshop.
The use of any other type of (bio)
fuel (vegetable or animal oils, pure
or diluted, domestic fuel...) is strictly
prohibited (risk of damage to the
engine and fuel system).
Page 145 of 268
143
Battery
QUICK HELP
7
ECONOMY MODE
After the engine has stopped, with
the key in the ignition position, certain
functions (windscreen wiper, electric
windows, courtesy lamps, audio
equipment, etc.) can only be used for a
cumulative duration of thirty minutes,
to prevent discharging of the battery.
Once the thirty minutes are over, the
active functions are put on standby
and the battery warning lamp fl ashes
accompanied by a message in the
screen.
To resume the use of these functions
immediately, start the engine and let it
run for a few minutes.
The time available will then be double
the time for which the engine was left
running. However, this time will always
be between fi ve and thirty minutes.
A fl at battery will prevent the engine
from starting.
Page 146 of 268

Changing a wheel
144
The temporary tyre repair kit consists
of a compressor and a bottle
(containing a sealant).
Using the kit
1. Tick the defl ated wheel on the speed limitation sticker then affi x
the sticker to the vehicle's steering
wheel to remind you that a wheel is
in temporary use.
2. Clip the bottle 1 on the
compressor 2 .
3. Connect the bottle 1 to the valve of
the tyre to be repaired.
4. Take care to unwind the compressor pipe before connecting
it to the bottle.
5. Connect the power lead to one of the vehicle's 12V sockets.
6. Switch on the compressor by pressing button A until the tyre
pressure reaches 2.0 bars. If this
pressure cannot be reached, the
tyre cannot be repaired.
7. Remove and store the compressor.
8. Drive immediately, for a few miles (kilometres), at reduced speed,
to fi ll the puncture.
9. Adjust the pressure using the compressor in accordance with the
recommendation for the vehicle and
check that the leak is fi lled correctly
(no further loss of pressure).
10. Drive at reduced speed (50 mph [80 km/h]). The tyre must be
examined and repaired by a
specialist as soon as possible. After use, the bottle can be stored in
a plastic bag, supplied in the kit, to
avoid staining your vehicle with traces
of fl uid.
Warning: the bottle of gel contains
ethylene-glycol, a product which
is harmful if swallowed and which
causes irritation to the eyes.
Keep it out of reach of children.
After use, do not discard the bottle into
the environment, take it to a CITROËN
dealer or to an specialised waste
disposal site.
Replacement bottles of sealant are
available from CITROËN dealers.
PUNCTURE REPAIR KIT
The kit is located in one of the two
storage compartments located under
the front seats.
Vehicles supplied with a temporary
puncture repair kit do not have a spare
wheel or tooling (jack, wheelbrace, ...).
Page 168 of 268

Weights
166
WEIGHTS AND TOWED LOADS (KG)
General points
For more information, refer to your
registration certifi cate.
In each country, it is imperative that
the towed loads authorised by local
legislation are complied with. To fi nd
out your vehicle's towing capacities
and its gross train weight, consult a
CITROËN dealer. With load transfer, the braked trailer
weight can be increased, on condition
that the equivalent of this load is
removed from the vehicle so that the
GTW is not exceeded. Warning: towing
with a lightly loaded towing vehicle
may have an adverse effect on its road
holding.
The speed of a towing vehicle must not
exceed 50 mph (80 km/h) (comply with
the legislation in force in your country). High ambient temperatures may result
in a reduction in the performance
of the vehicle in order to protect the
engine; when the ambient temperature
is higher than 37 °C, limit the towed
weight.
The kerb weight is equal to the weight
without load + driver (75 kg) + fuel tank
fi lled to 90%.
The GTW and towed load values
indicated are valid up to a maximum
altitude of 1000 metres; the towed load
mentioned must be reduced by 10 %
for each additional 1000 metres.
Page 186 of 268
9.16
05 NAVIGATION - GUIDANCE
ALERT PARAMETERS
RISK AREAS
Select:
- "Visual alert"
- "Audible alert"
- "Alert only in guidance"
- "Overspeed alarm only".
The choice of time of notifi cation defi nes how long in advance that Risk area warnings are given.
Select " OK " to confi rm the screen.
Select " Guidance options " and confi rm, then select " Set parameters for risk areas " and confi rm.
These functions are only available if risk areas have been downloaded and installed on the system.
The detailed procedure for updating risk area POIs can be found at www.citroen.com.
Press N AV to display the " Navigation - guidance " menu.
Page 226 of 268

9.56
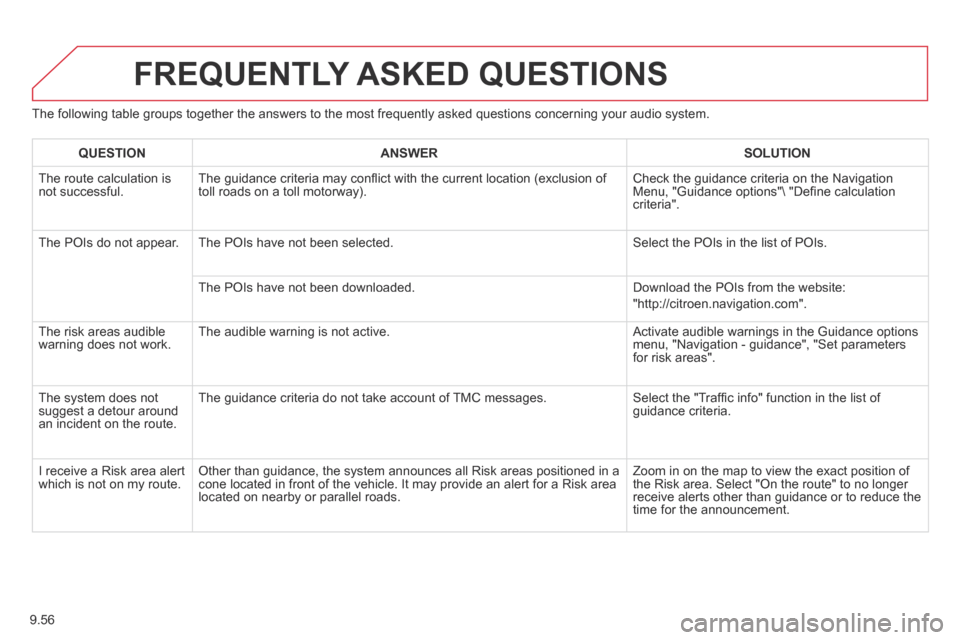
The following table groups together the answers to the most frequently asked questions concerning your audio system.
FREQUENTLY ASKED QUESTIONS
QUESTIONANSWERSOLUTION
The route calculation is not successful. The guidance criteria may confl ict with the current location (exclusion of toll roads on a toll motorway). Check the guidance criteria on the Navigation Menu, "Guidance options"\ "Defi ne calculation criteria".
The POIs do not appear. The POIs have not been selected. Select the POIs in the list of POIs.
The POIs have not been downloaded. Download the POIs from the website:
"http://citroen.navigation.com".
The risk areas audible warning does not work. The audible warning is not active. Activate audible warnings in the Guidance options menu, "Navigation - guidance", "Set parameters for risk areas".
The system does not suggest a detour around an incident on the route.
The guidance criteria do not take account of TMC messages. Select the "Traffi c info" function in the list of guidance criteria.
I receive a Risk area alert which is not on my route. Other than guidance, the system announces all Risk areas positioned in a\
cone located in front of the vehicle. It may provide an alert for a Risk\
area located on nearby or parallel roads.
Zoom in on the map to view the exact position of the Risk area. Select "On the route" to no longer receive alerts other than guidance or to reduce the time for the announcement.
Page 256 of 268
170
Instruments and controls
ESC 107
Parking sensors 104-105
Electric mirrors 100
Headlamp beam height adjustment 51
Stop & Start 44-46
Cruise control
54-56
Speed limiter 57-59
Lighting controls
49-51
Automatic illumination of headlamps 50-51
Foglamps 50
LED daytime running lamps 50
INSTRUMENTS AND CONTROLS
Dashboard, passenger compartment fuses 156-158
Opening the bonnet 133
Parking brake 103 Instrument panels, screens,
dials 27-28
Warning lamps, indicator lamps 29-34
Indicators, fuel gauge 35, 38-39
Setting the time in the instrument panel 28
Lighting dimmer 39
Gear shift indicator 40-41
Gearbox 40
Ignition switch
47
Wiper controls
52-53
Automatic rain sensitive wipers 52
Screenwash / headlamp wash 53, 137
Trip computer Section 9
Audio equipment steering mounted controls Section 9
Steering wheel adjustment 43
Horn 103