2014 CHEVROLET TAHOE parking brake
[x] Cancel search: parking brakePage 328 of 494
(70,1)Chevrolet Tahoe/Suburban Owner Manual (GMNA-Localizing-U.S./Canada/
Mexico-6081502) - 2014 - crc2 - 9/17/13
9-70 Driving and Operating
Electric Brake Control Wiring
Provisions
These wiring provisions are
included with the vehicle as part of
the trailer wiring package. These
provisions are for an electric brake
controller. The instrument panel
contains blunt cut wires near the
data link connector for the trailer
brake controller. The harness
contains the following wires:
.Dark Blue: Brake Signal to
Trailer Connector
.Red/Black: Battery
.Light Blue/White: Brake Switch
.White: Ground
It should be installed by your dealer
or a qualified service center.
If the vehicle is equipped with an
ITBC, the blunt cuts exist, but are
not connected further in the
harness. If an aftermarket trailer
brake controller is installed, the
ITBC must be disconnected. Do not power both ITBC and aftermarket
controllers to control the trailer
brakes at the same time.
Tow/Haul Mode
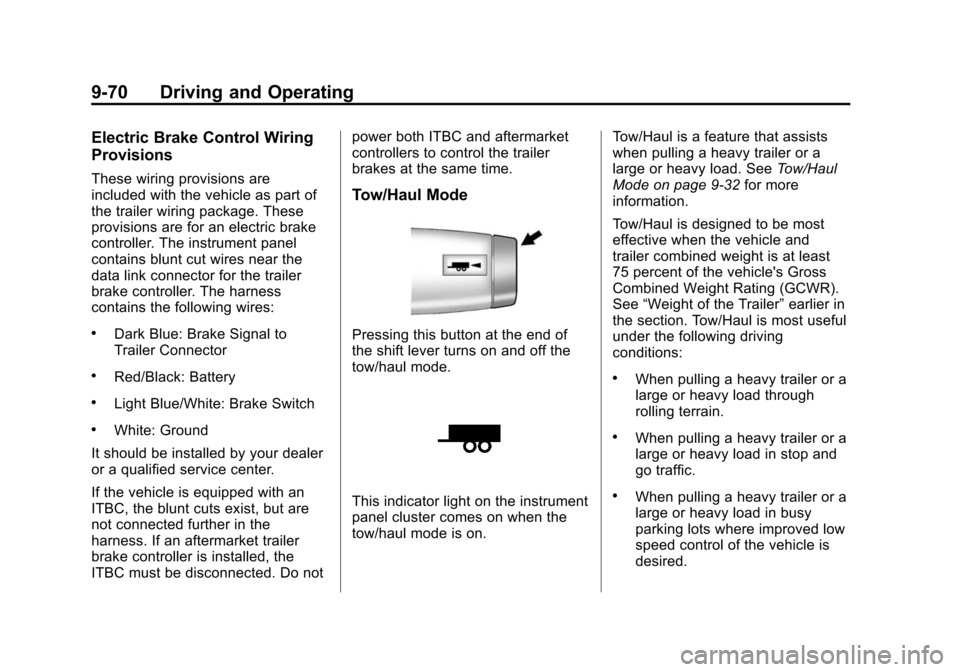
Pressing this button at the end of
the shift lever turns on and off the
tow/haul mode.
This indicator light on the instrument
panel cluster comes on when the
tow/haul mode is on.
Tow/Haul is a feature that assists
when pulling a heavy trailer or a
large or heavy load. See
Tow/Haul
Mode on page 9-32 for more
information.
Tow/Haul is designed to be most
effective when the vehicle and
trailer combined weight is at least
75 percent of the vehicle's Gross
Combined Weight Rating (GCWR).
See “Weight of the Trailer” earlier in
the section. Tow/Haul is most useful
under the following driving
conditions:
.When pulling a heavy trailer or a
large or heavy load through
rolling terrain.
.When pulling a heavy trailer or a
large or heavy load in stop and
go traffic.
.When pulling a heavy trailer or a
large or heavy load in busy
parking lots where improved low
speed control of the vehicle is
desired.
Page 351 of 494
(11,1)Chevrolet Tahoe/Suburban Owner Manual (GMNA-Localizing-U.S./Canada/
Mexico-6081502) - 2014 - crc2 - 9/17/13
Vehicle Care 10-11
2. Apply the parking brake andplace the shift lever in P (Park).
3. With your foot on the brake pedal, move the shift lever
through each gear range,
pausing for about three seconds
in each range. Then, move the
shift lever back to P (Park).
4. Allow the engine to idle (500 –
800 rpm) for at least 1 minute.
Slowly release the brake pedal.
5. Keep the engine running and press the Trip/Fuel button or trip
odometer reset stem until
TRANS TEMP (Transmission
Temperature) displays on the
Driver Information Center (DIC).
6. Using the TRANS TEMP reading, determine and perform
the appropriate check
procedure. If the TRANS TEMP
reading is not within the required
temperature ranges, allow the
vehicle to cool, or operate the
vehicle until the appropriate
transmission fluid temperature is
reached. Cold Check Procedure
Use this procedure only as a
reference to determine if the
transmission has enough fluid to be
operated safely until a hot check
procedure can be made. The hot
check procedure is the most
accurate method to check the fluid
level. Perform the hot check
procedure at the first opportunity.
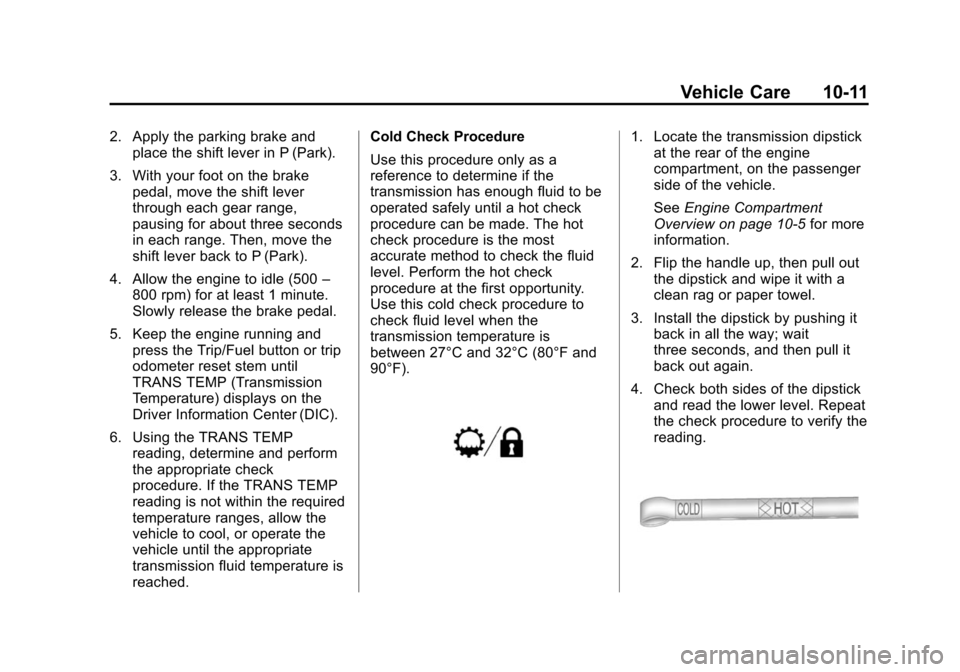
Use this cold check procedure to
check fluid level when the
transmission temperature is
between 27°C and 32°C (80°F and
90°F).1. Locate the transmission dipstick
at the rear of the engine
compartment, on the passenger
side of the vehicle.
See Engine Compartment
Overview on page 10-5 for more
information.
2. Flip the handle up, then pull out the dipstick and wipe it with a
clean rag or paper towel.
3. Install the dipstick by pushing it back in all the way; wait
three seconds, and then pull it
back out again.
4. Check both sides of the dipstick and read the lower level. Repeat
the check procedure to verify the
reading.
Page 367 of 494
(27,1)Chevrolet Tahoe/Suburban Owner Manual (GMNA-Localizing-U.S./Canada/
Mexico-6081502) - 2014 - crc2 - 9/17/13
Vehicle Care 10-27
The proper level is from 1.0 mm to
19.0 mm (0.04 in to 0.75 in) below
the bottom of the fill plug hole,
located on the rear axle. Add only
enough fluid to reach the proper
level.
Starter Switch Check
{Warning
When you are doing this
inspection, the vehicle could
move suddenly. If the vehicle
moves, you or others could be
injured.
1. Before starting this check, be sure there is enough room
around the vehicle.
2. Apply both the parking brake and the regular brake.
Do not use the accelerator
pedal, and be ready to turn off
the engine immediately if it
starts. 3. Try to start the engine in each
gear. The vehicle should start
only in P (Park) or N (Neutral).
If the vehicle starts in any other
position, contact your dealer for
service.
Automatic Transmission
Shift Lock Control
Function Check
{Warning
When you are doing this
inspection, the vehicle could
move suddenly. If the vehicle
moves, you or others could be
injured.
1. Before starting this check, be sure there is enough room
around the vehicle. It should be
parked on a level surface. 2. Apply the parking brake. Be
ready to apply the regular brake
immediately if the vehicle begins
to move.
3. With the engine off, turn the ignition on, but do not start the
engine. Without applying the
regular brake, try to move the
shift lever out of P (Park) with
normal effort. If the shift lever
moves out of P (Park), contact
your dealer for service.Ignition Transmission
Lock Check
If equipped with a key type ignition,
while parked and with the parking
brake set, try to turn the ignition to
LOCK/OFF in each shift lever
position.
.The ignition should turn to
LOCK/OFF only when the shift
lever is in P (Park).
.The ignition key should come
out only in LOCK/OFF.
Page 368 of 494
(28,1)Chevrolet Tahoe/Suburban Owner Manual (GMNA-Localizing-U.S./Canada/
Mexico-6081502) - 2014 - crc2 - 9/17/13
10-28 Vehicle Care
Contact your dealer if service is
required.
Park Brake and P (Park)
Mechanism Check
{Warning
When you are doing this check,
the vehicle could begin to move.
You or others could be injured
and property could be damaged.
Make sure there is room in front
of the vehicle in case it begins to
roll. Be ready to apply the regular
brake at once should the vehicle
begin to move.
Park on a fairly steep hill, with the
vehicle facing downhill. Keeping
your foot on the regular brake, set
the parking brake.
.To check the parking brake's
holding ability: With the engine
running and the transmission in
N (Neutral), slowly remove foot pressure from the regular brake
pedal. Do this until the vehicle is
held by the parking brake only.
.To check the P (Park)
mechanism's holding ability:
With the engine running, shift to
P (Park). Then release the
parking brake followed by the
regular brake.
Contact your dealer if service is
required.
Wiper Blade Replacement
Windshield wiper blades should be
inspected for wear or cracking. See
Maintenance Schedule on
page 11-2.
Replacement blades come in
different types and are removed in
different ways.
Front Wiper Blade
Replacement
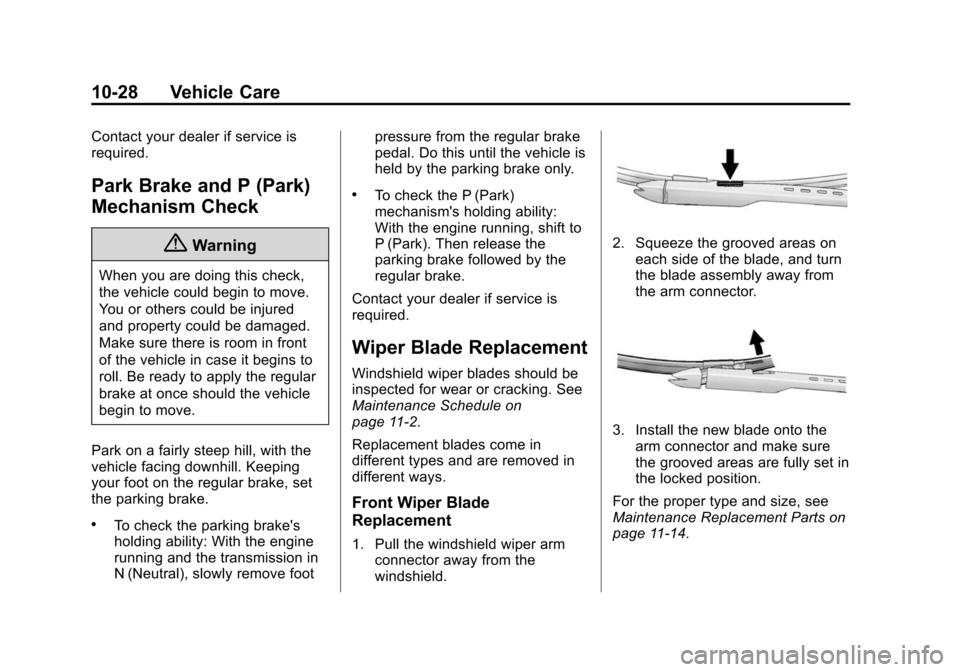
1. Pull the windshield wiper arm connector away from the
windshield.
2. Squeeze the grooved areas oneach side of the blade, and turn
the blade assembly away from
the arm connector.
3. Install the new blade onto thearm connector and make sure
the grooved areas are fully set in
the locked position.
For the proper type and size, see
Maintenance Replacement Parts on
page 11-14.
Page 375 of 494

(35,1)Chevrolet Tahoe/Suburban Owner Manual (GMNA-Localizing-U.S./Canada/
Mexico-6081502) - 2014 - crc2 - 9/17/13
Vehicle Care 10-35
The vehicle may not be equipped
with all of the fuses, relays, and
features shown.Fuses Usage
1 Right Trailer Stop/ Turn Lamp
2 Electronic Stability Suspension Control,
Automatic Level
Control Exhaust
3 Left Trailer Stop/ Turn Lamp
4 Engine Controls
5 Engine Control Module, Throttle
Control
6 Trailer Brake Controller
7 Front Washer
8 Oxygen Sensors
9 Antilock Brakes System 2 Fuses Usage
10 Trailer Back-up Lamps
11 Driver Side Low-Beam Headlamp
12 Engine Control Module (Battery)
13 Fuel Injectors, Ignition Coils (Right Side)
14 Transmission Control Module (Battery)
15 Vehicle Back-up Lamps
16 Passenger Side Low-Beam Headlamp
17 Air Conditioning Compressor
18 Oxygen Sensors
19 Transmission Controls (Ignition)
20 Fuel Pump Fuses Usage
21 Fuel System Control Module
22 Headlamp Washer
23 Rear Windshield Washer
24 Fuel Injectors, Ignition Coils (Left Side)
25 Trailer Parking Lamps
26 Driver Side Parking Lamps
27 Passenger Side Parking Lamps
28 Fog Lamps
29 Horn
30 Passenger Side High-Beam Headlamp
31 Daytime Running Lamps (DRL) (If
Equipped)
32 Driver Side High-Beam Headlamp
Page 394 of 494

(54,1)Chevrolet Tahoe/Suburban Owner Manual (GMNA-Localizing-U.S./Canada/
Mexico-6081502) - 2014 - crc2 - 9/17/13
10-54 Vehicle Care
malfunction light and the DIC
message should go off at the next
ignition cycle. The sensors are
matched to the tire/wheel positions,
using a TPMS relearn tool, in the
following order: driver side front tire,
passenger side front tire, passenger
side rear tire, and driver side rear.
See your dealer for service or to
purchase a relearn tool.
There are two minutes to match the
first tire/wheel position, and
five minutes overall to match all four
tire/wheel positions. If it takes
longer, the matching process stops
and must be restarted.
The TPMS sensor matching
process is:
1. Set the parking brake.
2. Turn the ignition to ON/RUN withthe engine off.
3. Press the Remote Keyless Entry (RKE) transmitter's
QandK
buttons at the same time for
approximately five seconds. The
horn sounds twice to signal the receiver is in relearn mode and
the TIRE LEARNING ACTIVE
message displays on the DIC
screen.
4. Start with the driver side front tire.
5. Place the relearn tool against the tire sidewall, near the valve
stem. Then press the button to
activate the TPMS sensor.
A horn chirp confirms that the
sensor identification code has
been matched to this tire and
wheel position.
6. Proceed to the passenger side front tire, and repeat the
procedure in Step 5.
7. Proceed to the passenger side rear tire, and repeat the
procedure in Step 5.
8. Proceed to the driver side rear tire, and repeat the procedure in
Step 5. The horn sounds two
times to indicate the sensor
identification code has been
matched to the driver side rear tire, and the TPMS sensor
matching process is no longer
active. The TIRE LEARNING
ACTIVE message on the DIC
display screen goes off.
9. Turn the ignition to LOCK/OFF.
10. Set all four tires to the recommended air pressure
level as indicated on the Tire
and Loading Information label.
Tire Inspection
We recommend that the tires,
including the spare tire, if the
vehicle has one, be inspected
for signs of wear or damage at
least once a month.
Replace the tire if:
.The indicators at three or
more places around the tire
can be seen.
.There is cord or fabric
showing through the tire's
rubber.
Page 397 of 494
(57,1)Chevrolet Tahoe/Suburban Owner Manual (GMNA-Localizing-U.S./Canada/
Mexico-6081502) - 2014 - crc2 - 9/17/13
Vehicle Care 10-57
Vehicle Storage
Tires age when stored normally
mounted on a parked vehicle. Park
a vehicle that will be stored for at
least a month in a cool, dry, clean
area away from direct sunlight to
slow aging. This area should be free
of grease, gasoline or other
substances that can deteriorate
rubber.
Parking for an extended period can
cause flat spots on the tires that
may result in vibrations while
driving. When storing a vehicle for
at least a month, remove the tires or
raise the vehicle to reduce the
weight from the tires.
Buying New Tires
GM has developed and matched
specific tires for the vehicle. The
original equipment tires installed
were designed to meet General
Motors Tire Performance Criteria
Specification (TPC Spec)
system rating. Whenreplacement tires are needed,
GM strongly recommends
buying tires with the same TPC
Spec rating.
GM's exclusive TPC Spec
system considers over a dozen
critical specifications that impact
the overall performance of the
vehicle, including brake system
performance, ride and handling,
traction control, and tire
pressure monitoring
performance. GM's TPC Spec
number is molded onto the tire's
sidewall near the tire size. If the
tires have an all-season tread
design, the TPC Spec number
will be followed by MS for mud
and snow. See
Tire Sidewall
Labeling on page 10-43 for
additional information.
GM recommends replacing worn
tires in complete sets of four.
Uniform tread depth on all tires
will help to maintain the performance of the vehicle.
Braking and handling
performance may be adversely
affected if all the tires are not
replaced at the same time.
If proper rotation and
maintenance have been done,
all four tires should wear out at
about the same time. See
Tire
Rotation on page 10-55 for
information on proper tire
rotation. However, if it is
necessary to replace only one
axle set of worn tires, place the
new tires on the rear axle.
{Warning
Tires could explode during
improper service. Attempting
to mount or dismount a tire
could cause injury or death.
Only your dealer or authorized
tire service center should
mount or dismount the tires.
Page 403 of 494
(63,1)Chevrolet Tahoe/Suburban Owner Manual (GMNA-Localizing-U.S./Canada/
Mexico-6081502) - 2014 - crc2 - 9/17/13
Vehicle Care 10-63
Warning (Continued)
tire service center repair or
replace the flat tire as soon as
possible.
{Warning
Lifting a vehicle and getting under
it to do maintenance or repairs is
dangerous without the
appropriate safety equipment and
training. If a jack is provided with
the vehicle, it is designed only for
changing a flat tire. If it is used for
anything else, you or others could
be badly injured or killed if the
vehicle slips off the jack. If a jack
is provided with the vehicle, only
use it for changing a flat tire.
If a tire goes flat, avoid further tire
and wheel damage by driving slowly
to a level place, well off the road, if possible. Turn on the hazard
warning flashers. See
Hazard
Warning Flashers on page 6-5.
{Warning
Changing a tire can be
dangerous. The vehicle can slip
off the jack and roll over or fall
causing injury or death. Find a
level place to change the tire. To
help prevent the vehicle from
moving:
1. Set the parking brake firmly.
2. Put the shift lever in P (Park).
3. For vehicles with four-wheel-drive with a
N (Neutral) transfer case
position, be sure the
transfer case is in a drive
gear —not in N (Neutral).
4. Turn off the engine and do not restart while the vehicle
is raised.
(Continued)
Warning (Continued)
5. Do not allow passengers toremain in the vehicle.
6. Place wheel blocks on both sides of the tire at the
opposite corner of the tire
being changed.
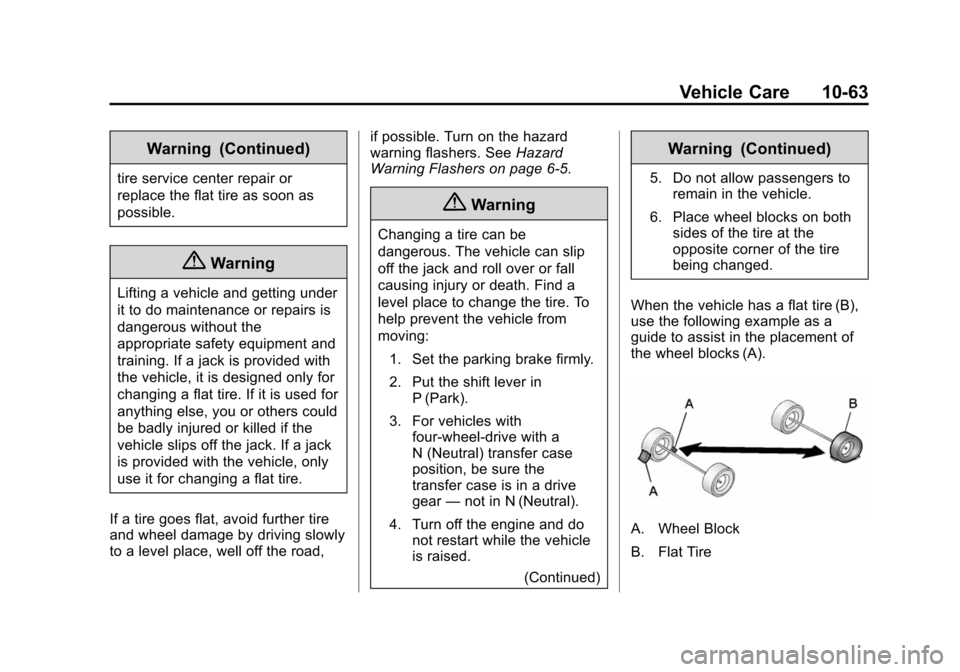
When the vehicle has a flat tire (B),
use the following example as a
guide to assist in the placement of
the wheel blocks (A).
A. Wheel Block
B. Flat Tire