2014 CHEVROLET SS warning light
[x] Cancel search: warning lightPage 275 of 422

Black plate (43,1)Chevrolet SS Sedan Owner Manual (GMNA-Localizing-U.S.-6014851) - 2014 -
1st Edition - 8/22/13
Driving and Operating 9-43
over that is in the side blind zone.
This indicates it may be unsafe to
change lanes. Before making a lane
change, check the SBZA display,
check mirrors, glance over your
shoulder, and use the turn signals.
Left Side MirrorDisplayRight Side Mirror Display
When the vehicle is started, both
outside mirror SBZA displays will
briefly come on to indicate the
system is operating. When the
vehicle is moving forward, the left-
or right-side mirror display will light
up if a vehicle is detected in that
blind zone. If the turn signal is
activated in the same direction of a
detected vehicle, this display will
flash as an extra warning not to
change lanes. SBZA can be disabled through
vehicle personalization. See
“Collision/Detection Systems”
under
Vehicle Personalization on
page 5-33. If SBZA is disabled by
the driver, the SBZA mirror displays
will not light up.
When the System Does Not
Seem to Work Properly
SBZA displays may not come on
when passing a vehicle quickly or
when towing a trailer. The SBZA
detection zones that extend back
from the side of the vehicle do not
move further back when a trailer is
towed. Use caution while changing
lanes when towing a trailer. SBZA
may alert to objects attached to the
vehicle, such as a trailer, bicycle,
or object extending out to either side
of the vehicle. This is normal system
operation; the vehicle does not need
service.
SBZA may not always alert the
driver to vehicles in the side blind
zone, especially in wet conditions.
The system does not need to be serviced. The system may light up
due to guardrails, signs, trees,
shrubs, and other non-moving
objects. This is normal system
operation; the vehicle does not need
service.
SBZA may not operate when the
SBZA sensors in the left or right
corners of the rear bumper are
covered with mud, dirt, snow, ice,
or slush, or in heavy rainstorms. For
cleaning instructions, see "Washing
the Vehicle" under
Exterior Care on
page 10-72. If the DIC still displays
the system unavailable message
after cleaning both sides of the
vehicle toward the rear corners of
the vehicle, see your dealer.
If the SBZA displays do not light up
when vehicles are in the blind zone
and the system is clean, the system
may need service. Take the vehicle
to your dealer.
ProCarManuals.com
Page 277 of 422

Black plate (45,1)Chevrolet SS Sedan Owner Manual (GMNA-Localizing-U.S.-6014851) - 2014 -
1st Edition - 8/22/13
Driving and Operating 9-45
To turn LDW on and off, press@on
the steering wheel. The control
indicator will light when LDW is on.
When the vehicle is started, the
LDW indicator on the instrument
cluster will come on briefly. If LDW is on, the LDW indicator will
appear green if the system detects
a left or right lane marking while the
vehicle is traveling at 56 km/h
(35 mph) or greater. If the vehicle
crosses a detected lane marking
without using the turn signal in the
lane departure direction, this
indicator will change to amber and
flash. In addition, three beeps will
be sounded from the left or right
side, depending on the lane
departure direction.
When the System Does Not
Seem to Work Properly
If the LDW symbol does not appear
when the system is on and the
vehicle is traveling at least 56 km/h
(35 mph):
.The lane markings on the road
may not be seen.
.The camera sensor may be
blocked by dirt, snow, or ice.
.The windshield may be
damaged.
.The weather may be limiting
visibility.
This is normal operation; the vehicle
does not need service. Clean the
windshield.
Lane markings may not be detected
on curves, highway exit ramps,
or hills; or due to poor visibility.
If the LDW camera system does not
seem to operate properly, cleaning
the outside of the windshield in front
of the camera sensor may correct
the issue.
{Warning
LDW does not provide a warning
to help avoid a crash, unless it
detects the lane markings. LDW
may not detect the lane markings
if the camera sensor is blocked
by dirt, snow, or ice, or if the
windshield is damaged. It may
also not detect a lane on winding
or hilly roads, or in conditions that (Continued)
ProCarManuals.com
Page 281 of 422

Black plate (49,1)Chevrolet SS Sedan Owner Manual (GMNA-Localizing-U.S.-6014851) - 2014 -
1st Edition - 8/22/13
Driving and Operating 9-49
The fuel cap is behind a hinged fuel
door on the passenger side of the
vehicle. To open the fuel door, push
and release the rearward center
edge of the door.
When reinstalling the cap, turn it
clockwise until it clicks, otherwise
the malfunction indicator lamp may
turn on. SeeMalfunction Indicator
Lamp on page 5-12.
Be careful not to spill fuel. Do not
top off or overfill the tank and wait a
few seconds after you have finished
pumping before removing the
nozzle. Clean fuel from painted
surfaces as soon as possible. See
Exterior Care on page 10-72.
When replacing the fuel cap, turn it
clockwise until it clicks. Make sure
the cap is fully installed. The
diagnostic system can determine if
the fuel cap has been left off or
improperly installed. This would
allow fuel to evaporate into the
atmosphere. See Malfunction
Indicator Lamp on page 5-12.{Warning
If a fire starts while you are
refueling, do not remove the
nozzle. Shut off the flow of fuel by
shutting off the pump or by
notifying the station attendant.
Leave the area immediately.
{Caution
If a new fuel cap is needed, be
sure to get the right type of cap
from your dealer. The wrong type
of fuel cap might not fit properly,
might cause the malfunction
indicator lamp to light, and could
damage the fuel tank and
emissions system. See
Malfunction Indicator Lamp on
page 5-12.
Filling a Portable Fuel
Container
{Warning
Filling a portable fuel container
while it is in the vehicle can cause
fuel vapors that can ignite either
by static electricity or other
means. You or others could be
badly burned and the vehicle
could be damaged. Always:
.Use approved fuel
containers.
.Remove the container from
the vehicle, trunk, or pickup
bed before filling.
.Place the container on the
ground.
.Place the nozzle inside the fill
opening of the container
before dispensing fuel, and
(Continued)
ProCarManuals.com
Page 282 of 422

Black plate (50,1)Chevrolet SS Sedan Owner Manual (GMNA-Localizing-U.S.-6014851) - 2014 -
1st Edition - 8/22/13
9-50 Driving and Operating
Warning (Continued)
keep it in contact with the fill
opening until filling is
complete.
.Fill the container no more
than 95% full to allow for
expansion.
.Do not smoke, light matches,
or use lighters while
pumping fuel.
.Avoid using cell phones or
other electronic devices.
Trailer Towing
The vehicle is neither designed nor
intended to tow a trailer.
Conversions and
Add-Ons
Add-On Electrical
Equipment
{Caution
Some electrical equipment can
damage the vehicle or cause
components to not work and
would not be covered by the
warranty. Always check with your
dealer before adding electrical
equipment.
Add-on equipment can drain the
vehicle's 12-volt battery, even if the
vehicle is not operating.
The vehicle has an airbag system.
Before attempting to add anything
electrical to the vehicle, see
Servicing the Airbag-Equipped
Vehicle on page 3-24 andAdding
Equipment to the Airbag-Equipped
Vehicle on page 3-25.
ProCarManuals.com
Page 283 of 422

Black plate (1,1)Chevrolet SS Sedan Owner Manual (GMNA-Localizing-U.S.-6014851) - 2014 -
1st Edition - 8/22/13
Vehicle Care 10-1
Vehicle Care
General Information
General Information . . . . . . . . . . 10-2
California Proposition65 Warning . . . . . . . . . . . . . . . . . 10-2
California Perchlorate Materials Requirements . . . . 10-2
Accessories and Modifications . . . . . . . . . . . . . . . 10-2
Vehicle Checks
Doing Your OwnService Work . . . . . . . . . . . . . . . 10-3
Hood . . . . . . . . . . . . . . . . . . . . . . . . 10-4
Engine Compartment Overview . . . . . . . . . . . . . . . . . . . 10-5
Engine Oil . . . . . . . . . . . . . . . . . . . 10-6
Engine Oil Life System . . . . . . 10-8
Automatic Transmission Fluid . . . . . . . . . . . . . . . . . . . . . . . 10-9
Engine Air Cleaner/Filter . . . . 10-10
Cooling System . . . . . . . . . . . . . 10-11
Engine Coolant . . . . . . . . . . . . . 10-12
Engine Overheating . . . . . . . . 10-16
Washer Fluid . . . . . . . . . . . . . . . 10-17
Brakes . . . . . . . . . . . . . . . . . . . . . 10-18
Brake Fluid . . . . . . . . . . . . . . . . . 10-19 Battery . . . . . . . . . . . . . . . . . . . . . 10-20
Rear Axle . . . . . . . . . . . . . . . . . . 10-21
Starter Switch Check . . . . . . . 10-21
Automatic Transmission Shift
Lock Control Function
Check . . . . . . . . . . . . . . . . . . . . . 10-22
Ignition Transmission Lock Check . . . . . . . . . . . . . . . . . . . . . 10-22
Park Brake and P (Park) Mechanism Check . . . . . . . . 10-23
Wiper Blade Replacement . . . . . . . . . . . . . . 10-23
Windshield Replacement . . . 10-24Headlamp Aiming
Headlamp Aiming . . . . . . . . . . 10-24
Bulb Replacement
Bulb Replacement . . . . . . . . . . 10-24
High Intensity Discharge (HID) Lighting . . . . . . . . . . . . . 10-24
License Plate Lamp . . . . . . . . 10-25
Replacement Bulbs . . . . . . . . . 10-25
Electrical System
Electrical System Overload . . . . . . . . . . . . . . . . . . 10-26
Fuses . . . . . . . . . . . . . . . . . . . . . . 10-26 Engine Compartment Fuse
Block . . . . . . . . . . . . . . . . . . . . . 10-27
Instrument Panel Fuse Block . . . . . . . . . . . . . . . . . . . . . 10-29
Rear Compartment Fuse
Block . . . . . . . . . . . . . . . . . . . . . 10-32
Wheels and Tires
Tires . . . . . . . . . . . . . . . . . . . . . . . . 10-34
Winter Tires . . . . . . . . . . . . . . . . 10-35
Low-Profile Tires . . . . . . . . . . . 10-35
Summer Tires . . . . . . . . . . . . . . 10-36
Tire Sidewall Labeling . . . . . . 10-36
Tire Designations . . . . . . . . . . . 10-37
Tire Terminology andDefinitions . . . . . . . . . . . . . . . . 10-38
Tire Pressure . . . . . . . . . . . . . . . 10-41
Tire Pressure Monitor
System . . . . . . . . . . . . . . . . . . . 10-42
Tire Pressure Monitor Operation . . . . . . . . . . . . . . . . . 10-43
Tire Inspection . . . . . . . . . . . . . . 10-46
Tire Rotation . . . . . . . . . . . . . . . 10-47
When It Is Time for New Tires . . . . . . . . . . . . . . . . . . . . . . 10-48
Buying New Tires . . . . . . . . . . . 10-49
Different Size Tires and Wheels . . . . . . . . . . . . . . . . . . . 10-50
ProCarManuals.com
Page 292 of 422

Black plate (10,1)Chevrolet SS Sedan Owner Manual (GMNA-Localizing-U.S.-6014851) - 2014 -
1st Edition - 8/22/13
10-10 Vehicle Care
service manual, seeService
Publications Ordering Information
on page 13-11.
Change the fluid and filter at the
intervals listed in Maintenance
Schedule on page 11-2, and be sure
to use the fluid listed in
Recommended Fluids and
Lubricants on page 11-12.
Engine Air Cleaner/Filter
See Engine Compartment Overview
on page 10-5 for the location of the
engine air cleaner/filter.
When to Inspect the Engine Air
Cleaner/Filter
Inspect the air cleaner/filter at the
scheduled maintenance intervals
and replace it when required. See
Maintenance Schedule on
page 11-2 for more information.
If driving in dusty/dirty conditions,
inspect the filter at each engine oil
change.
How to Inspect the Engine Air
Cleaner/Filter
To inspect the air cleaner/filter,
remove the filter from the vehicle
and lightly shake the filter to release
loose dust and dirt. If the filter
remains covered with dirt, a new
filter is required. Never use
compressed air to clean the filter.
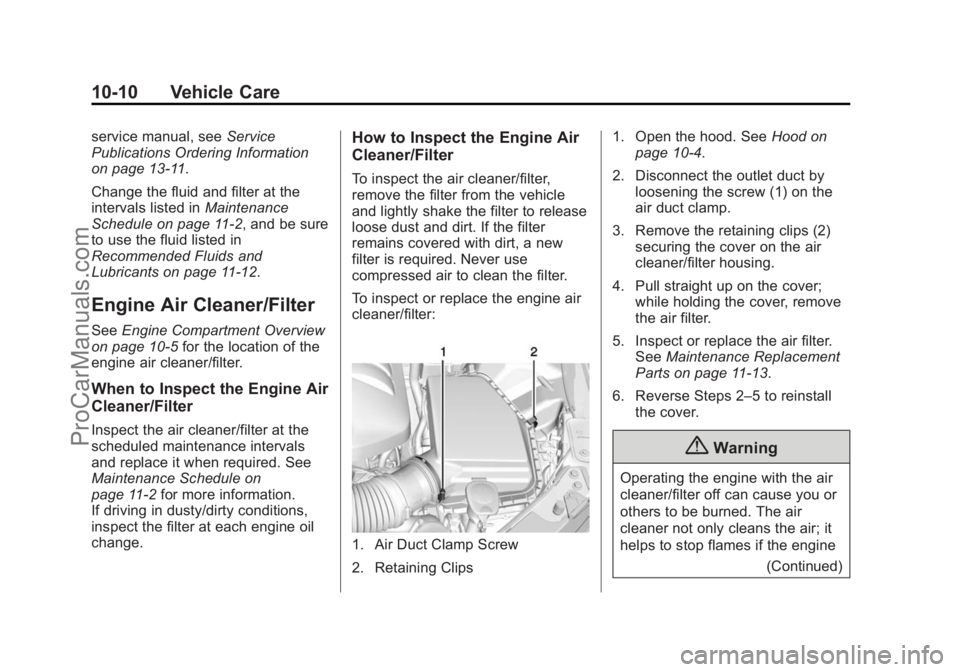
To inspect or replace the engine air
cleaner/filter:
1. Air Duct Clamp Screw
2. Retaining Clips 1. Open the hood. See
Hood on
page 10-4.
2. Disconnect the outlet duct by loosening the screw (1) on the
air duct clamp.
3. Remove the retaining clips (2) securing the cover on the air
cleaner/filter housing.
4. Pull straight up on the cover; while holding the cover, remove
the air filter.
5. Inspect or replace the air filter. See Maintenance Replacement
Parts on page 11-13.
6. Reverse Steps 2–5 to reinstall the cover.
{Warning
Operating the engine with the air
cleaner/filter off can cause you or
others to be burned. The air
cleaner not only cleans the air; it
helps to stop flames if the engine
(Continued)
ProCarManuals.com
Page 300 of 422

Black plate (18,1)Chevrolet SS Sedan Owner Manual (GMNA-Localizing-U.S.-6014851) - 2014 -
1st Edition - 8/22/13
10-18 Vehicle Care
Caution (Continued)
.Fill the washer fluid tank only
three-quarters full when it is
very cold. This allows for fluid
expansion if freezing occurs,
which could damage the tank
if it is completely full.
Brakes
This vehicle has disc brakes. Disc
brake pads have built-in wear
indicators that make a high-pitched
warning sound when the brake pads
are worn and new pads are needed.
The sound can come and go or be
heard all the time when the vehicle
is moving, except when applying the
brake pedal firmly.
{Warning
The brake wear warning sound
means that soon the brakes will
not work well. That could lead to(Continued)
Warning (Continued)
a crash. When the brake wear
warning sound is heard, have the
vehicle serviced.
{Caution
Continuing to drive with worn-out
brake pads could result in costly
brake repair.
Some driving conditions or climates
can cause a brake squeal when the
brakes are first applied or lightly
applied. This does not mean
something is wrong with the brakes.
Properly torqued wheel nuts are
necessary to help prevent brake
pulsation. When tires are rotated,
inspect brake pads for wear and
evenly tighten wheel nuts in the
proper sequence to torque
specifications. See Capacities and
Specifications on page 12-2. Brake pads should be replaced as
complete sets.
Brake Pedal Travel
See your dealer if the brake pedal
does not return to normal height,
or if there is a rapid increase in
pedal travel. This could be a sign
that brake service might be
required.
Brake Adjustment
Every time the brakes are applied,
with or without the vehicle moving,
the brakes adjust for wear.
Replacing Brake System Parts
The braking system on a vehicle is
complex. Its many parts have to be
of top quality and work well together
if the vehicle is to have really good
braking. The vehicle was designed
and tested with top-quality brake
parts. When parts of the braking
system are replaced, be sure to get
new, approved replacement parts.
If this is not done, the brakes might
not work properly. For example,
ProCarManuals.com
Page 301 of 422

Black plate (19,1)Chevrolet SS Sedan Owner Manual (GMNA-Localizing-U.S.-6014851) - 2014 -
1st Edition - 8/22/13
Vehicle Care 10-19
installing disc brake pads that are
wrong for the vehicle, can change
the balance between the front and
rear brakes—for the worse. The
braking performance expected can
change in many other ways if the
wrong replacement brake parts are
installed.
Brake Fluid
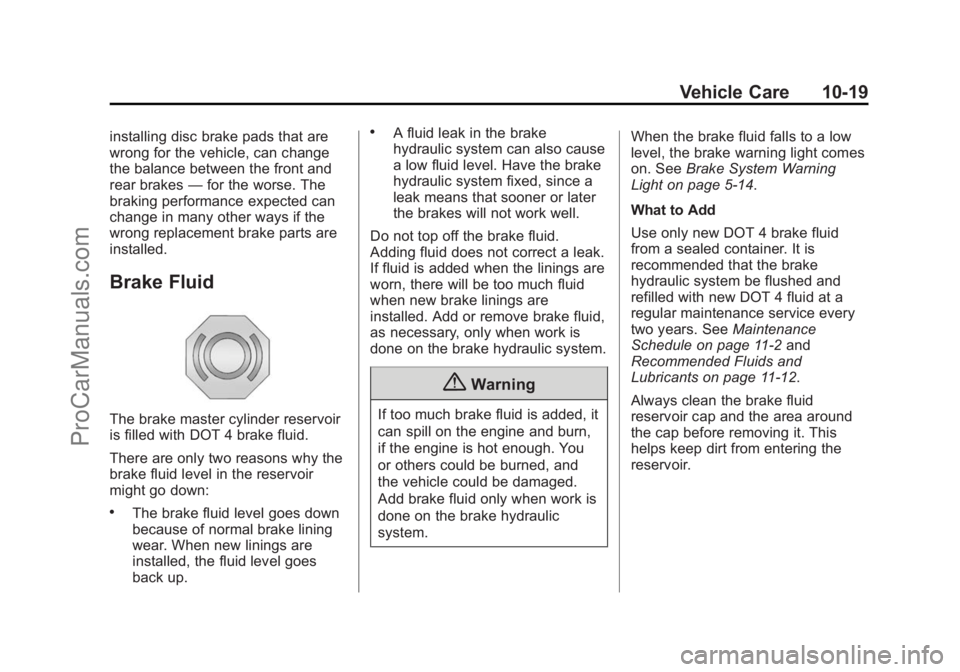
The brake master cylinder reservoir
is filled with DOT 4 brake fluid.
There are only two reasons why the
brake fluid level in the reservoir
might go down:
.The brake fluid level goes down
because of normal brake lining
wear. When new linings are
installed, the fluid level goes
back up.
.A fluid leak in the brake
hydraulic system can also cause
a low fluid level. Have the brake
hydraulic system fixed, since a
leak means that sooner or later
the brakes will not work well.
Do not top off the brake fluid.
Adding fluid does not correct a leak.
If fluid is added when the linings are
worn, there will be too much fluid
when new brake linings are
installed. Add or remove brake fluid,
as necessary, only when work is
done on the brake hydraulic system.
{Warning
If too much brake fluid is added, it
can spill on the engine and burn,
if the engine is hot enough. You
or others could be burned, and
the vehicle could be damaged.
Add brake fluid only when work is
done on the brake hydraulic
system. When the brake fluid falls to a low
level, the brake warning light comes
on. See
Brake System Warning
Light on page 5-14.
What to Add
Use only new DOT 4 brake fluid
from a sealed container. It is
recommended that the brake
hydraulic system be flushed and
refilled with new DOT 4 fluid at a
regular maintenance service every
two years. See Maintenance
Schedule on page 11-2 and
Recommended Fluids and
Lubricants on page 11-12.
Always clean the brake fluid
reservoir cap and the area around
the cap before removing it. This
helps keep dirt from entering the
reservoir.
ProCarManuals.com