2014 CHEVROLET SS ECO mode
[x] Cancel search: ECO modePage 256 of 422

Black plate (24,1)Chevrolet SS Sedan Owner Manual (GMNA-Localizing-U.S.-6014851) - 2014 -
1st Edition - 8/22/13
9-24 Driving and Operating
{Caution
If the vehicle accelerates slowly,
or does not shift gears, the
transmission could be damaged.
Have the vehicle serviced
right away.
Sport Shift Mode
Sport Shift mode can be selected
where maximum responsiveness is
required. When operated in Sport Shift mode,
the transmission will delay upshifts
and allow earlier downshifts.
In addition, the transmission can
sense enthusiastic driving, at which
point it may delay upshifting and
downshift earlier when braking. This
is designed to maximize vehicle
performance.
To activate sport shift mode:
1. Move the shift lever to D (Drive).
2. Push the shift lever to the right.
Sport Mode On is displayed on
the DIC.
Do not move the shift lever to
+ (Plus) or −(Minus), otherwise
Active Select mode will be
enabled.
3. To return to Normal Shift mode, move the shift lever left, to
D (Drive). Sport Mode Off is
displayed on the DIC.
On the bottom of the display, S
appears as long as Sport Shift
mode is selected. Normal Shift Mode
Normal shift mode is recommended
for normal or freeway driving, as it
provides optimum fuel economy.
When the shift lever is moved to
D (Drive), normal shift mode is
selected.
Manual Mode
Active Select (A/S) Mode
A/S mode allows gears to be
selected manually.
It can also provide engine braking
by selecting the appropriate lower
gear on a steep downhill grade.
ProCarManuals.com
Page 257 of 422

Black plate (25,1)Chevrolet SS Sedan Owner Manual (GMNA-Localizing-U.S.-6014851) - 2014 -
1st Edition - 8/22/13
Driving and Operating 9-25
To enable A/S mode:
1. Move the shift lever to D (Drive).
2. Push the lever to the right.
3. Shift to the required gear:To shift up a gear, briefly push
the lever forward toward the
+ (Plus) and release it.
To shift down a gear, briefly pull
the lever rearward toward the
−(Minus) and release it. After changing the gear and
releasing the shift lever, it returns to
the center position on the right side
of the selector.
On the bottom of the display, M and
the currently selected gear appear
as long as A/S mode is selected.
Alternatively, the paddles can be
used to shift to the required gear:
To shift up a gear, briefly pull the
+ (Plus) paddle toward the steering
wheel and release it. To shift down a gear, briefly pull the
−
(Minus) paddle toward the steering
wheel and release it.
.The transmission will shift to a
selected gear only if the engine
speed is within a suitable range.
If not suitable, SHIFT DENIED
will be displayed in the DIC, and
the transmission will not shift
gears. Continuing to hold the
lever in the −(Minus) position
will select the requested gear as
soon as the vehicle speed
decreases to the allowed speed
for that gear.
.If the engine speed becomes too
low for the currently selected
gear, the transmission will
automatically shift down, even
though A/S mode is still
selected.
.While in A/S mode, 2 (Second)
or 3 (Third) gear starts can be
selected from a standing start.
This is useful for gentle
acceleration on slippery
surfaces.
ProCarManuals.com
Page 258 of 422

Black plate (26,1)Chevrolet SS Sedan Owner Manual (GMNA-Localizing-U.S.-6014851) - 2014 -
1st Edition - 8/22/13
9-26 Driving and Operating
To disable A/S mode and return to
Normal Shift mode, push the shift
lever to the left, to position D (Drive).
On the bottom of the display, D is
displayed.
To disable A/S mode and return to
Sport Shift mode, hold the shift lever
in the + (Plus) position for more than
one second. On the bottom of the
display, S is displayed.
Temporary Active Select
(A/S) Mode
A/S can also be operated from
D (Drive) using the steering wheel
paddles only. With the vehicle in
motion, briefly pulling the + (Plus) or
−(Minus) steering wheel paddles at
any time will engage Temporary
A/S mode. In this mode A/S functions as if
activated from Sport mode, except
that the transmission will
automatically exit Temporary A/S
mode to Normal Shift mode if any of
the following conditions are met:
.The vehicle speed drops below
approximately 10 km/h (6 mph).
.No shift paddle is pressed, and
steady driving without
accelerating, decelerating,
or cornering is detected for
approximately seven seconds.
.The + (Plus) steering wheel
paddle is pulled and held for
more than one second.
.The shift lever is moved out of
D (Drive) to Sport Shift mode.
Brakes
Antilock Brake
System (ABS)
This vehicle has ABS, an advanced
electronic braking system that helps
prevent a braking skid.
When the vehicle begins to drive
away, ABS checks itself.
A momentary motor or clicking noise
might be heard while this test is
going on, and it might even be
noticed that the brake pedal moves
a little. This is normal.
If there is a problem with ABS, this
warning light stays on. See
Antilock
Brake System (ABS) Warning Light
on page 5-16.
ProCarManuals.com
Page 263 of 422

Black plate (31,1)Chevrolet SS Sedan Owner Manual (GMNA-Localizing-U.S.-6014851) - 2014 -
1st Edition - 8/22/13
Driving and Operating 9-31
Ifdcomes on and stays on:
1. Stop the vehicle.
2. Turn the engine off and wait 15 seconds.
3. Start the engine.
Drive the vehicle. If
dcomes on
and stays on, the vehicle may need
more time to diagnose the problem.
If the condition persists, see your
dealer.
Turning the Systems Off
and On
To turn the system off, press the
TCS/StabiliTrak button on the center
console.
To turn off only TCS, press and
release the TCS/StabiliTrak button.
The traction off light
idisplays in
the instrument cluster.
To turn TCS on again, press and
release the TCS/StabiliTrak button.
The traction off light
idisplayed in
the instrument cluster will turn off.
If TCS is limiting wheel spin when
the TCS/StabiliTrak button is
pressed, the system will not turn off
until the wheels stop spinning.
To turn off both TCS and StabiliTrak,
press and hold the TCS/StabiliTrak
button until the traction off light
i
and StabiliTrak OFF lightgcome
on and stay on in the instrument
cluster. To turn TCS and StabiliTrak on
again, press and release the TCS/
StabiliTrak button. The traction off
light
iand StabiliTrak OFF lightg
in the instrument cluster turn off.
Adding accessories can affect the
vehicle performance. See
Accessories and Modifications on
page 10-2.
Competitive Driving Mode
The Competitive Driving Mode
system is designed to allow
increased performance while
accelerating and/or cornering. This
is accomplished by regulating and
optimizing engine, steering, and
brake performance. This mode is for
use at a closed course race track
and is not intended for use on public
roads. It will not compensate for
driver inexperience or lack of
familiarity with the race track.
Drivers who prefer to allow the
system to have more control of the
ProCarManuals.com
Page 316 of 422

Black plate (34,1)Chevrolet SS Sedan Owner Manual (GMNA-Localizing-U.S.-6014851) - 2014 -
1st Edition - 8/22/13
10-34 Vehicle Care
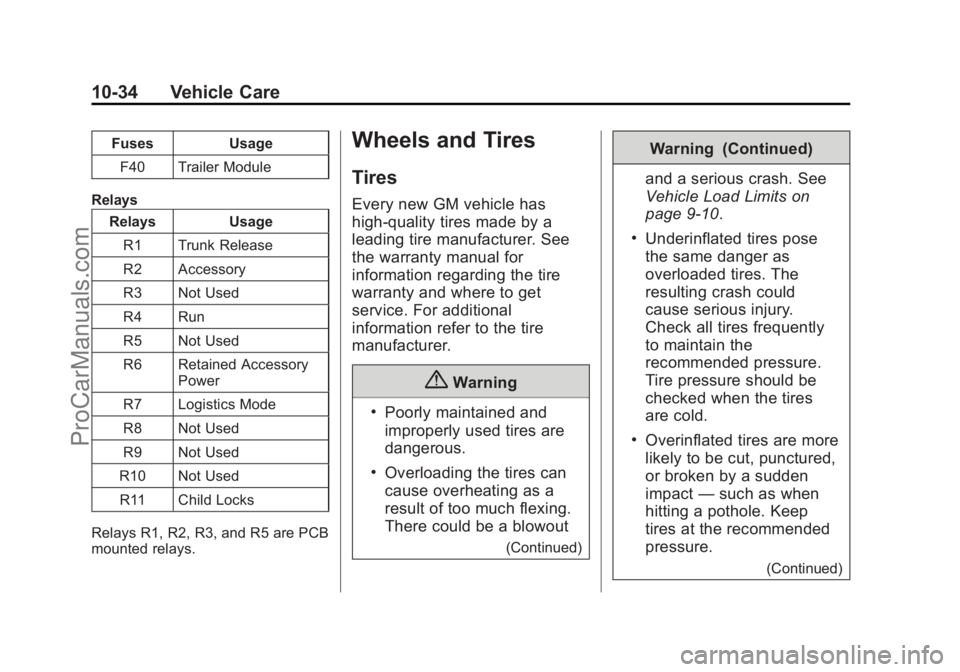
FusesUsage
F40 Trailer Module
Relays Relays Usage
R1 Trunk Release
R2 Accessory
R3 Not Used
R4 Run
R5 Not Used
R6 Retained Accessory Power
R7 Logistics Mode
R8 Not Used
R9 Not Used
R10 Not Used
R11 Child Locks
Relays R1, R2, R3, and R5 are PCB
mounted relays.Wheels and Tires
Tires
Every new GM vehicle has
high-quality tires made by a
leading tire manufacturer. See
the warranty manual for
information regarding the tire
warranty and where to get
service. For additional
information refer to the tire
manufacturer.
{Warning
.Poorly maintained and
improperly used tires are
dangerous.
.Overloading the tires can
cause overheating as a
result of too much flexing.
There could be a blowout
(Continued)
Warning (Continued)
and a serious crash. See
Vehicle Load Limits on
page 9-10.
.Underinflated tires pose
the same danger as
overloaded tires. The
resulting crash could
cause serious injury.
Check all tires frequently
to maintain the
recommended pressure.
Tire pressure should be
checked when the tires
are cold.
.Overinflated tires are more
likely to be cut, punctured,
or broken by a sudden
impact —such as when
hitting a pothole. Keep
tires at the recommended
pressure.
(Continued)
ProCarManuals.com
Page 322 of 422

Black plate (40,1)Chevrolet SS Sedan Owner Manual (GMNA-Localizing-U.S.-6014851) - 2014 -
1st Edition - 8/22/13
10-40 Vehicle Care
outward when mounted on a
vehicle. The side of the tire that
contains a whitewall, bears
white lettering, or bears
manufacturer, brand, and/or
model name molding that is
higher or deeper than the same
moldings on the other sidewall
of the tire.
Passenger (P-Metric) Tire
:A
tire used on passenger cars and
some light duty trucks and
multipurpose vehicles.
Recommended Inflation
Pressure
:Vehicle
manufacturer's recommended
tire inflation pressure as shown
on the tire placard. See Tire
Pressure on page 10-41 and
Vehicle Load Limits on
page 9-10. Radial Ply Tire
:A pneumatic
tire in which the ply cords that
extend to the beads are laid at
90 degrees to the centerline of
the tread.
Rim
:A metal support for a tire
and upon which the tire beads
are seated.
Sidewall
:The portion of a tire
between the tread and the bead.
Speed Rating
:An
alphanumeric code assigned to
a tire indicating the maximum
speed at which a tire can
operate.
Traction
:The friction between
the tire and the road surface.
The amount of grip provided.
Tread
:The portion of a tire that
comes into contact with
the road.
Treadwear Indicators
:Narrow
bands, sometimes called wear
bars, that show across the tread of a tire when only 1.6 mm
(1/16 in) of tread remains. See
When It Is Time for New Tires
on page 10-48.
UTQGS (Uniform Tire Quality
Grading Standards)
:A tire
information system that provides
consumers with ratings for a
tire's traction, temperature, and
treadwear. Ratings are
determined by tire
manufacturers using
government testing procedures.
The ratings are molded into the
sidewall of the tire. See Uniform
Tire Quality Grading on
page 10-51.
Vehicle Capacity Weight
:The
number of designated seating
positions multiplied by
68 kg (150 lb) plus the rated
cargo load. See Vehicle Load
Limits on page 9-10.
ProCarManuals.com
Page 328 of 422

Black plate (46,1)Chevrolet SS Sedan Owner Manual (GMNA-Localizing-U.S.-6014851) - 2014 -
1st Edition - 8/22/13
10-46 Vehicle Care
5. Press and hold the SET/CLRbutton to begin the sensor
matching process.
A message requesting
acceptance of the process may
display.
6. If requested, press the SET/CLR button again to confirm the
selection.
The horn sounds twice to signal
the receiver is in relearn mode
and the TIRE LEARN or TIRE
LEARNING ACTIVE message
displays on the DIC screen.
7. Start with the left front tire.
8. Place the relearn tool against the tire sidewall, near the valve
stem. Then press the button to
activate the TPMS sensor.
A horn chirp confirms that the
sensor identification code has
been matched to this tire and
wheel position.
9. Proceed to the right front tire, and repeat the procedure in
Step 8. 10. Proceed to the right rear tire,
and repeat the procedure in
Step 8.
11. Proceed to the left rear tire, and repeat the procedure in
Step 8. The horn sounds two
times to indicate the sensor
identification code has been
matched to the left rear tire,
and the TPMS sensor matching
process is no longer active.
The TIRE LEARN or TIRE
LEARNING ACTIVE message
on the DIC display screen
goes off.
12. Turn the ignition to LOCK/OFF.
13. Set all four tires to the recommended air pressure
level as indicated on the Tire
and Loading Information label.Tire Inspection
We recommend that the tires,
including the spare tire, if the
vehicle has one, be inspected
for signs of wear or damage at
least once a month.
Replace the tire if:
.The indicators at three or
more places around the tire
can be seen.
.There is cord or fabric
showing through the tire's
rubber.
.The tread or sidewall is
cracked, cut, or snagged
deep enough to show cord or
fabric.
.The tire has a bump, bulge,
or split.
ProCarManuals.com
Page 394 of 422

Black plate (10,1)Chevrolet SS Sedan Owner Manual (GMNA-Localizing-U.S.-6014851) - 2014 -
1st Edition - 8/22/13
13-10 Customer Information
Many insurance policies provide
reduced protection to the GM
vehicle by limiting compensation for
damage repairs through the use of
aftermarket collision parts. Some
insurance companies will not
specify aftermarket collision parts.
When purchasing insurance, we
recommend that you ensure that the
vehicle will be repaired with GM
original equipment collision parts.
If such insurance coverage is not
available from your current
insurance carrier, consider switching
to another insurance carrier.
If the vehicle is leased, the leasing
company may require you to have
insurance that ensures repairs with
Genuine GM Original Equipment
Manufacturer (OEM) parts or
Genuine Manufacturer replacement
parts. Read the lease carefully, as
you may be charged at the end of
the lease for poor quality repairs.If a Crash Occurs
If there has been an injury, call
emergency services for help. Do not
leave the scene of a crash until all
matters have been taken care of.
Move the vehicle only if its position
puts you in danger, or you are
instructed to move it by a police
officer.
Give only the necessary information
to police and other parties involved
in the crash.
For emergency towing see
Roadside Assistance Program on
page 13-5.
Gather the following information:
.Driver name, address, and
telephone number.
.Driver license number.
.Owner name, address, and
telephone number.
.Vehicle license plate number.
.Vehicle make, model, and
model year.
.Vehicle Identification
Number (VIN).
.Insurance company and policy
number.
.General description of the
damage to the other vehicle.
Choose a reputable repair facility
that uses quality replacement parts.
See “Collision Parts” earlier in this
section.
If the airbag has inflated, see What
Will You See after an Airbag
Inflates? on page 3-19.
Managing the Vehicle Damage
Repair Process
In the event that the vehicle requires
damage repairs, GM recommends
that you take an active role in its
repair. If you have a pre-determined
repair facility of choice, take the
vehicle there, or have it towed there.
Specify to the facility that any
required replacement collision parts
be original equipment parts, either
new Genuine GM parts or recycled
ProCarManuals.com