2014 CHEVROLET SILVERADO service
[x] Cancel search: servicePage 339 of 546
Black plate (71,1)Chevrolet Silverado Owner Manual (GMNA-Localizing-U.S./Canada/Mexico-
5853506) - 2014 - crc 2nd - 5/15/13
Driving and Operating 9-71
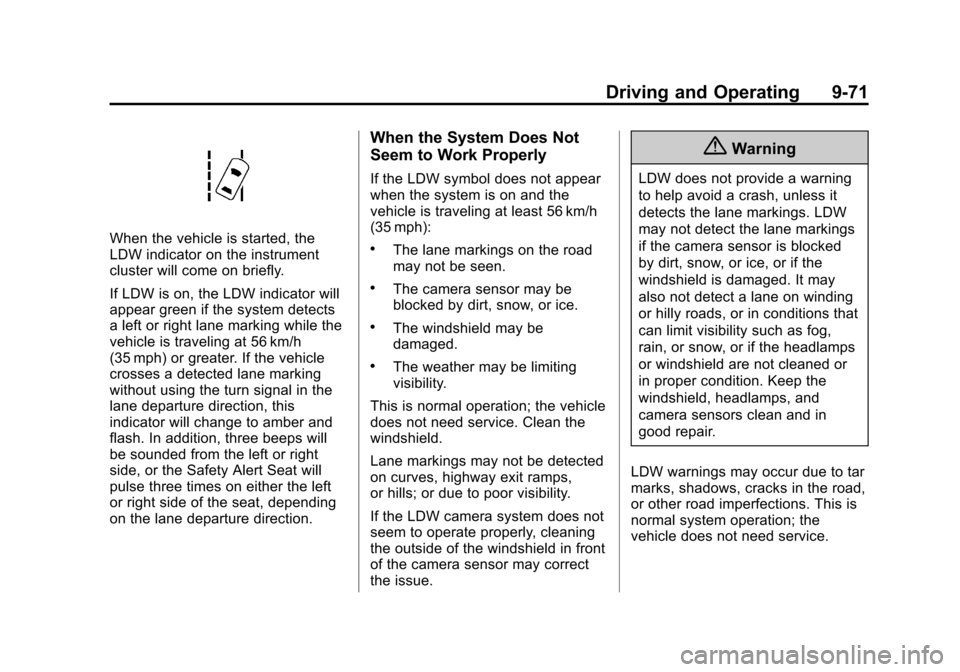
When the vehicle is started, the
LDW indicator on the instrument
cluster will come on briefly.
If LDW is on, the LDW indicator will
appear green if the system detects
a left or right lane marking while the
vehicle is traveling at 56 km/h
(35 mph) or greater. If the vehicle
crosses a detected lane marking
without using the turn signal in the
lane departure direction, this
indicator will change to amber and
flash. In addition, three beeps will
be sounded from the left or right
side, or the Safety Alert Seat will
pulse three times on either the left
or right side of the seat, depending
on the lane departure direction.
When the System Does Not
Seem to Work Properly
If the LDW symbol does not appear
when the system is on and the
vehicle is traveling at least 56 km/h
(35 mph):
.The lane markings on the road
may not be seen.
.The camera sensor may be
blocked by dirt, snow, or ice.
.The windshield may be
damaged.
.The weather may be limiting
visibility.
This is normal operation; the vehicle
does not need service. Clean the
windshield.
Lane markings may not be detected
on curves, highway exit ramps,
or hills; or due to poor visibility.
If the LDW camera system does not
seem to operate properly, cleaning
the outside of the windshield in front
of the camera sensor may correct
the issue.
{Warning
LDW does not provide a warning
to help avoid a crash, unless it
detects the lane markings. LDW
may not detect the lane markings
if the camera sensor is blocked
by dirt, snow, or ice, or if the
windshield is damaged. It may
also not detect a lane on winding
or hilly roads, or in conditions that
can limit visibility such as fog,
rain, or snow, or if the headlamps
or windshield are not cleaned or
in proper condition. Keep the
windshield, headlamps, and
camera sensors clean and in
good repair.
LDW warnings may occur due to tar
marks, shadows, cracks in the road,
or other road imperfections. This is
normal system operation; the
vehicle does not need service.
Page 340 of 546
Black plate (72,1)Chevrolet Silverado Owner Manual (GMNA-Localizing-U.S./Canada/Mexico-
5853506) - 2014 - crc 2nd - 5/15/13
9-72 Driving and Operating
Fuel
For diesel engine vehicles, see
“Fuel for Diesel Engines”in the
Duramax diesel supplement.
For gasoline engine vehicles, use of
the recommended fuel is an
important part of the proper
maintenance of this vehicle. To help
keep the engine clean and maintain
optimum vehicle performance, we
recommend using TOP TIER
Detergent Gasolines.
See www.toptiergas.com for a list of
TOP TIER Detergent Gasolines.
If the vehicle has a yellow fuel cap,
E85 or FlexFuel can be used in the
vehicle. See E85 or FlexFuel on
page 9-74.
For all vehicles except those with
the 6.2L V8 engine, use regular
unleaded gasoline with a posted
octane rating of 87 or higher. If the
octane rating is less than 87, an
audible knocking noise may be
heard. If this occurs, use a gasoline
rated at 87 octane or higher as soon
as possible. If heavy knocking is
heard when using a higher octane
rated gasoline, the engine needs
service. If the vehicle has the 6.2L V8 engine
(VIN Code J), use premium
unleaded gasoline with a posted
octane rating of 91 or higher. If the
octane is less than 91, you could
damage the engine and may void
your vehicle warranty. If heavy
knocking is heard when using
gasoline rated at 91 octane or
higher, the engine needs service.
Use of Seasonal Fuels
Use summer and winter fuels in the
appropriate season. Driving or
starting could be affected if the
incorrect fuel is used. Drive the
vehicle with the engine running until
the fuel is a half tank or less, then
refuel with the current seasonal fuel.
Prohibited Fuels
Gasolines containing oxygenates,
such as ethers and ethanol, as well
as reformulated gasolines are
available in some cities. If these
gasolines comply with the
previousely described specification,
then they are acceptable to use.
However, E85 (85% ethanol) and
Page 341 of 546
Black plate (73,1)Chevrolet Silverado Owner Manual (GMNA-Localizing-U.S./Canada/Mexico-
5853506) - 2014 - crc 2nd - 5/15/13
Driving and Operating 9-73
other fuels containing more than
15% ethanol must be used only in
flex fuel vehicles.
{Caution
Do not use fuel containing
methanol. It can corrode metal
parts in the fuel system and also
damage plastic and rubber parts.
That damage would not be
covered under the vehicle
warranty.
Some gasolines that are not
reformulated for low emissions can
contain an octane-enhancing
additive called
methylcyclopentadienyl manganese
tricarbonyl (MMT). Do not use
gasolines with MMT as they can
reduce spark plug life and affect
emission control system
performance. The malfunction
indicator lamp may turn on. If this
occurs, see your dealer for service.
Gasoline Specifications
At a minimum, gasoline should meet
ASTM specification D 4814. Some
gasolines contain an
octane-enhancing additive called
methylcyclopentadienyl manganese
tricarbonyl (MMT). We recommend
against the use of gasolines
containing MMT. See “Prohibited
Fuels" in Fuel on page 9-72.
California Fuel
Requirements
If the vehicle is certified to meet
California Emissions Standards, it is
designed to operate on fuels that
meet California specifications. See
the underhood emission control
label. If this fuel is not available in
states adopting California Emissions
Standards, the vehicle will operate
satisfactorily on fuels meeting
federal specifications, but emission
control system performance might
be affected. The malfunction
indicator lamp could turn on and the
vehicle may not pass a smog-check test. See
Malfunction Indicator
Lamp on page 5-22. If this occurs,
return to your authorized dealer for
diagnosis. If it is determined that the
condition is caused by the type of
fuel used, repairs may not be
covered by the vehicle warranty.
Fuels in Foreign
Countries
If planning to drive in countries
outside the U.S. or Canada, the
proper fuel might be hard to find.
Check regional auto club or fuel
retail brand websites for availability
in the country where driving. Never
use leaded gasoline, fuel containing
methanol, or any other fuel not
recommended. Costly repairs
caused by use of improper fuel
would not be covered by the vehicle
warranty.
Page 348 of 546
Black plate (80,1)Chevrolet Silverado Owner Manual (GMNA-Localizing-U.S./Canada/Mexico-
5853506) - 2014 - crc 2nd - 5/15/13
9-80 Driving and Operating
3. When the wheel chocks are inplace, release the regular brakes
until the chocks absorb the load.
4. Reapply the brake pedal. Then apply the parking brake and shift
into P (Park).
5. Release the brake pedal.
Leaving After Parking on a Hill
1. Apply and hold the brake pedal.
2. Start the engine.
3. Shift into a gear.
4. Release the parking brake.
5. Let up on the brake pedal.
6. Drive slowly until the trailer is clear of the chocks.
7. Stop and have someone pick up and store the chocks.
Maintenance when Trailer
Towing
The vehicle needs service more
often when pulling a trailer. See
Maintenance Schedule on
page 11-3. Things that are
especially important in trailer
operation are automatic
transmission fluid, engine oil, axle
lubricant, belts, cooling system, and
brake system. It is a good idea to
inspect these before and during
the trip.
Check periodically to see that all
hitch nuts and bolts are tight.
Trailer Towing
If the vehicle has a diesel engine,
see the Duramax diesel
supplement.
If the vehicle is bi-fuel, see the
bi-fuel supplement.
Do not tow a trailer during break-in.
See New Vehicle Break-In on
page 9-24.
{Warning
The driver can lose control when
pulling a trailer if the correct
equipment is not used or the
vehicle is not driven properly. For
example, if the trailer is too
heavy, the brakes may not work
well or even at all. The driver and
passengers could be seriously
injured. The vehicle may also be
damaged; the resulting repairs
would not be covered by the
vehicle warranty. Pull a trailer
only if all the steps in this section
have been followed. Ask your
dealer for advice and information
about towing a trailer with the
vehicle.
Page 364 of 546
Black plate (96,1)Chevrolet Silverado Owner Manual (GMNA-Localizing-U.S./Canada/Mexico-
5853506) - 2014 - crc 2nd - 5/15/13
9-96 Driving and Operating
If the vehicle is equipped with the
heavy-duty trailering option, see
“Heavy-Duty Trailer Wiring Harness
Package”earlier in this section.
When the camper-wiring harness is
ordered without the heavy-duty
trailering package, a seven-wire
harness with a seven-pin connector
is at the rear of the vehicle and is
tied to the vehicle's frame.
Electric Brake Control Wiring
Provisions
These wiring provisions are
included with the vehicle as part of
the trailer wiring package. These
provisions are for an electric brake
controller.
The harness should be installed by
your dealer or a qualified service
center.
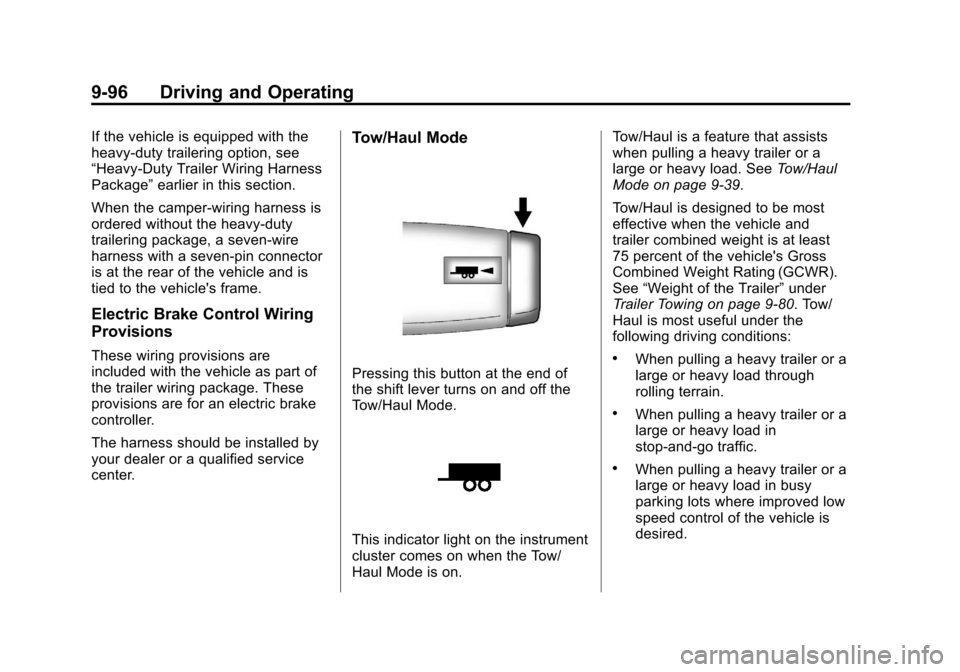
Tow/Haul Mode
Pressing this button at the end of
the shift lever turns on and off the
Tow/Haul Mode.
This indicator light on the instrument
cluster comes on when the Tow/
Haul Mode is on. Tow/Haul is a feature that assists
when pulling a heavy trailer or a
large or heavy load. See
Tow/Haul
Mode on page 9-39.
Tow/Haul is designed to be most
effective when the vehicle and
trailer combined weight is at least
75 percent of the vehicle's Gross
Combined Weight Rating (GCWR).
See “Weight of the Trailer” under
Trailer Towing on page 9-80. Tow/
Haul is most useful under the
following driving conditions:
.When pulling a heavy trailer or a
large or heavy load through
rolling terrain.
.When pulling a heavy trailer or a
large or heavy load in
stop-and-go traffic.
.When pulling a heavy trailer or a
large or heavy load in busy
parking lots where improved low
speed control of the vehicle is
desired.
Page 367 of 546
Black plate (99,1)Chevrolet Silverado Owner Manual (GMNA-Localizing-U.S./Canada/Mexico-
5853506) - 2014 - crc 2nd - 5/15/13
Driving and Operating 9-99
.A trailer with electric brakes has
become disconnected (a
CHECK TRAILER WIRING
message will also display on
the DIC).
.There is a fault present in the
wiring to the trailer brakes (a
CHECK TRAILER WIRING
message will also display on
the DIC).
.The ITBC system is not working
due to a fault (a SERVICE
TRAILER BRAKE SYSTEM
message will also display in
the DIC).
Manual Trailer Brake Apply
The Manual Trailer Brake Apply
Lever is used to apply the trailer ’s
electric brakes independent of the
vehicle’s brakes. Sliding the lever to
the left will apply only the trailer
brakes. Use this lever to adjust
Trailer Gain to properly adjust the
power output to the trailer brakes. The trailer's and the vehicle's brake
lamps will come on when either
vehicle brakes or manual trailer
brakes are applied.
Trailer Gain Adjustment Procedure
Trailer Gain should be set for a
specific trailering condition and must
be adjusted any time vehicle
loading, trailer loading, or road
surface conditions change.
{Warning
Trailer brakes that are
over-gained or under-gained may
not stop the vehicle and the trailer
as intended and can result in a
crash. Always follow the
instructions to set the Trailer Gain
for the proper trailer stopping
performance.
Use the following to adjust Trailer
Gain for each towing condition:
1. Drive the vehicle with the trailer
attached on a level road surface
representative of the towing
condition and free of traffic at
about 32 to 40 km/h (20 to
25 mph) and fully apply the
Manual Trailer Brake Apply
Lever.
Adjusting Trailer Gain at speeds
lower than 32 to 40 km/h (20 to
25 mph) may result in an
incorrect gain setting.
2. Adjust the Trailer Gain, using the Trailer Gain Adjustment Buttons,
to just below the point of trailer
wheel lock-up, indicated by
trailer wheel squeal or tire
smoke when a trailer wheel
locks.
Trailer wheel lock-up may not
occur if towing a heavily loaded
trailer. In this case, adjust the
Trailer Gain to the highest
allowable setting for the towing
condition.
Page 369 of 546
Black plate (101,1)Chevrolet Silverado Owner Manual (GMNA-Localizing-U.S./Canada/Mexico-
5853506) - 2014 - crc 2nd - 5/15/13
Driving and Operating 9-101
SERVICE TRAILER BRAKE
SYSTEM: This message will display
when there is a problem with the
ITBC system. If this message
continues over multiple ignition
cycles, there is a problem with the
ITBC system. Have the vehicle
serviced.
If either the CHECK TRAILER
WIRING or SERVICE TRAILER
BRAKE SYSTEM message displays
while driving, the ITBC system may
not be fully functional or may not
function at all. When traffic
conditions allow, carefully pull the
vehicle over to the side of the road
and turn the ignition off. Check the
wiring connection to the trailer and
turn the ignition back on. If either of
these messages continues, either
the vehicle or trailer needs service.A GM dealer may be able to
diagnose and repair problems with
the trailer. However, any diagnosis
and repair of the trailer is not
covered under the vehicle warranty.
Contact your trailer dealer for
assistance with trailer repairs and
trailer warranty information.
Trailer Sway
Control (TSC)
Vehicles with StabiliTrak have a
TSC feature. Trailer sway is
unintended side-to-side motion of a
trailer while being towed. If the
vehicle is towing a trailer and the
TSC detects that sway is increasing,
the vehicle brakes are selectively
applied at each wheel, to help
reduce excessive trailer sway. If the
vehicle is equipped with the
Integrated Trailer Brake Control
(ITBC) system, and the trailer has
the electric actuated brake system,
StabiliTrak may also apply the trailer
brakes.If TSC is enabled, the Traction
Control System (TCS)/StabiliTrak
warning light will flash on the
instrument cluster. Vehicle speed
must be reduced. If trailer sway
continues, StabiliTrak can reduce
engine torque to help slow the
vehicle. See
Traction Control/
Electronic Stability Control on
page 9-57.
Page 375 of 546
Black plate (1,1)Chevrolet Silverado Owner Manual (GMNA-Localizing-U.S./Canada/Mexico-
5853506) - 2014 - crc 2nd - 5/15/13
Vehicle Care 10-1
Vehicle Care
General Information
General Information . . . . . . . . . . 10-2
California Proposition65 Warning . . . . . . . . . . . . . . . . . 10-2
California Perchlorate Materials Requirements . . . . 10-3
Accessories and Modifications . . . . . . . . . . . . . . . 10-3
Vehicle Checks
Doing Your OwnService Work . . . . . . . . . . . . . . . 10-3
Hood . . . . . . . . . . . . . . . . . . . . . . . . 10-4
Engine Compartment Overview . . . . . . . . . . . . . . . . . . . 10-5
Engine Oil . . . . . . . . . . . . . . . . . . 10-10
Engine Oil Life System . . . . . 10-13
Automatic Transmission Fluid . . . . . . . . . . . . . . . . . . . . . . 10-14
Manual Transmission Fluid . . . . . . . . . . . . . . . . . . . . . . 10-17
Hydraulic Clutch . . . . . . . . . . . . 10-18
Engine Air Cleaner/Filter . . . . 10-18
Cooling System . . . . . . . . . . . . 10-19
Engine Coolant . . . . . . . . . . . . . 10-21
Engine Overheating . . . . . . . . 10-24 Overheated Engine
Protection Operating Mode
(6.0L V8 Engine Only) . . . . . 10-26
Engine Fan . . . . . . . . . . . . . . . . . 10-26
Power Steering Fluid (4.3L V6, 5.3L V8, and 6.2L
V8 Engines) . . . . . . . . . . . . . . . 10-27
Power Steering Fluid (6.0L V8 and 6.6L
V8 Engines) . . . . . . . . . . . . . . . 10-27
Washer Fluid . . . . . . . . . . . . . . . 10-28
Brakes . . . . . . . . . . . . . . . . . . . . . 10-29
Brake Fluid . . . . . . . . . . . . . . . . . 10-30
Battery . . . . . . . . . . . . . . . . . . . . . 10-31
Four-Wheel Drive . . . . . . . . . . . 10-32
Front Axle . . . . . . . . . . . . . . . . . . 10-33
Rear Axle . . . . . . . . . . . . . . . . . . 10-34
Noise Control System . . . . . . 10-35
Starter Switch Check . . . . . . . 10-36
Automatic Transmission Shift Lock Control Function
Check . . . . . . . . . . . . . . . . . . . . . 10-37
Ignition Transmission Lock Check . . . . . . . . . . . . . . . . . . . . . 10-37
Park Brake and P (Park) Mechanism Check . . . . . . . . 10-38
Wiper Blade Replacement . . . . . . . . . . . . . . 10-38
Glass Replacement . . . . . . . . 10-39
Headlamp Aiming
Headlamp Aiming . . . . . . . . . . 10-39
Bulb Replacement
Bulb Replacement . . . . . . . . . . 10-39
Halogen Bulbs . . . . . . . . . . . . . . 10-39
Headlamps, Front Turn Signal, Sidemarker, and
Parking Lamps . . . . . . . . . . . . 10-40
Fog Lamps . . . . . . . . . . . . . . . . . 10-40
Taillamps (Chassis Cab Models) . . . . . . . . . . . . . . . . . . . 10-41
Taillamps, Turn Signal, Stoplamps, and Back-Up
Lamps . . . . . . . . . . . . . . . . . . . . 10-41
Center High-Mounted Stoplamp (CHMSL) and
Cargo Lamp . . . . . . . . . . . . . . 10-42
License Plate Lamp . . . . . . . . 10-42
Replacement Bulbs . . . . . . . . . 10-42
Electrical System
Electrical System Overload . . . . . . . . . . . . . . . . . . 10-43
Fuses . . . . . . . . . . . . . . . . . . . . . . 10-43