2014 CHEVROLET SILVERADO 1500 steering wheel
[x] Cancel search: steering wheelPage 307 of 542
Black plate (41,1)Chevrolet Silverado Owner Manual (GMNA-Localizing-U.S./Canada/Mexico-
5853506) - 2014 - CRC 3rd Edition - 8/29/13
Driving and Operating 9-41
Drive Systems
Four-Wheel Drive
If equipped, you can send the
engine's driving power to all four
wheels for extra traction. To get the
most satisfaction out of four-wheel
drive, you must be familiar with its
operation. Read the following before
using four-wheel drive. See the
appropriate text for the transfer case
in the vehicle.
{Caution
Driving on clean, dry pavement in
Four-Wheel Drive High or
Four-Wheel Drive Low for an
extended period of time may
cause premature wear on the
vehicle's powertrain. Do not drive
on clean, dry pavement in
Four-Wheel Drive High or
Four-Wheel Drive Low for
extended periods of time.While driving on clean, dry
pavement and during tight turns,
you may experience vibration in the
steering system.
Shifting into Four-Wheel Drive Low
will turn Traction Control and
StabiliTrak
®off. See
Traction
Control/Electronic Stability Control
on page 9-56.
Front Axle
The front axle engages and
disengages automatically when you
shift the transfer case. Some delay
for the axle to engage or disengage
is normal.
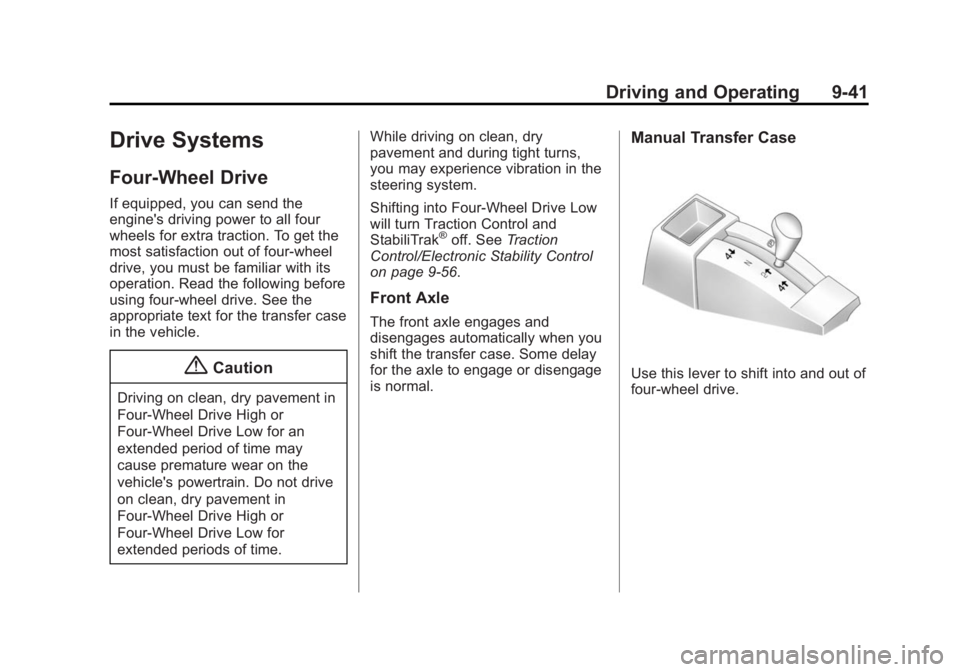
Manual Transfer Case
Use this lever to shift into and out of
four-wheel drive.
Page 311 of 542
Black plate (45,1)Chevrolet Silverado Owner Manual (GMNA-Localizing-U.S./Canada/Mexico-
5853506) - 2014 - CRC 3rd Edition - 8/28/13
Driving and Operating 9-45
Electronic Transfer Case
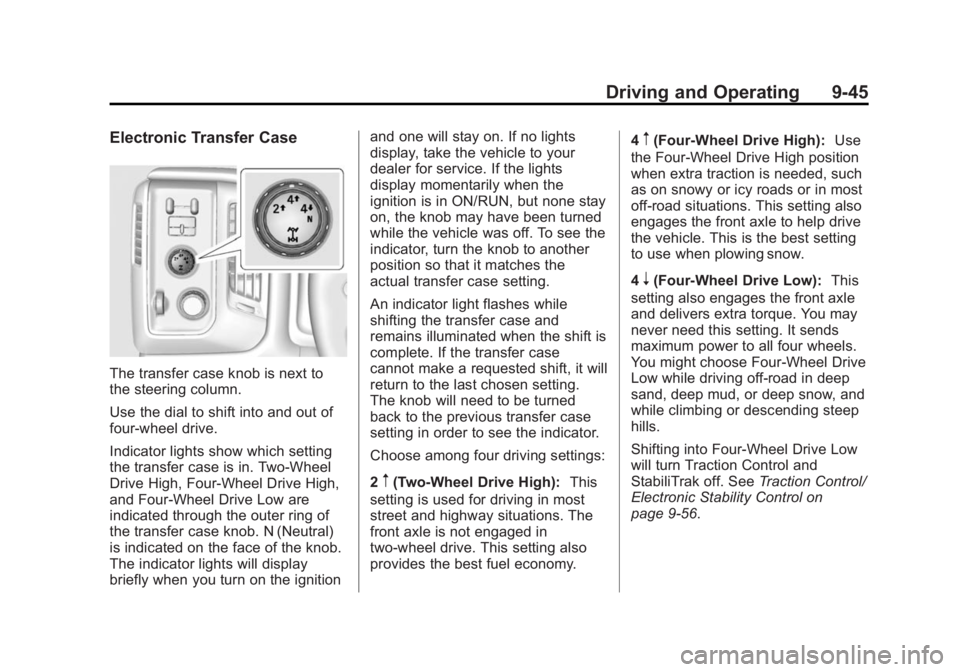
The transfer case knob is next to
the steering column.
Use the dial to shift into and out of
four-wheel drive.
Indicator lights show which setting
the transfer case is in. Two-Wheel
Drive High, Four-Wheel Drive High,
and Four-Wheel Drive Low are
indicated through the outer ring of
the transfer case knob. N (Neutral)
is indicated on the face of the knob.
The indicator lights will display
briefly when you turn on the ignitionand one will stay on. If no lights
display, take the vehicle to your
dealer for service. If the lights
display momentarily when the
ignition is in ON/RUN, but none stay
on, the knob may have been turned
while the vehicle was off. To see the
indicator, turn the knob to another
position so that it matches the
actual transfer case setting.
An indicator light flashes while
shifting the transfer case and
remains illuminated when the shift is
complete. If the transfer case
cannot make a requested shift, it will
return to the last chosen setting.
The knob will need to be turned
back to the previous transfer case
setting in order to see the indicator.
Choose among four driving settings:
2
m(Two-Wheel Drive High):
This
setting is used for driving in most
street and highway situations. The
front axle is not engaged in
two-wheel drive. This setting also
provides the best fuel economy. 4
m(Four-Wheel Drive High):
Use
the Four-Wheel Drive High position
when extra traction is needed, such
as on snowy or icy roads or in most
off-road situations. This setting also
engages the front axle to help drive
the vehicle. This is the best setting
to use when plowing snow.
4
n(Four-Wheel Drive Low): This
setting also engages the front axle
and delivers extra torque. You may
never need this setting. It sends
maximum power to all four wheels.
You might choose Four-Wheel Drive
Low while driving off-road in deep
sand, deep mud, or deep snow, and
while climbing or descending steep
hills.
Shifting into Four-Wheel Drive Low
will turn Traction Control and
StabiliTrak off. See Traction Control/
Electronic Stability Control on
page 9-56.
Page 315 of 542
Black plate (49,1)Chevrolet Silverado Owner Manual (GMNA-Localizing-U.S./Canada/Mexico-
5853506) - 2014 - CRC 3rd Edition - 8/28/13
Driving and Operating 9-49
Automatic Transfer Case
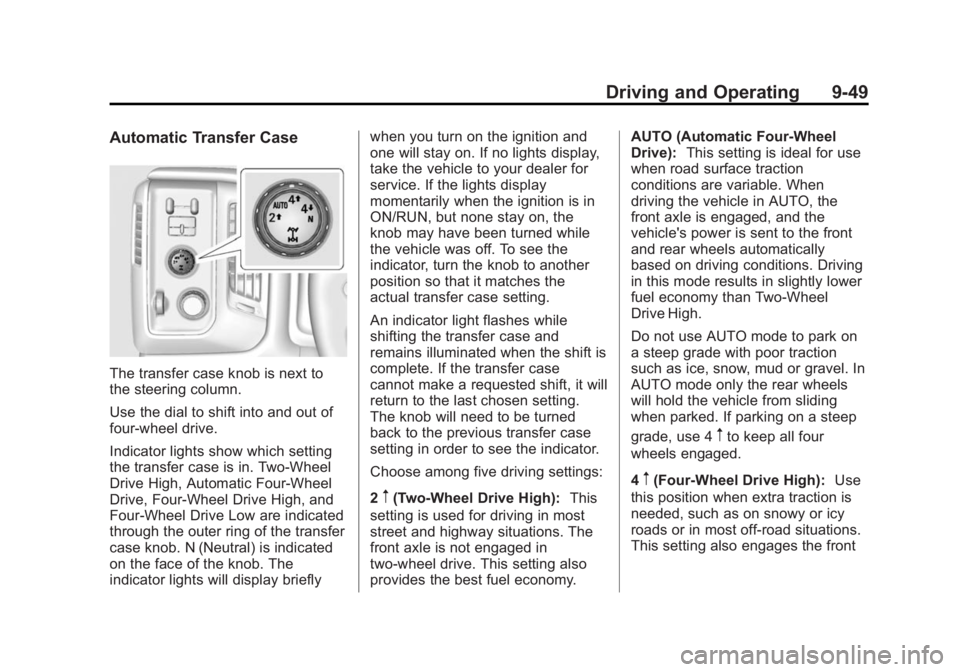
The transfer case knob is next to
the steering column.
Use the dial to shift into and out of
four-wheel drive.
Indicator lights show which setting
the transfer case is in. Two-Wheel
Drive High, Automatic Four-Wheel
Drive, Four-Wheel Drive High, and
Four-Wheel Drive Low are indicated
through the outer ring of the transfer
case knob. N (Neutral) is indicated
on the face of the knob. The
indicator lights will display brieflywhen you turn on the ignition and
one will stay on. If no lights display,
take the vehicle to your dealer for
service. If the lights display
momentarily when the ignition is in
ON/RUN, but none stay on, the
knob may have been turned while
the vehicle was off. To see the
indicator, turn the knob to another
position so that it matches the
actual transfer case setting.
An indicator light flashes while
shifting the transfer case and
remains illuminated when the shift is
complete. If the transfer case
cannot make a requested shift, it will
return to the last chosen setting.
The knob will need to be turned
back to the previous transfer case
setting in order to see the indicator.
Choose among five driving settings:
2
m(Two-Wheel Drive High):
This
setting is used for driving in most
street and highway situations. The
front axle is not engaged in
two-wheel drive. This setting also
provides the best fuel economy. AUTO (Automatic Four-Wheel
Drive):
This setting is ideal for use
when road surface traction
conditions are variable. When
driving the vehicle in AUTO, the
front axle is engaged, and the
vehicle's power is sent to the front
and rear wheels automatically
based on driving conditions. Driving
in this mode results in slightly lower
fuel economy than Two-Wheel
Drive High.
Do not use AUTO mode to park on
a steep grade with poor traction
such as ice, snow, mud or gravel. In
AUTO mode only the rear wheels
will hold the vehicle from sliding
when parked. If parking on a steep
grade, use 4
mto keep all four
wheels engaged.
4
m(Four-Wheel Drive High): Use
this position when extra traction is
needed, such as on snowy or icy
roads or in most off-road situations.
This setting also engages the front
Page 326 of 542
Black plate (60,1)Chevrolet Silverado Owner Manual (GMNA-Localizing-U.S./Canada/Mexico-
5853506) - 2014 - CRC 3rd Edition - 8/28/13
9-60 Driving and Operating
If equipped with an Allison or
Hydra-Matic 6-speed automatic
transmission, see“Tow/Haul Mode
Grade Braking” underTow/Haul
Mode on page 9-38 for an
explanation of how cruise control
interacts with the Range Selection
Mode, Tow/Haul Mode, and Grade
Braking systems.
If the cruise control is being used
and the Traction Control (TCS)
system or StabiliTrak begins to limit
wheel spin, the cruise control will
automatically disengage. See
Traction Control/Electronic Stability
Control on page 9-56. When road
conditions allow the cruise control to
be safely used again, it can be
turned back on.
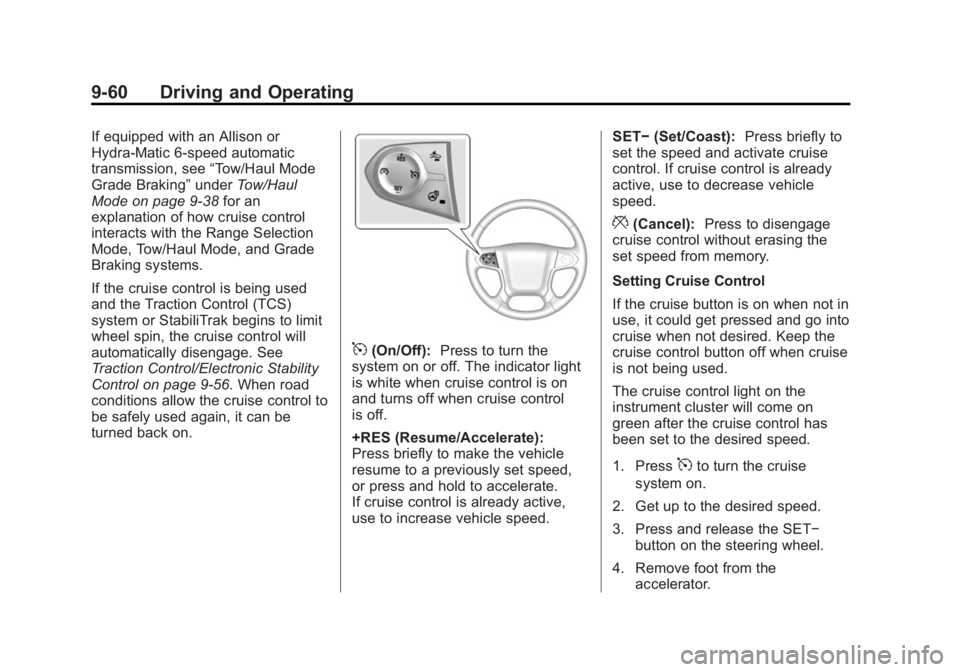
5(On/Off): Press to turn the
system on or off. The indicator light
is white when cruise control is on
and turns off when cruise control
is off.
+RES (Resume/Accelerate):
Press briefly to make the vehicle
resume to a previously set speed,
or press and hold to accelerate.
If cruise control is already active,
use to increase vehicle speed. SET−
(Set/Coast): Press briefly to
set the speed and activate cruise
control. If cruise control is already
active, use to decrease vehicle
speed.
*(Cancel): Press to disengage
cruise control without erasing the
set speed from memory.
Setting Cruise Control
If the cruise button is on when not in
use, it could get pressed and go into
cruise when not desired. Keep the
cruise control button off when cruise
is not being used.
The cruise control light on the
instrument cluster will come on
green after the cruise control has
been set to the desired speed.
1. Press
5to turn the cruise
system on.
2. Get up to the desired speed.
3. Press and release the SET− button on the steering wheel.
4. Remove foot from the accelerator.
Page 327 of 542
Black plate (61,1)Chevrolet Silverado Owner Manual (GMNA-Localizing-U.S./Canada/Mexico-
5853506) - 2014 - CRC 3rd Edition - 8/28/13
Driving and Operating 9-61
Resuming a Set Speed
If the cruise control is set at a
desired speed and then the brakes
are applied, the cruise control is
disengaged without erasing the set
speed from memory.
Once the vehicle speed reaches
about 40 km/h (25 mph) or more,
press the +RES button briefly on the
steering wheel. The vehicle returns
to the previous set speed.
Increasing Speed While Using
Cruise Control
If the cruise control system is
already activated:
.Press and hold the +RES button
on the steering wheel until the
desired speed is reached, then
release it.
.To increase vehicle speed in
small increments, briefly press
the +RES button. Each time this
is done, the vehicle goes about
1.6 km/h (1 mph) faster.Reducing Speed While Using
Cruise Control
If the cruise control system is
already activated:
.Press and hold the SET–
button
on the steering wheel until the
desired lower speed is reached,
then release it.
.To slow down in small
increments, briefly press the
SET– button. Each time this is
done, the vehicle goes about
1.6 km/h (1 mph) slower.
Passing Another Vehicle While
Using Cruise Control
Use the accelerator pedal to
increase the vehicle speed. When
you take your foot off the pedal, the
vehicle will slow down to the
previous set cruise speed. While
pressing the accelerator pedal or
shortly following the release to
override cruise control, briefly
pressing the SET– button will result
in cruise control set to the current
vehicle speed. Using Cruise Control on Hills
How well the cruise control works
on hills depends on the vehicle
speed, the load, and the steepness
of the hills. When going up steep
hills, pressing the accelerator pedal
may be necessary to maintain
vehicle speed.
While going downhill:.Vehicles with a 6-speed
automatic transmission and a
gasoline engine have Cruise
Grade Braking to help maintain
driver selected speed.
Cruise Grade Braking is enabled
when the vehicle is started and
cruise control is active. It is not
enabled in Range Selection
Mode. It assists in maintaining
driver selected speed when
driving on downhill grades by
using the engine and
transmission to slow the vehicle.
To disable and enable Cruise
Grade Braking for the current
ignition key cycle, press and
Page 328 of 542
Black plate (62,1)Chevrolet Silverado Owner Manual (GMNA-Localizing-U.S./Canada/Mexico-
5853506) - 2014 - CRC 3rd Edition - 8/29/13
9-62 Driving and Operating
hold the Tow/Haul button for
five seconds. A DIC message
displays. SeeTransmission
Messages on page 5-41.
.Vehicles with a diesel engine
have Cruise Grade Braking
enabled when Tow/Haul Mode is
on, the exhaust brake is on,
or both are on.
For other forms of Grade Braking,
see Automatic Transmission on
page 9-34.Tow/Haul Mode on
page 9-38, and Hill Descent Control
(HDC) on page 9-58. Ending Cruise Control
There are three ways to end cruise
control:.To disengage cruise control,
step lightly on the brake pedal.
.To disengage cruise control,
press
*on the steering wheel.
.To turn off the cruise control,
press
5on the steering wheel.
Erasing Speed Memory
The cruise control set speed is
erased from memory by pressing
5
or if the ignition is turned off.
Driver Assistance
Systems
This vehicle may have features that
work together to help avoid crashes
or reduce crash damage while
driving, backing, and parking. Read
this entire section before using
these systems.
{Warning
Do not rely on the Driver
Assistance Systems. These
systems do not replace the need
for paying attention and driving
safely. You may not hear or feel
alerts or warnings provided by
these systems. Failure to use
proper care when driving may
result in injury, death, or vehicle
damage. See Defensive Driving
on page 9-3.
(Continued)
Page 334 of 542
Black plate (68,1)Chevrolet Silverado Owner Manual (GMNA-Localizing-U.S./Canada/Mexico-
5853506) - 2014 - CRC 3rd Edition - 8/28/13
9-68 Driving and Operating
Press the collision alert button on
the steering wheel to set the FCA
timing to Far, Medium, Near, or Off.
The first button press shows the
current setting on the DIC.
Additional button presses will
change this setting. The chosen
setting will remain until it is changed
and will affect the timing of both the
Collision Alert and the Tailgating
Alert features. The timing of both
alerts will vary based on vehicle
speed. The faster the vehicle speed,
the farther away the alert will occur.
Consider traffic and weather
conditions when selecting the alert
timing. The range of selectable alert
timing may not be appropriate for all
drivers and driving conditions.
Unnecessary Alerts
FCA may provide unnecessary
alerts for turning vehicles, vehicles
in other lanes, objects that are not
vehicles, or shadows. These alerts
are normal operation and the
vehicle does not need service.
Cleaning the System
If the FCA system does not seem to
operate properly, cleaning the
outside of the windshield in front of
the camera sensor may correct the
issue.
Lane Departure
Warning (LDW)
If equipped, LDW may help avoid
crashes due to unintentional lane
departures. It may provide a
warning if the vehicle is crossing a
detected lane marking without using
a turn signal in the lane departure
direction. LDW uses a camera
sensor to detect the lane markings.
It only operates at speeds of
56 km/h (35 mph) or greater.
When the vehicle crosses a
detected lane marking, the LDW
indicator will flash and either three
beeps will be sounded from the left
or right side, or three Safety Alert
Seat pulses will occur on the left or
right side of the seat, depending on
the lane departure direction. LDWwill not warn if the turn signal is on
in the departure direction, or if a
sharp maneuver is made.
{Warning
The LDW system is an aid to help
the vehicle stay in the driving
lane. It does not steer the vehicle.
The LDW system may not:
.Provide enough time to avoid
a crash.
.Detect lane markings under
bad weather conditions or if
the windshield is dirty.
.Detect lane markings and will
not detect road edges.
.Warn that the vehicle is
crossing a lane marking if the
system does not detect the
lane marking.
If LDW only detects lane
markings on one side of the road,
it will only warn you when (Continued)
Page 343 of 542
Black plate (77,1)Chevrolet Silverado Owner Manual (GMNA-Localizing-U.S./Canada/Mexico-
5853506) - 2014 - CRC 3rd Edition - 8/28/13
Driving and Operating 9-77
Backing Up
Hold the bottom of the steering
wheel with one hand. To move the
trailer to the left, move that hand to
the left. To move the trailer to the
right, move your hand to the right.
Always back up slowly and,
if possible, have someone
guide you.
Making Turns
{Caution
Making very sharp turns while
trailering could cause the trailer to
come in contact with the vehicle.
The vehicle could be damaged.
Avoid making very sharp turns
while trailering.
When turning with a trailer, make
wider turns than normal. Do this so
the trailer will not strike soft
shoulders, curbs, road signs, trees,
or other objects. Avoid jerky or
sudden maneuvers. Signal well in
advance. If the trailer turn signal bulbs burn
out, the arrows on the instrument
cluster will still flash for turns. It is
important to check occasionally to
be sure the trailer bulbs are still
working.
Driving on Grades
Reduce speed and shift to a lower
gear
before starting down a long or
steep downgrade. If the
transmission is not shifted down, the
brakes might get hot and no longer
work well.
Vehicles can tow in D (Drive). Shift
the transmission to a lower gear if
the transmission shifts too often
under heavy loads and/or hilly
conditions.
The Tow/Haul Mode may be used if
the transmission shifts too often.
See Tow/Haul Mode on page 9-38.
When towing at high altitude on
steep uphill grades, consider the
following: Engine coolant will boil at
a lower temperature than at normal
altitudes. If the engine is turned off immediately after towing at high
altitude on steep uphill grades, the
vehicle may show signs similar to
engine overheating. To avoid this,
let the engine run while parked,
preferably on level ground, with the
transmission in P (Park) for a few
minutes before turning the engine
off. If the overheat warning comes
on, see
Engine Overheating on
page 10-23.
Parking on Hills
{Warning
Parking the vehicle on a hill with
the trailer attached can be
dangerous. If something goes
wrong, the rig could start to move.
People can be injured, and both
the vehicle and the trailer can be
damaged. When possible, always
park the rig on a flat surface.