2014 CHEVROLET SILVERADO 1500 ignition
[x] Cancel search: ignitionPage 316 of 542
Black plate (50,1)Chevrolet Silverado Owner Manual (GMNA-Localizing-U.S./Canada/Mexico-
5853506) - 2014 - CRC 3rd Edition - 8/28/13
9-50 Driving and Operating
axle to help drive the vehicle. This is
the best setting to use when
plowing snow.
4
n(Four-Wheel Drive Low):This
setting also engages the front axle
and delivers extra torque. You may
never need this setting. It sends
maximum power to all four wheels.
You might choose Four-Wheel Drive
Low if you are driving off-road in
deep sand, deep mud, or deep
snow, and while climbing or
descending steep hills.
Shifting into Four-Wheel Drive Low
will turn Traction Control and
StabiliTrak off. See Traction Control/
Electronic Stability Control on
page 9-56.
{Warning
Shifting the transfer case to
N (Neutral) can cause the vehicle
to roll even if the transmission is
in P (Park). You or someone else
(Continued)
Warning (Continued)
could be seriously injured. Be
sure to set the parking brake
before placing the transfer case in
N (Neutral). SeeParking Brake on
page 9-54.
N (Neutral): Shift the vehicle's
transfer case to N (Neutral) only
when towing the vehicle. See
Recreational Vehicle Towing on
page 10-94 orTowing the Vehicle
on page 10-94.
If the SERVICE 4WD message
stays on, take the vehicle to your
dealer for service. See “SERVICE
4WD” under Transmission
Messages on page 5-41.
Shifting Into Four-Wheel Drive
High or AUTO (Automatic
Four-Wheel Drive)
Turn the knob to the Four-Wheel
Drive High or AUTO position. This
can be done at any speed, except
when shifting from Four-Wheel Drive Low. The indicator light will
flash while shifting. It will remain on
when the shift is completed.
Shifting Into Two-Wheel
Drive High
Turn the knob to the Two-Wheel
Drive High position. This can be
done at any speed, except when
shifting from Four-Wheel Drive Low.
The indicator light will flash while
shifting. It will remain on when the
shift is completed.
Shifting Into Four-Wheel
Drive Low
When Four-Wheel Drive Low is
engaged, vehicle speed should be
kept below 72 km/h (45 mph).
Extended high-speed operation in
Four-Wheel Drive Low may damage
or shorten the life of the drivetrain.
To shift to the Four-Wheel Drive
Low position, the ignition must be in
ON/RUN and the vehicle must be
stopped or moving less than 5 km/h
(3 mph) with the transmission in
N (Neutral). The preferred method
Page 317 of 542

Black plate (51,1)Chevrolet Silverado Owner Manual (GMNA-Localizing-U.S./Canada/Mexico-
5853506) - 2014 - CRC 3rd Edition - 8/28/13
Driving and Operating 9-51
for shifting into Four-Wheel Drive
Low is to have the vehicle moving
1.6 to 3.2 km/h (1 to 2 mph). Turn the
knob to the Four-Wheel Drive Low
position. You must wait for the
Four-Wheel Drive Low indicator light
to stop flashing before shifting the
transmission into gear.
{Caution
Shifting the transmission into gear
before the requested mode
indicator light has stopped
flashing could damage the
transfer case. To help avoid
damaging the vehicle, always wait
for the mode indicator lights to
stop flashing before shifting the
transmission into gear.
It is typical for the vehicle to exhibit
significant engagement noise and
bump when shifting between
Four-Wheel Drive Low and
Four-Wheel Drive High ranges or
from N (Neutral) with the engine
running. If the knob is turned to the
Four-Wheel Drive Low position
when the vehicle is in gear and/or
moving more than 5 km/h (3 mph),
the Four-Wheel Drive Low indicator
light will flash for 30 seconds and
not complete the shift. After
30 seconds the transfer case will
shift to Four-Wheel Drive
High mode. In this case, the knob
will need to be turned to the
Four-Wheel Drive High position in
order to see the indicator. With the
vehicle moving less than 5 km/h
(3 mph), and the transmission in
N (Neutral), attempt the shift again.
Shifting Out of Four-Wheel
Drive Low
To shift from Four-Wheel Drive Low
to Four-Wheel Drive High, AUTO,
or Two-Wheel Drive High, the
vehicle must be stopped or moving
less than 5 km/h (3 mph) with the
transmission in N (Neutral) and the
ignition in ON/RUN. The preferred
method for shifting out of
Four-Wheel Drive Low is to have
the vehicle moving
1.6 to 3.2 km/h (1 to 2 mph). Turn the
knob to the Four-Wheel Drive High,
AUTO, or Two-Wheel Drive High
position. You must wait for the
Four-Wheel Drive High, AUTO,
or Two-Wheel Drive High indicator
light to stop flashing before shifting
the transmission into gear.
{Caution
Shifting the transmission into gear
before the requested mode
indicator light has stopped
flashing could damage the
transfer case. To help avoid
damaging the vehicle, always wait
for the mode indicator lights to
stop flashing before shifting the
transmission into gear.
It is typical for the vehicle to exhibit
significant engagement noise and
bump when shifting between
Four-Wheel Drive Low and
Four-Wheel Drive High ranges or
from N (Neutral) with the engine
running.
Page 318 of 542
Black plate (52,1)Chevrolet Silverado Owner Manual (GMNA-Localizing-U.S./Canada/Mexico-
5853506) - 2014 - CRC 3rd Edition - 8/28/13
9-52 Driving and Operating
If the knob is turned to the
Four-Wheel Drive High, AUTO,
or Two-Wheel Drive High switch
position when the vehicle is in gear
and/or moving more than
5 km/h (3 mph), the Four-Wheel
Drive High, AUTO, or Two-Wheel
Drive High indicator light will flash
for 30 seconds but will not complete
the shift. With the vehicle moving
less than 5 km/h (3 mph), and the
transmission in N (Neutral), attempt
the shift again.
Shifting into N (Neutral)
To shift the transfer case to
N (Neutral):
1. Make sure the vehicle is parkedso that it will not roll.
2. Set the parking brake and apply the regular brake pedal. See
Parking Brake on page 9-54.
3. Start the vehicle or turn the ignition to ON/RUN.
4. Put the transmission in N (Neutral). 5. Shift the transfer case to
Two-Wheel Drive High.
6. Turn the transfer case dial clockwise to N (Neutral) until it
stops and hold it there until the
N (Neutral) light starts blinking.
This will take at least
10 seconds. Then slowly release
the dial to the Four-Wheel Drive
Low position. The N (Neutral)
light will come on when the
transfer case shift to N (Neutral)
is complete.
7. If the engine is running, make sure that the transfer case is in
N (Neutral) by shifting the
transmission to R (Reverse) for
one second, then shift the
transmission to D (Drive) for
one second.
8. Turn the ignition to ACC/ ACCESSORY, which will turn the
engine off.
9. Place the transmission shift lever in P (Park). 10. Release the parking brake prior
to moving the vehicle.
11. Turn the ignition to LOCK/OFF.
Shifting Out of N (Neutral)
To shift out of N (Neutral):
1. Set the parking brake and apply the regular brake pedal.
2. Turn the ignition to ON/RUN with the engine off, and shift the
transmission to N (Neutral).
3. Turn the transfer case dial to Two-Wheel Drive High,
Four-Wheel Drive High,
or AUTO.
After the transfer case has
shifted out of N (Neutral), the
N (Neutral) light will go out.
4. Release the parking brake prior to moving the vehicle.
Page 320 of 542
Black plate (54,1)Chevrolet Silverado Owner Manual (GMNA-Localizing-U.S./Canada/Mexico-
5853506) - 2014 - CRC 3rd Edition - 8/28/13
9-54 Driving and Operating
suddenly slows or stops. Always
leave enough room up ahead to
stop, even with ABS.
Using ABS
Do not pump the brakes. Just hold
the brake pedal down firmly and let
ABS work. You might hear the ABS
pump or motor operating and feel
the brake pedal pulsate, but this is
normal.
Braking in Emergencies
ABS allows you to steer and brake
at the same time. In many
emergencies, steering can help
more than even the very best
braking.
Parking Brake
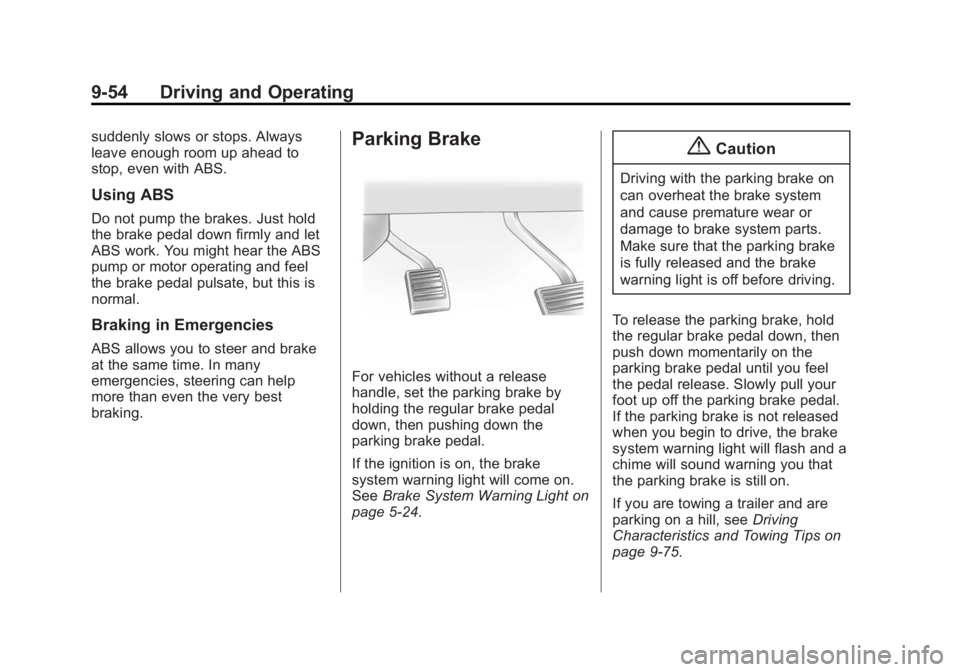
For vehicles without a release
handle, set the parking brake by
holding the regular brake pedal
down, then pushing down the
parking brake pedal.
If the ignition is on, the brake
system warning light will come on.
SeeBrake System Warning Light on
page 5-24.
{Caution
Driving with the parking brake on
can overheat the brake system
and cause premature wear or
damage to brake system parts.
Make sure that the parking brake
is fully released and the brake
warning light is off before driving.
To release the parking brake, hold
the regular brake pedal down, then
push down momentarily on the
parking brake pedal until you feel
the pedal release. Slowly pull your
foot up off the parking brake pedal.
If the parking brake is not released
when you begin to drive, the brake
system warning light will flash and a
chime will sound warning you that
the parking brake is still on.
If you are towing a trailer and are
parking on a hill, see Driving
Characteristics and Towing Tips on
page 9-75.
Page 321 of 542
Black plate (55,1)Chevrolet Silverado Owner Manual (GMNA-Localizing-U.S./Canada/Mexico-
5853506) - 2014 - CRC 3rd Edition - 8/28/13
Driving and Operating 9-55
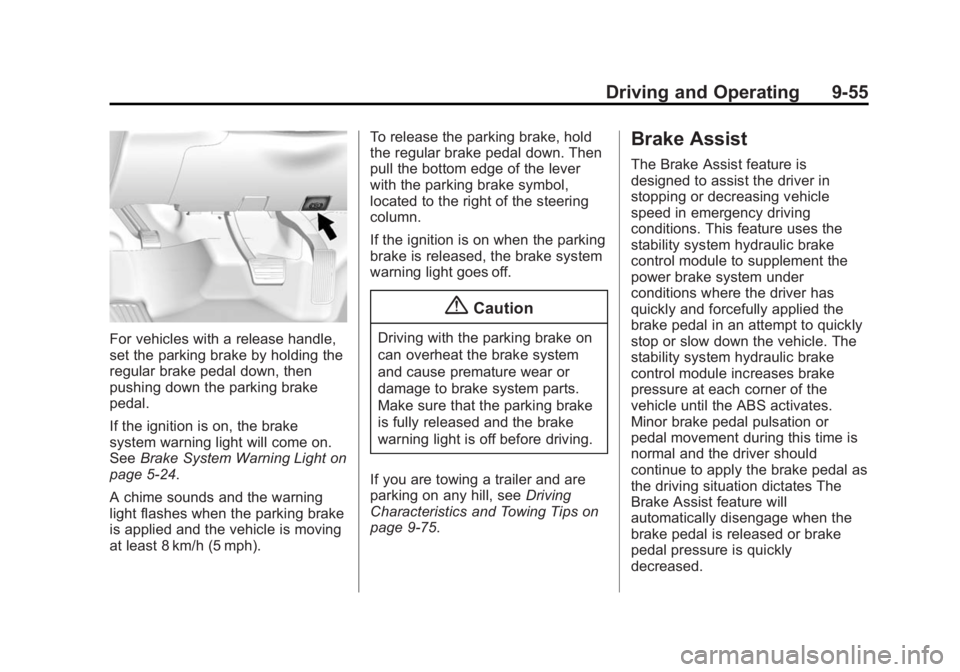
For vehicles with a release handle,
set the parking brake by holding the
regular brake pedal down, then
pushing down the parking brake
pedal.
If the ignition is on, the brake
system warning light will come on.
SeeBrake System Warning Light on
page 5-24.
A chime sounds and the warning
light flashes when the parking brake
is applied and the vehicle is moving
at least 8 km/h (5 mph). To release the parking brake, hold
the regular brake pedal down. Then
pull the bottom edge of the lever
with the parking brake symbol,
located to the right of the steering
column.
If the ignition is on when the parking
brake is released, the brake system
warning light goes off.
{Caution
Driving with the parking brake on
can overheat the brake system
and cause premature wear or
damage to brake system parts.
Make sure that the parking brake
is fully released and the brake
warning light is off before driving.
If you are towing a trailer and are
parking on any hill, see Driving
Characteristics and Towing Tips on
page 9-75.
Brake Assist
The Brake Assist feature is
designed to assist the driver in
stopping or decreasing vehicle
speed in emergency driving
conditions. This feature uses the
stability system hydraulic brake
control module to supplement the
power brake system under
conditions where the driver has
quickly and forcefully applied the
brake pedal in an attempt to quickly
stop or slow down the vehicle. The
stability system hydraulic brake
control module increases brake
pressure at each corner of the
vehicle until the ABS activates.
Minor brake pedal pulsation or
pedal movement during this time is
normal and the driver should
continue to apply the brake pedal as
the driving situation dictates The
Brake Assist feature will
automatically disengage when the
brake pedal is released or brake
pedal pressure is quickly
decreased.
Page 327 of 542
Black plate (61,1)Chevrolet Silverado Owner Manual (GMNA-Localizing-U.S./Canada/Mexico-
5853506) - 2014 - CRC 3rd Edition - 8/28/13
Driving and Operating 9-61
Resuming a Set Speed
If the cruise control is set at a
desired speed and then the brakes
are applied, the cruise control is
disengaged without erasing the set
speed from memory.
Once the vehicle speed reaches
about 40 km/h (25 mph) or more,
press the +RES button briefly on the
steering wheel. The vehicle returns
to the previous set speed.
Increasing Speed While Using
Cruise Control
If the cruise control system is
already activated:
.Press and hold the +RES button
on the steering wheel until the
desired speed is reached, then
release it.
.To increase vehicle speed in
small increments, briefly press
the +RES button. Each time this
is done, the vehicle goes about
1.6 km/h (1 mph) faster.Reducing Speed While Using
Cruise Control
If the cruise control system is
already activated:
.Press and hold the SET–
button
on the steering wheel until the
desired lower speed is reached,
then release it.
.To slow down in small
increments, briefly press the
SET– button. Each time this is
done, the vehicle goes about
1.6 km/h (1 mph) slower.
Passing Another Vehicle While
Using Cruise Control
Use the accelerator pedal to
increase the vehicle speed. When
you take your foot off the pedal, the
vehicle will slow down to the
previous set cruise speed. While
pressing the accelerator pedal or
shortly following the release to
override cruise control, briefly
pressing the SET– button will result
in cruise control set to the current
vehicle speed. Using Cruise Control on Hills
How well the cruise control works
on hills depends on the vehicle
speed, the load, and the steepness
of the hills. When going up steep
hills, pressing the accelerator pedal
may be necessary to maintain
vehicle speed.
While going downhill:.Vehicles with a 6-speed
automatic transmission and a
gasoline engine have Cruise
Grade Braking to help maintain
driver selected speed.
Cruise Grade Braking is enabled
when the vehicle is started and
cruise control is active. It is not
enabled in Range Selection
Mode. It assists in maintaining
driver selected speed when
driving on downhill grades by
using the engine and
transmission to slow the vehicle.
To disable and enable Cruise
Grade Braking for the current
ignition key cycle, press and
Page 328 of 542
Black plate (62,1)Chevrolet Silverado Owner Manual (GMNA-Localizing-U.S./Canada/Mexico-
5853506) - 2014 - CRC 3rd Edition - 8/29/13
9-62 Driving and Operating
hold the Tow/Haul button for
five seconds. A DIC message
displays. SeeTransmission
Messages on page 5-41.
.Vehicles with a diesel engine
have Cruise Grade Braking
enabled when Tow/Haul Mode is
on, the exhaust brake is on,
or both are on.
For other forms of Grade Braking,
see Automatic Transmission on
page 9-34.Tow/Haul Mode on
page 9-38, and Hill Descent Control
(HDC) on page 9-58. Ending Cruise Control
There are three ways to end cruise
control:.To disengage cruise control,
step lightly on the brake pedal.
.To disengage cruise control,
press
*on the steering wheel.
.To turn off the cruise control,
press
5on the steering wheel.
Erasing Speed Memory
The cruise control set speed is
erased from memory by pressing
5
or if the ignition is turned off.
Driver Assistance
Systems
This vehicle may have features that
work together to help avoid crashes
or reduce crash damage while
driving, backing, and parking. Read
this entire section before using
these systems.
{Warning
Do not rely on the Driver
Assistance Systems. These
systems do not replace the need
for paying attention and driving
safely. You may not hear or feel
alerts or warnings provided by
these systems. Failure to use
proper care when driving may
result in injury, death, or vehicle
damage. See Defensive Driving
on page 9-3.
(Continued)
Page 361 of 542
Black plate (95,1)Chevrolet Silverado Owner Manual (GMNA-Localizing-U.S./Canada/Mexico-
5853506) - 2014 - CRC 3rd Edition - 8/29/13
Driving and Operating 9-95
This symbol is on the Trailer Brake
Control Panel on vehicles with an
Integrated Trailer Brake Control
system. The power output to the
trailer brakes is based on the
amount of brake pressure being
applied by the vehicle’s brake
system, and on the type of trailer
brakes detected. This available
power output to the trailer brakes
can be adjusted to a wide range of
trailering situations.
The ITBC system is integrated with
the vehicle’s brake, antilock brake,
and StabiliTrak systems. In trailering
conditions that cause the vehicle’s
antilock brake or StabiliTrak
systems to activate, power sent to
the trailer's brakes will be
automatically adjusted to minimize
trailer wheel lock-up. This does not
imply that the trailer has StabiliTrak.
If the vehicle’s brake, antilock brake,
or StabiliTrak systems are not
functioning properly, the ITBC
system may not be fully functional
or may not function at all. Make sure all of these systems are fully
operational to ensure full
functionality of the ITBC system.
The ITBC system is powered
through the vehicle's electrical
system. Turning the ignition off will
also turn off the ITBC system. The
ITBC system is fully functional only
when the ignition is in ON/RUN.
{Warning
Connecting a trailer that has an
air brake system may result in
reduced or complete loss of trailer
braking. There may be an
increase in stopping distance or
trailer instability which could
result in personal injury or
damage to the vehicle, trailer,
or other property. Use the ITBC
system only with electric or
electric over hydraulic trailer
brakes.
Trailer Brake Control Panel
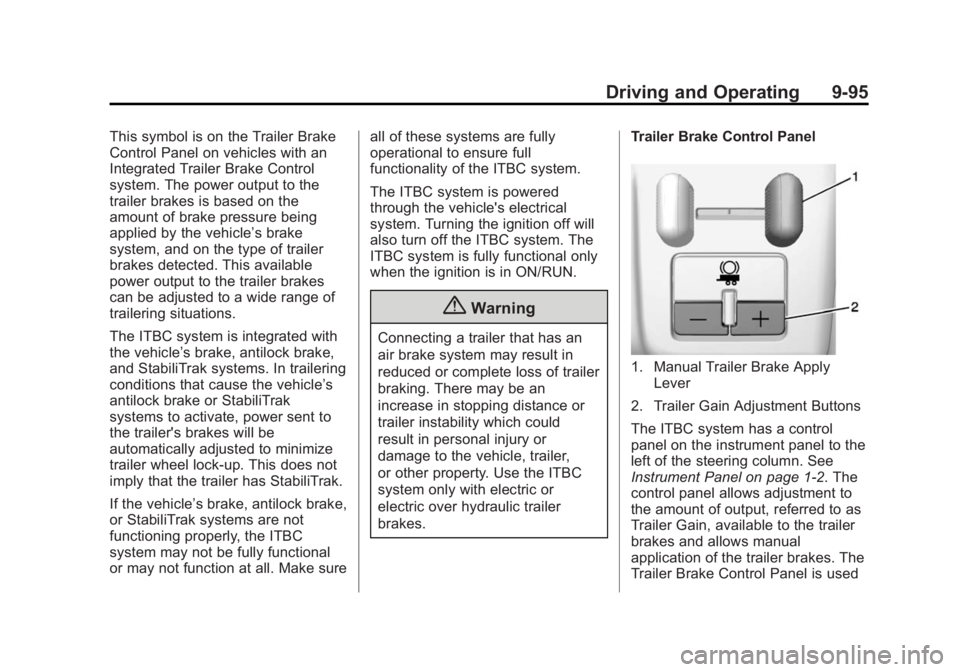
1. Manual Trailer Brake Apply
Lever
2. Trailer Gain Adjustment Buttons
The ITBC system has a control
panel on the instrument panel to the
left of the steering column. See
Instrument Panel on page 1-2. The
control panel allows adjustment to
the amount of output, referred to as
Trailer Gain, available to the trailer
brakes and allows manual
application of the trailer brakes. The
Trailer Brake Control Panel is used