2014 CHEVROLET MALIBU reset
[x] Cancel search: resetPage 30 of 428
Black plate (24,1)Chevrolet Malibu Owner Manual (GMNA-Localizing-U.S./Canada/Mexico-
6081487) - 2014 - CRC - 11/19/13
1-24 In Brief
.To turn off both traction control
and StabiliTrak, press and hold
the TCS/StabiliTrak button
gon
the center stack, until
iandg
illuminate in the instrument
cluster.
.Press and release the TCS/
StabiliTrak button again to turn
on both systems.
See Traction Control/Electronic
Stability Control on page 9-32.
Tire Pressure Monitor
This vehicle may have a Tire
Pressure Monitor System (TPMS).
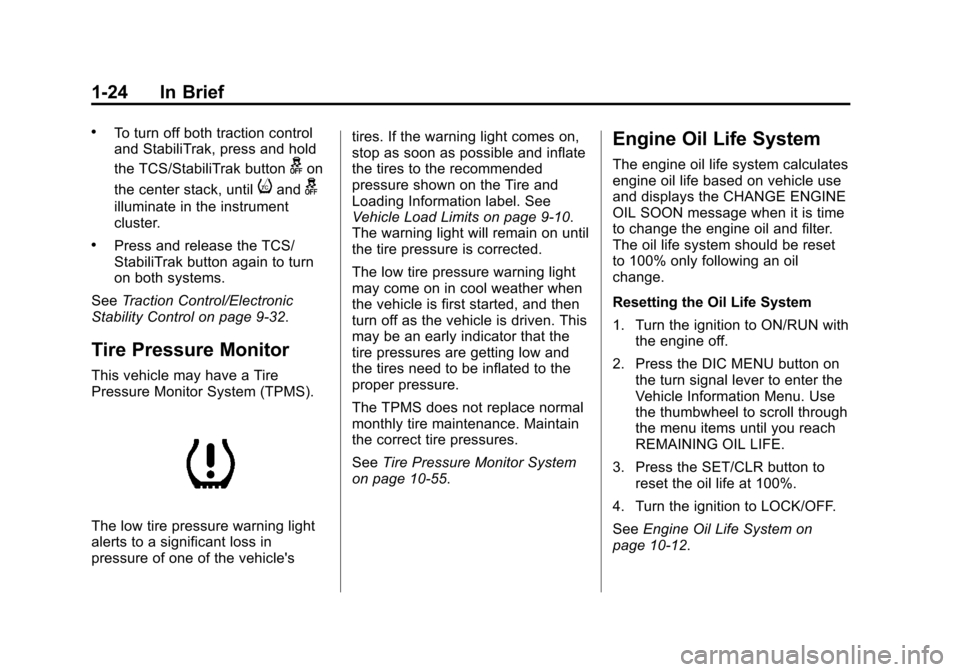
The low tire pressure warning light
alerts to a significant loss in
pressure of one of the vehicle's tires. If the warning light comes on,
stop as soon as possible and inflate
the tires to the recommended
pressure shown on the Tire and
Loading Information label. See
Vehicle Load Limits on page 9-10.
The warning light will remain on until
the tire pressure is corrected.
The low tire pressure warning light
may come on in cool weather when
the vehicle is first started, and then
turn off as the vehicle is driven. This
may be an early indicator that the
tire pressures are getting low and
the tires need to be inflated to the
proper pressure.
The TPMS does not replace normal
monthly tire maintenance. Maintain
the correct tire pressures.
See
Tire Pressure Monitor System
on page 10-55.
Engine Oil Life System
The engine oil life system calculates
engine oil life based on vehicle use
and displays the CHANGE ENGINE
OIL SOON message when it is time
to change the engine oil and filter.
The oil life system should be reset
to 100% only following an oil
change.
Resetting the Oil Life System
1. Turn the ignition to ON/RUN with the engine off.
2. Press the DIC MENU button on the turn signal lever to enter the
Vehicle Information Menu. Use
the thumbwheel to scroll through
the menu items until you reach
REMAINING OIL LIFE.
3. Press the SET/CLR button to reset the oil life at 100%.
4. Turn the ignition to LOCK/OFF.
See Engine Oil Life System on
page 10-12.
Page 44 of 428
Black plate (12,1)Chevrolet Malibu Owner Manual (GMNA-Localizing-U.S./Canada/Mexico-
6081487) - 2014 - CRC - 11/19/13
2-12 Keys, Doors, and Windows
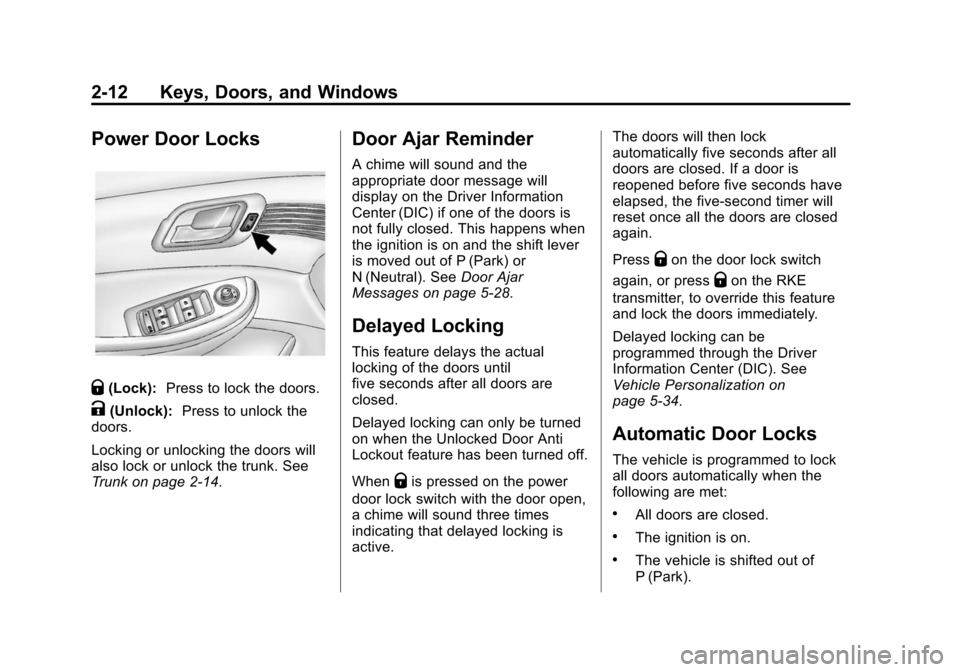
Power Door Locks
Q(Lock):Press to lock the doors.
K(Unlock): Press to unlock the
doors.
Locking or unlocking the doors will
also lock or unlock the trunk. See
Trunk on page 2-14.
Door Ajar Reminder
A chime will sound and the
appropriate door message will
display on the Driver Information
Center (DIC) if one of the doors is
not fully closed. This happens when
the ignition is on and the shift lever
is moved out of P (Park) or
N (Neutral). See Door Ajar
Messages on page 5-28.
Delayed Locking
This feature delays the actual
locking of the doors until
five seconds after all doors are
closed.
Delayed locking can only be turned
on when the Unlocked Door Anti
Lockout feature has been turned off.
When
Qis pressed on the power
door lock switch with the door open,
a chime will sound three times
indicating that delayed locking is
active. The doors will then lock
automatically five seconds after all
doors are closed. If a door is
reopened before five seconds have
elapsed, the five-second timer will
reset once all the doors are closed
again.
Press
Qon the door lock switch
again, or press
Qon the RKE
transmitter, to override this feature
and lock the doors immediately.
Delayed locking can be
programmed through the Driver
Information Center (DIC). See
Vehicle Personalization on
page 5-34.
Automatic Door Locks
The vehicle is programmed to lock
all doors automatically when the
following are met:
.All doors are closed.
.The ignition is on.
.The vehicle is shifted out of
P (Park).
Page 54 of 428
Black plate (22,1)Chevrolet Malibu Owner Manual (GMNA-Localizing-U.S./Canada/Mexico-
6081487) - 2014 - CRC - 11/19/13
2-22 Keys, Doors, and Windows
If equipped, the driver window may
also have an express-up feature.
Pull a window switch up or press it
down all the way, release it, and the
window goes up or down
automatically. Stop the window by
pressing or pulling the switch in the
same direction a second time, or by
briefly operating the switch to the
first detent in either direction.
Safety Function
This is for vehicles with the
express-up feature. If any object is
in the path of the window when the
express-up feature is active, the
window will stop and auto-reverse to
a preset position. Weather
conditions may cause the window to
auto-reverse. The window switch
may be held up to the second
position to close the window. The
window will return to normal
operation once the obstruction or
condition is removed.
Safety Function Override
This is for vehicles with the
express-up feature. If the battery on
the vehicle has been recharged or
disconnected, or is not working, the
windows will need to be
reprogrammed for the express-up
feature to work. Before
reprogramming, replace or recharge
the vehicle's battery.
To program the driver window:
1. Close all doors, with the ignitionin ACC/ACCESSORY or ON/
RUN, or with RAP active.
2. Press and hold the power window switch until the window
is fully open.
3. Pull the power window switch up until the window is fully closed.
4. Continue holding the switch up for approximately two seconds
after the window is completely
closed.
The window is now reprogrammed.
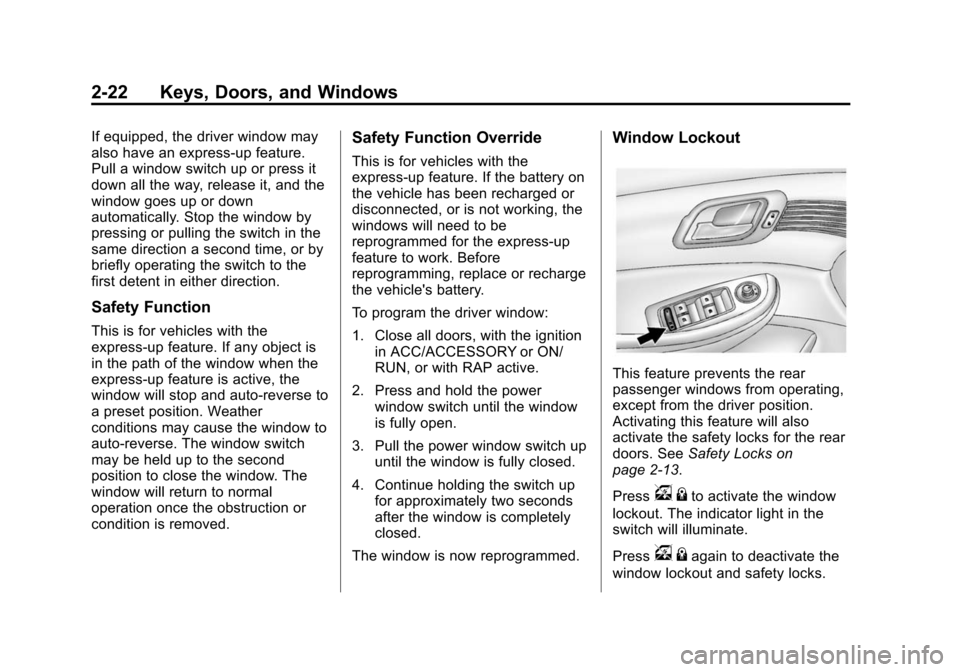
Window Lockout
This feature prevents the rear
passenger windows from operating,
except from the driver position.
Activating this feature will also
activate the safety locks for the rear
doors. See Safety Locks on
page 2-13.
Press
v {to activate the window
lockout. The indicator light in the
switch will illuminate.
Press
v {again to deactivate the
window lockout and safety locks.
Page 116 of 428
Black plate (6,1)Chevrolet Malibu Owner Manual (GMNA-Localizing-U.S./Canada/Mexico-
6081487) - 2014 - CRC - 11/19/13
5-6 Instruments and Controls
turning off the vehicle. SeeRetained
Accessory Power (RAP) on
page 9-23.
Open the protective cover to use the
accessory power outlet.
Certain electrical accessories may
not be compatible with the
accessory power outlets and could
overload vehicle or adapter fuses.
If there is a problem, see your
dealer.
When adding electrical equipment,
be sure to follow the installation
instructions included with the
equipment. See Add-On Electrical
Equipment on page 9-58.
{Caution
Hanging heavy equipment from
the power outlet can cause
damage not covered by the
vehicle warranty. The power
outlets are designed for
accessory power plugs only, such
as cell phone charge cords.
Power Outlet 120 Volt
Alternating Current
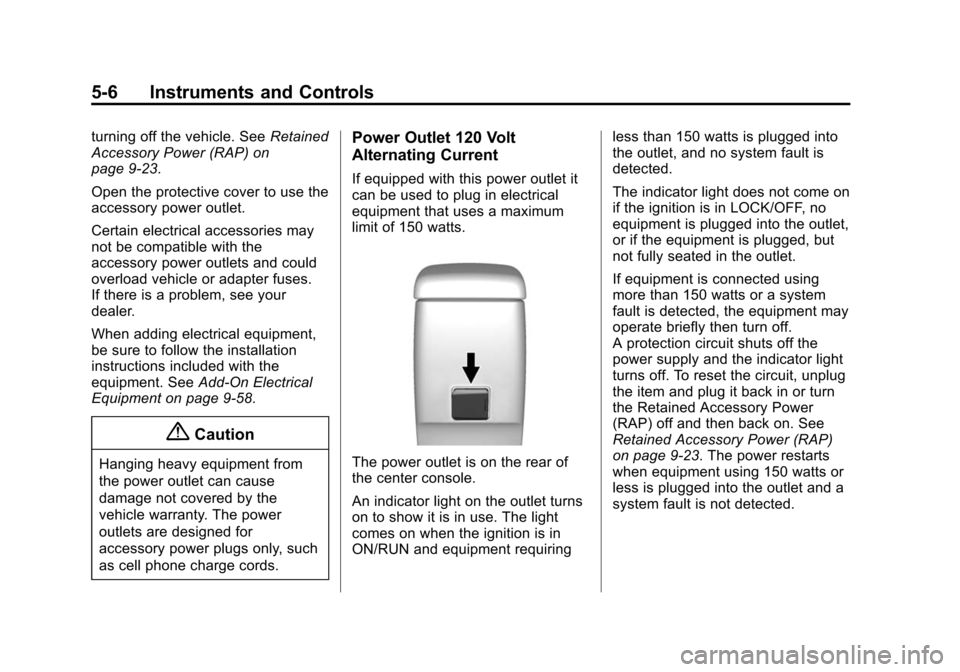
If equipped with this power outlet it
can be used to plug in electrical
equipment that uses a maximum
limit of 150 watts.
The power outlet is on the rear of
the center console.
An indicator light on the outlet turns
on to show it is in use. The light
comes on when the ignition is in
ON/RUN and equipment requiring less than 150 watts is plugged into
the outlet, and no system fault is
detected.
The indicator light does not come on
if the ignition is in LOCK/OFF, no
equipment is plugged into the outlet,
or if the equipment is plugged, but
not fully seated in the outlet.
If equipment is connected using
more than 150 watts or a system
fault is detected, the equipment may
operate briefly then turn off.
A protection circuit shuts off the
power supply and the indicator light
turns off. To reset the circuit, unplug
the item and plug it back in or turn
the Retained Accessory Power
(RAP) off and then back on. See
Retained Accessory Power (RAP)
on page 9-23. The power restarts
when equipment using 150 watts or
less is plugged into the outlet and a
system fault is not detected.
Page 120 of 428
Black plate (10,1)Chevrolet Malibu Owner Manual (GMNA-Localizing-U.S./Canada/Mexico-
6081487) - 2014 - CRC - 11/19/13
5-10 Instruments and Controls
Speedometer
The speedometer shows the
vehicle's speed in either kilometers
per hour (km/h) or miles per
hour (mph).
Odometer
The odometer shows how far the
vehicle has been driven, in either
kilometers or miles.
This vehicle has a tamper‐resistant
odometer. The digital odometer will
read 999,999 if it is turned back.
If the vehicle needs a new odometer
installed, it must be set to the
mileage total of the old odometer.
If that is not possible, then it must
be set at zero and a label must be
put on the driver door to show the
old mileage reading when the new
odometer was installed.
Trip Odometer
The trip odometer can show how far
the vehicle has been driven since
the trip odometer was last reset.The trip odometer is accessed and
reset through the Driver Information
Center (DIC). See
Driver
Information Center (DIC) on
page 5-24.
Tachometer
The tachometer displays the engine
speed in revolutions per
minute (rpm).
For eAssist vehicles, when the
ignition is in ON/RUN, the
tachometer indicates the vehicle
status. When pointing to AUTO
STOP, the engine is off but the
vehicle is on and can move. The
engine could auto start at any time.
When the indicator points to OFF,
the vehicle is off.
When the engine is on, the
tachometer will indicate the engine’s
revolutions per minute (rpm). The
tachometer may vary by several
hundred rpm’s, during auto stop
mode, when the engine is shutting
off and restarting. A slight bump may be felt when the
transmission is determining the
most fuel efficient operating range.
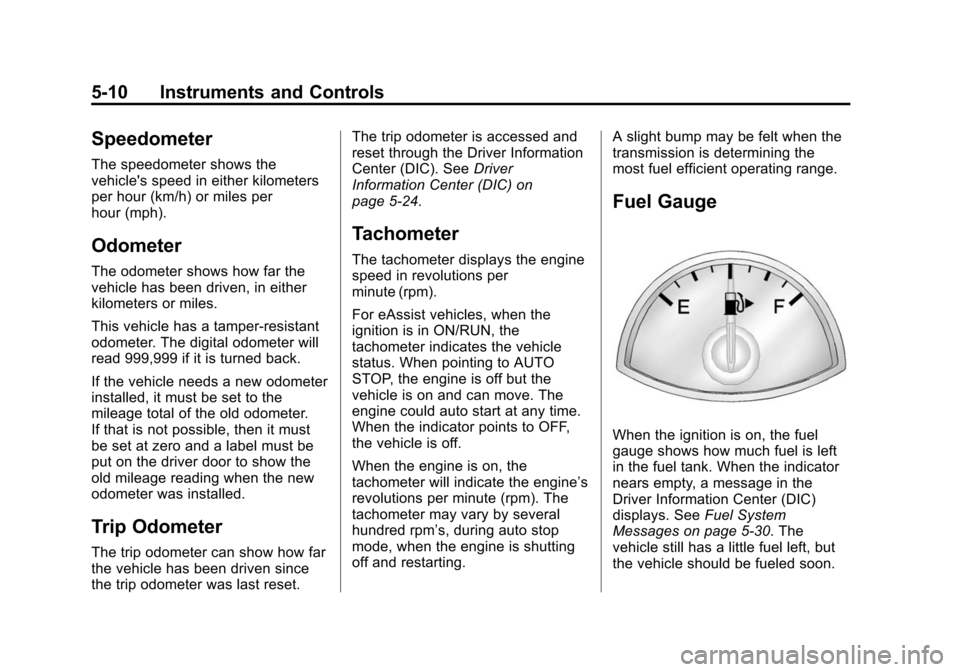
Fuel Gauge
When the ignition is on, the fuel
gauge shows how much fuel is left
in the fuel tank. When the indicator
nears empty, a message in the
Driver Information Center (DIC)
displays. See
Fuel System
Messages on page 5-30. The
vehicle still has a little fuel left, but
the vehicle should be fueled soon.
Page 128 of 428
Black plate (18,1)Chevrolet Malibu Owner Manual (GMNA-Localizing-U.S./Canada/Mexico-
6081487) - 2014 - CRC - 11/19/13
5-18 Instruments and Controls
If it does not, have the vehicle
serviced by your dealer. If the
system is working normally, the
indicator light then goes off.
If the ABS light stays on, turn the
ignition off. If the light comes on
while driving, stop as soon as it is
safely possible and turn the ignition
off. Then start the engine again to
reset the system. If the ABS light
stays on, or comes on again while
driving, the vehicle needs service.
If the regular brake system warning
light is not on, the vehicle still has
brakes, but not antilock brakes.
If the regular brake system warning
light is also on, the vehicle does not
have antilock brakes and there is a
problem with the regular brakes.
SeeBrake System Warning Light on
page 5-17.
For vehicles with a Driver
Information Center (DIC), see Brake
System Messages on page 5-28 for
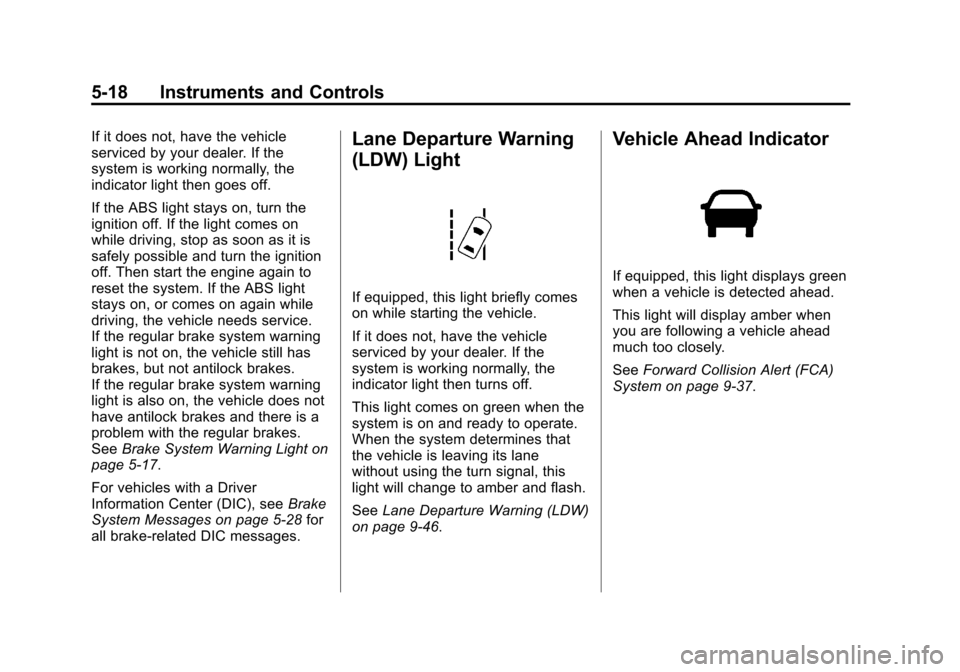
all brake-related DIC messages.Lane Departure Warning
(LDW) Light
If equipped, this light briefly comes
on while starting the vehicle.
If it does not, have the vehicle
serviced by your dealer. If the
system is working normally, the
indicator light then turns off.
This light comes on green when the
system is on and ready to operate.
When the system determines that
the vehicle is leaving its lane
without using the turn signal, this
light will change to amber and flash.
See Lane Departure Warning (LDW)
on page 9-46.
Vehicle Ahead Indicator
If equipped, this light displays green
when a vehicle is detected ahead.
This light will display amber when
you are following a vehicle ahead
much too closely.
See Forward Collision Alert (FCA)
System on page 9-37.
Page 134 of 428
Black plate (24,1)Chevrolet Malibu Owner Manual (GMNA-Localizing-U.S./Canada/Mexico-
6081487) - 2014 - CRC - 11/19/13
5-24 Instruments and Controls
Driver Information
Center (DIC)
The DIC displays information about
the vehicle. It also displays warning
messages if a system problem is
detected. SeeVehicle Messages on
page 5-27. All messages appear in
the DIC display in the center of the
instrument cluster.
The vehicle may also have features
that can be customized through the
controls on the radio. See Vehicle
Personalization on page 5-34.
DIC Operation and Displays
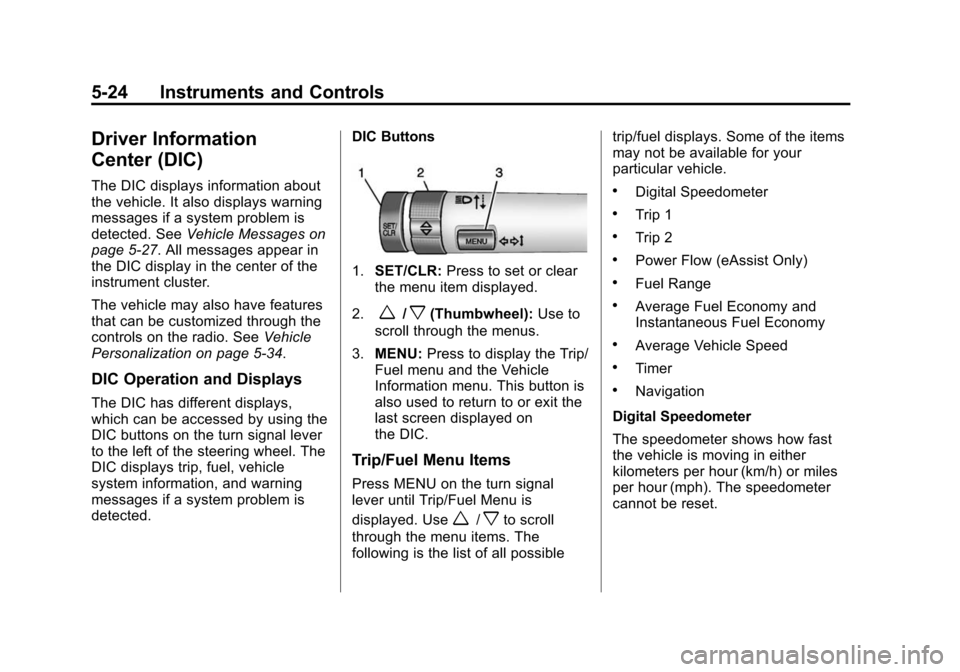
The DIC has different displays,
which can be accessed by using the
DIC buttons on the turn signal lever
to the left of the steering wheel. The
DIC displays trip, fuel, vehicle
system information, and warning
messages if a system problem is
detected. DIC Buttons
1.
SET/CLR: Press to set or clear
the menu item displayed.
2.
w/x(Thumbwheel): Use to
scroll through the menus.
3. MENU: Press to display the Trip/
Fuel menu and the Vehicle
Information menu. This button is
also used to return to or exit the
last screen displayed on
the DIC.
Trip/Fuel Menu Items
Press MENU on the turn signal
lever until Trip/Fuel Menu is
displayed. Use
w/xto scroll
through the menu items. The
following is the list of all possible trip/fuel displays. Some of the items
may not be available for your
particular vehicle.
.Digital Speedometer
.Trip 1
.Trip 2
.Power Flow (eAssist Only)
.Fuel Range
.Average Fuel Economy and
Instantaneous Fuel Economy
.Average Vehicle Speed
.Timer
.Navigation
Digital Speedometer
The speedometer shows how fast
the vehicle is moving in either
kilometers per hour (km/h) or miles
per hour (mph). The speedometer
cannot be reset.
Page 135 of 428
Black plate (25,1)Chevrolet Malibu Owner Manual (GMNA-Localizing-U.S./Canada/Mexico-
6081487) - 2014 - CRC - 11/19/13
Instruments and Controls 5-25
Trip 1 and Trip 2
This display shows the current
distance traveled, in either
kilometers (km) or miles (mi), since
the last reset for the trip odometer.
The trip odometer can be reset to
zero by pressing SET/CLR while the
trip odometer display is showing.
Power Flow (eAssist Only)
This display shows the operating
mode of the eAssist system and the
high voltage battery charge level.
The animation indicates the
direction of energy flow.
Fuel Range
This display shows the approximate
distance the vehicle can be driven
without refueling. The fuel range
estimate is based on an average of
the vehicle's fuel economy over
recent driving history and the
amount of fuel remaining in the fuel
tank. Fuel range cannot be reset.Average Fuel Economy and
Instantaneous Fuel Economy
This display shows the approximate
average liters per 100 kilometers
(L/100 km) or miles per
gallon (mpg). This number is
calculated based on the number of
L/100 km (mpg) recorded since the
last time this menu item was reset.
The fuel economy can be reset by
pressing SET/CLR while the
Average Fuel Economy display is
showing.
The instantaneous fuel economy
display shows the current fuel
economy in liters per 100 kilometers
(L/100 km) or miles per gallon
(mpg). This number reflects only the
fuel economy that the vehicle has
right now and changes frequently as
driving conditions change. Unlike
average economy, this display
cannot be reset.
Average Vehicle Speed
This display shows the average
speed of the vehicle in kilometers
per hour (km/h) or miles per hour (mph). This average is
calculated based on the various
vehicle speeds recorded since the
last reset of this value. The average
speed can be reset by pressing
SET/CLR while the Average Vehicle
Speed display is showing.
Timer
This display can be used as a timer.
To start the timer, press SET/CLR
while Timer is displayed. The
display will show the amount of time
that has passed since the timer was
last reset, not including time the
ignition is off. Time will continue to
be counted as long as the ignition is
on, even if another display is being
shown on the DIC. The timer will
record up to 99 hours, 59 minutes,
and 59 seconds (99:59:59) after
which the display will return to zero.
To stop the timer, press SET/CLR
briefly while Timer is displayed. To
reset the timer to zero, press and
hold SET/CLR.