2014 CHEVROLET MALIBU keyless
[x] Cancel search: keylessPage 140 of 428
Black plate (30,1)Chevrolet Malibu Owner Manual (GMNA-Localizing-U.S./Canada/Mexico-
6081487) - 2014 - CRC - 11/19/13
5-30 Instruments and Controls
OIL PRESSURE LOW—STOP
ENGINE
This message displays if low oil
pressure levels occur. Stop the
vehicle as soon as safely possible
and do not operate it until the cause
of the low oil pressure has been
corrected. Check the oil as soon as
possible and have the vehicle
serviced by your dealer.
Engine Power Messages
ENGINE POWER IS REDUCED
This message displays when the
vehicle's engine power is reduced.
Reduced engine power can affect
the vehicle's ability to accelerate.
If this message is on, but there is no
reduction in performance, proceed
to your destination. The
performance may be reduced the
next time the vehicle is driven. The
vehicle may be driven at a reduced
speed while this message is on, but
maximum acceleration and speed
may be reduced. Anytime this message stays on, the vehicle
should be taken to your dealer for
service as soon as possible.
Fuel System Messages
FUEL LEVEL LOW
This message displays when the
vehicle is low on fuel. Refuel as
soon as possible.
TIGHTEN GAS CAP
This message displays when the
fuel cap is not on tight. Tighten the
fuel cap.
Key and Lock Messages
NO REMOTE DETECTED
This message displays when the
transmitter battery is weak on
vehicles with Keyless Access. See
“Starting the Vehicle with a Low
Transmitter Battery”
underRemote
Keyless Entry (RKE) System
Operation on page 2-3.
REPLACE BATTERY IN
REMOTE KEY
This message displays when the
battery in the Remote Keyless Entry
(RKE) transmitter needs to be
replaced. See “Battery
Replacement” underRemote
Keyless Entry (RKE) System
Operation on page 2-3.
USE TRANSMITTER POCKET
TO START
This message displays when trying
to start the vehicle if an RKE
transmitter is not detected. The
transmitter battery may be weak.
See “Starting the Vehicle with a Low
Transmitter Battery” underRemote
Keyless Entry (RKE) System
Operation on page 2-3.
Page 149 of 428
Black plate (39,1)Chevrolet Malibu Owner Manual (GMNA-Localizing-U.S./Canada/Mexico-
6081487) - 2014 - CRC - 11/19/13
Instruments and Controls 5-39
doors will unlock at the first press
of
K. Press TUNE/MENU to confirm
and go back to the last menu.
Memory Remote Recall
This allows the Memory Remote
Recall feature to be turned on or off.
When on, this feature will recall the
current driver's last seat and outside
mirror positions upon unlocking the
driver door with the RKE transmitter,
and opening that door. The current
driver is identified when the RKE
transmitter is used to unlock the
driver door. If equipped with Keyless
Access, the recall will occur upon
opening the driver door. See
“Recalling RKE Memory Positions”
under Memory Seats on page 3-6.
Press TUNE/MENU when Memory
Remote Recall is highlighted. Turn
the TUNE/MENU knob to select On
or Off. Press TUNE/MENU to
confirm and go back to the
last menu. Remote Left in Vehicle Reminder
This allows the Remote Left in
Vehicle Reminder feature to be
turned on or off. If on, the horn will
chirp if a remote is left in the
vehicle.
Press TUNE/MENU when Remote
Left in Vehicle Reminder is
highlighted. Turn the TUNE/MENU
knob to select On or Off. Press
TUNE/MENU to confirm and go
back to the last menu.
Relock Remote Door
When on, the doors will
automatically lock after a period of
time if the vehicle is not entered or
exited.
Press TUNE/MENU when Relock
Remote Door is highlighted. Turn
the TUNE/MENU knob to select On
or Off. Press TUNE/MENU to
confirm and go back to the
last menu.
Passive Door Unlock
This allows selection of which doors
are unlocked by pressing the button
on the outside door handle.
Press TUNE/MENU when Passive
Door Unlock is highlighted. Turn the
TUNE/MENU knob to select All
Doors or Driver Door. Press TUNE/
MENU to confirm and go back to the
last menu.
Passive Door Lock
This allows for turning Passive
Locking off, on, or on with feedback.
Press TUNE/MENU when Passive
Door Lock is highlighted. Turn the
TUNE/MENU knob to select Off, On,
or On with Active Horn Chirp. Press
TUNE/MENU to confirm and go
back to the last menu.
Page 160 of 428
Black plate (6,1)Chevrolet Malibu Owner Manual (GMNA-Localizing-U.S./Canada/Mexico-
6081487) - 2014 - CRC - 11/19/13
6-6 Lighting
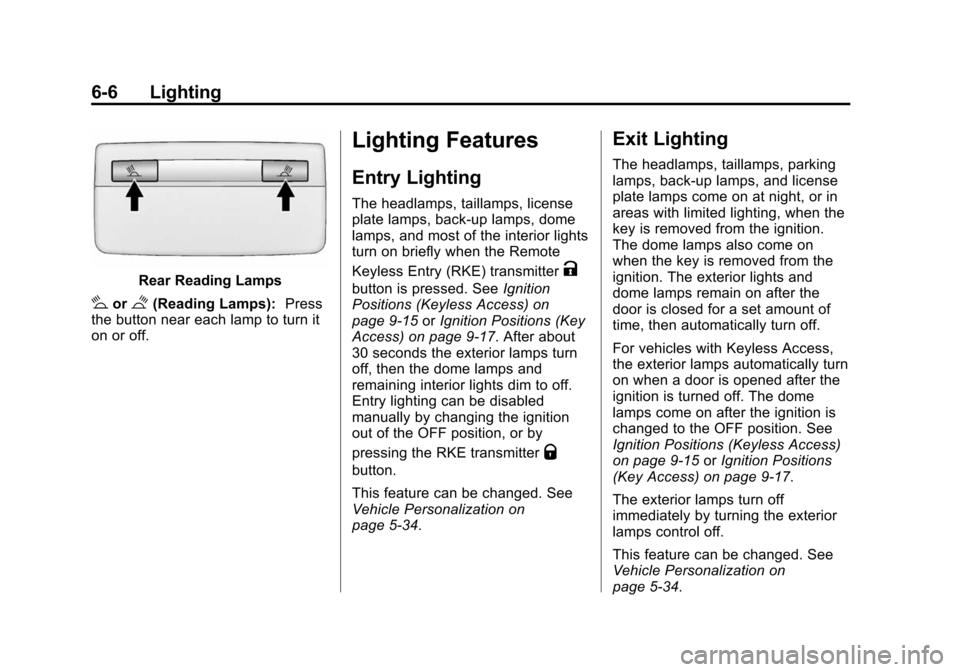
Rear Reading Lamps
#or$(Reading Lamps):Press
the button near each lamp to turn it
on or off.
Lighting Features
Entry Lighting
The headlamps, taillamps, license
plate lamps, back-up lamps, dome
lamps, and most of the interior lights
turn on briefly when the Remote
Keyless Entry (RKE) transmitter
K
button is pressed. See Ignition
Positions (Keyless Access) on
page 9-15 orIgnition Positions (Key
Access) on page 9-17. After about
30 seconds the exterior lamps turn
off, then the dome lamps and
remaining interior lights dim to off.
Entry lighting can be disabled
manually by changing the ignition
out of the OFF position, or by
pressing the RKE transmitter
Q
button.
This feature can be changed. See
Vehicle Personalization on
page 5-34.
Exit Lighting
The headlamps, taillamps, parking
lamps, back-up lamps, and license
plate lamps come on at night, or in
areas with limited lighting, when the
key is removed from the ignition.
The dome lamps also come on
when the key is removed from the
ignition. The exterior lights and
dome lamps remain on after the
door is closed for a set amount of
time, then automatically turn off.
For vehicles with Keyless Access,
the exterior lamps automatically turn
on when a door is opened after the
ignition is turned off. The dome
lamps come on after the ignition is
changed to the OFF position. See
Ignition Positions (Keyless Access)
on page 9-15 orIgnition Positions
(Key Access) on page 9-17.
The exterior lamps turn off
immediately by turning the exterior
lamps control off.
This feature can be changed. See
Vehicle Personalization on
page 5-34.
Page 205 of 428
Black plate (1,1)Chevrolet Malibu Owner Manual (GMNA-Localizing-U.S./Canada/Mexico-
6081487) - 2014 - CRC - 11/19/13
Driving and Operating 9-1
Driving and
Operating
Driving Information
Distracted Driving . . . . . . . . . . . . . 9-2
Defensive Driving . . . . . . . . . . . . . 9-3
Drunk Driving . . . . . . . . . . . . . . . . . 9-3
Control of a Vehicle . . . . . . . . . . . 9-3
Braking . . . . . . . . . . . . . . . . . . . . . . . 9-3
Steering . . . . . . . . . . . . . . . . . . . . . . . 9-4
Off-Road Recovery . . . . . . . . . . . . 9-5
Loss of Control . . . . . . . . . . . . . . . . 9-5
Track Events and CompetitiveDriving . . . . . . . . . . . . . . . . . . . . . . . 9-6
Driving on Wet Roads . . . . . . . . . 9-6
Highway Hypnosis . . . . . . . . . . . . 9-7
Hill and Mountain Roads . . . . . . 9-7
Winter Driving . . . . . . . . . . . . . . . . . 9-8
If the Vehicle Is Stuck . . . . . . . . . 9-9
Vehicle Load Limits . . . . . . . . . . 9-10
Starting and Operating
New Vehicle Break-In . . . . . . . . 9-14
Ignition Positions (Keyless Access) . . . . . . . . . . . . . . . . . . . . 9-15
Ignition Positions (Key Access) . . . . . . . . . . . . . . . . . . . . 9-17 Starting the Engine . . . . . . . . . . 9-19
Engine Heater . . . . . . . . . . . . . . . 9-22
Retained Accessory
Power (RAP) . . . . . . . . . . . . . . . 9-23
Shifting Into Park . . . . . . . . . . . . 9-23
Shifting out of Park . . . . . . . . . . 9-25
Parking over Things
That Burn . . . . . . . . . . . . . . . . . . 9-26
Engine Exhaust
Engine Exhaust . . . . . . . . . . . . . . 9-26
Running the Vehicle WhileParked . . . . . . . . . . . . . . . . . . . . . 9-27
Automatic Transmission
Automatic Transmission . . . . . 9-27
Manual Mode . . . . . . . . . . . . . . . . 9-29
Brakes
Antilock BrakeSystem (ABS) . . . . . . . . . . . . . . 9-30
Parking Brake . . . . . . . . . . . . . . . 9-31
Brake Assist . . . . . . . . . . . . . . . . . 9-32
Hill Start Assist (HSA) . . . . . . . 9-32
Ride Control Systems
Traction Control/Electronic Stability Control . . . . . . . . . . . . 9-32
Cruise Control
Cruise Control . . . . . . . . . . . . . . . 9-35
Driver Assistance Systems
Forward Collision Alert (FCA)System . . . . . . . . . . . . . . . . . . . . . 9-37
Ultrasonic Parking Assist . . . . 9-40
Side Blind Zone Alert (SBZA) . . . . . . . . . . . . . . . 9-41
Rear Vision Camera (RVC) . . . . . . . . . . . . . 9-43
Lane Departure Warning (LDW) . . . . . . . . . . . . . 9-46
Fuel
Fuel . . . . . . . . . . . . . . . . . . . . . . . . . 9-48
Recommended Fuel . . . . . . . . . 9-48
Gasoline Specifications . . . . . . 9-49
California FuelRequirements . . . . . . . . . . . . . . 9-49
Fuels in Foreign Countries . . . 9-49
Fuel Additives . . . . . . . . . . . . . . . 9-50
E85 or FlexFuel . . . . . . . . . . . . . . 9-50
Filling the Tank . . . . . . . . . . . . . . 9-51
Filling a Portable Fuel Container . . . . . . . . . . . . . . . . . . . 9-52
Page 219 of 428

Black plate (15,1)Chevrolet Malibu Owner Manual (GMNA-Localizing-U.S./Canada/Mexico-
6081487) - 2014 - CRC - 11/19/13
Driving and Operating 9-15
Caution (Continued)
breaking-in guideline every
time you get new brake
linings.
Following break-in, engine speed
and load can be gradually
increased.
Ignition Positions
(Keyless Access)
The vehicle may have an electronic
keyless ignition with pushbutton
start.
Pressing the button cycles it through
three modes, ACC/ACCESSORY,
ON/RUN/START, and Stopping the
Engine/OFF. The transmitter must be in the
vehicle for the system to operate.
If the pushbutton start is not
working, the vehicle may be near a
strong radio antenna signal causing
interference to the Keyless Access
system. See
Remote Keyless Entry
(RKE) System Operation on
page 2-3.
To shift out of P (Park), the vehicle
must be in ACC/ACCESSORY or
ON/RUN and the brake pedal must
be applied.
Stopping the Engine/LOCK/
OFF (No Indicator Lights): When
the vehicle is stopped, press the
ENGINE START/STOP button once
to turn the engine off.
If the vehicle is in P (Park), the
ignition will turn off, and Retained
Accessory Power (RAP) will remain
active. See Retained Accessory
Power (RAP) on page 9-23. If the vehicle is not in P (Park), the
ignition will return to ACC/
ACCESSORY and display the
message SHIFT TO PARK in the
Driver Information Center (DIC).
See
Transmission Messages on
page 5-33. When the vehicle is
shifted into P (Park), the ignition
system will switch to OFF.
Do not turn the engine off when the
vehicle is moving. This will cause a
loss of power assist in the brake
and steering systems and disable
the airbags.
If the vehicle must be shut off in an
emergency:
1. Brake using a firm and steady pressure. Do not pump the
brakes repeatedly. This may
deplete power assist, requiring
increased brake pedal force.
2. Shift the vehicle to N (Neutral). This can be done while the
vehicle is moving. After shifting
to N (Neutral), firmly apply the
brakes and steer the vehicle to a
safe location.
Page 265 of 428
Black plate (3,1)Chevrolet Malibu Owner Manual (GMNA-Localizing-U.S./Canada/Mexico-
6081487) - 2014 - CRC - 11/19/13
Vehicle Care 10-3
cause cancer and birth defects or
other reproductive harm. Engine
exhaust, many parts and systems,
many fluids, and some component
wear by-products contain and/or
emit these chemicals.
California Perchlorate
Materials Requirements
Certain types of automotive
applications, such as airbag
initiators, safety belt pretensioners,
and lithium batteries contained in
Remote Keyless Entry transmitters,
may contain perchlorate materials.
Special handling may be necessary.
For additional information, see
www.dtsc.ca.gov/hazardouswaste/
perchlorate.
Accessories and
Modifications
Adding non‐dealer accessories or
making modifications to the vehicle
can affect vehicle performance and
safety, including such things as
airbags, braking, stability, ride andhandling, emissions systems,
aerodynamics, durability, and
electronic systems like antilock
brakes, traction control, and stability
control. These accessories or
modifications could even cause
malfunction or damage not covered
by the vehicle warranty.
Damage to vehicle components
resulting from modifications or the
installation or use of non‐GM
certified parts, including control
module or software modifications, is
not covered under the terms of the
vehicle warranty and may affect
remaining warranty coverage for
affected parts.
GM Accessories are designed to
complement and function with other
systems on the vehicle. See your
dealer to accessorize the vehicle
using genuine GM Accessories
installed by a dealer technician.
Also, see
Adding Equipment to the
Airbag-Equipped Vehicle on
page 3-30.
Vehicle Checks
Doing Your Own
Service Work
{Warning
It can be dangerous to work on
your vehicle if you do not have
the proper knowledge, service
manual, tools, or parts. Always
follow owner manual procedures
and consult the service manual
for your vehicle before doing any
service work.
If doing some of your own service
work, use the proper service
manual. It tells you much more
about how to service the vehicle
than this manual can. To order the
proper service manual, see Service
Publications Ordering Information
on page 13-11.
Page 320 of 428
Black plate (58,1)Chevrolet Malibu Owner Manual (GMNA-Localizing-U.S./Canada/Mexico-
6081487) - 2014 - CRC - 11/19/13
10-58 Vehicle Care
If the TPMS is not functioning
properly it cannot detect or signal a
low tire condition. See your dealer
for service if the TPMS malfunction
light and DIC message comes on
and stays on.
TPMS Sensor Matching
Process
Each TPMS sensor has a unique
identification code. The identification
code needs to be matched to a new
tire/wheel position after rotating the
vehicle’s tires or replacing one or
more of the TPMS sensors. The
TPMS sensor matching process
should also be performed after
replacing a spare tire with a road
tire containing the TPMS sensor.
The malfunction light and the DIC
message should go off at the next
ignition cycle. The sensors are
matched to the tire/wheel positions,
using a TPMS relearn tool, in the
following order: driver side front tire,
passenger side front tire, passengerside rear tire, and driver side rear.
See your dealer for service or to
purchase a relearn tool.
There are two minutes to match the
first tire/wheel position, and
five minutes overall to match all four
tire/wheel positions. If it takes
longer, the matching process stops
and must be restarted.
The TPMS sensor matching
process is:
1. Set the parking brake.
2. Turn the ignition to ON/RUN with
the engine off or place the
vehicle power mode in ON/RUN/
START. See Ignition Positions
(Keyless Access) on page 9-15
or Ignition Positions (Key
Access) on page 9-17.
3. Use the MENU button to select the Vehicle Information Menu in
the Driver Information
Center (DIC).
4. Use the thumbwheel to scroll to the Tire Pressure Menu Item
screen. 5. Press the SET/CLR button to
begin the sensor matching
process.
A message asking if the process
should begin should appear.
6. Press the SET/CLR button again to confirm the selection.
The horn sounds twice to signal
the receiver is in relearn mode
and the TIRE LEARNING
ACTIVE message displays on
the DIC screen.
7. Start with the driver side front tire.
8. Place the relearn tool against the tire sidewall, near the valve
stem. Then press the button to
activate the TPMS sensor.
A horn chirp confirms that the
sensor identification code has
been matched to this tire and
wheel position.
9. Proceed to the passenger side front tire, and repeat the
procedure in Step 8.
Page 353 of 428
Black plate (91,1)Chevrolet Malibu Owner Manual (GMNA-Localizing-U.S./Canada/Mexico-
6081487) - 2014 - CRC - 11/19/13
Vehicle Care 10-91
Jump Starting
Jump Starting (On-board
with eAssist Only)
If the vehicle fails to crank, it may
be jump started by using the eAssist
battery to charge the 12-volt battery.
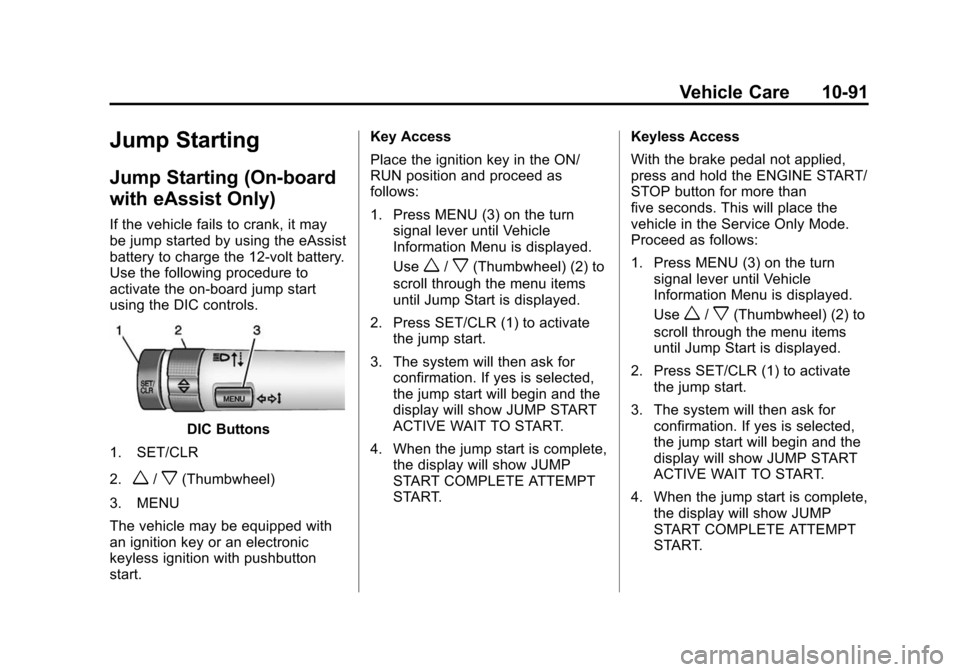
Use the following procedure to
activate the on-board jump start
using the DIC controls.
DIC Buttons
1. SET/CLR
2.
w/x(Thumbwheel)
3. MENU
The vehicle may be equipped with
an ignition key or an electronic
keyless ignition with pushbutton
start. Key Access
Place the ignition key in the ON/
RUN position and proceed as
follows:
1. Press MENU (3) on the turn
signal lever until Vehicle
Information Menu is displayed.
Use
w/x(Thumbwheel) (2) to
scroll through the menu items
until Jump Start is displayed.
2. Press SET/CLR (1) to activate the jump start.
3. The system will then ask for confirmation. If yes is selected,
the jump start will begin and the
display will show JUMP START
ACTIVE WAIT TO START.
4. When the jump start is complete, the display will show JUMP
START COMPLETE ATTEMPT
START. Keyless Access
With the brake pedal not applied,
press and hold the ENGINE START/
STOP button for more than
five seconds. This will place the
vehicle in the Service Only Mode.
Proceed as follows:
1. Press MENU (3) on the turn
signal lever until Vehicle
Information Menu is displayed.
Use
w/x(Thumbwheel) (2) to
scroll through the menu items
until Jump Start is displayed.
2. Press SET/CLR (1) to activate the jump start.
3. The system will then ask for confirmation. If yes is selected,
the jump start will begin and the
display will show JUMP START
ACTIVE WAIT TO START.
4. When the jump start is complete, the display will show JUMP
START COMPLETE ATTEMPT
START.