2014 CHEVROLET MALIBU wheel
[x] Cancel search: wheelPage 352 of 428
Black plate (90,1)Chevrolet Malibu Owner Manual (GMNA-Localizing-U.S./Canada/Mexico-
6081487) - 2014 - CRC - 11/19/13
10-90 Vehicle Care
The compact spare is for temporary
use only. Replace the compact
spare tire with a full-size tire as
soon as you can.
Compact Spare Tire
{Warning
Driving with more than one
compact spare tire at a time could
result in loss of braking and
handling. This could lead to a
crash and you or others could be
injured. Use only one compact
spare tire at a time.
If this vehicle has a compact spare
tire, it was fully inflated when new;
however, it can lose air over time.
Check the inflation pressure
regularly. It should be 420 kPa
(60 psi). Stop as soon as possible and check
that the spare tire is correctly
inflated after being installed on the
vehicle. The compact spare tire is
designed for temporary use only.
The vehicle will perform differently
with the spare tire installed and it is
recommended that the vehicle
speed be limited to 80 km/h
(50 mph). To conserve the tread of
the spare tire, have the standard tire
repaired or replaced as soon as
convenient and return the spare tire
to the storage area.
When using a compact spare tire,
the ABS and Traction Control
systems may engage until the spare
tire is recognized by the vehicle,
especially on slippery roads. Adjust
driving to reduce possible
wheel slip.
{Caution
When the compact spare is
installed, do not take the vehicle
through an automatic car wash
with guide rails. The compact
spare can get caught on the rails
which can damage the tire, wheel,
and other parts of the vehicle.
Do not use the compact spare on
other vehicles.
Do not mix the compact spare tire or
wheel with other wheels or tires.
They will not fit. Keep the spare tire
and its wheel together.
{Caution
Tire chains will not fit the compact
spare. Using them can damage
the vehicle and the chains. Do not
use tire chains on the compact
spare.
Page 353 of 428
Black plate (91,1)Chevrolet Malibu Owner Manual (GMNA-Localizing-U.S./Canada/Mexico-
6081487) - 2014 - CRC - 11/19/13
Vehicle Care 10-91
Jump Starting
Jump Starting (On-board
with eAssist Only)
If the vehicle fails to crank, it may
be jump started by using the eAssist
battery to charge the 12-volt battery.
Use the following procedure to
activate the on-board jump start
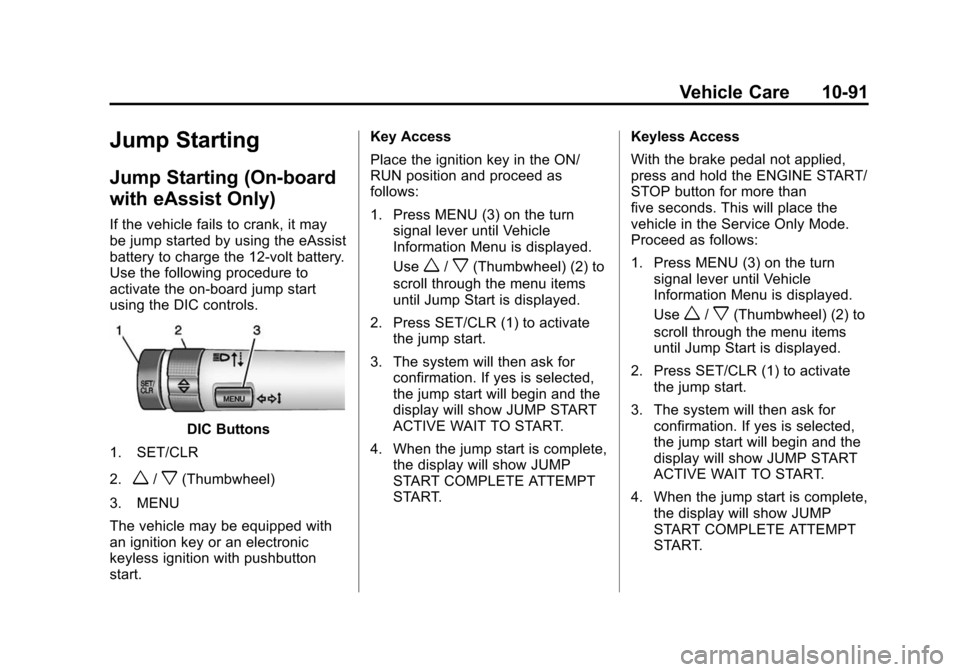
using the DIC controls.
DIC Buttons
1. SET/CLR
2.
w/x(Thumbwheel)
3. MENU
The vehicle may be equipped with
an ignition key or an electronic
keyless ignition with pushbutton
start. Key Access
Place the ignition key in the ON/
RUN position and proceed as
follows:
1. Press MENU (3) on the turn
signal lever until Vehicle
Information Menu is displayed.
Use
w/x(Thumbwheel) (2) to
scroll through the menu items
until Jump Start is displayed.
2. Press SET/CLR (1) to activate the jump start.
3. The system will then ask for confirmation. If yes is selected,
the jump start will begin and the
display will show JUMP START
ACTIVE WAIT TO START.
4. When the jump start is complete, the display will show JUMP
START COMPLETE ATTEMPT
START. Keyless Access
With the brake pedal not applied,
press and hold the ENGINE START/
STOP button for more than
five seconds. This will place the
vehicle in the Service Only Mode.
Proceed as follows:
1. Press MENU (3) on the turn
signal lever until Vehicle
Information Menu is displayed.
Use
w/x(Thumbwheel) (2) to
scroll through the menu items
until Jump Start is displayed.
2. Press SET/CLR (1) to activate the jump start.
3. The system will then ask for confirmation. If yes is selected,
the jump start will begin and the
display will show JUMP START
ACTIVE WAIT TO START.
4. When the jump start is complete, the display will show JUMP
START COMPLETE ATTEMPT
START.
Page 357 of 428
Black plate (95,1)Chevrolet Malibu Owner Manual (GMNA-Localizing-U.S./Canada/Mexico-
6081487) - 2014 - CRC - 11/19/13
Vehicle Care 10-95
{Caution
If the jumper cables are
connected or removed in the
wrong order, electrical shorting
may occur and damage the
vehicle. The repairs would not be
covered by the vehicle warranty.
Always connect and remove the
jumper cables in the correct order,
making sure that the cables do
not touch each other or other
metal.
Jumper Cable Removal
Reverse the sequence exactly when
removing the jumper cables.
Towing the Vehicle
{Caution
Incorrectly towing a disabled
vehicle may cause damage. The
damage would not be covered by
the vehicle warranty. Do not lash
or hook to the chassis
components —including the front
and rear subframes, suspension
control arms, and links —during
towing and recovery of a disabled
vehicle, or when securing the
vehicle. Use the proper nylon
strap harnesses around the tires
to secure the vehicle.
Have the vehicle towed on a wheel
lift tow truck. A flatbed car carrier
could damage the vehicle. The
wheel lift tow truck must raise the
rear of the vehicle and wheel dollies
must be used to lift the front wheels
off the ground. Consult your dealer or a
professional towing service if the
disabled vehicle must be towed.
To tow the vehicle behind another
vehicle for recreational purposes,
such as behind a motor home, see
“Recreational Vehicle Towing”
following.
Recreational Vehicle
Towing
Recreational vehicle towing means
towing the vehicle behind another
vehicle
–such as behind a motor
home. The two most common types
of recreational vehicle towing are
known as dinghy towing and dolly
towing. Dinghy towing is towing the
vehicle with all four wheels on the
ground. Dolly towing is towing the
vehicle with two wheels on the
ground and two wheels up on a
device known as a dolly.
Page 358 of 428
Black plate (96,1)Chevrolet Malibu Owner Manual (GMNA-Localizing-U.S./Canada/Mexico-
6081487) - 2014 - CRC - 11/19/13
10-96 Vehicle Care
Here are some important things to
consider before recreational vehicle
towing:
.What is the towing capacity of
the towing vehicle? Be sure to
read the tow vehicle
manufacturer's
recommendations.
.How far will the vehicle be
towed? Some vehicles have
restrictions on how far and how
long they can tow.
.Does the vehicle have the
proper towing equipment? See
your dealer or trailering
professional for additional advice
and equipment
recommendations.
.Is the vehicle ready to be
towed? Just as preparing the
vehicle for a long trip, make sure
the vehicle is prepared to be
towed.
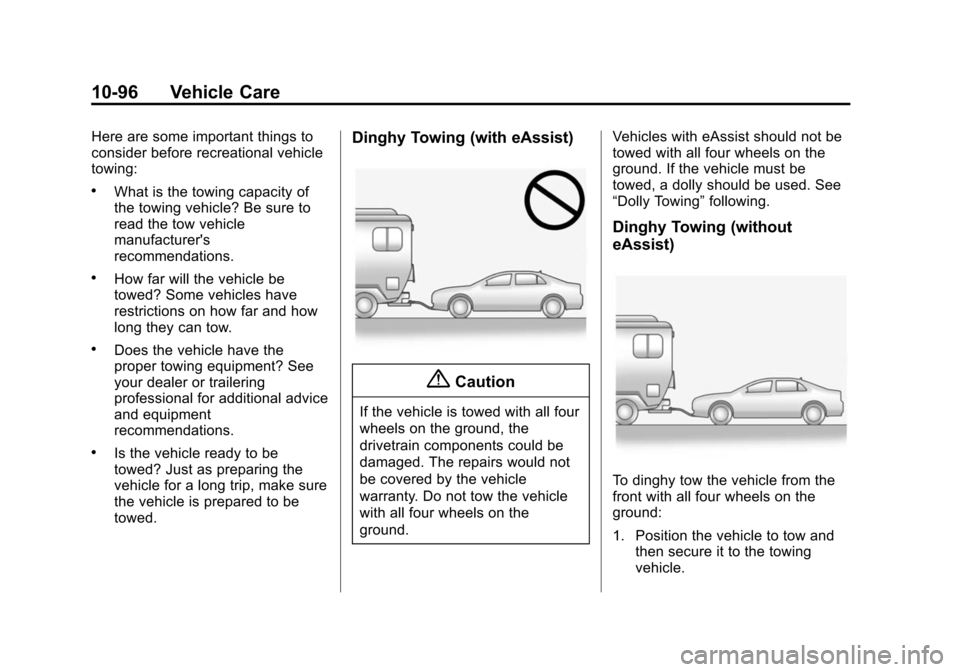
Dinghy Towing (with eAssist)
{Caution
If the vehicle is towed with all four
wheels on the ground, the
drivetrain components could be
damaged. The repairs would not
be covered by the vehicle
warranty. Do not tow the vehicle
with all four wheels on the
ground.Vehicles with eAssist should not be
towed with all four wheels on the
ground. If the vehicle must be
towed, a dolly should be used. See
“Dolly Towing”
following.
Dinghy Towing (without
eAssist)
To dinghy tow the vehicle from the
front with all four wheels on the
ground:
1. Position the vehicle to tow and
then secure it to the towing
vehicle.
Page 359 of 428
Black plate (97,1)Chevrolet Malibu Owner Manual (GMNA-Localizing-U.S./Canada/Mexico-
6081487) - 2014 - CRC - 11/19/13
Vehicle Care 10-97
2. Shift the transmission to Neutral.
3. Place the ignition in the ACC/ACCESSORY position. See
Ignition Positions (Keyless
Access) on page 9-15 orIgnition
Positions (Key Access) on
page 9-17.
4. To prevent the battery from draining while the vehicle is
being towed, remove fuse 8, 22
(Key Access only), and 24, from
the instrument panel fuse block.
See Instrument Panel Fuse
Block on page 10-42.
Remember to reinstall the fuses
once the destination has been
reached.
{Caution
If 105 km/h (65 mph) is exceeded
while towing the vehicle, it could
be damaged. Never exceed
105 km/h (65 mph) while towing
the vehicle.
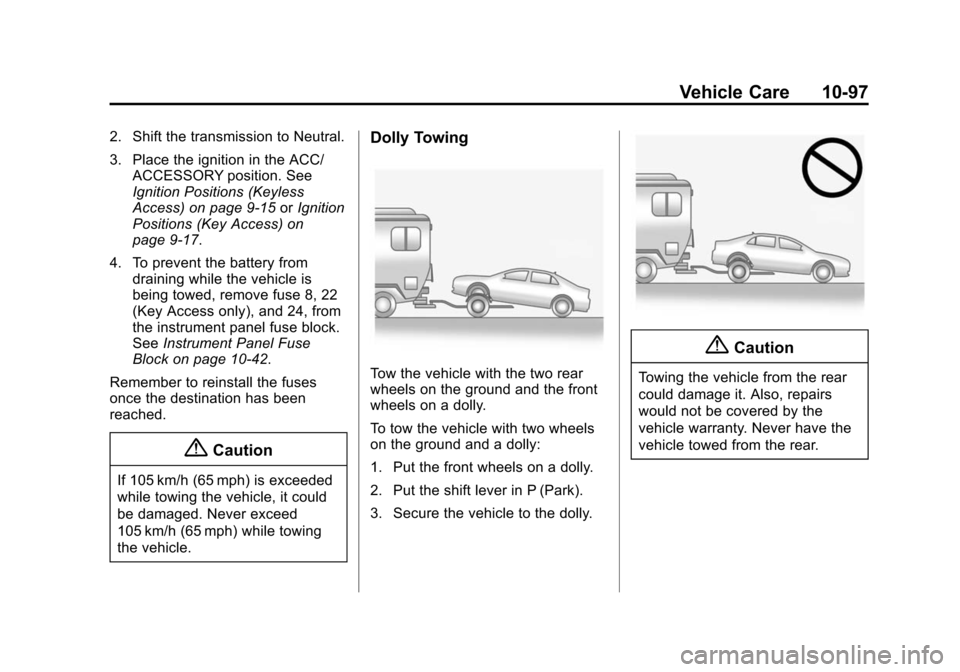
Dolly Towing
Tow the vehicle with the two rear
wheels on the ground and the front
wheels on a dolly.
To tow the vehicle with two wheels
on the ground and a dolly:
1. Put the front wheels on a dolly.
2. Put the shift lever in P (Park).
3. Secure the vehicle to the dolly.
{Caution
Towing the vehicle from the rear
could damage it. Also, repairs
would not be covered by the
vehicle warranty. Never have the
vehicle towed from the rear.
Page 363 of 428
Black plate (101,1)Chevrolet Malibu Owner Manual (GMNA-Localizing-U.S./Canada/Mexico-
6081487) - 2014 - CRC - 11/19/13
Vehicle Care 10-101
Windshield and Wiper Blades
Clean the outside of the windshield
with glass cleaner.
Clean rubber blades using a lint-free
cloth or paper towel soaked with
windshield washer fluid or a mild
detergent. Wash the windshield
thoroughly when cleaning the
blades. Bugs, road grime, sap, and
a buildup of vehicle wash/wax
treatments may cause wiper
streaking.
Replace the wiper blades if they are
worn or damaged. Damage can be
caused by extreme dusty
conditions, sand, salt, heat, sun,
snow, and ice.
Weatherstrips
Apply Dielectric silicone grease on
weatherstrips to make them last
longer, seal better, and not stick or
squeak. Lubricate weatherstrips at
least once a year. Hot, dry climates
may require more frequent
application. Black marks from
rubber material on painted surfacescan be removed by rubbing with a
clean cloth. See
Recommended
Fluids and Lubricants on
page 11-12.
Tires
Use a stiff brush with tire cleaner to
clean the tires.
{Caution
Using petroleum-based tire
dressing products on the vehicle
may damage the paint finish and/
or tires. When applying a tire
dressing, always wipe off any
overspray from all painted
surfaces on the vehicle.
Wheels and Trim —Aluminum
or Chrome
Use a soft, clean cloth with mild
soap and water to clean the wheels.
After rinsing thoroughly with clean
water, dry with a soft, clean towel.
A wax may then be applied.
{Caution
Chrome wheels and other chrome
trim may be damaged if the
vehicle is not washed after driving
on roads that have been sprayed
with magnesium, calcium,
or sodium chloride. These
chlorides are used on roads for
conditions such as ice and dust.
Always wash the chrome with
soap and water after exposure.
{Caution
To avoid surface damage, do not
use strong soaps, chemicals,
abrasive polishes, cleaners,
brushes, or cleaners that contain
acid on aluminum or
chrome-plated wheels. Use only
approved cleaners. Also, never
drive a vehicle with aluminum or
chrome-plated wheels through an
(Continued)
Page 378 of 428
Black plate (10,1)Chevrolet Malibu Owner Manual (GMNA-Localizing-U.S./Canada/Mexico-
6081487) - 2014 - CRC - 11/19/13
11-10 Service and Maintenance
.With a multi-point inspection,
your dealer can check the lamps
and note any concerns.
Shocks and Struts
Shocks and struts help aid in control
for a smoother ride.
.Signs of wear may include
steering wheel vibration, bounce/
sway while braking, longer
stopping distance, or uneven
tire wear.
.As part of the multi-point
inspection, trained dealer
technicians can visually inspect
the shocks and struts for signs
of leaking, blown seals,
or damage, and can advise
when service is needed. Tires
Tires need to be properly inflated,
rotated, and balanced. Maintaining
the tires can save money and fuel,
and can reduce the risk of tire
failure.
.Signs that the tires need to be
replaced include three or more
visible treadwear indicators; cord
or fabric showing through the
rubber; cracks or cuts in the
tread or sidewall; or a bulge or
split in the tire.
.Trained dealer technicians can
inspect and recommend the right
tires. Your dealer can also
provide tire/wheel balancing
services to ensure smooth
vehicle operation at all speeds.
Your dealer sells and services
name brand tires.
Vehicle Care
To help keep the vehicle looking like
new, vehicle care products are
available from your dealer. For
information on how to clean and
protect the vehicle’s interior and
exterior, see Interior Care on
page 10-102 andExterior Care on
page 10-98.
Page 379 of 428
Black plate (11,1)Chevrolet Malibu Owner Manual (GMNA-Localizing-U.S./Canada/Mexico-
6081487) - 2014 - CRC - 11/19/13
Service and Maintenance 11-11
Wheel Alignment
Wheel alignment is critical for
ensuring that the tires deliver
optimal wear and performance.
.Signs that the alignment may
need to be adjusted include
pulling, improper vehicle
handling, or unusual tire wear.
.Your dealer has the required
equipment to ensure proper
wheel alignment.Windshield
For safety, appearance, and the
best viewing, keep the windshield
clean and clear.
.Signs of damage include
scratches, cracks, and chips.
.Trained dealer technicians can
inspect the windshield and
recommend proper replacement
if needed.
Wiper Blades
Wiper blades need to be cleaned
and kept in good condition to
provide a clear view.
.Signs of wear include streaking,
skipping across the windshield,
and worn or split rubber.
.Trained dealer technicians can
check the wiper blades and
replace them when needed.