2014 CHEVROLET EXPRESS PASSANGER maintenance schedule
[x] Cancel search: maintenance schedulePage 261 of 406

Black plate (11,1)Chevrolet Express Owner Manual (GMNA-Localizing-U.S./Canada/Mexico-
6014662) - 2014 - crc - 8/26/13
Vehicle Care 10-11
Automatic Transmission
Fluid (4-Speed
Transmission)
If the vehicle has a diesel engine,
see the Duramax diesel supplement
for more information.
When to Check and Change
Automatic Transmission Fluid
A good time to check the automatic
transmission fluid level is when the
engine oil is changed.
Change the fluid and filter at the
intervals listed inMaintenance
Schedule on page 11-3 and be sure
to use the transmission fluid listed in
Recommended Fluids and
Lubricants on page 11-12.
How to Check Automatic
Transmission Fluid
Because this operation can be a
little difficult, it may be decided to
have this done at the dealer. If not taken to the dealer, be sure to
follow all the instructions here or a
false reading on the dipstick could
result.
{Caution
Too much or too little fluid can
damage the transmission. Too
much can mean that some of the
fluid could come out and fall on
hot engine parts or exhaust
system parts, starting a fire. Too
little fluid could cause the
transmission to overheat. Be sure
to get an accurate reading if
checking the transmission fluid.
Wait at least 30 minutes before
checking the transmission fluid level
if you have been driving:
.When outside temperatures are
above 32°C (90°F).
.At high speed for quite a while.
.In heavy traffic —especially in
hot weather.
.While pulling a trailer.
To get the right reading, the fluid
should be at normal operating
temperature, which is 82°C to 93°C
(180°F to 200°F).
Get the vehicle warmed up by
driving about 24 km (15 mi) when
outside temperatures are above 10°
C (50°F). If it is colder than 10°C
(50°F), drive the vehicle in 3 (Third)
until the engine temperature gauge
moves and then remains steady for
10 minutes.
A cold fluid check can be made
after the vehicle has been sitting for
eight hours or more with the engine
off, but this is used only as a
reference. Let the engine run at idle
for five minutes if outside
temperatures are 10°C (50°F) or
more. If it is colder than 10°C
(50°F), the engine may have to idle
longer. Should the fluid level be low
during this cold check, the fluid must
be checked hot before adding fluid.
Checking the fluid hot will give a
more accurate reading of the fluid
level.
Page 263 of 406

Black plate (13,1)Chevrolet Express Owner Manual (GMNA-Localizing-U.S./Canada/Mexico-
6014662) - 2014 - crc - 8/26/13
Vehicle Care 10-13
{Caution
Use of the incorrect automatic
transmission fluid may damage
the vehicle, and the damage may
not be covered by the vehicle
warranty. Always use the
automatic transmission fluid listed
inRecommended Fluids and
Lubricants on page 11-12.
.After adding fluid, recheck the
fluid level as described under
“How to Check Automatic
Transmission Fluid,” earlier in
this section.
.When the correct fluid level is
obtained, push the dipstick back
in all the way; then flip the
handle down to lock the dipstick
in place.
Automatic Transmission
Fluid (6-Speed
Transmission)
When to Check and Change
Automatic Transmission Fluid
It is usually not necessary to check
the transmission fluid level. The only
reason for fluid loss is a
transmission leak or overheated
transmission. If a small leak is
suspected, use the following
procedures to check the fluid level.
However, if there is a large leak, it
may be necessary to have the
vehicle towed to a dealer and have
it repaired before driving the vehicle
further.
Change the fluid and filter at the
intervals listed in Maintenance
Schedule on page 11-3, and be sure
to use the transmission fluid listed in
Recommended Fluids and
Lubricants on page 11-12.
How to Check Automatic
Transmission Fluid
Because this operation can be
difficult, it is recommended to have
this check done at your dealer,
which can monitor the transmission
temperature. The transmission fluid
level increases with temperature. To
obtain a highly accurate fluid level
check, the transmission temperature
must be measured.
If it is decided to check the fluid
level, be sure to follow all the
instructions here, or a false reading
on the dipstick may occur.
{Caution
Too much or too little fluid can
damage the transmission. Too
much can mean that some of the
fluid could come out and fall on
hot engine parts or exhaust
system parts, starting a fire. Too
little fluid could cause the
(Continued)
Page 266 of 406

Black plate (16,1)Chevrolet Express Owner Manual (GMNA-Localizing-U.S./Canada/Mexico-
6014662) - 2014 - crc - 8/26/13
10-16 Vehicle Care
Fluid”earlier in this section for
instructions on driving to achieve
warm or hot transmission fluid.
It does not take much fluid,
generally less than 0.5 L (1 pt). Do
not overfill.
{Caution
Use of the incorrect automatic
transmission fluid may damage
the vehicle, and the damage may
not be covered by the vehicle
warranty. Always use the
automatic transmission fluid listed
in Recommended Fluids and
Lubricants on page 11-12.
.After adding fluid, recheck the
fluid level as described under
“How to Check Automatic
Transmission Fluid,” earlier in
this section.
.When the correct fluid level is
obtained, push the dipstick back
in all the way; then flip the
handle down to lock the dipstick
in place.
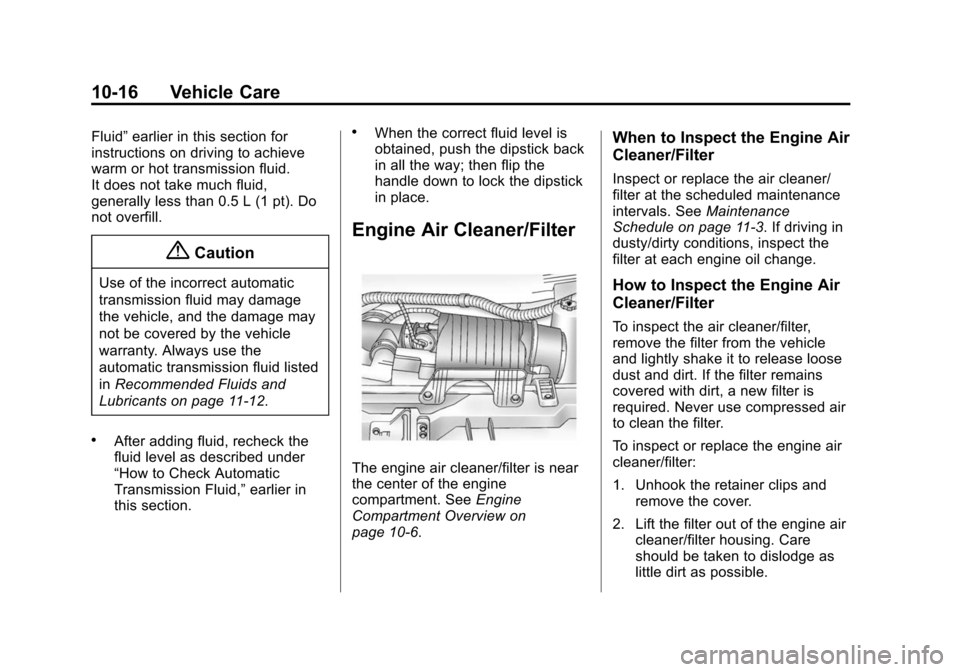
Engine Air Cleaner/Filter
The engine air cleaner/filter is near
the center of the engine
compartment. See Engine
Compartment Overview on
page 10-6.
When to Inspect the Engine Air
Cleaner/Filter
Inspect or replace the air cleaner/
filter at the scheduled maintenance
intervals. See Maintenance
Schedule on page 11-3. If driving in
dusty/dirty conditions, inspect the
filter at each engine oil change.
How to Inspect the Engine Air
Cleaner/Filter
To inspect the air cleaner/filter,
remove the filter from the vehicle
and lightly shake it to release loose
dust and dirt. If the filter remains
covered with dirt, a new filter is
required. Never use compressed air
to clean the filter.
To inspect or replace the engine air
cleaner/filter:
1. Unhook the retainer clips and
remove the cover.
2. Lift the filter out of the engine air cleaner/filter housing. Care
should be taken to dislodge as
little dirt as possible.
Page 277 of 406

Black plate (27,1)Chevrolet Express Owner Manual (GMNA-Localizing-U.S./Canada/Mexico-
6014662) - 2014 - crc - 8/26/13
Vehicle Care 10-27
Do not top off the brake fluid.
Adding fluid does not correct a leak.
If fluid is added when the linings are
worn, there will be too much fluid
when new brake linings are
installed. Add or remove brake fluid,
as necessary, only when work is
done on the brake hydraulic system.
{Warning
If too much brake fluid is added, it
can spill on the engine and/or fuel
operated heater parts,
if equipped. If the vehicle has a
diesel engine and a fuel operated
heater, see“Fuel Operated
Heater (FOH)” in the diesel
engine supplement. The fluid will
burn if the engine is hot enough.
You or others could be burned,
and the vehicle could be
damaged. Add brake fluid only
when work is done on the brake
hydraulic system. See “Checking
Brake Fluid” in this section. Refer to the Maintenance Schedule
to determine when to check the
brake fluid. See
Maintenance
Schedule on page 11-3.
Checking Brake Fluid
Check brake fluid by looking at the
brake fluid reservoir. See Engine
Compartment Overview on
page 10-6.
The fluid level should be above
MIN. If it is not, have the brake
hydraulic system checked to see if
there is a leak. After work is done on the brake
hydraulic system, make sure the
level is above the MIN but not over
the MAX mark.
What to Add
Use only new DOT 3 brake fluid
from a sealed container. See
Recommended Fluids and
Lubricants on page 11-12.
Always clean the brake fluid
reservoir cap and the area around
the cap before removing it. This
helps keep dirt from entering the
reservoir.
{Warning
With the wrong kind of fluid in the
brake hydraulic system, the
brakes might not work well. This
could cause a crash. Always use
the proper brake fluid.
Page 279 of 406

Black plate (29,1)Chevrolet Express Owner Manual (GMNA-Localizing-U.S./Canada/Mexico-
6014662) - 2014 - crc - 8/26/13
Vehicle Care 10-29
All-Wheel Drive
Transfer Case
When to Check Lubricant
Refer to the Maintenance Schedule
to determine how often to check the
lubricant. SeeMaintenance
Schedule on page 11-3.
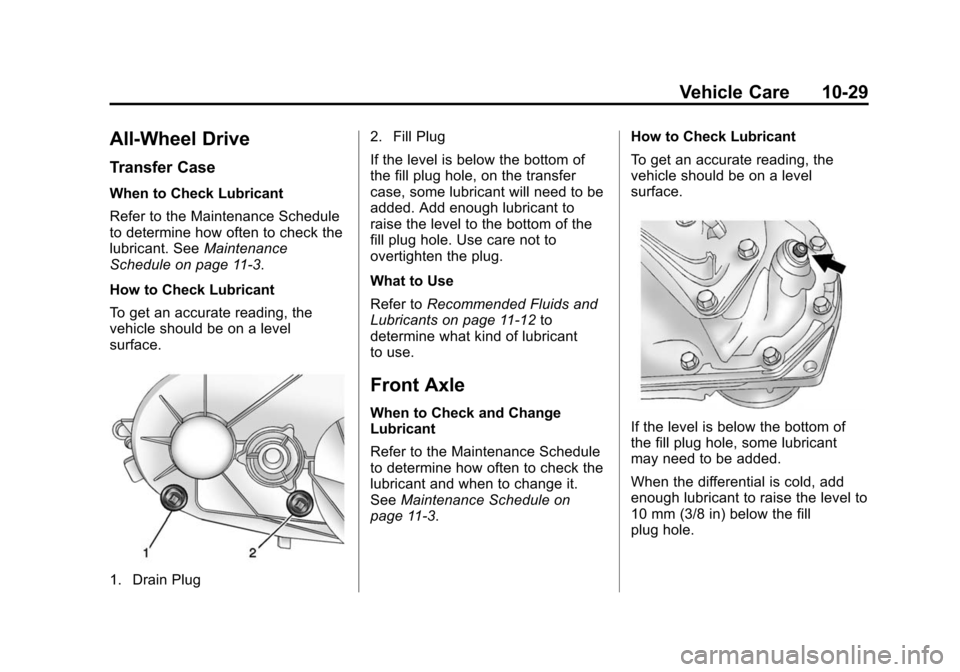
How to Check Lubricant
To get an accurate reading, the
vehicle should be on a level
surface.
1. Drain Plug 2. Fill Plug
If the level is below the bottom of
the fill plug hole, on the transfer
case, some lubricant will need to be
added. Add enough lubricant to
raise the level to the bottom of the
fill plug hole. Use care not to
overtighten the plug.
What to Use
Refer to
Recommended Fluids and
Lubricants on page 11-12 to
determine what kind of lubricant
to use.
Front Axle
When to Check and Change
Lubricant
Refer to the Maintenance Schedule
to determine how often to check the
lubricant and when to change it.
See Maintenance Schedule on
page 11-3. How to Check Lubricant
To get an accurate reading, the
vehicle should be on a level
surface.If the level is below the bottom of
the fill plug hole, some lubricant
may need to be added.
When the differential is cold, add
enough lubricant to raise the level to
10 mm (3/8 in) below the fill
plug hole.
Page 280 of 406

Black plate (30,1)Chevrolet Express Owner Manual (GMNA-Localizing-U.S./Canada/Mexico-
6014662) - 2014 - crc - 8/26/13
10-30 Vehicle Care
When the differential is at operating
temperature (warm), add enough
lubricant to raise the level to the
bottom of the fill plug hole.
What to Use
Refer toRecommended Fluids and
Lubricants on page 11-12 to
determine what kind of lubricant
to use.
Rear Axle
When to Check Lubricant
Refer to the Maintenance Schedule
on page 11-3 to determine how
often to check the lubricant.
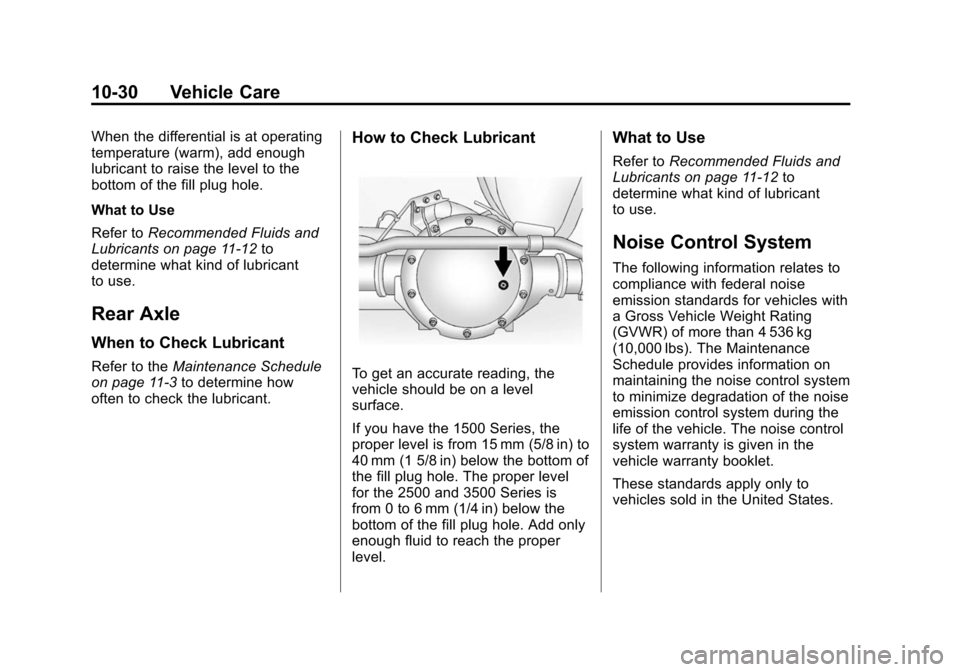
How to Check Lubricant
To get an accurate reading, the
vehicle should be on a level
surface.
If you have the 1500 Series, the
proper level is from 15 mm (5/8 in) to
40 mm (1 5/8 in) below the bottom of
the fill plug hole. The proper level
for the 2500 and 3500 Series is
from 0 to 6 mm (1/4 in) below the
bottom of the fill plug hole. Add only
enough fluid to reach the proper
level.
What to Use
Refer to Recommended Fluids and
Lubricants on page 11-12 to
determine what kind of lubricant
to use.
Noise Control System
The following information relates to
compliance with federal noise
emission standards for vehicles with
a Gross Vehicle Weight Rating
(GVWR) of more than 4 536 kg
(10,000 lbs). The Maintenance
Schedule provides information on
maintaining the noise control system
to minimize degradation of the noise
emission control system during the
life of the vehicle. The noise control
system warranty is given in the
vehicle warranty booklet.
These standards apply only to
vehicles sold in the United States.
Page 283 of 406

Black plate (33,1)Chevrolet Express Owner Manual (GMNA-Localizing-U.S./Canada/Mexico-
6014662) - 2014 - crc - 8/26/13
Vehicle Care 10-33
.To check the P (Park)
mechanism's holding ability:
With the engine running, shift to
P (Park). Then release the
parking brake followed by the
regular brake.
Contact your dealer if service is
required.
Wiper Blade Replacement
Windshield wiper blades should be
inspected for wear and cracking.
See Maintenance Schedule on
page 11-3.
Replacement blades come in
different types and are removed in
different ways. For proper type and
length, see Maintenance
Replacement Parts on page 11-14.
{Caution
Allowing the wiper arm to touch
the windshield when no wiper
blade is installed could damage
(Continued)
Caution (Continued)
the windshield. Any damage that
occurs would not be covered by
your warranty. Do not allow the
wiper arm to touch the windshield.
1. Lift the wiper arm away from the windshield.
2. Push the release lever (2) todisengage the hook and push
the wiper arm (1) out of the
blade assembly (3).
3. Push the new blade assembly securely on the wiper arm until
the release lever clicks into
place.
Headlamp Aiming
Headlamp aim has been preset and
should need no further adjustment.
If the vehicle is damaged in a crash,
the headlamp aim may be affected.
If adjustment to the headlamps is
necessary, see your dealer.
Page 311 of 406

Black plate (61,1)Chevrolet Express Owner Manual (GMNA-Localizing-U.S./Canada/Mexico-
6014662) - 2014 - crc - 8/26/13
Vehicle Care 10-61
10. Set all four tires to therecommended air pressure
level as indicated on the Tire
and Loading Information label.
Tire Inspection
We recommend that the tires,
including the spare tire, if the
vehicle has one, be inspected
for signs of wear or damage at
least once a month.
Replace the tire if:
.The indicators at three or
more places around the tire
can be seen.
.There is cord or fabric
showing through the tire's
rubber.
.The tread or sidewall is
cracked, cut, or snagged
deep enough to show cord or
fabric.
.The tire has a bump, bulge,
or split.
.The tire has a puncture, cut,
or other damage that cannot
be repaired well because of
the size or location of the
damage.
Tire Rotation
Tires should be rotated every
12 000 km (7,500 mi). See
Maintenance Schedule on
page 11-3.
Tires are rotated to achieve a
uniform wear for all tires. The
first rotation is the most
important.
Any time unusual wear is
noticed, rotate the tires as soon
as possible and check the wheel
alignment. Also check for
damaged tires or wheels. See
When It Is Time for New Tires
on page 10-63 andWheel
Replacement on page 10-68.
Use this rotation pattern when
rotating the tires.
If the vehicle has a compact
spare tire, do not include it in the
tire rotation.
Adjust the front and rear tires to
the recommended inflation
pressure on the Tire and
Loading Information label after
the tires have been rotated. See
Tire Pressure on page 10-55
and Vehicle Load Limits on
page 9-10.