2014 CHEVROLET EQUINOX center console
[x] Cancel search: center consolePage 23 of 390
Black plate (17,1)Chevrolet Equinox Owner Manual (GMNA-Localizing-U.S./Canada-
6081479) - 2014 - crc2 - 10/23/13
In Brief 1-17
Storing a Favorite Station
Stations from all bands can be
stored in the favorite lists in any
order. Up to six stations can be
stored in each favorite page and the
number of available favorite pages
can be set.
To store the station to a position in
the list, press the corresponding
numeric button 1-6 until the station
can be heard again.
For more information, see“Storing a
Station as a Favorite” inAM-FM
Radio on page 7-7.
Setting the Clock
For detailed instructions on setting
either clock, see Clock on page 5-5.
To set the time on the Radio with
CD and Touchscreen:
1. Press
Hto enter the menu
options. Turn the MENU/SEL
knob to scroll through the
available setup features. 2. Press + or
−to decrease or
increase the Hours and Minutes
displayed on the clock.
12/24 HR Format: Press the 12
Hour screen button for standard
time; press the 24 Hour screen
button for military time.
Day + or Day −:Press the Day +
and Day −display buttons to
increase or decrease the day.
Display: Press Display to turn the
display of the time on the screen on
or off.
Satellite Radio
If equipped, vehicles with a
SiriusXM®satellite radio tuner and a
valid SiriusXM satellite radio
subscription can receive SiriusXM
programming.
SiriusXM Satellite Radio
Service
SiriusXM is a satellite radio service
based in the 48 contiguous United
States and 10 Canadian provinces. SiriusXM satellite radio has a wide
variety of programming and
commercial-free music, coast to
coast, and in digital-quality sound.
A fee is required to receive the
SiriusXM service.
Refer to:
.www.siriusxm.com or call
1-866-635-2349 (U.S.).
.www.xmradio.ca or call
1-877-209-0079 (Canada).
See Satellite Radio on page 7-9.
Portable Audio Devices
Some vehicles have a 3.5 mm
(1/8 in) auxiliary input and a USB
port in the center console. External
devices such as iPods
®, laptop
computers, MP3 players, CD
changers, and USB drives may be
connected, depending on the audio
system.
See Auxiliary Devices on page 7-17.
Page 26 of 390
Black plate (20,1)Chevrolet Equinox Owner Manual (GMNA-Localizing-U.S./Canada-
6081479) - 2014 - crc2 - 10/23/13
1-20 In Brief
approximately 60 m (197 ft) and
operates at speeds above 40 km/h
(25 mph).
SeeForward Collision Alert (FCA)
System on page 9-37.
Lane Departure
Warning (LDW)
If equipped, LDW is intended to help
avoid unintentional lane departures
at speeds of 56 km/h (35 mph) or
greater. LDW uses a camera sensor
to detect the lane markings. The
LDW indicator,
@, appears green if
a lane marking is detected. If the
vehicle departs the lane, the
indicator will change to amber and
flash. In addition, beeps will sound.
See Lane Departure Warning (LDW)
on page 9-43.
Rear Vision
Camera (RVC)
If equipped, RVC displays a view of
the area behind the vehicle, on the
infotainment system display, when
the vehicle is shifted into
R (Reverse).
See Rear Vision Camera (RVC) on
page 9-40.
Ultrasonic Parking Assist
If equipped, this system uses
sensors on the rear bumper to
assist with parking and avoiding
objects while in R (Reverse).
It operates at speeds less than
8 km/h (5 mph). Ultrasonic Rear
Parking Assist (URPA) uses audible
beeps to provide distance and
system information.
Keep the sensors on the vehicle's
rear bumper clean to ensure proper
operation.
See Ultrasonic Parking Assist on
page 9-39.
Power Outlets
The accessory power outlets can be
used to connect electrical
equipment, such as a cell phone or
MP3 player.
There are four accessory power
outlets in the following locations:
below the CD slot, inside the center
console storage, on the rear of the
center console storage, and in the
rear cargo compartment.
To use the outlets, remove the cover
and close when not in use.
See Power Outlets on page 5-6.
Universal Remote System
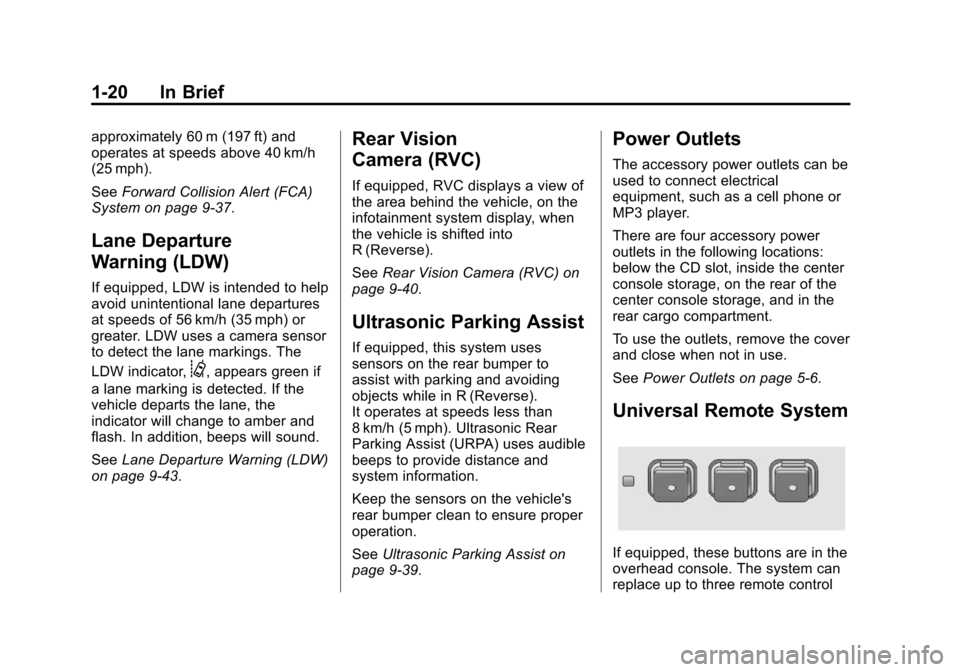
If equipped, these buttons are in the
overhead console. The system can
replace up to three remote control
Page 41 of 390
Black plate (11,1)Chevrolet Equinox Owner Manual (GMNA-Localizing-U.S./Canada-
6081479) - 2014 - crc2 - 10/23/13
Keys, Doors, and Windows 2-11
Choose the power liftgate mode by
turning the dial on the switch until
the indicator lines up with the
desired position. The vehicle must
be in P (Park).
The three modes are:
MAX :The liftgate power opens to
the full open height.
3/4 : The liftgate power opens to a
reduced open height that can be set
by the vehicle operator. Use this
setting to prevent the liftgate from
opening into overhead obstructions
such as a garage door or roof
mounted cargo during power
operation. The liftgate can still be
fully opened manually.
OFF : The liftgate only operates
manually in this position.
Manual operation of a liftgate that
also has power operation requires
more effort than a standard manual
liftgate. The liftgate can be opened manually
by pressing the touch pad under the
liftgate handle, with the doors
unlocked and lifting up.
In either the MAX or the 3/4 mode,
the liftgate can be power opened
and closed by:
.Pressing and holdingVorY
on the RKE transmitter until the
liftgate starts moving. See
Remote Keyless Entry (RKE)
System Operation on page 2-3.
.Pressing the power liftgate
button in the center of the mode
switch on the overhead console,
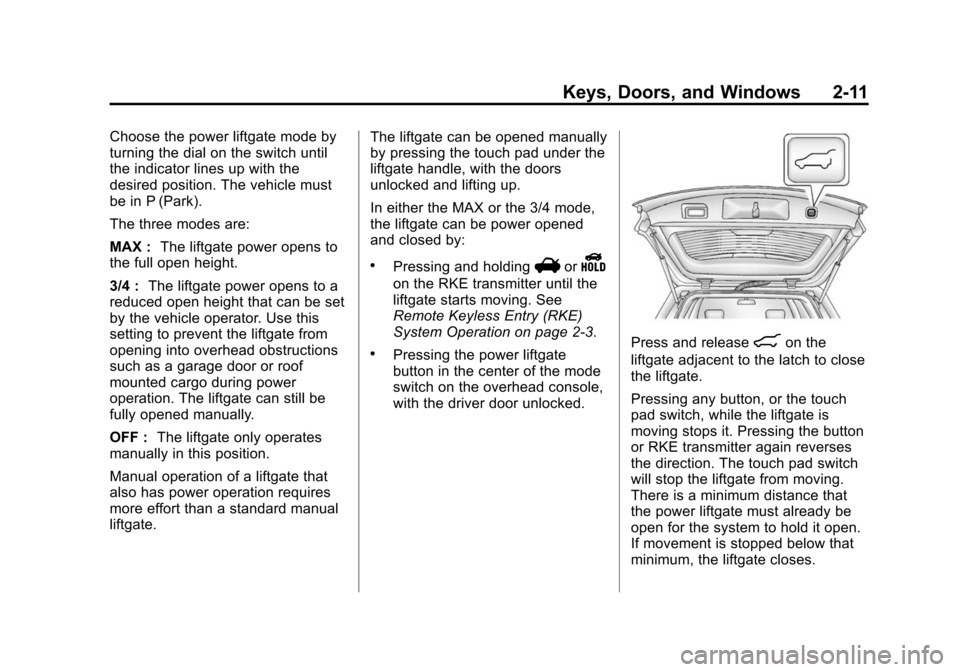
with the driver door unlocked.Press and release8on the
liftgate adjacent to the latch to close
the liftgate.
Pressing any button, or the touch
pad switch, while the liftgate is
moving stops it. Pressing the button
or RKE transmitter again reverses
the direction. The touch pad switch
will stop the liftgate from moving.
There is a minimum distance that
the power liftgate must already be
open for the system to hold it open.
If movement is stopped below that
minimum, the liftgate closes.
Page 101 of 390
Black plate (1,1)Chevrolet Equinox Owner Manual (GMNA-Localizing-U.S./Canada-
6081479) - 2014 - crc2 - 10/23/13
Storage 4-1
Storage
Storage Compartments
Storage Compartments . . . . . . . 4-1
Instrument Panel Storage . . . . . 4-1
Glove Box . . . . . . . . . . . . . . . . . . . . 4-1
Cupholders . . . . . . . . . . . . . . . . . . . 4-1
Center Console Storage . . . . . . 4-2
Additional Storage Features
Cargo Cover . . . . . . . . . . . . . . . . . . 4-2
Cargo Tie-Downs . . . . . . . . . . . . . 4-2
Convenience Net . . . . . . . . . . . . . 4-2
Roof Rack System
Roof Rack System . . . . . . . . . . . . 4-3
Storage
Compartments
{Warning
Do not store heavy or sharp
objects in storage compartments.
In a crash, these objects may
cause the cover to open and
could result in injury.
Instrument Panel Storage
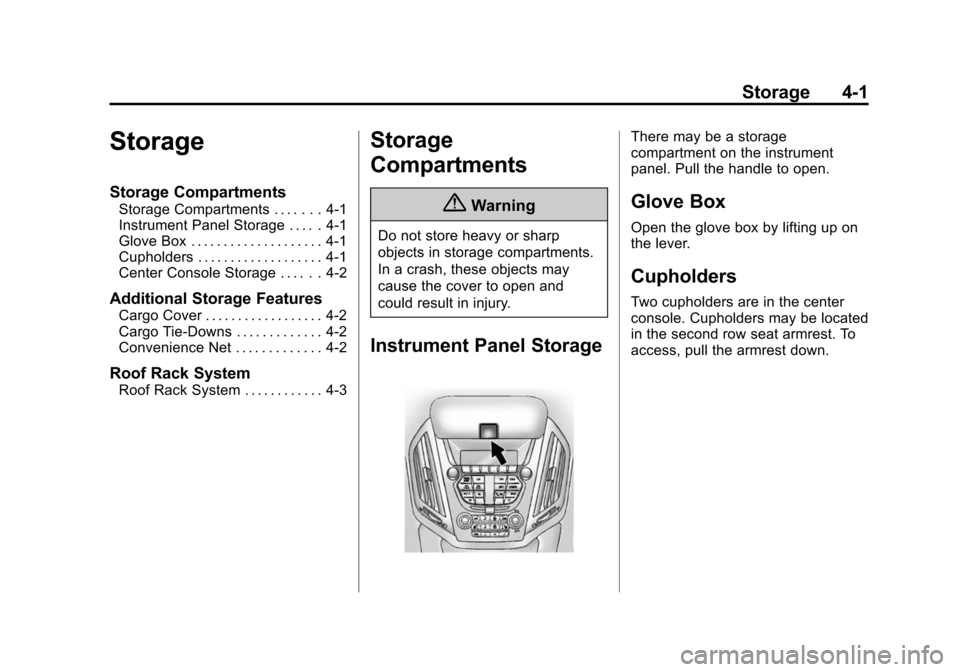
There may be a storage
compartment on the instrument
panel. Pull the handle to open.
Glove Box
Open the glove box by lifting up on
the lever.
Cupholders
Two cupholders are in the center
console. Cupholders may be located
in the second row seat armrest. To
access, pull the armrest down.
Page 102 of 390
Black plate (2,1)Chevrolet Equinox Owner Manual (GMNA-Localizing-U.S./Canada-
6081479) - 2014 - crc2 - 10/23/13
4-2 Storage
Center Console Storage
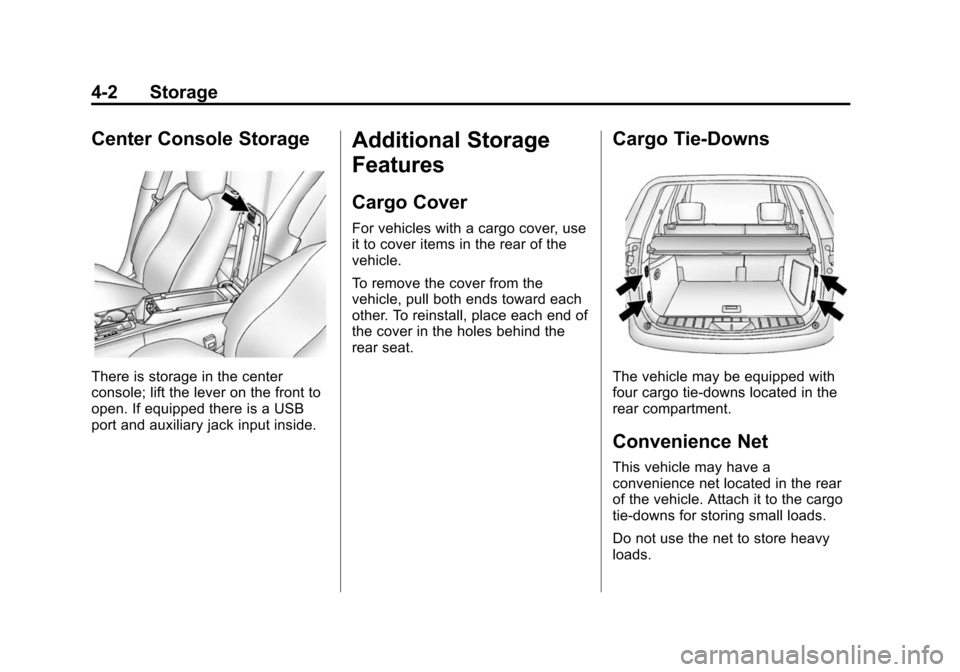
There is storage in the center
console; lift the lever on the front to
open. If equipped there is a USB
port and auxiliary jack input inside.
Additional Storage
Features
Cargo Cover
For vehicles with a cargo cover, use
it to cover items in the rear of the
vehicle.
To remove the cover from the
vehicle, pull both ends toward each
other. To reinstall, place each end of
the cover in the holes behind the
rear seat.
Cargo Tie-Downs
The vehicle may be equipped with
four cargo tie-downs located in the
rear compartment.
Convenience Net
This vehicle may have a
convenience net located in the rear
of the vehicle. Attach it to the cargo
tie‐downs for storing small loads.
Do not use the net to store heavy
loads.
Page 110 of 390
Black plate (6,1)Chevrolet Equinox Owner Manual (GMNA-Localizing-U.S./Canada-
6081479) - 2014 - crc2 - 10/23/13
5-6 Instruments and Controls
4. Press the MENU/SEL knob toselect DD/MM/YYYY (day/
month/year), MM/DD/YYYY
(month/day/year), or YYYY/MM/
DD (year/month/day).
Setting the Clock Without Date
Display
To set the Time and Date:
1. Turn the infotainment system on.
2. Press the CONFIG button and
select Time Settings, or press
the
Hbutton.
3. Select Set Time.
4. Turn the MENU/SEL knob to adjust the highlighted value.
5. Press the MENU/SEL knob to select the next value.
6. To save the time and return to the Time Settings menu, press
the MENU/SEL knob after
adjusting the time.
To set the 12/24 hour format:
1. Turn the infotainment system on. 2. Press the CONFIG button and
select Time Settings, or press
the
Hbutton.
3. Highlight 12 hr /24 hr Format.
4. Press the MENU/SEL knob to select the 12 Hour or 24 Hour
display format.
Setting the Clock (Radio with
CD and Touchscreen)
To set the time:
1. Press the CONFIG button toenter the menu options. Turn the
TUNE/MENU knob to scroll
through the available setup
features. Press the TUNE/MENU
knob or press the Time screen
button to display other options
within that feature.
2. Press + or −to decrease or
increase the Hours and Minutes
displayed on the clock.
12/24 HR Format: Press the 12
Hour screen button for standard
time; press the 24 Hour screen
button for military time. Day + or Day
−:Press the Day +
or Day −display buttons to increase
or decrease the day.
Display: Press Display to turn the
display of the time on the screen on
or off.
Power Outlets
The accessory power outlets can be
used to connect electrical
equipment, such as a cell phone or
MP3 player.
There are four accessory power
outlets in the following locations:
below the CD slot, inside the center
console storage, on the rear of the
center console storage, and in the
rear cargo compartment.
To use the outlets, remove the cover
and close when not in use.
Page 117 of 390
Black plate (13,1)Chevrolet Equinox Owner Manual (GMNA-Localizing-U.S./Canada-
6081479) - 2014 - crc2 - 10/23/13
Instruments and Controls 5-13
The front passenger safety belt
warning light and chime may turn on
if an object is put on the seat such
as a briefcase, handbag, grocery
bag, laptop, or other electronic
device. To turn off the warning light
and/or chime, remove the object
from the seat or buckle the
safety belt.
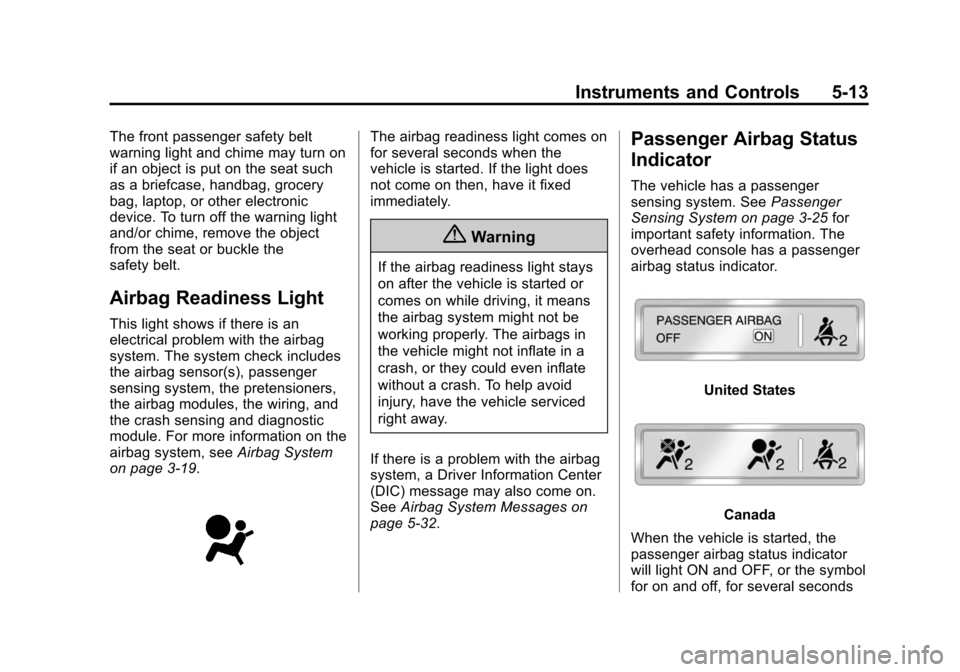
Airbag Readiness Light
This light shows if there is an
electrical problem with the airbag
system. The system check includes
the airbag sensor(s), passenger
sensing system, the pretensioners,
the airbag modules, the wiring, and
the crash sensing and diagnostic
module. For more information on the
airbag system, seeAirbag System
on page 3-19.
The airbag readiness light comes on
for several seconds when the
vehicle is started. If the light does
not come on then, have it fixed
immediately.
{Warning
If the airbag readiness light stays
on after the vehicle is started or
comes on while driving, it means
the airbag system might not be
working properly. The airbags in
the vehicle might not inflate in a
crash, or they could even inflate
without a crash. To help avoid
injury, have the vehicle serviced
right away.
If there is a problem with the airbag
system, a Driver Information Center
(DIC) message may also come on.
See Airbag System Messages on
page 5-32.
Passenger Airbag Status
Indicator
The vehicle has a passenger
sensing system. See Passenger
Sensing System on page 3-25 for
important safety information. The
overhead console has a passenger
airbag status indicator.
United States
Canada
When the vehicle is started, the
passenger airbag status indicator
will light ON and OFF, or the symbol
for on and off, for several seconds
Page 167 of 390
Black plate (17,1)Chevrolet Equinox Owner Manual (GMNA-Localizing-U.S./Canada-
6081479) - 2014 - crc2 - 10/23/13
Infotainment System 7-17
Root Directory
The root directory is treated as a
folder. All files contained directly
under the root directory are
accessed prior to any root directory
folders.
Empty Folders
If a root directory or folder is empty
or contains only folders, the player
advances to the next folder in the
file structure that contains a
compressed audio file. The empty
folder(s) are not displayed or
numbered.
No Folder
When the CD only contains
compressed audio files without any
folders or playlists, all files are
under the root folder.
File System and Naming
The song titles, artists, albums, and
genres are taken from the file's ID3
tag and are only displayed if present
in the tag. If a song title is notpresent in the ID3 tag, the radio
displays the file name as the
track name.
Preprogrammed Playlists
The radio recognizes
preprogrammed playlists; however,
there is no editing capability. These
playlists are treated as special
folders containing compressed
audio song files.
Auxiliary Devices
See the infotainment manual for
more information.
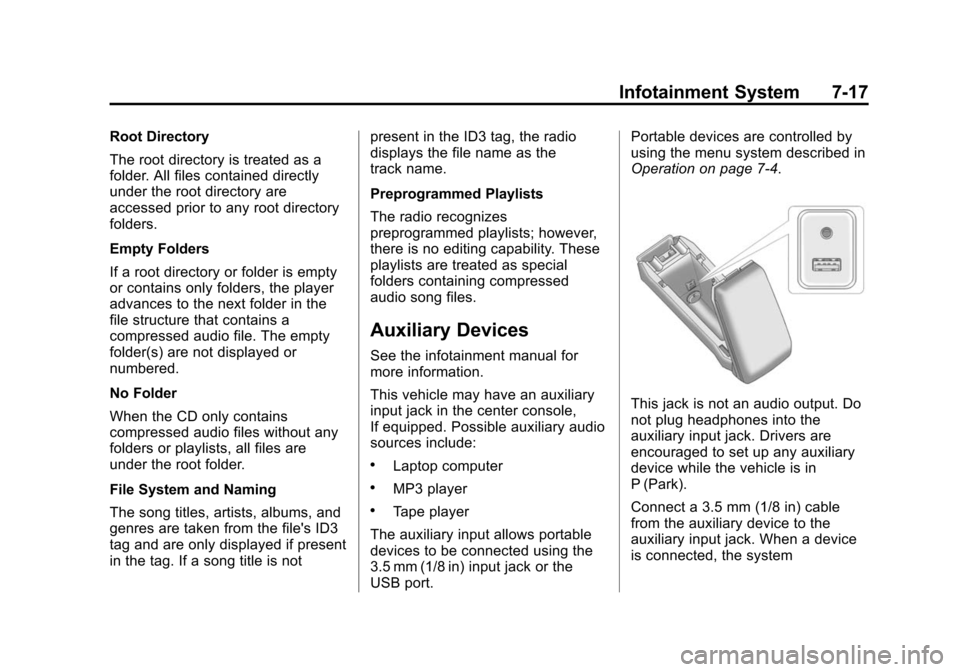
This vehicle may have an auxiliary
input jack in the center console,
If equipped. Possible auxiliary audio
sources include:
.Laptop computer
.MP3 player
.Tape player
The auxiliary input allows portable
devices to be connected using the
3.5 mm (1/8 in) input jack or the
USB port. Portable devices are controlled by
using the menu system described in
Operation on page 7-4.
This jack is not an audio output. Do
not plug headphones into the
auxiliary input jack. Drivers are
encouraged to set up any auxiliary
device while the vehicle is in
P (Park).
Connect a 3.5 mm (1/8 in) cable
from the auxiliary device to the
auxiliary input jack. When a device
is connected, the system