2014 CHEVROLET EQUINOX engine
[x] Cancel search: enginePage 273 of 390
Black plate (25,1)Chevrolet Equinox Owner Manual (GMNA-Localizing-U.S./Canada-
6081479) - 2014 - crc2 - 10/23/13
Vehicle Care 10-25
Automatic Transmission
Shift Lock Control
Function Check
{Warning
When you are doing this
inspection, the vehicle could
move suddenly. If the vehicle
moves, you or others could be
injured.
1. Before starting this check, be sure there is enough room
around the vehicle. It should be
parked on a level surface.
2. Apply the parking brake. Be ready to apply the regular brake
immediately if the vehicle begins
to move.
3. With the engine off, turn the ignition on, but do not start the
engine. Without applying the
regular brake, try to move the
shift lever out of P (Park) with normal effort. If the shift lever
moves out of P (Park), contact
your dealer for service.
Ignition Transmission
Lock Check
While parked and with the parking
brake set, try to turn the ignition to
LOCK/OFF in each shift lever
position.
.The ignition should turn to
LOCK/OFF only when the shift
lever is in P (Park).
.The ignition key should come
out only in LOCK/OFF.
Contact your dealer if service is
required.
Park Brake and P (Park)
Mechanism Check
{Warning
When you are doing this check,
the vehicle could begin to move.
You or others could be injured
and property could be damaged.
Make sure there is room in front
of the vehicle in case it begins to
roll. Be ready to apply the regular
brake at once should the vehicle
begin to move.
Park on a fairly steep hill, with the
vehicle facing downhill. Keeping
your foot on the regular brake, set
the parking brake.
.To check the parking brake's
holding ability: With the engine
running and the transmission in
N (Neutral), slowly remove foot
pressure from the regular brake
pedal. Do this until the vehicle is
held by the parking brake only.
Page 274 of 390
Black plate (26,1)Chevrolet Equinox Owner Manual (GMNA-Localizing-U.S./Canada-
6081479) - 2014 - crc2 - 10/23/13
10-26 Vehicle Care
.To check the P (Park)
mechanism's holding ability:
With the engine running, shift to
P (Park). Then release the
parking brake followed by the
regular brake.
Contact your dealer if service is
required.
Wiper Blade Replacement
Windshield wiper blades should be
inspected for wear and cracking.
See Maintenance Schedule on
page 11-2.
Replacement blades come in
different types and are removed in
different ways. For proper type and
length, see Maintenance
Replacement Parts on page 11-13.
{Caution
Allowing the wiper arm to touch
the windshield when no wiper
blade is installed could damage
the windshield. Any damage that
occurs would not be covered by
your warranty. Do not allow the
wiper arm to touch the windshield.
Front Wiper Blade
Replacement
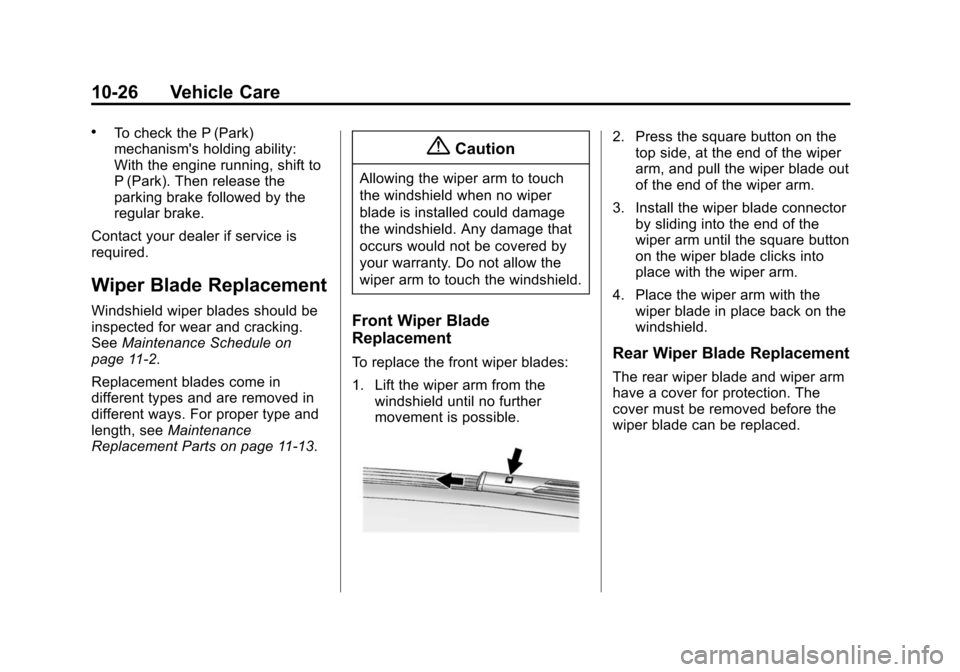
To replace the front wiper blades:
1. Lift the wiper arm from the
windshield until no further
movement is possible.
2. Press the square button on thetop side, at the end of the wiper
arm, and pull the wiper blade out
of the end of the wiper arm.
3. Install the wiper blade connector by sliding into the end of the
wiper arm until the square button
on the wiper blade clicks into
place with the wiper arm.
4. Place the wiper arm with the wiper blade in place back on the
windshield.
Rear Wiper Blade Replacement
The rear wiper blade and wiper arm
have a cover for protection. The
cover must be removed before the
wiper blade can be replaced.
Page 280 of 390
Black plate (32,1)Chevrolet Equinox Owner Manual (GMNA-Localizing-U.S./Canada-
6081479) - 2014 - crc2 - 10/23/13
10-32 Vehicle Care
Electrical System
Fuses
The wiring circuits in the vehicle are
protected from short circuits by
fuses. This greatly reduces the
chance of damage caused by
electrical problems.
Look at the silver-colored band
inside the fuse. If the band is broken
or melted, replace the fuse. Be sure
to replace a bad fuse with a new
one of the identical size and rating.
Replace a bad fuse with a new one
of the identical size and rating.
If there is a problem on the road and
a fuse needs to be replaced, the
same amperage fuse can be
borrowed. Choose some feature of
the vehicle that is not needed to use
and replace it as soon as possible.
There are two fuse blocks in the
vehicle: one in the engine
compartment and one in the
instrument panel.There is a fuse puller located in the
engine compartment fuse block.
See
Engine Compartment Fuse
Block on page 10-32. It can be used
to easily remove fuses from the fuse
block.
Engine Compartment
Fuse Block
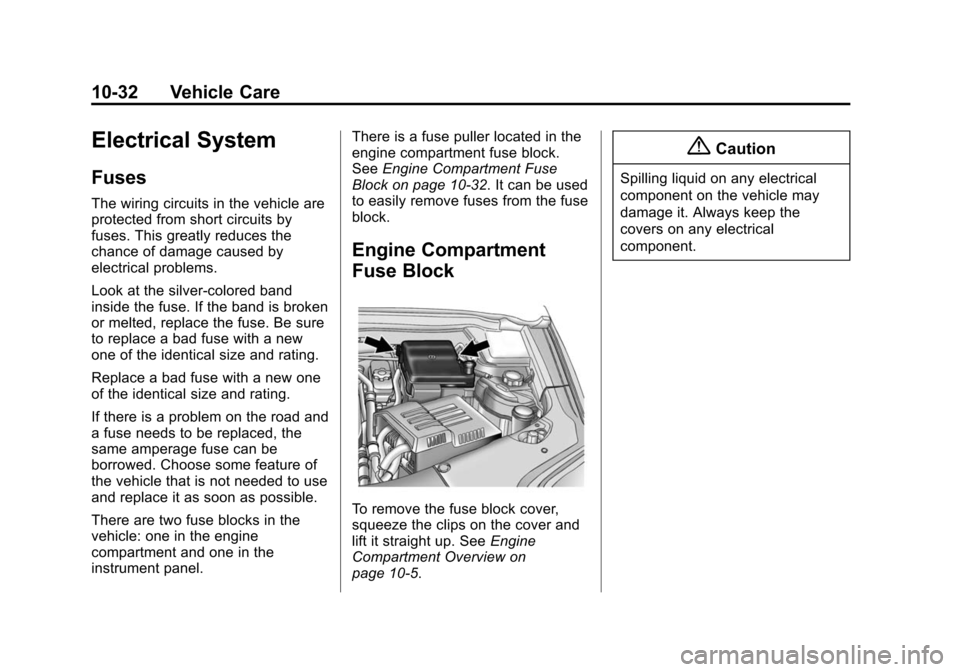
To remove the fuse block cover,
squeeze the clips on the cover and
lift it straight up. See Engine
Compartment Overview on
page 10-5.
{Caution
Spilling liquid on any electrical
component on the vehicle may
damage it. Always keep the
covers on any electrical
component.
Page 282 of 390
Black plate (34,1)Chevrolet Equinox Owner Manual (GMNA-Localizing-U.S./Canada-
6081479) - 2014 - crc2 - 10/23/13
10-34 Vehicle Care
Mini Fuses Usage17 Transmission Control Module
Battery
18 Trailer Parking Light
19 AIR Pump Solenoid
20 Engine Control Module Battery
21 Canister Vent
22 Trailer Left Side (If Equipped)
23 Lift Gate Module
24 Power Lumbar
25 Trailer Right Side (If Equipped)
26 Rear Accessory Power Outlet
27 Memory Mirror Module
28 Regulated Voltage Control Battery
Sensor Mini Fuses Usage
29 Front Wiper
30 Rear Wiper
31 Air Conditioning Compressor
32 Rear Latch
33 Heated Mirrors
34 Horn
35 Right High-Beam Headlamp
36 Left High-Beam Headlamp
37 Ignition Even Coil
38 Ignition Odd Coil
39 Windshield Washer
40 Front Fog Lamps
41 Post Catalytic Converter Oxygen
Sensor
42 Engine Control Module Mini Fuses Usage
43 Pre–Catalytic Converter Oxygen
Sensor
44 Transmission Control Module
45 Mirror
46 Fuel System Control Module Ignition
47 Spare
48 Rear Drive Module
49 Lift Gate Module Logic
50 Instrument Panel Fuse Block Ignition
51 Heated Seat– Front
52 Fuel System Control Module
53 Engine Control Module
54 Rear Vision Camera
Page 283 of 390
Black plate (35,1)Chevrolet Equinox Owner Manual (GMNA-Localizing-U.S./Canada-
6081479) - 2014 - crc2 - 10/23/13
Vehicle Care 10-35
Mini Fuses Usage78 Passenger Power Lumber
Midi Fuse Usage 55 Electric Power Steering
Micro
Relays Usage
56 AIR Pump Solenoid
57 Brake Booster
58 Cooling Fan Low
59 Headlamp High Beam
60 Cooling Fan Control
61 Wiper On/Off Control
62 Air Conditioning Compressor
63 Rear Defogger
64 Wiper Speed Micro
Relays Usage
65 Fog Lamp
66 Engine Control
67 Starter
68 Run/Crank
Mini Relays Usage 69 Cooling Fan High
70 AIR Pump MotorInstrument Panel Fuse
Block
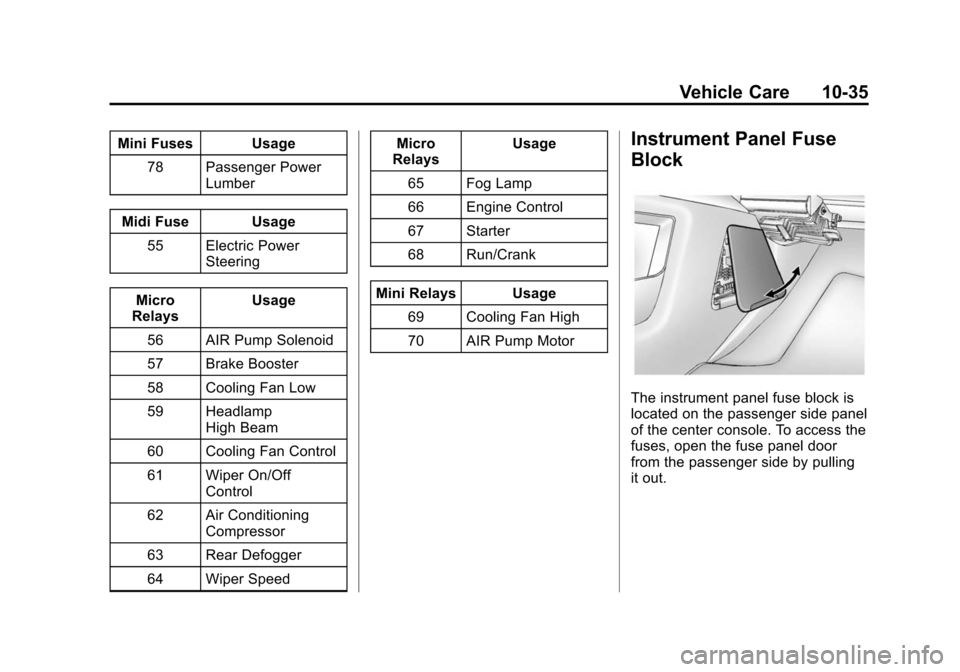
The instrument panel fuse block is
located on the passenger side panel
of the center console. To access the
fuses, open the fuse panel door
from the passenger side by pulling
it out.
Page 290 of 390
Black plate (42,1)Chevrolet Equinox Owner Manual (GMNA-Localizing-U.S./Canada-
6081479) - 2014 - crc2 - 10/23/13
10-42 Vehicle Care
(5) Tire Inflation:The
temporary use tire or compact
spare tire should be inflated to
420 kPa (60 psi). For more
information on tire pressure and
inflation see Tire Pressure on
page 10-46.
(6) Tire Size
:A combination of
letters and numbers define a
tire's width, height, aspect ratio,
construction type, and service
description. The letter T as the
first character in the tire size
means the tire is for temporary
use only.
(7) TPC Spec (Tire
Performance Criteria
Specification)
:Original
equipment tires designed to
GM's specific tire performance
criteria have a TPC specification
code molded onto the sidewall.
GM's TPC specifications meet or
exceed all federal safety
guidelines.
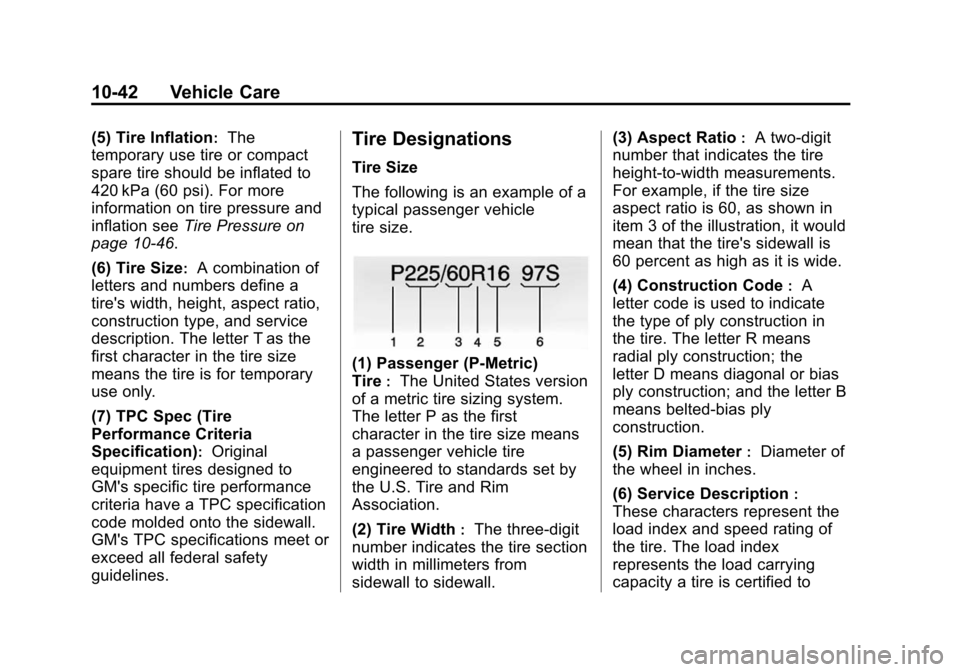
Tire Designations
Tire Size
The following is an example of a
typical passenger vehicle
tire size.
(1) Passenger (P-Metric)
Tire
:The United States version
of a metric tire sizing system.
The letter P as the first
character in the tire size means
a passenger vehicle tire
engineered to standards set by
the U.S. Tire and Rim
Association.
(2) Tire Width
:The three-digit
number indicates the tire section
width in millimeters from
sidewall to sidewall. (3) Aspect Ratio
:A two-digit
number that indicates the tire
height-to-width measurements.
For example, if the tire size
aspect ratio is 60, as shown in
item 3 of the illustration, it would
mean that the tire's sidewall is
60 percent as high as it is wide.
(4) Construction Code
:A
letter code is used to indicate
the type of ply construction in
the tire. The letter R means
radial ply construction; the
letter D means diagonal or bias
ply construction; and the letter B
means belted-bias ply
construction.
(5) Rim Diameter
:Diameter of
the wheel in inches.
(6) Service Description
:
These characters represent the
load index and speed rating of
the tire. The load index
represents the load carrying
capacity a tire is certified to
Page 298 of 390
Black plate (50,1)Chevrolet Equinox Owner Manual (GMNA-Localizing-U.S./Canada-
6081479) - 2014 - crc2 - 10/23/13
10-50 Vehicle Care
.Replacement tires or wheels do
not match the original equipment
tires or wheels. Tires and wheels
other than those recommended
could prevent the TPMS from
functioning properly. SeeBuying
New Tires on page 10-53.
.Operating electronic devices or
being near facilities using radio
wave frequencies similar to the
TPMS could cause the TPMS
sensors to malfunction.
If the TPMS is not functioning
properly, it cannot detect or signal a
low tire condition. See your dealer
for service if the TPMS malfunction
light and DIC message comes on
and stays on.
TPMS Sensor Matching
Process
Each TPMS sensor has a unique
identification code. The identification
code needs to be matched to a new
tire/wheel position after rotating the
tires or replacing one or more of the
TPMS sensors. The TPMS sensor
matching process should also be performed after replacing a spare
tire with a road tire containing the
TPMS sensor. The malfunction light
and the DIC message should go off
at the next ignition cycle. The
sensors are matched to the tire/
wheel positions, using a TPMS
relearn tool, in the following order:
driver side front tire, passenger side
front tire, passenger side rear tire,
and driver side rear. See your
dealer for service or to purchase a
relearn tool.
There are two minutes to match the
first tire/wheel position, and
five minutes overall to match all four
tire/wheel positions. If it takes
longer, the matching process stops
and must be restarted.
The TPMS sensor matching
process is:
1. Set the parking brake.
2. Turn the ignition to ON/RUN with
the engine off. 3. Use the MENU button to select
the Vehicle Information Menu in
the Driver Information Center
(DIC). Use the arrow keys to
scroll to the Tire Pressure
screen.
4. Press the SET/CLR button to begin the sensor matching
process.
A message requesting
acceptance of the process
should display.
5. Press the SET/CLR button again to confirm the selection.
The horn sounds twice to signal
the receiver is in relearn mode
and the TIRE LEARNING
ACTIVE message displays on
the DIC screen.
6. Start with the driver side front tire.
7. Place the relearn tool against the tire sidewall, near the valve
stem. Then press the button to
activate the TPMS sensor.
A horn chirp confirms that the
Page 307 of 390
Black plate (59,1)Chevrolet Equinox Owner Manual (GMNA-Localizing-U.S./Canada-
6081479) - 2014 - crc2 - 10/23/13
Vehicle Care 10-59
A rear blowout, particularly on a
curve, acts much like a skid and
may require the same correction as
used in a skid. Stop pressing the
accelerator pedal and steer to
straighten the vehicle. It may be
very bumpy and noisy. Gently brake
to a stop, well off the road,
if possible.
{Warning
Driving on a flat tire will cause
permanent damage to the tire.
Re-inflating a tire after it has been
driven on while severely
underinflated or flat may cause a
blowout and a serious crash.
Never attempt to re-inflate a tire
that has been driven on while
severely underinflated or flat.
Have your dealer or an authorized
tire service center repair or
replace the flat tire as soon as
possible.
{Warning
Lifting a vehicle and getting under
it to do maintenance or repairs is
dangerous without the
appropriate safety equipment and
training. If a jack is provided with
the vehicle, it is designed only for
changing a flat tire. If it is used for
anything else, you or others could
be badly injured or killed if the
vehicle slips off the jack. If a jack
is provided with the vehicle, only
use it for changing a flat tire.
If a tire goes flat, avoid further tire
and wheel damage by driving slowly
to a level place, well off the road,
if possible. Turn on the hazard
warning flashers. See Hazard
Warning Flashers on page 6-3.
{Warning
Changing a tire can be
dangerous. The vehicle can slip
off the jack and roll over or fall
causing injury or death. Find a
level place to change the tire. To
help prevent the vehicle from
moving:
1. Set the parking brake firmly.
2. Put an automatic transmission in P (Park) or a
manual transmission in
1 (First) or R (Reverse).
3. Turn off the engine and do not restart while the vehicle
is raised.
4. Do not allow passengers to remain in the vehicle.
5. Place wheel blocks on both sides of the tire at the
opposite corner of the tire
being changed.