2014 CHEVROLET CRUZE seat adjustment
[x] Cancel search: seat adjustmentPage 7 of 420
Black plate (1,1)Chevrolet Cruze Owner Manual (GMNA-Localizing-U.S./Canada-6007168) -
2014 - 2nd Edition - 7/15/13
In Brief 1-1
In Brief
Instrument Panel
Instrument Panel Overview . . . . 1-2
Initial Drive Information
Initial Drive Information . . . . . . . . 1-4
Remote Keyless Entry (RKE)System . . . . . . . . . . . . . . . . . . . . . . 1-4
Remote Vehicle Start . . . . . . . . . 1-5
Door Locks . . . . . . . . . . . . . . . . . . . 1-5
Windows . . . . . . . . . . . . . . . . . . . . . . 1-7
Seat Adjustment . . . . . . . . . . . . . . 1-7
Heated Seats . . . . . . . . . . . . . . . . . 1-9
Head Restraint Adjustment . . . . 1-9
Safety Belts . . . . . . . . . . . . . . . . . . 1-10
Passenger Sensing System . . . . . . . . . . . . . . . . . . . . . 1-10
Mirror Adjustment . . . . . . . . . . . . 1-10
Steering Wheel Adjustment . . . . . . . . . . . . . . . . . 1-11
Interior Lighting . . . . . . . . . . . . . . 1-12
Exterior Lighting . . . . . . . . . . . . . 1-12
Windshield Wiper/Washer . . . . 1-13
Climate Controls . . . . . . . . . . . . . 1-13
Transmission . . . . . . . . . . . . . . . . 1-15
Vehicle Features
Radio(s) . . . . . . . . . . . . . . . . . . . . . 1-15
Satellite Radio . . . . . . . . . . . . . . . 1-16
Portable Audio Devices . . . . . . 1-16
Bluetooth
®. . . . . . . . . . . . . . . . . . . 1-17
Steering Wheel Controls . . . . . 1-17
Cruise Control . . . . . . . . . . . . . . . 1-18
Navigation System . . . . . . . . . . . 1-18
Driver Information
Center (DIC) . . . . . . . . . . . . . . . 1-18
Ultrasonic Parking Assist . . . . 1-19
Power Outlets . . . . . . . . . . . . . . . 1-19
Performance and Maintenance
Traction Control/Electronic Stability Control . . . . . . . . . . . . 1-19
Tire Pressure Monitor . . . . . . . . 1-20
Engine Oil Life System . . . . . . 1-20
Driving for Better Fuel Economy . . . . . . . . . . . . . . . . . . . 1-21
Diesel Particulate Filter . . . . . . 1-21
Diesel Exhaust Fluid . . . . . . . . . 1-22
Roadside Assistance Program . . . . . . . . . . . . . . . . . . . . 1-23
OnStar
®. . . . . . . . . . . . . . . . . . . . . 1-23
Page 9 of 420

Black plate (3,1)Chevrolet Cruze Owner Manual (GMNA-Localizing-U.S./Canada-6007168) -
2014 - 2nd Edition - 7/15/13
In Brief 1-3
1.Exterior Lamp Controls on
page 6-1.
Front Fog Lamps on page 6-4 (If
Equipped).
Instrument Panel Illumination
Control on page 6-4.
2. Air Vents on page 8-6.
3. Headlamp High/Low-Beam
Changer on page 6-2.
Turn Signal Lever. See Turn and
Lane-Change Signals on
page 6-3.
Driver Information Center (DIC)
Buttons. See Driver Information
Center (DIC) on page 5-23.
4. Instrument Cluster on page 5-8.
5. Driver Information Center (DIC)
on page 5-23.
6. Steering Wheel Controls on
page 5-2.
7. Windshield Wiper/Washer on
page 5-3.
8. Infotainment on page 7-1.
Satellite Radio on page 7-9 (If
Equipped). 9. Infotainment Display Screen.
10.
Instrument Panel Storage on
page 4-1 (If Equipped).
11. Light Sensor. See Automatic
Headlamp System on
page 6-3.
12. Hood Release. See Hood on
page 10-4.
13. Data Link Connector (DLC) (Out of View). See Malfunction
Indicator Lamp on page 5-14.
14. Instrument Panel Fuse Block
on page 10-42.
15. Cruise Control on page 9-43.
16. Steering Wheel Adjustment on
page 5-2.
17. Horn on page 5-3.
18. Ignition Switch or Keyless Ignition Button (If Equipped).
SeeIgnition Positions (Keyless
Access) on page 9-14 or
Ignition Positions (Key Access)
on page 9-16. 19.
Power Door Locks on
page 2-12.
20. Hazard Warning Flashers on
page 6-3.
21. Power Outlets on page 5-6.
22. Parking Brake on page 9-40.
23. Shift Lever. See Automatic
Transmission on page 9-33 or
Manual Transmission on
page 9-37.
24. Traction Control/Electronic
Stability Control on page 9-41.
25. Climate Control Systems on
page 8-1 (If Equipped).
Automatic Climate Control
System on page 8-3 (If
Equipped).
Heated Front Seats on
page 3-5 (If Equipped).
26. Passenger Airbag Status
Indicator on page 5-13.
Page 13 of 420
Black plate (7,1)Chevrolet Cruze Owner Manual (GMNA-Localizing-U.S./Canada-6007168) -
2014 - 2nd Edition - 7/15/13
In Brief 1-7
If a rear door handle is pulled the
same time the safety lock is
deactivated, that door will remain
locked and the indicator light may
flash. Release the handle, then
press the safety lock twice to
deactivate the safety locks.
SeeSafety Locks on page 2-13.
Windows
{Warning
Children could be seriously
injured or killed if caught in the
path of a closing window. Never
leave keys in a vehicle with
children. When there are children
in the rear seat, use the window
lockout button to prevent
operation of the windows. See
Keys on page 2-1.
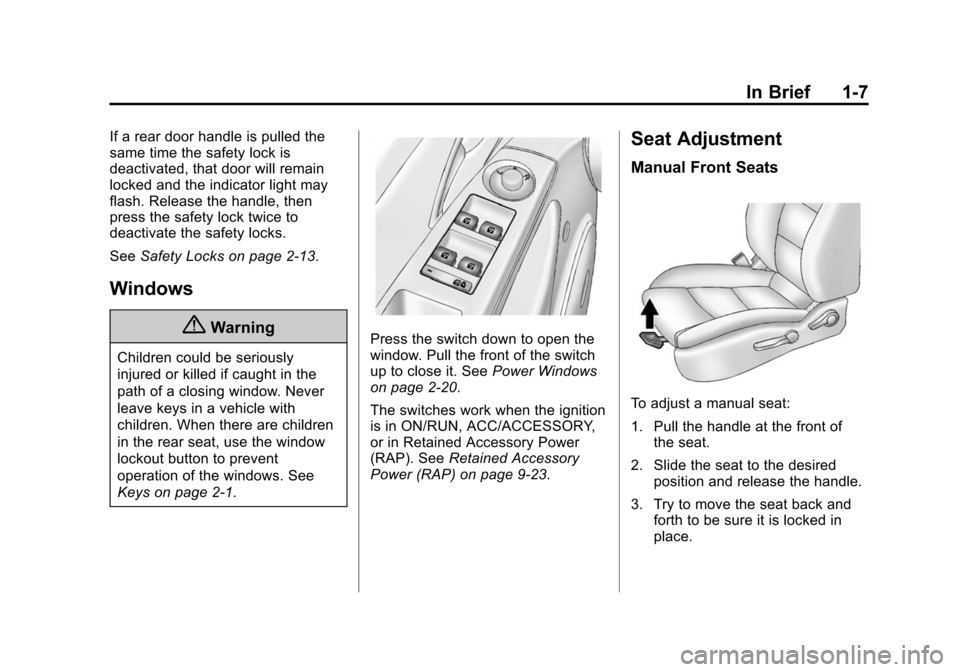
Press the switch down to open the
window. Pull the front of the switch
up to close it. See Power Windows
on page 2-20.
The switches work when the ignition
is in ON/RUN, ACC/ACCESSORY,
or in Retained Accessory Power
(RAP). See Retained Accessory
Power (RAP) on page 9-23.
Seat Adjustment
Manual Front Seats
To adjust a manual seat:
1. Pull the handle at the front of the seat.
2. Slide the seat to the desired position and release the handle.
3. Try to move the seat back and forth to be sure it is locked in
place.
Page 14 of 420
Black plate (8,1)Chevrolet Cruze Owner Manual (GMNA-Localizing-U.S./Canada-6007168) -
2014 - 2nd Edition - 7/15/13
1-8 In Brief
Seat Height Adjuster
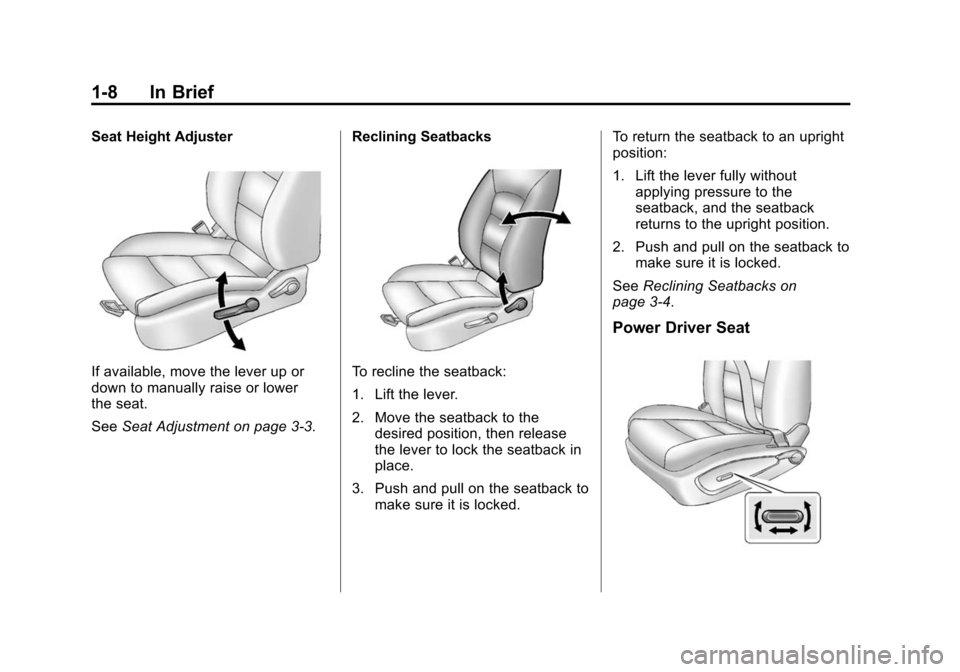
If available, move the lever up or
down to manually raise or lower
the seat.
SeeSeat Adjustment on page 3-3. Reclining SeatbacksTo recline the seatback:
1. Lift the lever.
2. Move the seatback to the
desired position, then release
the lever to lock the seatback in
place.
3. Push and pull on the seatback to make sure it is locked. To return the seatback to an upright
position:
1. Lift the lever fully without
applying pressure to the
seatback, and the seatback
returns to the upright position.
2. Push and pull on the seatback to make sure it is locked.
See Reclining Seatbacks on
page 3-4.
Power Driver Seat
Page 15 of 420
Black plate (9,1)Chevrolet Cruze Owner Manual (GMNA-Localizing-U.S./Canada-6007168) -
2014 - 2nd Edition - 7/15/13
In Brief 1-9
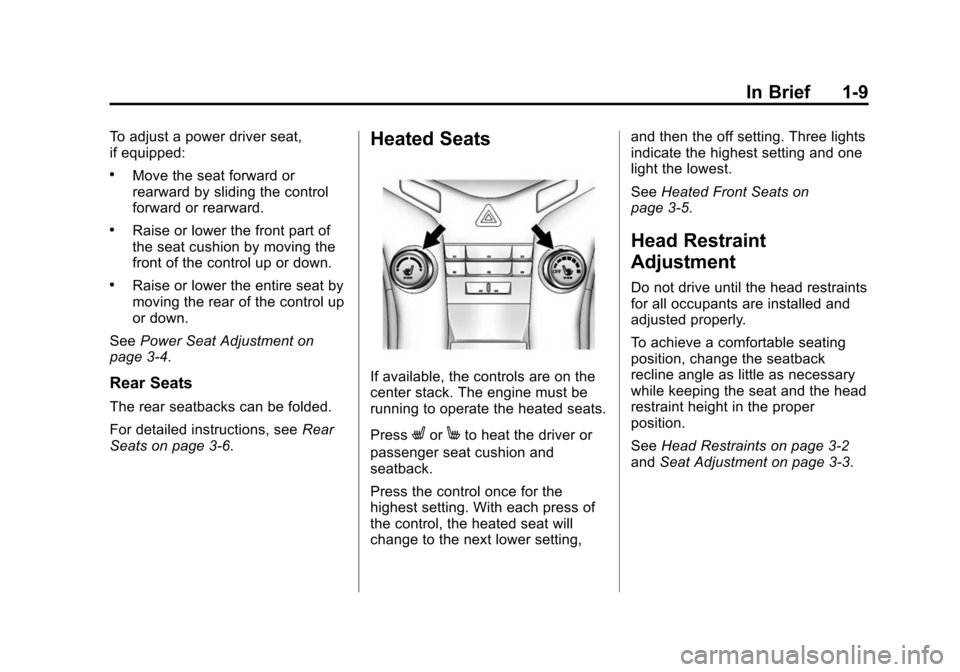
To adjust a power driver seat,
if equipped:
.Move the seat forward or
rearward by sliding the control
forward or rearward.
.Raise or lower the front part of
the seat cushion by moving the
front of the control up or down.
.Raise or lower the entire seat by
moving the rear of the control up
or down.
See Power Seat Adjustment on
page 3-4.
Rear Seats
The rear seatbacks can be folded.
For detailed instructions, see Rear
Seats on page 3-6.
Heated Seats
If available, the controls are on the
center stack. The engine must be
running to operate the heated seats.
Press
LorMto heat the driver or
passenger seat cushion and
seatback.
Press the control once for the
highest setting. With each press of
the control, the heated seat will
change to the next lower setting, and then the off setting. Three lights
indicate the highest setting and one
light the lowest.
See
Heated Front Seats on
page 3-5.
Head Restraint
Adjustment
Do not drive until the head restraints
for all occupants are installed and
adjusted properly.
To achieve a comfortable seating
position, change the seatback
recline angle as little as necessary
while keeping the seat and the head
restraint height in the proper
position.
See Head Restraints on page 3-2
and Seat Adjustment on page 3-3.
Page 48 of 420
Black plate (18,1)Chevrolet Cruze Owner Manual (GMNA-Localizing-U.S./Canada-6007168) -
2014 - 2nd Edition - 7/15/13
2-18 Keys, Doors, and Windows
Do not leave the key or device that
disarms or deactivates the
theft-deterrent system in the vehicle.Exterior Mirrors
Convex Mirrors
{Warning
A convex mirror can make things,
like other vehicles, look farther
away than they really are. If you
cut too sharply into the right lane,
you could hit a vehicle on the
right. Check the inside mirror or
glance over your shoulder before
changing lanes.
The passenger side mirror is convex
shaped. A convex mirror's surface is
curved so more can be seen from
the driver seat.
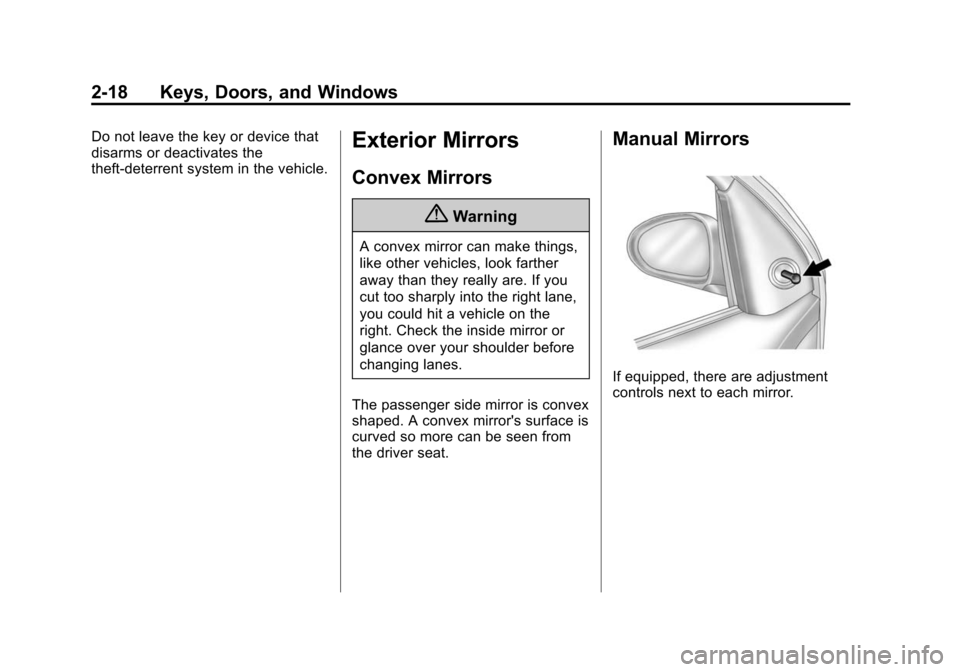
Manual Mirrors
If equipped, there are adjustment
controls next to each mirror.
Page 55 of 420
Black plate (1,1)Chevrolet Cruze Owner Manual (GMNA-Localizing-U.S./Canada-6007168) -
2014 - 2nd Edition - 7/15/13
Seats and Restraints 3-1
Seats and
Restraints
Head Restraints
Head Restraints . . . . . . . . . . . . . . . 3-2
Front Seats
Seat Adjustment . . . . . . . . . . . . . . 3-3
Power Seat Adjustment . . . . . . . 3-4
Reclining Seatbacks . . . . . . . . . . 3-4
Heated Front Seats . . . . . . . . . . . 3-5
Rear Seats
Rear Seats . . . . . . . . . . . . . . . . . . . . 3-6
Safety Belts
Safety Belts . . . . . . . . . . . . . . . . . . . 3-8
How to Wear Safety BeltsProperly . . . . . . . . . . . . . . . . . . . . . 3-9
Lap-Shoulder Belt . . . . . . . . . . . 3-10
Safety Belt Use During Pregnancy . . . . . . . . . . . . . . . . . . 3-14 Safety Belt Extender . . . . . . . . . 3-15
Safety System Check . . . . . . . . 3-15
Safety Belt Care . . . . . . . . . . . . . 3-15
Replacing Safety Belt System
Parts after a Crash . . . . . . . . . 3-15
Airbag System
Airbag System . . . . . . . . . . . . . . . 3-16
Where Are the Airbags? . . . . . 3-18
When Should an Airbag
Inflate? . . . . . . . . . . . . . . . . . . . . . 3-20
What Makes an Airbag Inflate? . . . . . . . . . . . . . . . . . . . . . 3-21
How Does an Airbag Restrain? . . . . . . . . . . . . . . . . . . . 3-21
What Will You See after an Airbag Inflates? . . . . . . . . . . . . 3-22
Passenger Sensing System . . . . . . . . . . . . . . . . . . . . . 3-23
Servicing the Airbag-Equipped Vehicle . . . . . . . . . . . . . . . . . . . . . 3-27 Adding Equipment to the
Airbag-Equipped Vehicle . . . 3-28
Airbag System Check . . . . . . . . 3-29
Replacing Airbag System Parts after a Crash . . . . . . . . . 3-29
Child Restraints
Older Children . . . . . . . . . . . . . . . 3-30
Infants and Young
Children . . . . . . . . . . . . . . . . . . . . 3-32
Child Restraint Systems . . . . . 3-34
Where to Put the Restraint . . . 3-36
Lower Anchors and Tethers for Children (LATCH
System) . . . . . . . . . . . . . . . . . . . . 3-37
Replacing LATCH System Parts After a Crash . . . . . . . . . 3-43
Securing Child Restraints (Front Passenger Seat) . . . . 3-44
Securing Child Restraints (Rear Seat) . . . . . . . . . . . . . . . . . 3-47
Page 57 of 420
Black plate (3,1)Chevrolet Cruze Owner Manual (GMNA-Localizing-U.S./Canada-6007168) -
2014 - 2nd Edition - 7/15/13
Seats and Restraints 3-3
The front seat outboard head
restraints are not designed to be
removed.
If you are installing a child restraint
in the rear seat, see“Securing a
Child Restraint Designed for the
LATCH System” underLower
Anchors and Tethers for Children
(LATCH System) on page 3-37.Front Seats
Seat Adjustment
{Warning
You can lose control of the
vehicle if you try to adjust a driver
seat while the vehicle is moving.
Adjust the driver seat only when
the vehicle is not moving.
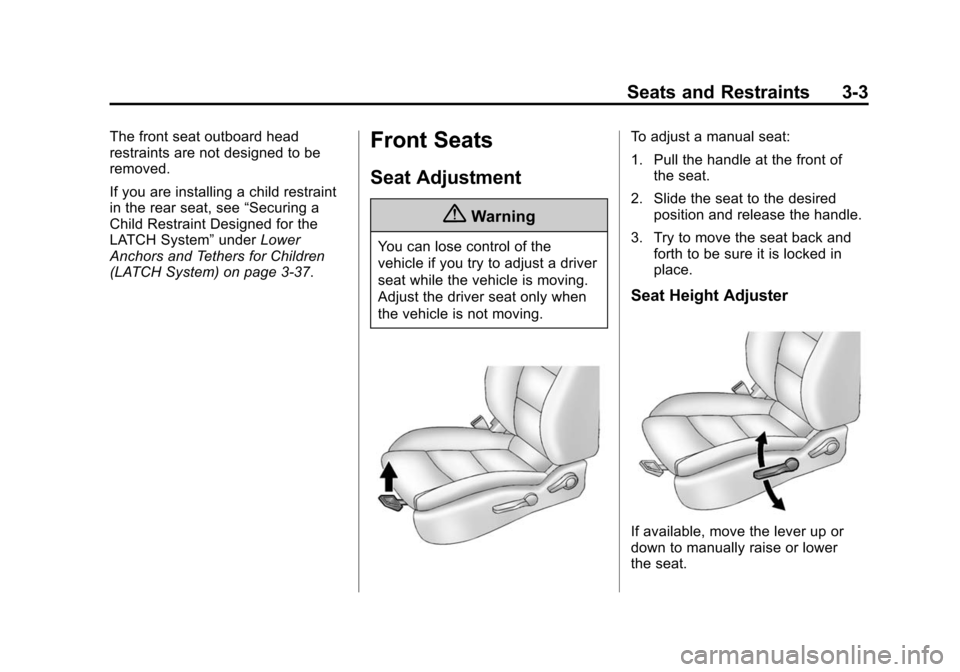
To adjust a manual seat:
1. Pull the handle at the front of the seat.
2. Slide the seat to the desired position and release the handle.
3. Try to move the seat back and forth to be sure it is locked in
place.
Seat Height Adjuster
If available, move the lever up or
down to manually raise or lower
the seat.