2014 CHEVROLET CAPTIVA SPORT four wheel drive
[x] Cancel search: four wheel drivePage 217 of 382

Black plate (25,1)Chevrolet Captiva Sport Owner Manual (GMNA-Localizing-U.S./Mexico-
6014141) - 2014 - crc - 8/13/13
Driving and Operating 9-25
Drive Systems
All-Wheel Drive
Vehicles with this feature always
send engine power to all four
wheels. It is fully automatic, and
adjusts itself as needed for road
conditions.
When using a compact spare tire on
an AWD vehicle, the system
automatically detects the compact
spare and disables AWD. To restore
AWD operation and prevent
excessive wear on the system,
replace the compact spare with a
full-size tire as soon as possible.
SeeCompact Spare Tire on
page 10-65.
Brakes
Antilock Brake
System (ABS)
This vehicle has ABS, an advanced
electronic braking system that helps
prevent a braking skid.
When the vehicle begins to drive
away, ABS checks itself.
A momentary motor or clicking noise
might be heard while this test is
going on, and it might even be
noticed that the brake pedal moves
a little. This is normal.
If there is a problem with ABS, this
warning light stays on. See Antilock
Brake System (ABS) Warning Light
on page 5-18. If driving safely on a wet road and it
becomes necessary to slam on the
brakes and continue braking to
avoid a sudden obstacle, a
computer senses that the wheels
are slowing down. If one of the
wheels is about to stop rolling, the
computer will separately work the
brakes at each wheel.
ABS can change the brake pressure
to each wheel, as required, faster
than any driver could. This can help
you steer around the obstacle while
braking hard.
As the brakes are applied, the
computer keeps receiving updates
on wheel speed and controls
braking pressure accordingly.
Remember: ABS does not change
the time needed to get a foot up to
the brake pedal or always decrease
stopping distance. If you get too
close to the vehicle in front of you,
there will not be enough time to
apply the brakes if that vehicle
Page 289 of 382

Black plate (49,1)Chevrolet Captiva Sport Owner Manual (GMNA-Localizing-U.S./Mexico-
6014141) - 2014 - crc - 8/13/13
Vehicle Care 10-49
malfunction light should go off
once the TPMS sensor matching
process is performed
successfully. See“TPMS Sensor
Matching Process” later in this
section.
.One or more TPMS sensors are
missing or damaged. The
malfunction light should go off
when the TPMS sensors are
installed and the sensor
matching process is performed
successfully. See your dealer for
service.
.Replacement tires or wheels do
not match the original equipment
tires or wheels. Tires and wheels
other than those recommended
could prevent the TPMS from
functioning properly. See Buying
New Tires on page 10-52.
.Operating electronic devices or
being near facilities using radio
wave frequencies similar to the
TPMS could cause the TPMS
sensors to malfunction.
TPMS Sensor Matching
Process
Each TPMS sensor has a unique
identification code. The identification
code needs to be matched to a new
tire/wheel position after rotating the
vehicle’s tires or replacing one or
more of the TPMS sensors. Also,
the TPMS sensor matching process
should be performed after replacing
a spare tire with a road tire
containing the TPMS sensor. The
malfunction light should go off at the
next ignition cycle. The sensors are
matched to the tire/wheel positions,
using a TPMS relearn tool, in the
following order: driver side front tire,
passenger side front tire, passenger
side rear tire, and driver side rear.
See your dealer for service or to
purchase a relearn tool.
There are two minutes to match the
first tire/wheel position, and
five minutes overall to match all four
tire/wheel positions. If it takes
longer, the matching process stops
and must be restarted. The TPMS matching process is:
1. Set the parking brake.
2. Turn the ignition to ON/RUN with
the engine off.
3. Press and hold the RKE transmitter's
QandKbuttons at
the same time, for about
three seconds. The horn will
sound twice to indicate the
receiver is ready for the sensor
matching process to begin.
4. Start with the driver side front tire. The driver side turn signal
lamp comes on.
5. Place the relearn tool against the tire sidewall, near the valve
stem. Then press the button to
activate the TPMS sensor.
A horn chirp confirms that the
sensor identification code has
been matched to this tire and
wheel position.
6. Proceed to the passenger side front tire. The passenger side
front turn signal lamp comes on.
Repeat the procedure in Step 5.
Page 290 of 382

Black plate (50,1)Chevrolet Captiva Sport Owner Manual (GMNA-Localizing-U.S./Mexico-
6014141) - 2014 - crc - 8/13/13
10-50 Vehicle Care
7. Proceed to the passenger siderear tire. The passenger side
rear turn signal lamp comes on.
Repeat the procedure in Step 5.
8. Proceed to the driver side rear tire. The driver side rear turn
signal lamp comes on. Repeat
the procedure in Step 5. The
horn sounds two times to
indicate the sensor identification
code has been matched to the
driver side rear tire, and the
TPMS sensor matching process
is no longer active.
9. Turn the ignition to LOCK/OFF.
10. Set all four tires to the recommended air pressure
level as indicated on the Tire
and Loading Information label.
Tire Inspection
We recommend that the tires,
including the spare tire, if the
vehicle has one, be inspected
for signs of wear or damage at
least once a month. Replace the tire if:
.The indicators at three or
more places around the tire
can be seen.
.There is cord or fabric
showing through the tire's
rubber.
.The tread or sidewall is
cracked, cut, or snagged
deep enough to show cord or
fabric.
.The tire has a bump, bulge,
or split.
.The tire has a puncture, cut,
or other damage that cannot
be repaired well because of
the size or location of the
damage.
Tire Rotation
Tires should be rotated every
12 000 km (7,500 mi). See
Maintenance Schedule on
page 11-2.
Tires are rotated to achieve a
uniform wear for all tires. The
first rotation is the most
important.
Anytime unusual wear is
noticed, rotate the tires as soon
as possible, check for proper tire
inflation pressure, and check for
damaged tires or wheels. If the
unusual wear continues after the
rotation, check the wheel
alignment. See
When It Is Time
for New Tires on page 10-51
and Wheel Replacement on
page 10-56.
Page 311 of 382

Black plate (71,1)Chevrolet Captiva Sport Owner Manual (GMNA-Localizing-U.S./Mexico-
6014141) - 2014 - crc - 8/13/13
Vehicle Care 10-71
To tow the vehicle behind another
vehicle for recreational purposes,
such as behind a motor home, see
“Recreational Vehicle Towing”
following.
Recreational Vehicle
Towing
Recreational vehicle towing means
towing the vehicle behind another
vehicle, such as behind a motor
home. The two most common types
of recreational vehicle towing are
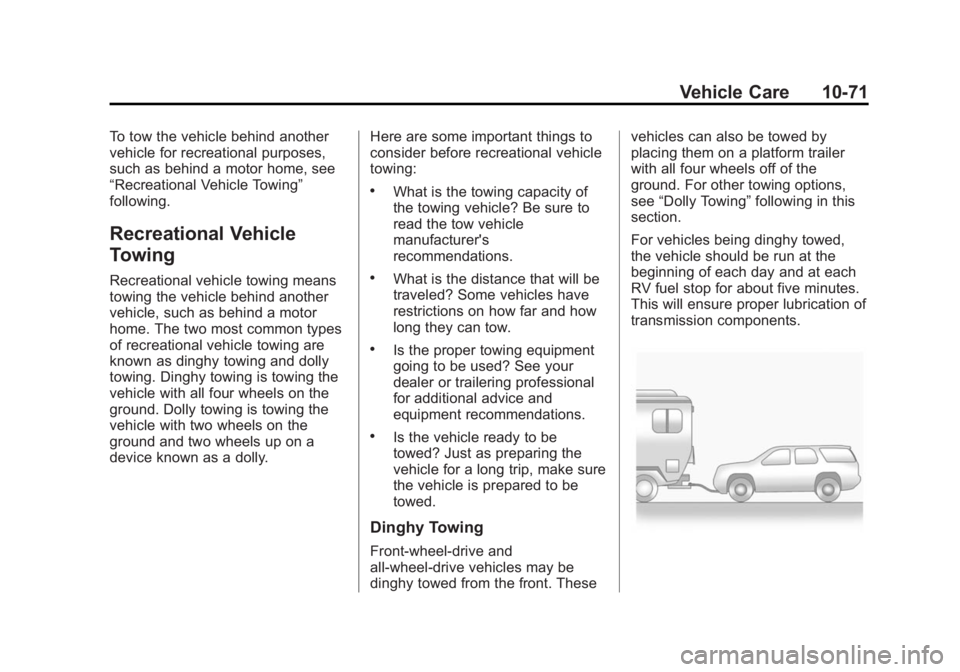
known as dinghy towing and dolly
towing. Dinghy towing is towing the
vehicle with all four wheels on the
ground. Dolly towing is towing the
vehicle with two wheels on the
ground and two wheels up on a
device known as a dolly.Here are some important things to
consider before recreational vehicle
towing:
.What is the towing capacity of
the towing vehicle? Be sure to
read the tow vehicle
manufacturer's
recommendations.
.What is the distance that will be
traveled? Some vehicles have
restrictions on how far and how
long they can tow.
.Is the proper towing equipment
going to be used? See your
dealer or trailering professional
for additional advice and
equipment recommendations.
.Is the vehicle ready to be
towed? Just as preparing the
vehicle for a long trip, make sure
the vehicle is prepared to be
towed.
Dinghy Towing
Front-wheel-drive and
all-wheel-drive vehicles may be
dinghy towed from the front. Thesevehicles can also be towed by
placing them on a platform trailer
with all four wheels off of the
ground. For other towing options,
see
“Dolly Towing” following in this
section.
For vehicles being dinghy towed,
the vehicle should be run at the
beginning of each day and at each
RV fuel stop for about five minutes.
This will ensure proper lubrication of
transmission components.
Page 312 of 382

Black plate (72,1)Chevrolet Captiva Sport Owner Manual (GMNA-Localizing-U.S./Mexico-
6014141) - 2014 - crc - 8/13/13
10-72 Vehicle Care
To tow the vehicle from the front
with all four wheels on the ground:
1. Position the vehicle that will betowed and secure it to the
towing vehicle.
2. Turn the ignition key to ACC/ ACCESSORY.
3. Shift the transmission to N (Neutral).
4. Turn fog lamps and all accessories off.
5. To prevent the battery from draining while the vehicle is
being towed, remove the 2 amp
PWR/MODING fuse from the
instrument panel fuse block and
store it in a safe location. See
Instrument Panel Fuse Block on
page 10-34.
{Caution
If the vehicle is towed without
performing each of the steps
listed under “Dinghy Towing,” the
(Continued)
Caution (Continued)
automatic transmission could be
damaged. Be sure to follow all
steps of the dinghy towing
procedure prior to and after
towing the vehicle.
{Caution
If 105 km/h (65 mph) is exceeded
while towing the vehicle, it could
be damaged. Never exceed
105 km/h (65 mph) while towing
the vehicle.
Once the destination has been
reached:
1. Set the parking brake.
2. Shift the transmission to P (Park).
3. Reinstall the 2 amp PWR/ MODING fuse to the instrument
panel fuse block. 4. Turn the ignition key to LOCK/
OFF and remove the key from
the ignition.
{Caution
Do not tow a vehicle with the front
drive wheels on the ground if one
of the front tires is a compact
spare tire. Towing with two
different tire sizes on the front of
the vehicle can cause severe
damage to the transmission.
Dolly Towing (All-Wheel-Drive
Vehicles)
All-wheel-drive vehicles should not
be towed with two wheels on the
ground. To properly tow these
vehicles, they should be placed on
a platform trailer with all four wheels
off of the ground or dinghy towed
from the front. See “Dinghy Towing”
earlier in this section.