2014 CADILLAC XTS steering
[x] Cancel search: steeringPage 2 of 20

2
Electric Parking Brake
Switch
Head-Up Display
Controls♦
Turn Signal Lever/Exterior
Lamps Control
Instrument Cluster/Driver Information
Center
Power Rake/Telescope Steering Wheel Control
Cruise Control/Phone
Buttons
Windshield Wipers
Lever
Audio Steering Wheel Controls/
5-way Controller
Heated/Ventilated Seat Buttons♦
Storage Compartment with USB port (touch chrome bar)
Instrument Panel Storage
Power Mirrors Control
Review this guide for an overview of some important features in your Cadillac XTS. Some optional equipment (denoted by ♦) described in this guide may not be included in your vehicle. More detailed information can be found in your Owner Manual.
Instrument Panel
CUE Touch
Screen
Engine Start/Stop Button
Climate Controls
Hazard Warning Flashers/Traction Control and StabiliTrak/Lane Departure
Warning♦ Buttons
Glove Box/Parking Assist
Buttons
Audio System
Controls
Page 3 of 20

3
Instrument Cluster
Uplevel Cluster Configurations♦
1. Use the 5-way controller on the steering wheel to find the Settings page in one of the display zones on the cluster.
2. Press SEL (Select) to enter the Settings menu.
3. Scroll down to highlight Display Layout; press SEL.
4. Scroll up or down to highlight one of four
reconfigurable
displays; press SEL.
5. Press to exit the menu.
See Instruments and Controls in your Owner Manual.
Cluster Display Zones
Use the 5-way controller on the right side of the steering wheel to navigate and select between the available display zones in each
cluster configuration.
Balanced configuration shown
Page 4 of 20

Driver Information Center
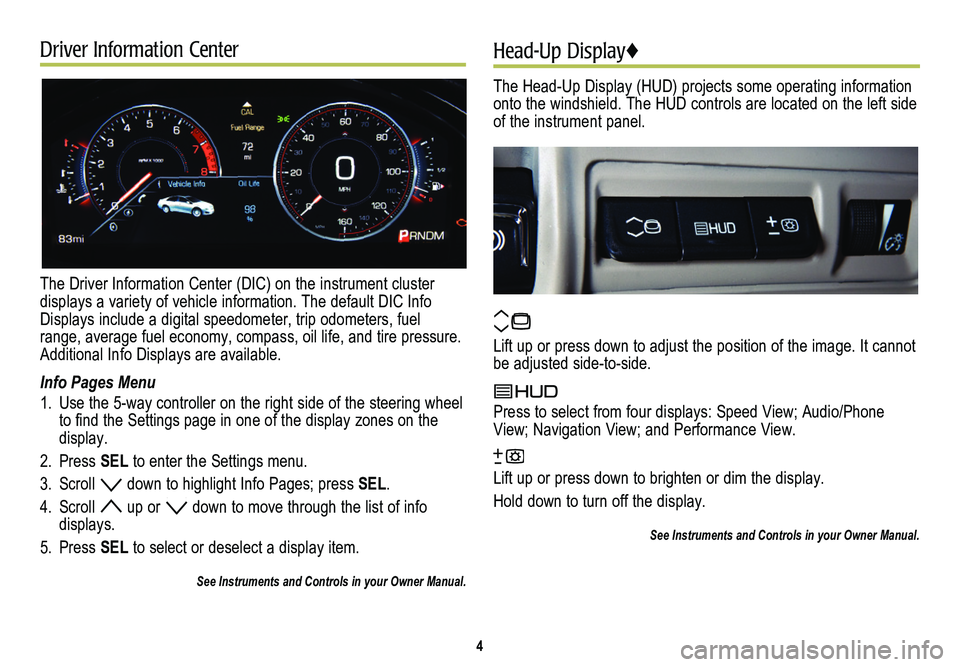
The Driver Information Center (DIC) on the instrument cluster displays a variety of vehicle information. The default DIC Info Displays include a digital speedometer, trip odometers, fuel range, average fuel economy, compass, oil life, and tire pressure. Additional Info Displays are available.
Info Pages Menu
1. Use the 5-way controller on the right side of the steering wheel to find the Settings page in one of the display zones on the display.
2. Press SEL to enter the Settings menu.
3. Scroll down to highlight Info Pages; press SEL.
4. Scroll up or down to move through the list of info displays.
5. Press SEL to select or deselect a display item.
See Instruments and Controls in your Owner Manual.
Head-Up Display♦
The Head-Up Display (HUD) projects some operating information onto the windshield. The HUD controls are located on the left side of the instrument panel.
Lift up or press down to adjust the position of the image. It cannot be adjusted side-to-side.
Press to select from four displays: Speed View; Audio/Phone View; Navigation View; and Performance View.
Lift up or press down to brighten or dim the display.
Hold down to turn off the display.
See Instruments and Controls in your Owner Manual.
4
Page 5 of 20

Voice Recognition
Push to Talk
Press to interact with the OnStar, Bluetooth or CUE system.
End Call/Mute
Press to end/reject a call or mute the audio system.
See Instruments and Controls in your Owner Manual.
5-Way Controller
Moves left/right, up/down, and in.
Left/Right
Press to navigate to the left or right cluster display or to toggle to the next or previous menu option.
Up/Down
Press the control bar up or down to scroll through a menu.
SEL Select
Press to select a highlighted menu item.
Audio Controls
+ – Volume
Press + or – to increase or decrease the volume.
Next/Previous
Press or to select the next or previous favorite radio
station, track or file.
See Instruments and Controls in your Owner Manual.
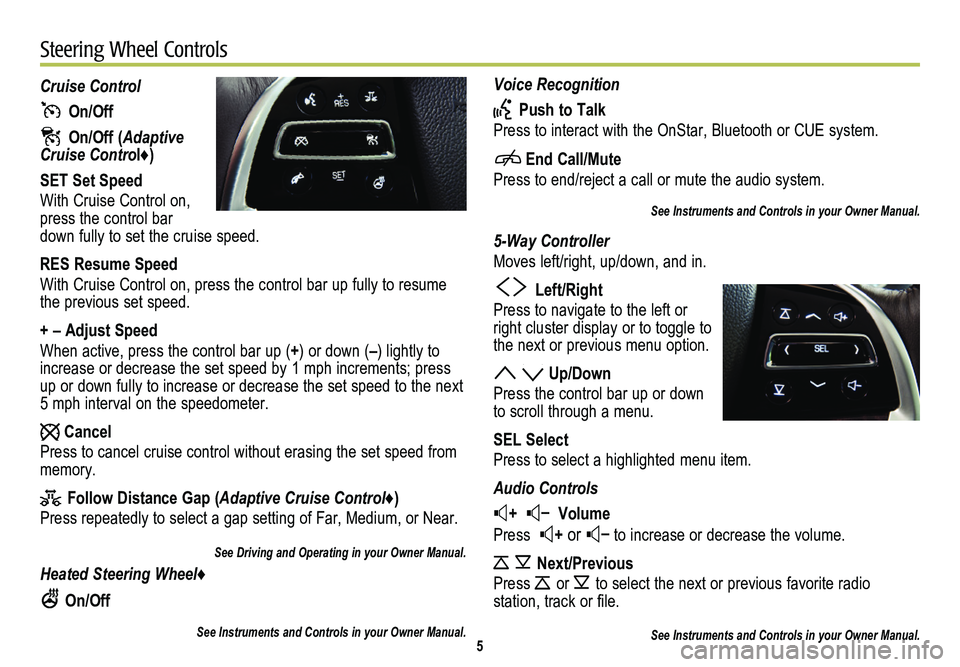
Cruise Control
On/Off
On/Off (Adaptive Cruise Control♦)
SET Set Speed
With Cruise Control on, press the control bar down fully to set the cruise speed.
RES Resume Speed
With Cruise Control on, press the control bar up fully to resume the previous set speed.
+ – Adjust Speed
When active, press the control bar up (+) or down (–) lightly to increase or decrease the set speed by 1 mph increments; press up or down fully to increase or decrease the set speed to the next 5 mph interval on the speedometer.
Cancel
Press to cancel cruise control without erasing the set speed from memory.
Follow Distance Gap (Adaptive Cruise Control♦)
Press repeatedly to select a gap setting of Far, Medium, or Near.
See Driving and Operating in your Owner Manual.
Heated Steering Wheel♦
On/Off
See Instruments and Controls in your Owner Manual.5
Steering Wheel Controls
Page 10 of 20

10
Voice RecognitionBluetooth® System
Control the music source and navigation destination, and make phone calls hands-free, using the enhanced voice recognition system.
1. Press the Push to Talk button on the steering wheel.
2. The radio will say “Please say a command,” followed by a beep.
3. After the beep, say what you want it to do.
• Hands-free calling:
Example command: “Call Amanda” or “Dial 555-1212”
• Connected music device search:
Example command: “Play artist Van Halen”
Example command: “Play song ‘Dance the Night Away’”
• Radio control:
Example command: “Tune FM 104.3” or “Tune XM Classic Vinyl”
Example command: “Tune Pandora” (Pandora app required)
• Navigation:
Example command: “Destination address”
Example command: “Destination point of interest”
• Help:
– Say “Help” for voice recognition assistance.
– To start speaking immediately without waiting for the beep, press thePush to Talk button twice.
See your CUE System Owner Manual.
Before using a Bluetooth-enabled device in the vehicle, it must be paired with the in-vehicle Bluetooth system. Not all devices will support all functions. For more information, visit www.gmtotalconnect.com.
Pair a Phone using Voice Recognition
1. Press the Push to Talk button.
2. After the beep, say “Pair.” The system will search for your phone. A code appears on the display.
3. Start the pairing process on the phone. Locate Cadillac CUE on the phone.
4. Enter the four-digit code that appears on the touch screen or confirm a six-digit code on the phone.
5. If your phone prompts you to accept the connection or phone book download, click “yes” and always allow.
Device List
Up to 10 devices may be paired with the in-vehicle Bluetooth
system. To switch devices using voice recognition:
1. Press the Push to Talk button.
2. Say “Device list” or “Select device.”
3. Select from the list of paired phones/devices.
See your CUE System Owner Manual.
Page 15 of 20

The driver assistance systems are based on a “control and alert” strategy that helps identify potential collision situations and inter-venes when a collision threat appears more imminent, employing layers of visual, audible and tactile (vibration) alerts, depending on\
the alert feature.
Driver Awareness Package
Lane Departure Warning – When crossing a detected lane
marking without using a turn signal, flashes a visual alert on the instrument panel, and pulses the left or right side of the driver’s seat or beeps sound.
Press the Lane Departure Warning button on the center of the instrument panel to turn the system on or off.
Forward Collision Alert – When approaching a vehicle directly ahead too quickly, flashes a visual alert on the windshield, and pulses the driver’s seat or beeps sound.
Press the Collision Alert button on the left side of the steering wheel to set the alert timing.
Side Blind Zone Alert – When a vehicle is detected in a side blind spot area, displays a warning symbol on the side mirror.
To turn off the system, see the Settings > Vehicle > Collision/Detection Systems menu. The system turns on automatically every time the vehicle is started.
15
Driver Awareness♦ and Driver Assist♦ Features♦
Rear Cross Traffic Alert – Warns of traffic coming in either direction by displaying a visual alert on the touch screen from the Rear Vision Camera, and pulses the left or right side of the driver’s seat or beeps sound.
Press the Parking Assist button on the center of the instrument panel to turn system on or off, or see the Collision/Detection Systems menu under Vehicle Settings. The system turns on automatically every time the vehicle is started.
Driver Assist Package
Front and Rear Automatic Braking – Automatically applies the brakes if it detects that the vehicle is backing up or approaching an object too fast to avoid a collision.
Press the Parking Assist button on the center of the instrument panel to turn Rear Automatic Braking on or off.
Adaptive Cruise Control – If a vehicle is detected ahead, the vehicle will accelerate or moderately brake to maintain the select-ed following gap. If driver action is required, the system pulses the driver’s seat or beeps sound.
Press the Follow Distance Gap button on the left side of the steering wheel to set a following gap.
Automatic Collision Preparation – Prepares the brakes or applies the brakes if an emergency collision appears immediate or the driver does not react to previous alerts.
See Driving and Operating in your Owner Manual.
Page 17 of 20

17
Memory Seats♦UltraView Sunroof♦
Set Memory Positions
1. Adjust the driver’s seat, power outside mirrors and the power steering column to the desired positions.
2. Press and hold the SET button and button 1 on the driver’s door until a beep sounds.
3. Repeat the steps using button 2 for a second driver.
Set Exit Position
1. Adjust the driver’s seat, power outside mirrors and the power steering column to the desired positions.
2. Press and hold the SET button and the button on the driver’s door until a beep sounds.
Recall Positions
• Press button 1, 2 or . If the vehicle is moving, press and hold the button until the seat and mirrors reach the set position.
Passenger Memory Seat♦
The front passenger memory seat operates the same as the driver's seat. Use the memory seat controls, located on the
passenger's door, to save and recall settings for the front passenger's seat.
See Seats and Restraints in your Owner Manual.
Open/Close the Sunshade
• Press the rear or front of the Sunshade switch to express-open or express-close the sunshade.
Open/Close the Sunroof
• Press and hold the front of the Sunroof switch to vent the sunroof.
• Press the rear of the switch to express-open the sunroof to the comfort position.
• Press the front of the switch to express-close the sunroof.
See Keys, Doors and Windows in your Owner Manual.
Page 18 of 20

The traction control
system limits wheelspin and the StabiliTrak
stability control system assists with directional control of the vehicle in difficult driving conditions. Both systems turn on automatically every time the vehicle is started.
Turning Off Traction Control
Turn off traction control if the vehicle is stuck and rocking the vehicle is required.
• Press the Traction Control/StabiliTrak button on the
center of the instrument panel. The Traction Control Off light on the instrument cluster will illuminate.
• Press the button again to turn on traction control.
See Driving and Operating in your Owner Manual.
18
Automatic Transmission Tap ShiftStabiliTrak®/Traction Control Systems
The 6-speed automatic transmission has a Tap Shift mode that allows you to shift gears similar to a manual transmission.
Using Tap Shift
1. Move the shift lever to the M (Manual Mode) position.
2. Using the buttons on the back of the steering wheel, tap the left (–) button to downshift and the right (+) button to upshift. The current gear selection will be shown in the DIC and HUD♦.
If current vehicle speed is too high or too low for the requested gear, the shift will not occur. When coming to a stop, the transmis-sion will automatically shift to 1st gear.
Note: Changing to the Manual Mode also changes the Magnetic Ride Control settings.
See Driving and Operating in your Owner Manual.