2014 BMW X5 XDRIVE35D wheel
[x] Cancel search: wheelPage 220 of 265

Maximum speed of winter tiresIf the maximum speed of the vehicle is higher
than the permissible speed for the winter tires,
then display a corresponding sign in the field
of vision. You can obtain this sign from the tire
specialist or from your service center.
Maximum speed for winter tires
Do not exceed the maximum speed for
the respective winter tires; otherwise, tire dam‐
age and accidents can occur.◀
Run-flat tires If you are already using run-flat tires, for your
own safety you should replace them only with
the same kind. No spare tire is available in the
case of a flat tire. Your service center will be
glad to advise you.
Rotating wheels between axles The manufacturer of your vehicle advisesagainst switching wheels between the front
and rear axles.
This can impair the handling characteristics.
Storage
Store wheels and tires in a cool, dry place with
as little exposure to light as possible.
Always protect tires against all contact with oil,
grease and fuels.
Do not exceed the maximum tire inflation pres‐
sure indicated on the side wall of the tire.Run-flat tires
Label
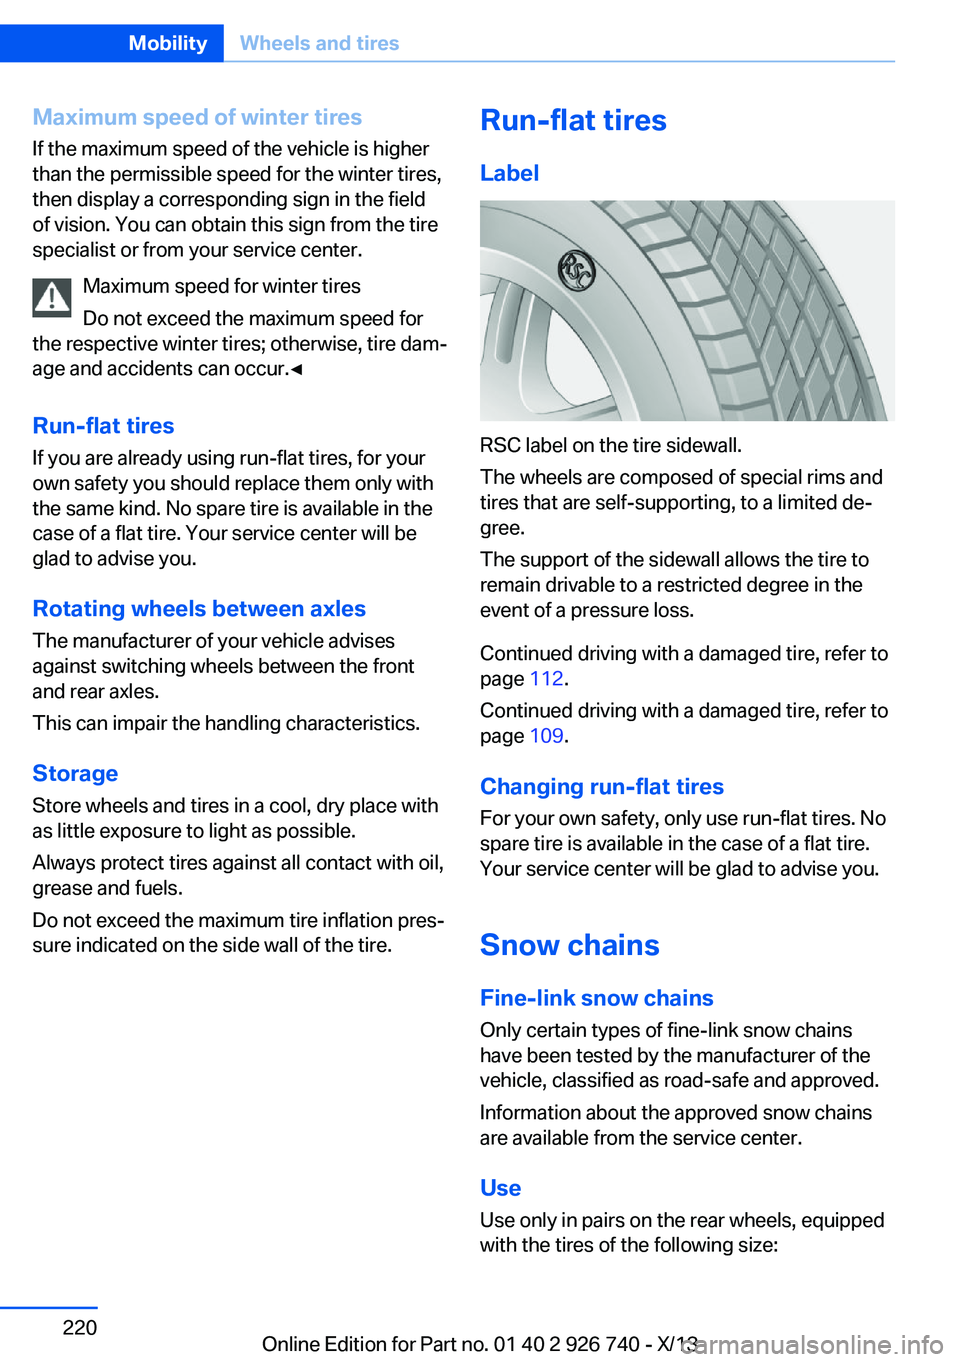
RSC label on the tire sidewall.
The wheels are composed of special rims and
tires that are self-supporting, to a limited de‐
gree.
The support of the sidewall allows the tire to
remain drivable to a restricted degree in the
event of a pressure loss.
Continued driving with a damaged tire, refer to
page 112.
Continued driving with a damaged tire, refer to
page 109.
Changing run-flat tires
For your own safety, only use run-flat tires. No
spare tire is available in the case of a flat tire.
Your service center will be glad to advise you.
Snow chains
Fine-link snow chains
Only certain types of fine-link snow chains
have been tested by the manufacturer of the
vehicle, classified as road-safe and approved.
Information about the approved snow chains
are available from the service center.
Use
Use only in pairs on the rear wheels, equipped
with the tires of the following size:
Seite 220MobilityWheels and tires220
Online Edition for Part no. 01 40 2 926 740 - X/13
Page 221 of 265

▷255/55 R 18.▷255/50 R 19.
Follow the chain manufacturer's instructions.
Make sure that the snow chains are always
sufficiently tight. Retighten as needed accord‐
ing to the chain manufacturer's instructions.
Do not initialize the Flat Tire Monitor after
mounting snow chains, as doing so may result
in incorrect readings.
Do not initialize the Tire Pressure Monitor after
mounting snow chains, as doing so may result
in incorrect readings.
When driving with snow chains, briefly activate
Dynamic Traction Control if necessary.
Maximum speed with snow chains Do not exceed a speed of 30 mph/50 km/h
when using snow chains.
Seite 221Wheels and tiresMobility221
Online Edition for Part no. 01 40 2 926 740 - X/13
Page 235 of 265

The bulb is attached to the cap.3.Turn the bulb clockwise to remove it.4.Insert the new bulb and attach the cover in
the reverse order.
Lateral turn signals
Follow the general instructions on Lamps and
bulbs, refer to page 232.
These lamps are made using LED technology.
Contact your service center in the event of a
malfunction.
Tail lamps, bulb replacement
LED tail lamps
These tail lamps are made using LED technol‐
ogy. Contact your service center in the event
of a malfunction.
Changing wheels
Hints
With three rows of seats, the vehicle equip‐
ment does not include a spare tire.
When using run-flat tires or tire sealants, a tire
does not need to be changed immediately in
the event of pressure loss due to a flat tire.
The tools for changing wheels are available as
accessories from your service center.
Jacking points for the vehicle jack
The jacking points for the vehicle jack are lo‐
cated at the positions shown.
Compact wheel
Hints Safety measures in case of a breakdownor a wheel change
▷Park the vehicle as far away as possible
from passing traffic and on solid ground.
Switch on the hazard warning system.▷Set the parking brake and engage trans‐
mission position P.▷Have all vehicle occupants get out of the
vehicle and ensure that they remain out‐
side the immediate area in a safe place,
such as behind a guardrail.▷If necessary, set up a warning triangle or
portable hazard warning lamp at an appro‐
priate distance. Comply with all safety
guidelines and regulations.▷Perform wheel change only on a flat, solid
and slip-resistant surface. On soft or slip‐
pery ground, e.g., snow, ice, tiles, etc., the
vehicle or vehicle jack can slip away to the
side.▷Do not place wood blocks or similar items
under the vehicle jack; otherwise, it cannot
reach its carrying capacity because of the
restricted height.▷If the vehicle is raised, do not lie under the
vehicle and do not start the engine; other‐
wise, a mortal hazard exists.◀Seite 235Replacing componentsMobility235
Online Edition for Part no. 01 40 2 926 740 - X/13
Page 236 of 265

Use the vehicle jack only for changing
wheels
Use the vehicle jack only for changing wheels
Do not attempt to use it to jack up a different
type of vehicle or loads of any kind; otherwise,
this could cause material damage and personal
injury.◀
At a glance
The compact wheel and the tools are located
in the cargo area under the cargo floor cover.1Compact wheel2Vehicle jack3Vehicle jack crank4Wheel lug wrench
Remove compact wheel
1.Remove tool holder.2.Unscrew the wing nut 1.3.Remove the washer 2 to the side.4.Remove compact wheel.Prepare wheel change1.Follow the Safety instructions, refer to
page 235.2.Loosen the wheel lug bolts a half turn.
Jacking up the vehicle
1.Place the vehicle jack at the jacking point
closest to the wheel such that the vehicle
jack foot is vertically beneath the vehicle
jacking point with the entire surface on the
ground.2.Insert the vehicle jack head in the rectan‐
gular recess of the jacking point for crank‐
ing it up.3.Crank it up until the wheel in question lifts
off of the ground.
Wheel mounting
1.Unscrew the wheel lug bolts and remove
the wheel.2.Put the new wheel or compact wheel on
and screw in at least two bolts.
If original BMW light alloy wheels are not
mounted, any accompanying lug bolts also
have to be used.3.Screw in the remaining the lug bolts and
tighten all bolts well in a crosswise pattern.4.Lower the vehicle and remove the vehicle
jack.
After the wheel change
1.Tighten the lug bolts crosswise. The tight‐
ening torque is 101 lb ft/140 Nm.Seite 236MobilityReplacing components236
Online Edition for Part no. 01 40 2 926 740 - X/13
Page 237 of 265

Check for secure seating of the lug
bolts
For safety reasons, have the secure seat‐
ing of the lug bolts checked with a cali‐
brated torque wrench; otherwise, a safety
hazard results from incorrectly tightened
lug bolts.◀2.Stow the defective wheel in the cargo area.
The defective wheel cannot be stored un‐
der the cargo floor cover because of its
size.3.Check tire inflation pressure at the next op‐
portunity and correct as needed.4.Reinitialize the Flat Tire Monitor, refer to
page 111.
Reinitialize the Tire Pressure Monitor, refer
to page 108.5.Replace the damaged tires as soon as pos‐
sible.
Driving with the compact wheel
Watch the speed when driving with the
compact wheel
Drive conservatively and do not exceed a
speed of 50 mph/80 km/h; otherwise, changed
driving characteristics such as reduced lane
stability while braking, extended braking dis‐
tance and changed self-steering properties in
the limit area.◀
Mounting only one compact wheel
Only a single compact wheel may be
mounted. Reinstall wheels and tires of the
original size as quickly as possible; otherwise,
there is a safety risk.◀
Vehicle battery Maintenance
The battery is maintenance-free. The added
amount of acid is sufficient for the service life
of the battery.
Your service center will be glad to advise you
on questions regarding the battery.
Battery replacement Use approved vehicle batteries only
Only use vehicle batteries that have been
approved for your vehicle by the manufacturer;
otherwise, the vehicle could be damaged and
systems or functions may not be fully availa‐
ble.◀
After a battery replacement, have the battery
registered on the vehicle by your service cen‐
ter to ensure that all comfort functions are fully
available and that any Check Control mes‐
sages of these comfort functions are no longer
displayed.
Charging the battery
Note Do not plug chargers into the socket
Do not connect battery chargers to the
factory-installed sockets in the vehicle as this
may damage the battery.◀
General information
Make sure that the battery is always suffi‐
ciently charged to guarantee that the battery
remains usable for its full service life.
The battery may need to be charged in the fol‐
lowing cases:▷When making frequent short-distance
drives.▷If the vehicle is not used for prolonged pe‐
riods, longer than a month.
Starting aid terminals
In the vehicle, only charge the battery via the
starting aid terminals, refer to page 241, in the
engine compartment with the engine off.
Seite 237Replacing componentsMobility237
Online Edition for Part no. 01 40 2 926 740 - X/13
Page 244 of 265

CareVehicle equipmentAll standard, country-specific and optional
equipment that is offered in the model series is
described in this chapter. Therefore, equip‐
ment is also described that is not available in a
vehicle, e. g., because of the selected optional
equipment or country variant. This also applies
for safety-related functions and systems.
Car washes Hints Steam jets or high-pressure washers
When using steam jets or high-pressure
washers, hold them a sufficient distance away and use a maximum temperature of
140 ℉/60 ℃.
If the vehicle has a glass sunroof, ensure that a distance of at least 31.5 inches/80 cm is main‐
tained. Holding them too close or using exces‐
sively high pressures or temperatures can
cause damage or preliminary damage that may
then lead to long-term damage.
Follow the user's manual for the high-pressure
washer.◀
Cleaning sensors/cameras with high-
pressure washers
When using high-pressure washers, do not
spray the exterior sensors and cameras, e.g., Park Distance Control, for extended periods of
time and only from a distance of at least
12 in/30 cm.◀▷Regularly remove foreign items such as
leaves in the area below the windshield
when the hood is raised.▷Wash your vehicle frequently, particularly
in winter.Intense soiling and road salt can damage
the vehicle.
Automatic car washes
Hints
Note the following:
▷Give preference to cloth car washes or
those that use soft brushes in order to
avoid paint damage.▷Make sure that the wheels and tires are not
damaged by the transport mechanisms.▷Fold in the exterior mirrors; otherwise, they
may be damaged, depending on the width
of the vehicle.▷Deactivate, refer to page 76,the rain sensor
to avoid unintentional wiper activation.▷In some cases, an unintentional alarm can
be triggered by the interior motion sensor
of the alarm system. Follow the instruc‐
tions on avoiding an unintentional alarm,
refer to page 46.
Guide rails in car washes
Avoid car washes with guide rails higher
than 4 in/10 cm; otherwise, the vehicle body
could be damaged.◀
Different types of tires Observing vehicle width
Before entering washing systems, make
sure that the vehicle width is not too great for
the car wash; otherwise, there could be dam‐
age to the vehicle and car wash.◀
Before driving into a car wash In order to ensure that the vehicle can roll in a
car wash, take the following steps:
1.Drive into the car wash.Seite 244MobilityCare244
Online Edition for Part no. 01 40 2 926 740 - X/13
Page 246 of 265

To guard against discoloration, such as from
clothing, provide leather care roughly every
two months.
Clean light-colored leather more frequently be‐
cause soiling on such surfaces is substantially
more visible.
Use leather care products; otherwise, dirt and
grease will gradually break down the protective
layer of the leather surface.
Suitable care products are available from the
service center.
Upholstery material care Vacuum regularly with a vacuum cleaner.
If they are very dirty, e.g., beverage stains, use
a soft sponge or microfiber cloth with a suita‐
ble interior cleaner.
Clean the upholstery down to the seams using
large sweeping motions. Avoid rubbing the
material vigorously.
Damage from Velcro® fasteners
Open Velcro® fasteners on pants or
other articles of clothing can damage the seat
covers. Ensure that any Velcro® fasteners are
closed.◀
Caring for special components
Light-alloy wheels When cleaning the vehicle, use only neutral
wheel cleaners having a pH value from 5 to 9.
Do not use abrasive cleaning agents or steam
jets above 140 ℉/60 ℃. Follow the manufac‐
turer's instructions.
Aggressive, acidic or alkaline cleaning agents
can destroy the protective layer of adjacent
components, such as the brake disk.
Chrome surfaces Carefully clean components such as the radia‐
tor grille or door handles with an ample supply of water, possibly with shampoo added, partic‐ularly when they have been exposed to road
salt.
Rubber components Aside from water, treat only with rubber
cleansers.
When cleaning rubber seals, do not use any
silicon-containing car care products in order to
avoid damage or reduced noise damping.
Fine wood parts Clean fine wood facing and fine wood compo‐
nents only with a moist rag. Then dry with a
soft cloth.
Plastic components
These include:▷Imitation leather surfaces.▷Headliner.▷Lamp lenses.▷Instrument cluster cover.▷Matte black spray-coated components.▷Painted parts in the interior.
Clean with a microfiber cloth.
Lightly dampen the cloth with water.
Do not soak the headliner.
Do not use cleansers that contain alcohol
or solvents
Do not use cleansers that contain alcohol or
solvents, such as lacquer thinners, heavy-duty
grease removers, fuel, or such; this could lead
to surface damage.◀
Safety belts
Dirty belt straps impede the reeling action and
thus have a negative impact on safety.
Chemical cleaning
Do not clean chemically; this can destroy
the webbing.◀
Seite 246MobilityCare246
Online Edition for Part no. 01 40 2 926 740 - X/13
Page 250 of 265

Technical dataVehicle equipment
All standard, country-specific and optional
equipment that is offered in the model series is
described in this chapter. Therefore, equip‐
ment is also described that is not available in a
vehicle, e. g., because of the selected optional
equipment or country variant. This also applies
for safety-related functions and systems.Dimensions
BMW X5Width with mirrorsinches/mm86.0/2,184Width without mirrors
Width without mirrors with 20" wheels
inches/mm
inches/mm
76.3/1,938
78.2/1,985
Heightinches/mm69.4/1,762Lengthinches/mm193.2/4,908Wheel baseinches/mm115.5/2,933Smallest turning circle diam.ft/m41.8/12.7
Weights
X5 sDrive35iApproved gross vehicle weight
With the third row of seats
lbs/kg
lbs/kg
6,070/2,753
6,350/2,880
Load
With the third row of seats
lbs/kg
lbs/kg
1,110/503
1,350/612
Approved front axle load
With the third row of seats
lbs/kg
lbs/kg
2,670/1,211
2,680/1,216
Approved rear axle load
With the third row of seats
lbs/kg
lbs/kg
3,540/1,606
3,840/1,742
Approved roof load capacitylbs/kg220/100Cargo area capacitycu ft/l22.94–66.03/650–1,870Seite 250ReferenceTechnical data250
Online Edition for Part no. 01 40 2 926 740 - X/13