2014 BMW X5 XDRIVE 50I interior lights
[x] Cancel search: interior lightsPage 37 of 265

▷Tone: tone settings.▷Automatic climate control: settings.▷Steering wheel position.▷Navigation: map views, route criteria, voice
output on/off.▷Night Vision with pedestrian detection.▷Intelligent Safety: individual settings.▷Park Distance Control PDC: adjusting the
signal tone volume.▷Radio: stored stations, station listened to
last, special settings.▷Rearview camera: selection of functions
and type of display.▷Side View: selection of the display type.▷Language on the Control Display.▷Lane departure warning: last setting, on/
off.▷Active Blind Spot Detection: last setting,
on/off.▷Daytime running lights: current setting.▷Triple turn signal activation.▷Locking the vehicle: after a brief period or
after starting to drive.
Central locking system
The concept The central locking system becomes active
when the driver's door is closed.
The system simultaneously engages and re‐
leases the locks on the following:
▷Doors.▷Tailgate.▷Fuel filler flap.
Operating from the outside
▷Via the remote control.▷Via the door handles.▷Via the button on the tailgate.The following takes place simultaneously
when locking/unlocking the vehicle via the re‐
mote control:▷Depending on how the vehicle is equipped,
the theft protection is activated/deacti‐
vated. Theft protection prevents the doors
from being unlocked using the lock but‐
tons or the door opener.▷The welcome lamps, interior lamps and
courtesy lamps are switched on and off.▷The alarm system, refer to page 45, is
armed or disarmed.
Operating from the inside
▷ Press the button.
The vehicle is unlocked.▷ Press the button.
Vehicle is locked.
If the vehicle has been locked from inside, the
fuel filler flap remains unlocked.
If an accident of a certain severity occurs, the
central locking system unlocks automatically.
The hazard warning system and interior lamps
come on.
Seite 37Opening and closingControls37
Online Edition for Part no. 01 40 2 926 740 - X/13
Page 46 of 265

▷With Comfort Access: If you are carrying
the remote control with you, grasp the
driver side or front passenger side door
handle completely.
Indicator lamp on the interior rearview
mirror
▷The indicator lamp flashes briefly every
2 seconds:
The system is armed.▷The indicator lamp flashes after locking:
The doors, hood or tailgate is not closed
properly, but the rest of the vehicle is se‐
cured.
After 10 seconds, the indicator lamp
flashes continuously. Interior motion sen‐
sor and tilt alarm sensor are not active.▷The indicator lamp goes out after unlock‐
ing:
The vehicle has not been tampered with.▷The indicator lamp flashes after unlocking
until the engine ignition is switched on, but
no longer than approx. 5 minutes:
An alarm has been triggered.
Tilt alarm sensor The tilt of the vehicle is monitored.
The alarm system responds in situations such
as attempts to steal a wheel or when the car is
towed.
Interior motion sensor
The windows and glass sunroof must be
closed for the system to function properly.
Avoiding unintentional alarms
The tilt alarm sensor and interior motion sen‐
sor can be switched off together, such as in
the following situations:▷In automatic car washes.▷In duplex garages.▷During transport on car-carrying trains, at
sea or on a trailer.▷When animals are to remain in the vehicle.
Switching off the tilt alarm sensor and
interior motion sensor
Press the remote control button again
within 10 seconds as soon as the vehicle
is locked.
The indicator lamp lights up for approx. 2 sec‐
onds and then continues to flash.
The tilt alarm sensor and interior motion sen‐
sor are switched off until the vehicle is locked
again.
Power windows
General information Take the remote control with you
Take the remote control with you when
leaving the vehicle so that children, for exam‐
ple, cannot operate the power windows and in‐
jure themselves.◀
Seite 46ControlsOpening and closing46
Online Edition for Part no. 01 40 2 926 740 - X/13
Page 92 of 265

At a glance
Camera
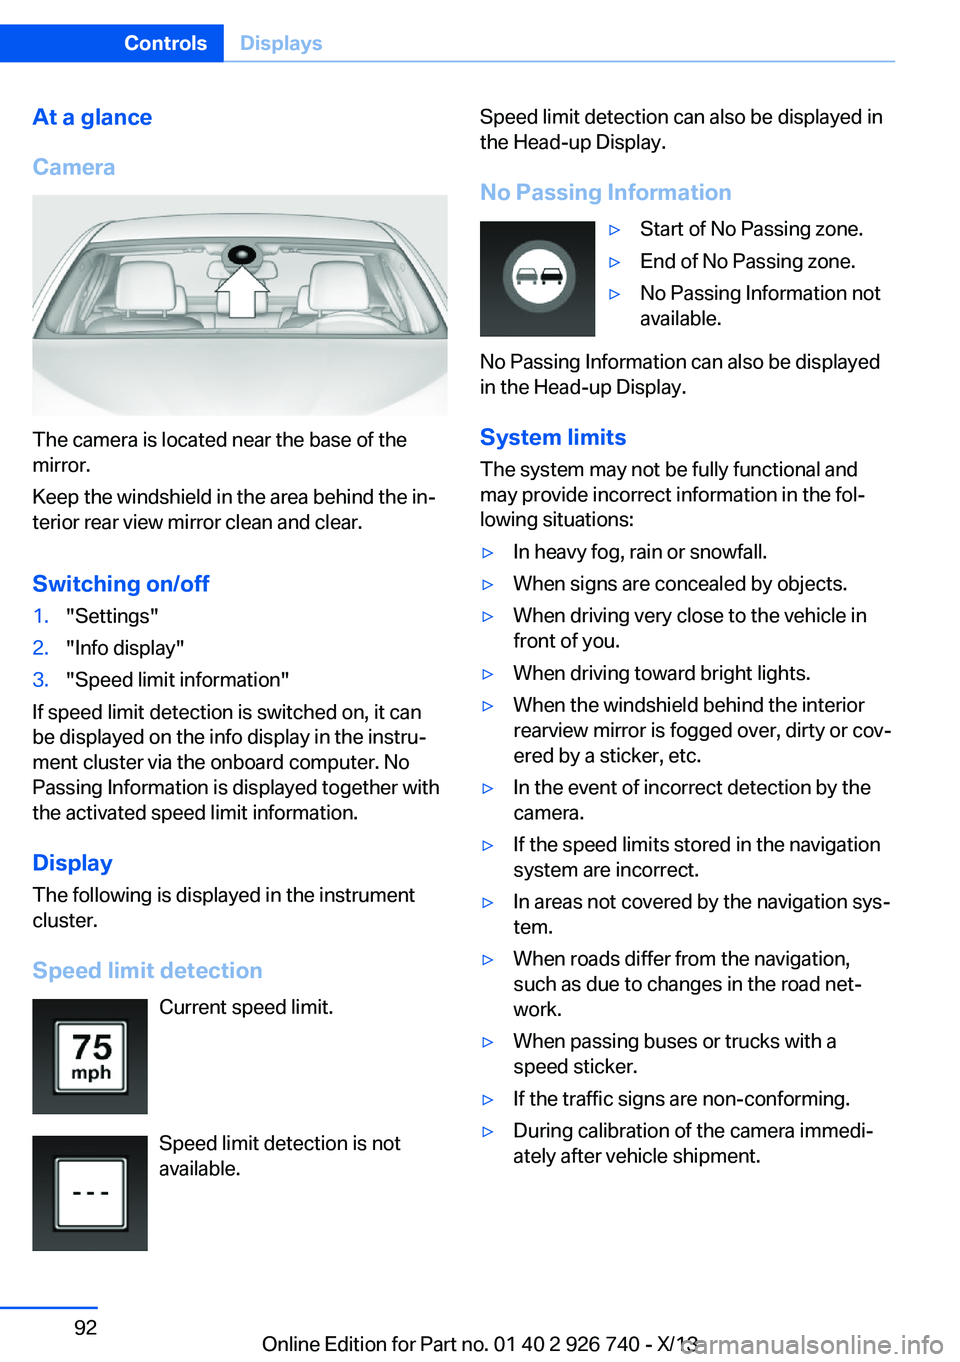
The camera is located near the base of the
mirror.
Keep the windshield in the area behind the in‐
terior rear view mirror clean and clear.
Switching on/off
1."Settings"2."Info display"3."Speed limit information"
If speed limit detection is switched on, it can
be displayed on the info display in the instru‐
ment cluster via the onboard computer. No
Passing Information is displayed together with
the activated speed limit information.
Display The following is displayed in the instrument
cluster.
Speed limit detection Current speed limit.
Speed limit detection is not available.
Speed limit detection can also be displayed in
the Head-up Display.
No Passing Information▷Start of No Passing zone.▷End of No Passing zone.▷No Passing Information not
available.
No Passing Information can also be displayed
in the Head-up Display.
System limits
The system may not be fully functional and
may provide incorrect information in the fol‐ lowing situations:
▷In heavy fog, rain or snowfall.▷When signs are concealed by objects.▷When driving very close to the vehicle in
front of you.▷When driving toward bright lights.▷When the windshield behind the interior
rearview mirror is fogged over, dirty or cov‐
ered by a sticker, etc.▷In the event of incorrect detection by the
camera.▷If the speed limits stored in the navigation
system are incorrect.▷In areas not covered by the navigation sys‐
tem.▷When roads differ from the navigation,
such as due to changes in the road net‐
work.▷When passing buses or trucks with a
speed sticker.▷If the traffic signs are non-conforming.▷During calibration of the camera immedi‐
ately after vehicle shipment.Seite 92ControlsDisplays92
Online Edition for Part no. 01 40 2 926 740 - X/13
Page 99 of 265

LampsVehicle equipment
All standard, country-specific and optional
equipment that is offered in the model series is
described in this chapter. Therefore, equip‐
ment is also described that is not available in a
vehicle, e. g., because of the selected optional
equipment or country variant. This also applies
for safety-related functions and systems.
At a glance1Rear fog lamps2Front fog lamps3Automatic headlamp control, Adaptive
Light Control, High-beam Assistant, Wel‐
come lamps, Daytime running lights4Lamps off, daytime running lights5Parking lamps, daytime running lights6Low beams, welcome lamps, High-beam
Assistant7Instrument lighting
Parking lamps/low beams,
headlamp control
General information Switch position: 0,
,
If the driver door is opened with the ignition
switched off, the exterior lighting is automati‐
cally switched off at these switch settings.
Parking lamps
Switch position
: the vehicle lamps light
up on all sides, e.g., for parking.
Do not use the parking lamps for extended pe‐
riods; otherwise, the vehicle battery may be‐
come discharged and it would then be impos‐
sible to start the engine.
When parking, it is preferable to switch on the
one-sided roadside parking lamps, refer to
page 100.
Low beams Switch position
with the ignition switched
on: the low beams light up.
Welcome lamps When the vehicle is parked, leave the switch in
position
or : parking and interior lamps
come on briefly when the vehicle is unlocked
depending on the ambient light.
Activating/deactivating
1."Settings"2."Lighting"3."Welcome lights"
The setting is stored for the remote control
currently in use.
Headlamp courtesy delay feature
The low beams stay lit for a short while if the
headlamp flasher is switched on after the igni‐
tion is switched off.
Setting the duration
1."Settings"2."Lighting"Seite 99LampsControls99
Online Edition for Part no. 01 40 2 926 740 - X/13
Page 101 of 265

To avoid blinding oncoming traffic, the Adap‐
tive Light Control does not swivel to the driv‐
er's side when the vehicle is at a standstill.
When driving in reverse, only the cornering
lamp is active.
Self-leveling headlamps The self-leveling headlamps compensate for
acceleration and braking operations in order
not to blind the oncoming traffic and to achieve
optimum illumination of the roadway.
Malfunction
A Check Control message is displayed.
Adaptive light control is malfunctioning or has
failed. Have the system checked as soon as
possible.
High-beam Assistant The conceptWhen the low beams are switched on, this sys‐
tem automatically switches the high beams on
and off. The procedure is controlled by a sen‐
sor on the front of the interior rearview mirror.
The assistant ensures that the high beams are
switched on whenever the traffic situation al‐
lows. The driver can intervene at any time and
switch the high beams on and off as usual.
ActivatingThe High-beam Assistant can be activated
when the low beams are switched on.1.Turn the light switch to or .2.Press the button on the turn signal lever,
arrow.
The indicator lamp in the instrument
cluster lights up.
When the low beams are on, the lights are au‐
tomatically brightened or dimmed.
The system responds to light from oncoming
traffic and traffic driving ahead of you, and to
adequate illumination, e.g., in towns and cities.
The blue indicator lamp in the instru‐
ment cluster lights up when the system
switches on the high beams. Depend‐
ing on the version of the system in the vehicle, the high beams may not switch off for oncom‐
ing vehicles, but may only be dimmed in the
areas that blind oncoming traffic. In this case,
the blue indicator light will stay on.
Switching the high beams on and off
manually
▷High beams on, arrow 1.▷High beams off/headlamp flasher, arrow 2.
The High-beam Assistant can be switched off
when manually adjusting the light. To reacti‐
vate the High-beam Assistant, press the but‐
ton on the turn signal lever.
Seite 101LampsControls101
Online Edition for Part no. 01 40 2 926 740 - X/13
Page 102 of 265

System limitsPersonal responsibility
The high-beam assistant cannot serve as
a substitute for the driver's personal judgment
of when to use the high beams. Therefore,
manually switch off the high beams in situa‐
tions where this is required to avoid a safety
risk.◀
The system is not fully functional in situations
such as the following, and driver intervention
may be necessary:▷In very unfavorable weather conditions,
such as fog or heavy precipitation.▷In detecting poorly-lit road users, such as
pedestrians, cyclists, horseback riders and
wagons; when driving close to train or ship
traffic; and at animal crossings.▷In tight curves, on hilltops or in depres‐
sions, in cross traffic or half-obscured on‐
coming traffic on freeways.▷In poorly-lit towns and cities and in the
presence of highly reflective signs.▷At low speeds.▷When the windshield in front of the interior
rearview mirror is fogged over, dirty or cov‐
ered with stickers, etc.
Camera
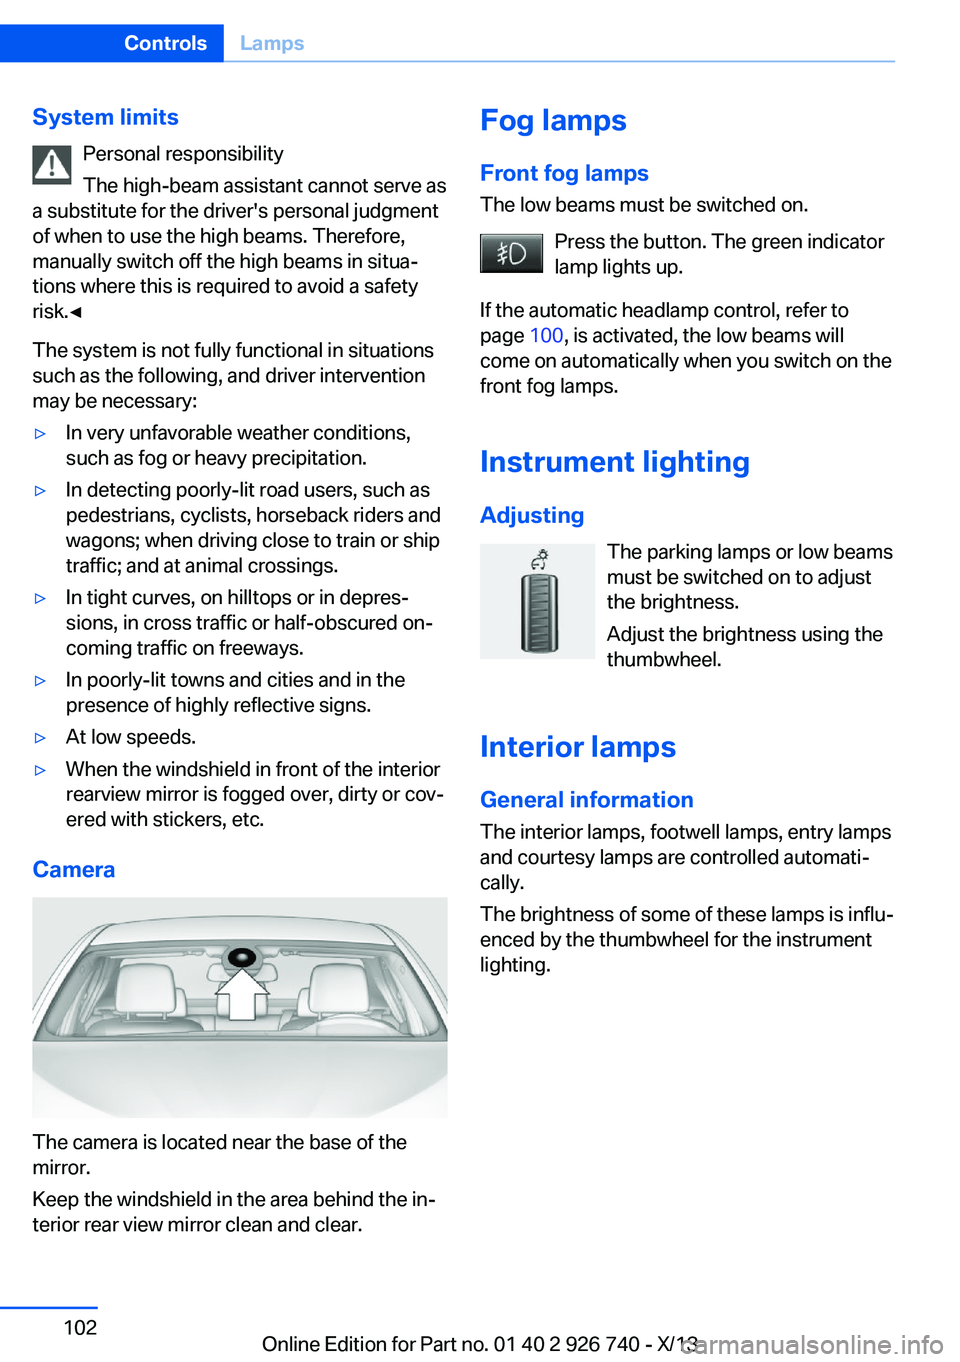
The camera is located near the base of the
mirror.
Keep the windshield in the area behind the in‐
terior rear view mirror clean and clear.
Fog lamps
Front fog lamps
The low beams must be switched on.
Press the button. The green indicator
lamp lights up.
If the automatic headlamp control, refer to
page 100, is activated, the low beams will
come on automatically when you switch on the
front fog lamps.
Instrument lighting
Adjusting The parking lamps or low beams
must be switched on to adjust
the brightness.
Adjust the brightness using the
thumbwheel.
Interior lamps
General information
The interior lamps, footwell lamps, entry lamps
and courtesy lamps are controlled automati‐
cally.
The brightness of some of these lamps is influ‐
enced by the thumbwheel for the instrument
lighting.Seite 102ControlsLamps102
Online Edition for Part no. 01 40 2 926 740 - X/13
Page 103 of 265

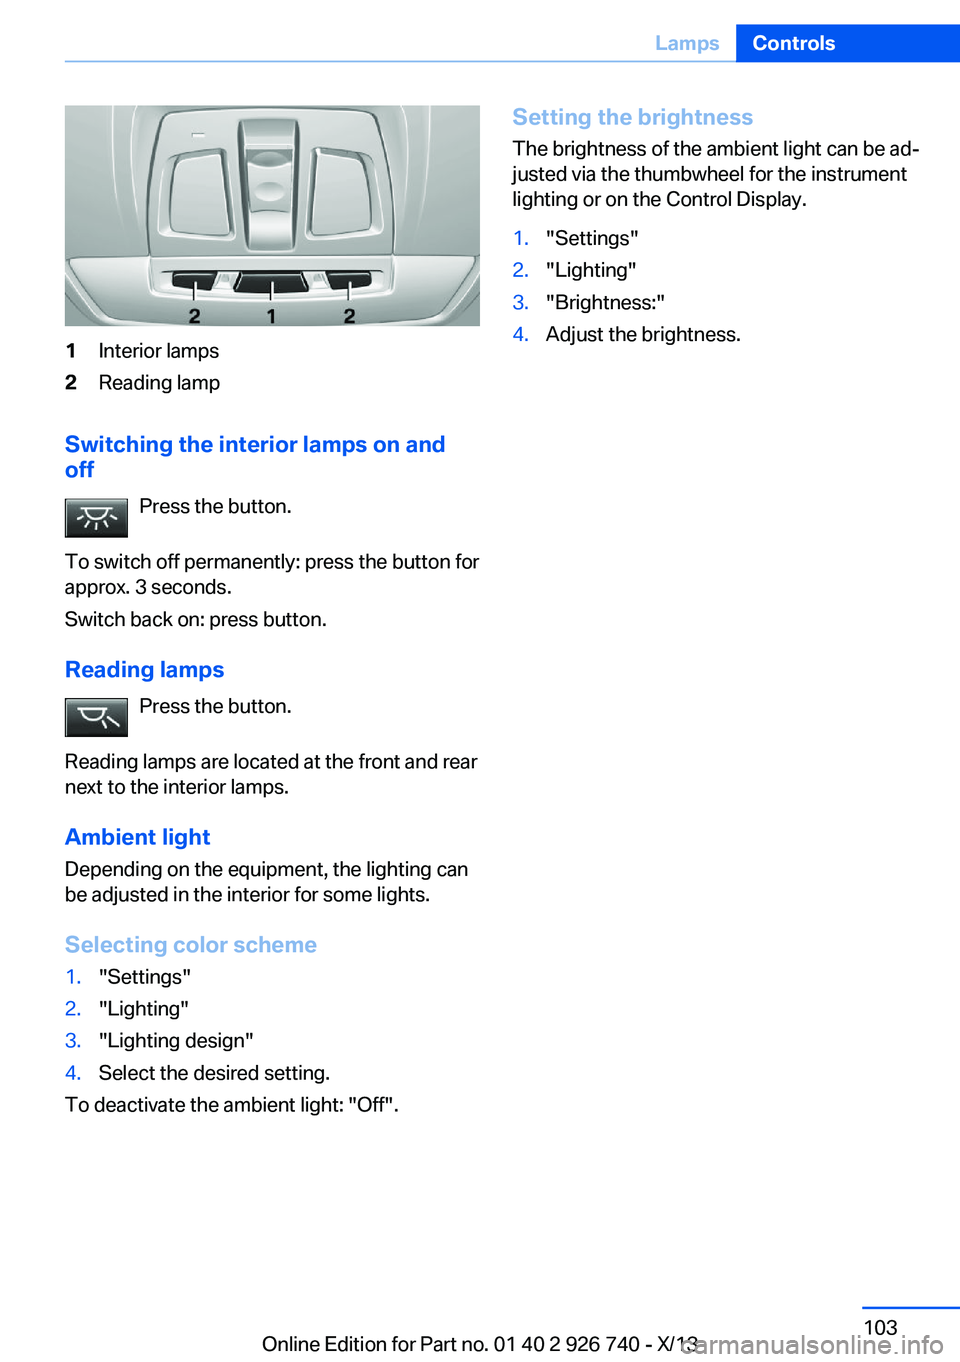
1Interior lamps2Reading lamp
Switching the interior lamps on and
off
Press the button.
To switch off permanently: press the button for
approx. 3 seconds.
Switch back on: press button.
Reading lamps Press the button.
Reading lamps are located at the front and rear
next to the interior lamps.
Ambient light
Depending on the equipment, the lighting can
be adjusted in the interior for some lights.
Selecting color scheme
1."Settings"2."Lighting"3."Lighting design"4.Select the desired setting.
To deactivate the ambient light: "Off".
Setting the brightness
The brightness of the ambient light can be ad‐
justed via the thumbwheel for the instrument
lighting or on the Control Display.1."Settings"2."Lighting"3."Brightness:"4.Adjust the brightness.Seite 103LampsControls103
Online Edition for Part no. 01 40 2 926 740 - X/13
Page 126 of 265

Press the button briefly:▷Intelligent Safety systems are individually
switched off according to individual set‐
ting.▷The LED lights up orange.
Press the button again:
▷All Intelligent Safety systems are switched
on.▷The LED lights up green.
Hold the button down:
▷All Intelligent Safety systems are switched
off.▷The LED goes out.
Display in the instrument cluster
▷Lines: system is activated.▷Arrows: at least one lane marking
was detected and warnings can be
issued.
Issued warning
If you leave the lane and if a lane marking has
been detected, the steering wheel begins vi‐
brating.
If the turn signal is set before changing the
lane, a warning is not issued.
End of warning
The warning ends:
▷Automatically after approx. 3 seconds.▷When returning to your own lane.▷When braking hard.▷When using the turn signal.
System limits
The system may not be fully functional in the
following situations:
▷In heavy fog, rain or snowfall.▷In the event of worn, poorly visible, merg‐
ing, diverging, or multiple lane markings
such as in construction areas.▷When lane markings are covered in snow,
ice, dirt or water.▷In tight curves or on narrow lanes.▷When the lane markings are covered by
objects.▷When driving very close to the vehicle in
front of you.▷When driving toward bright lights.▷When the windshield in front of the interior
rearview mirror is fogged over, dirty or cov‐
ered with stickers, etc.▷During calibration of the camera immedi‐
ately after vehicle shipment.
Active Blind Spot Detection
The concept
Two radar sensors below the rear bumper
monitor the area behind and next to the vehicle
at speeds above approx. 30 mph/50 km/h.
The system indicates whether there are vehi‐
cles in the blind spot, arrow 1, or approaching
from behind on the adjacent lane, arrow 2.
The lamp in the exterior mirror housing lights
up dimly.
Before you change lanes after setting the turn
signal, the system issues a warning in the sit‐
uations described above.
Seite 126ControlsSafety126
Online Edition for Part no. 01 40 2 926 740 - X/13