2014 BMW X5 XDRIVE 50I lock
[x] Cancel search: lockPage 180 of 265

Cargo area
Cargo cover
Hints Hook the cargo cover on both sides
Hook the cargo cover on both sides to
prevent damaging the cover.◀
Do not deposit heavy objects
Do not deposit heavy or hard objects on
the cargo cover. Otherwise, they may pose a risk to occupants, such as during braking and
avoidance maneuvers.◀
Do not let the trunk cover snap back into
place
Do not allow the trunk cover to snap back into
place; this can damage it.◀
Attaching1.Remove cargo cover, arrow 1.2.Hook cargo cover into the brackets on both
sides, arrow 2
Removing
The cover can be removed to load bulky lug‐
gage.
1.Press the button, arrow 1, to unlock the
cover.2.Pull the cover back, arrow 2.
Installing
Slide the cover forward horizontally into the
two side brackets until it audibly latches. The
red warning fields disappear. Tug on the cover
to check if it is properly locked in place.
Enlarging the cargo area
General information
The cargo area can be enlarged by folding
down the rear seat backrest.
The rear seat backrest is divided at a ratio of
40–20–40. The sides and the middle section
can be folded down separately.
Hints Danger of pinching
Before folding down the rear seat back‐
rests, ensure that the area of movement of the backrests is clear. In particular, ensure that no
one is located in or reaches into the area of
movement of the rear seat backrests when the
middle section is folded down. Otherwise, in‐
jury or damage may result.◀
Lock the rear seat backrests in position
Before installation of child restraint sys‐
tems on the rear seat backrest, set a backrest
tilt at which the childseat rests firmly against
the backrest and securely latch all backrests.
Otherwise, the stability of the child seat is lim‐
Seite 180ControlsInterior equipment180
Online Edition for Part no. 01 40 2 926 740 - X/13
Page 181 of 265

ited, and there is an increased risk of injury be‐
cause of unexpected movement of the rear
seat backrest.◀
Ensure that the lock is securely engaged
When folding back the backrest, make
sure that it securely locks in place. When this
happens the red warning field on the seat dis‐
appears. If the backrest is not properly en‐
gaged, transported cargo could enter the pas‐
senger compartment during braking or evasive
maneuvers and endanger the vehicle occu‐
pants.◀
Using the middle safety belt
If the middle safety belt in the rear is
used, the larger section of the backrest must
be locked. Otherwise, the safety belt will not
have a restraining effect.◀
Folding down the sides Move the front seats to an upright posi‐
tion
Before folding down the rear backrests, ensure
that the front seats are moved forward slightly
and are in an upright position. Otherwise, the
head restraint and screen could be damaged.◀
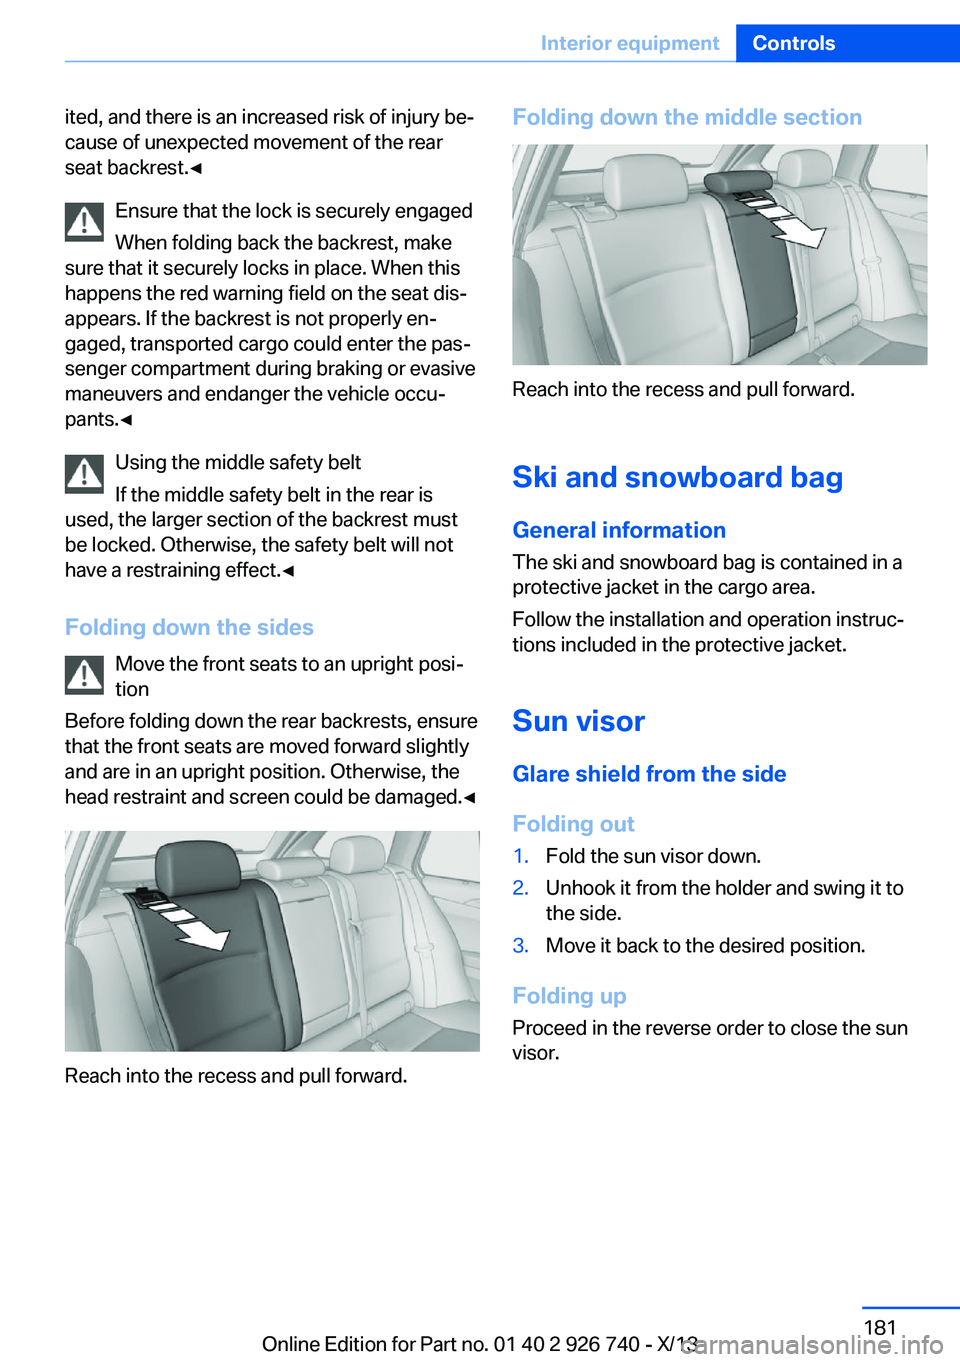
Reach into the recess and pull forward.
Folding down the middle section
Reach into the recess and pull forward.
Ski and snowboard bag General information
The ski and snowboard bag is contained in a
protective jacket in the cargo area.
Follow the installation and operation instruc‐
tions included in the protective jacket.
Sun visorGlare shield from the sideFolding out
1.Fold the sun visor down.2.Unhook it from the holder and swing it to
the side.3.Move it back to the desired position.
Folding up
Proceed in the reverse order to close the sun
visor.
Seite 181Interior equipmentControls181
Online Edition for Part no. 01 40 2 926 740 - X/13
Page 182 of 265

Storage compartmentsVehicle equipmentAll standard, country-specific and optional
equipment that is offered in the model series is
described in this chapter. Therefore, equip‐
ment is also described that is not available in a
vehicle, e. g., because of the selected optional
equipment or country variant. This also applies
for safety-related functions and systems.
Notes No loose objects in the passenger com‐
partment
Do not stow any objects in the passenger
compartment without securing them; other‐
wise, they may present a danger to occupants
for instance during braking and avoidance ma‐
neuvers.◀
Do not place anti-slip mats on the dash‐
board
Do not place anti-slip mats on the dashboard.
The mat materials could damage the dash‐
board.◀
Storage compartments
The following storage compartments are avail‐
able in the vehicle interior:▷Glove compartment on the front passenger
side, refer to page 182.▷Glove compartment on the driver's side,
refer to page 183.▷Compartments in the doors, refer to
page 183.▷Storage compartment on the center arm‐
rest, refer to page 183.▷Center armrest, refer to page 183▷Glasses compartment, refer to page 184.Glove compartment
Front passenger side
Note Close the glove compartment again im‐
mediately
Close the glove compartment immediately af‐
ter use while driving; otherwise, injury may oc‐
cur during accidents.◀
Opening
Pull the handle.
The light in the glove compartment switches
on.
The net in the glove compartment is used to
store small objects.
Closing Fold cover closed.
Locking After the glove compartment is locked, the re‐
mote control can be handed over, such as at a
hotel, without the integrated key.
Seite 182ControlsStorage compartments182
Online Edition for Part no. 01 40 2 926 740 - X/13
Page 204 of 265

RefuelingVehicle equipment
All standard, country-specific and optional
equipment that is offered in the model series is
described in this chapter. Therefore, equip‐
ment is also described that is not available in a
vehicle, e. g., because of the selected optional
equipment or country variant. This also applies
for safety-related functions and systems.
Hints Refuel promptly
Refuel no later than at a range of
30 miles/50 km, or operation of the engine is
not ensured and damage may occur.◀
Diesel engines The filler neck is designed for refueling at die‐
sel fuel pumps.
Fuel cap
Opening1.Briefly press the rear edge of the fuel filler
flap.2.Turn the fuel cap counterclockwise.3.Place the fuel cap in the bracket attached
to the fuel filler flap.
Closing
1.Fit the cap and turn it clockwise until you
clearly hear a click.2.Close the fuel filler flap.
Do not pinch the retaining strap
Do not pinch the retaining strap attached
to the cap; otherwise, the cap cannot be
closed properly and fuel vapors can escape.◀
Manually unlocking fuel filler flap In the event of an electrical malfunction, for ex‐
ample.
Seite 204MobilityRefueling204
Online Edition for Part no. 01 40 2 926 740 - X/13
Page 209 of 265

Suitable Diesel exhaust fluid▷Preferred: BMW Diesel Exhaust Fluid. With
this bottle and its special adapter, Diesel
exhaust fluid can be replenished simply
and safely.
▷Alternative: NOx reduction agent AUS 32
Diesel exhaust fluid can be purchased at your
Service Center.
Refill quantity
When the Reserve display starts, add at least 2
bottles of reducing agent.
This corresponds to approx. 1 gallon.
Tank for reducing agent
The tank for the reducing agent is located in
the engine compartment.
Adding
1.Open the hood, refer to page 222.2.Turn the fuel cap counterclockwise and re‐
move.
3.Place the bottle on it and turn it as far as it
will go, see arrow.
4.Press the bottle down, see arrow.
The vehicle container will be filled.
The container is full when the fill level in
the bottle no longer changes. It is not pos‐
sible to overfill.
5.Pull back the bottle, see arrow, and un‐
screw it.
6.Replace the fuel cap and turn it clockwise.7.Close the hood.
After adding Diesel exhaust fluid
Note
Incorrect fluids
After filling with incorrect fluids, such as
antifreeze for washer water, do not start the
engine, otherwise there is risk of fire.◀
Contact your service center.
Disposing of bottles
You take your empty Diesel exhaust
fluid bottles to your Service Center for
disposal.
Seite 209FuelMobility209
Online Edition for Part no. 01 40 2 926 740 - X/13
Page 223 of 265

Never reach into the engine compart‐
ment
Never reach into the intermediate spaces or
gaps in the engine compartment. Otherwise,
there is risk of injury, e.g., from rotating or hot
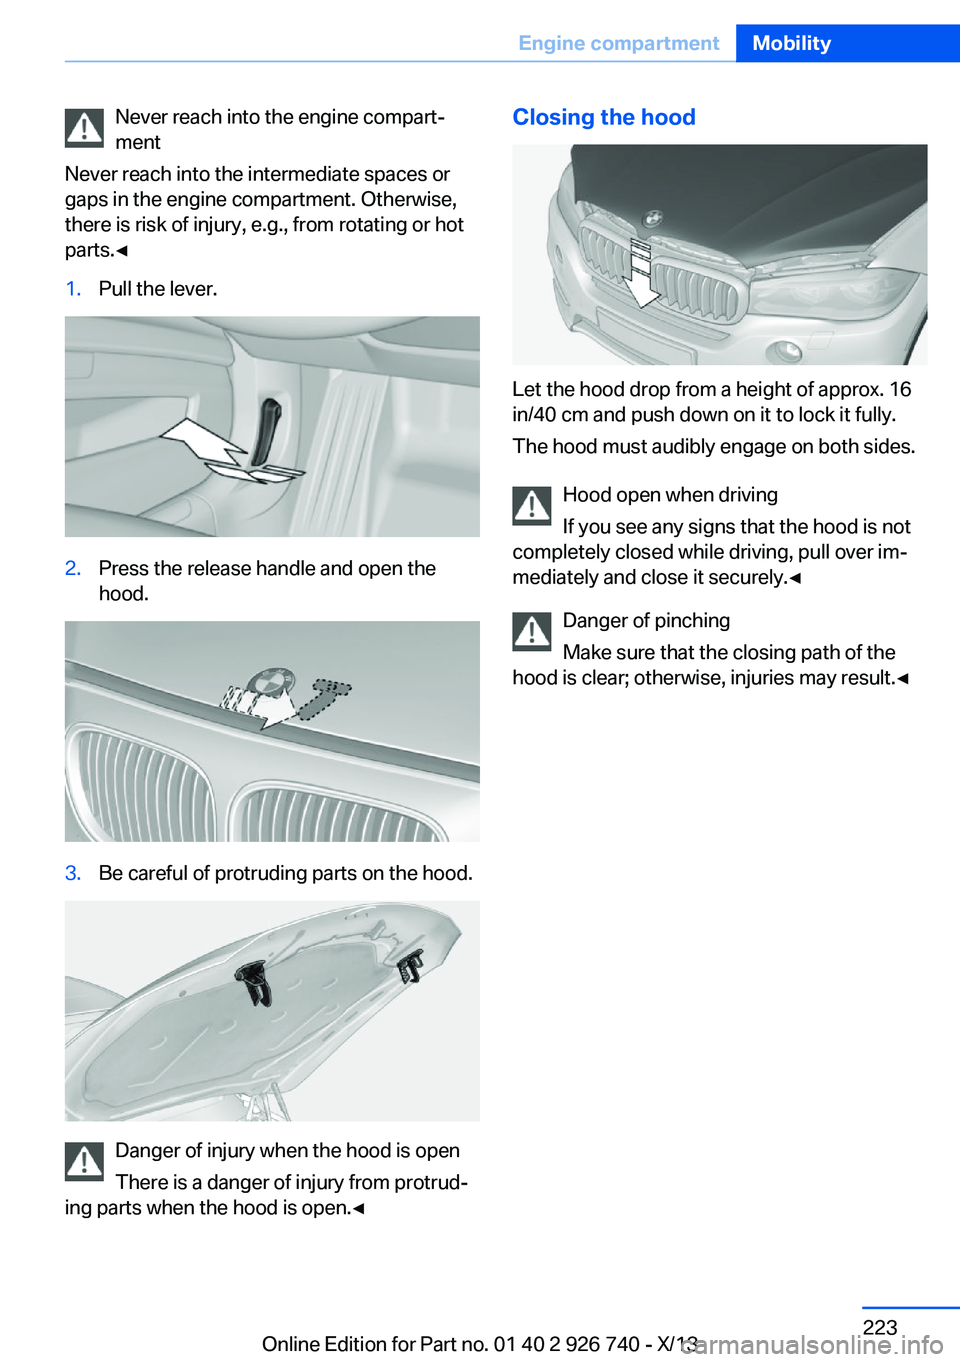
parts.◀1.Pull the lever.2.Press the release handle and open the
hood.3.Be careful of protruding parts on the hood.
Danger of injury when the hood is open
There is a danger of injury from protrud‐
ing parts when the hood is open.◀
Closing the hood
Let the hood drop from a height of approx. 16
in/40 cm and push down on it to lock it fully.
The hood must audibly engage on both sides.
Hood open when driving
If you see any signs that the hood is not
completely closed while driving, pull over im‐
mediately and close it securely.◀
Danger of pinching
Make sure that the closing path of the
hood is clear; otherwise, injuries may result.◀
Seite 223Engine compartmentMobility223
Online Edition for Part no. 01 40 2 926 740 - X/13
Page 227 of 265

CoolantVehicle equipmentAll standard, country-specific and optional
equipment that is offered in the model series is
described in this chapter. Therefore, equip‐
ment is also described that is not available in a
vehicle, e. g., because of the selected optional
equipment or country variant. This also applies
for safety-related functions and systems.
Hints Danger of burns from hot engine
Do not open the cooling system while
the engine is hot; otherwise, escaping coolant
may cause burns.◀
Suitable additives
Only use suitable additives; otherwise,
engine damage may occur. The additives are
harmful to your health.◀
Coolant consists of water and additives.
Not all commercially available additives are
suitable for the vehicle. Information about the
suitable additives are available from the service
center.
Coolant level
If there is no Min. and Max. mark in the filler
neck of the coolant reservoir, have the coolant
level checked if necessary by your service cen‐
ter and add coolant as needed.
Checking1.Let the engine cool.2.Turn the cap of the coolant reservoir
slightly counterclockwise to allow any ex‐cess pressure to dissipate, and then open
it.3.The coolant level is correct if it lies be‐
tween the minimum and maximum marks
in the filler neck.
Filling
1.Let the engine cool.2.Turn the cap of the coolant reservoir
slightly counterclockwise to allow any ex‐
cess pressure to dissipate, and then open
it.Seite 227CoolantMobility227
Online Edition for Part no. 01 40 2 926 740 - X/13
Page 234 of 265

Replacement1.Insert the screwdriver from the onboard
vehicle tool kit, with the flat side facing out‐
ward, past the removal hook and onto the
clip, arrow 1.2.Turn the screwdriver by 90°, arrow 2.3.Press the removal hook upward, arrow, and
remove the front fog lamp from the front
using the hook.4.Detach the connector.5.Turn the bulb bracket and remove it.6.Remove the bulb and replace it.7.Proceed in reverse order to insert the front
fog lamp. Note the guide rails in doing so.
LED front fog lamps
Follow the general instructions on Lamps and
bulbs, refer to page 232.
These front fog lamps are made using LED
technology. Contact your service center in the
event of a malfunction.
Turn signal
Note
Follow the general instructions on Lamps and
bulbs, refer to page 232.
The turn signals are located next to each low
beam in the engine compartment.
21-watt bulb, PY 21W.
Replacement
1.Opening the hood, refer to page 2222.Unscrew the cap counterclockwise and re‐
move it carefully.Seite 234MobilityReplacing components234
Online Edition for Part no. 01 40 2 926 740 - X/13