2014 BMW X1 XDRIVE 28I high beam
[x] Cancel search: high beamPage 86 of 295

Switching the high beams on and off
manually▷High beams on, arrow 1.▷High beams off/headlamp flasher, arrow 2.
To reactivate the High-beam Assistant, briefly
push the turn indicator lever toward the high
beams.
Activating/deactivating via iDrive
1."Settings"2."Lighting"3."High beam assistant"
The setting is stored for the remote control
currently in use.
System limits Personal responsibility
The High-beam Assistant cannot serve
as a substitute for the driver's personal judg‐
ment of when to use the high beams. There‐
fore, manually switch off the high beams in sit‐
uations where this is required to avoid a safety
risk.◀
The system is not fully functional in situations
such as the following, and driver intervention
may be necessary:▷In very unfavorable weather conditions,
such as fog or heavy precipitation.▷In detecting poorly-lit road users, such as
pedestrians, cyclists, horseback riders and
wagons; when driving close to train or ship
traffic; and at animal crossings.▷In tight curves, on hilltops or in depres‐
sions, in cross traffic or half-obscured on‐
coming traffic on freeways.▷In poorly-lit towns and cities and in the
presence of highly reflective signs.▷At low speeds.▷When the windshield in front of the interior
rearview mirror is fogged over, dirty or cov‐
ered with stickers, etc.▷If the sensor view field is dirty.
The view field of the sensor is located on
the front of the interior rearview mirror.
Do not cover this area with stickers, etc.
Clean the sensor view field with a cloth
moistened with a small amount of glass
cleaner.
Fog lamps
Front fog lamps
The parking lamps or low beams must be
switched on.
Press the button. The green indicator
lamp in the instrument cluster lights
up.
If the automatic headlamp control, refer to
page 84, is activated, the low beams will come
on automatically when you switch on the fog
lamps.
Seite 86ControlsLamps86
Online Edition for Part no. 01 40 2 911 269 - VI/13
Page 251 of 295
Removing the headlamp cover
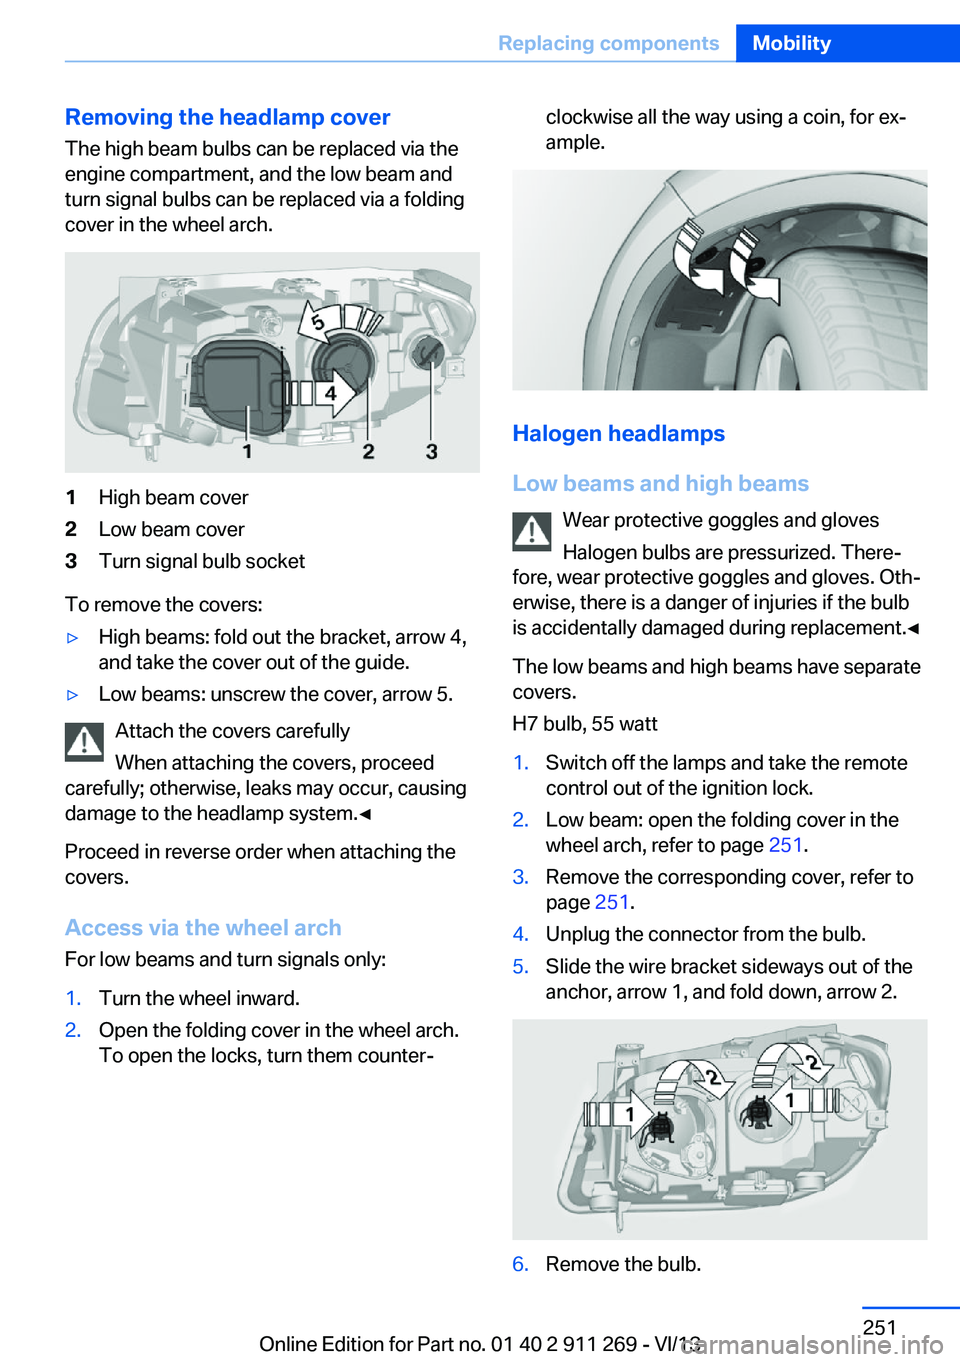
The high beam bulbs can be replaced via the
engine compartment, and the low beam and
turn signal bulbs can be replaced via a folding
cover in the wheel arch.1High beam cover2Low beam cover3Turn signal bulb socket
To remove the covers:
▷High beams: fold out the bracket, arrow 4,
and take the cover out of the guide.▷Low beams: unscrew the cover, arrow 5.
Attach the covers carefully
When attaching the covers, proceed
carefully; otherwise, leaks may occur, causing
damage to the headlamp system.◀
Proceed in reverse order when attaching the
covers.
Access via the wheel arch For low beams and turn signals only:
1.Turn the wheel inward.2.Open the folding cover in the wheel arch.
To open the locks, turn them counter‐clockwise all the way using a coin, for ex‐
ample.
Halogen headlamps
Low beams and high beams Wear protective goggles and gloves
Halogen bulbs are pressurized. There‐
fore, wear protective goggles and gloves. Oth‐
erwise, there is a danger of injuries if the bulb
is accidentally damaged during replacement.◀
The low beams and high beams have separate
covers.
H7 bulb, 55 watt
1.Switch off the lamps and take the remote
control out of the ignition lock.2.Low beam: open the folding cover in the
wheel arch, refer to page 251.3.Remove the corresponding cover, refer to
page 251.4.Unplug the connector from the bulb.5.Slide the wire bracket sideways out of the
anchor, arrow 1, and fold down, arrow 2.6.Remove the bulb.Seite 251Replacing componentsMobility251
Online Edition for Part no. 01 40 2 911 269 - VI/13
Page 252 of 295
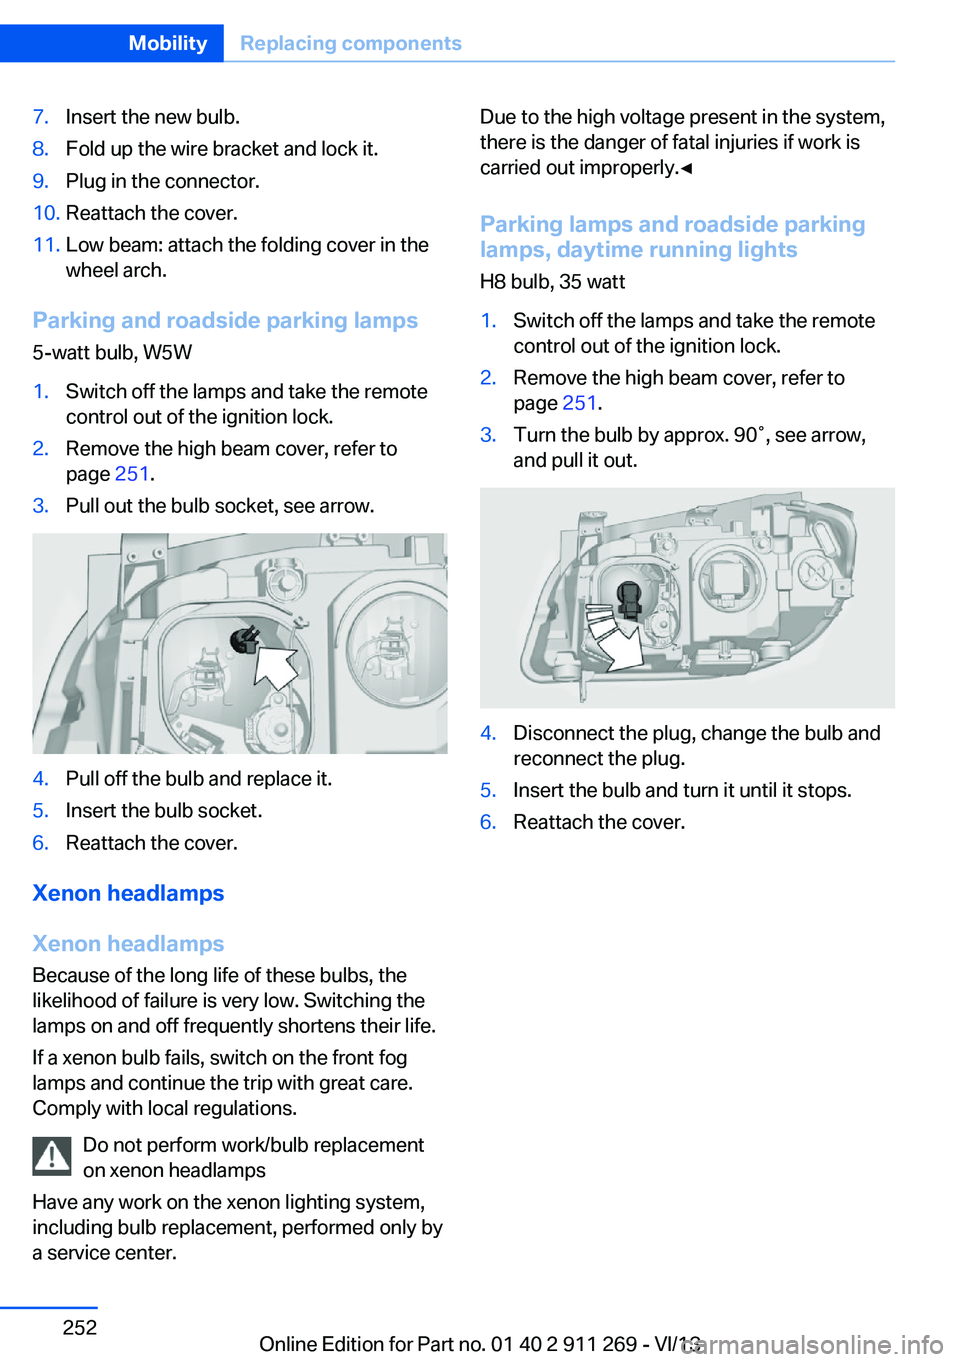
7.Insert the new bulb.8.Fold up the wire bracket and lock it.9.Plug in the connector.10.Reattach the cover.11.Low beam: attach the folding cover in the
wheel arch.
Parking and roadside parking lamps
5-watt bulb, W5W
1.Switch off the lamps and take the remote
control out of the ignition lock.2.Remove the high beam cover, refer to
page 251.3.Pull out the bulb socket, see arrow.4.Pull off the bulb and replace it.5.Insert the bulb socket.6.Reattach the cover.
Xenon headlamps
Xenon headlamps Because of the long life of these bulbs, the
likelihood of failure is very low. Switching the
lamps on and off frequently shortens their life.
If a xenon bulb fails, switch on the front fog
lamps and continue the trip with great care.
Comply with local regulations.
Do not perform work/bulb replacement
on xenon headlamps
Have any work on the xenon lighting system,
including bulb replacement, performed only by
a service center.
Due to the high voltage present in the system,
there is the danger of fatal injuries if work is
carried out improperly.◀
Parking lamps and roadside parkinglamps, daytime running lights
H8 bulb, 35 watt1.Switch off the lamps and take the remote
control out of the ignition lock.2.Remove the high beam cover, refer to
page 251.3.Turn the bulb by approx. 90˚, see arrow,
and pull it out.4.Disconnect the plug, change the bulb and
reconnect the plug.5.Insert the bulb and turn it until it stops.6.Reattach the cover.Seite 252MobilityReplacing components252
Online Edition for Part no. 01 40 2 911 269 - VI/13
Page 282 of 295
Car phone, installation loca‐tion, refer to Center arm‐
rest 124
Car phone, refer to Tele‐ phone 196
Car vacuum cleaner, connect‐ ing, refer to Connecting
electrical devices 117
Car wash 263
Catalytic converter, refer to Hot exhaust system 130
CBS Condition Based Serv‐ ice 247
CD/DVD 174
CD/DVD notes 178
CDs, storing 179
Cell phone 196
Cell phone, installation loca‐ tion, refer to Center arm‐
rest 124
Center armrest, front 124
Center armrest, rear 124
Center brake lamp, bulb re‐ placement 254
Center console, refer to Around the center con‐
sole 16
Central locking– Comfort Access 37– From the inside 35– Setting the unlocking char‐
acteristics 32
Central locking system
– From the outside 31– Principle 31
Central screen, refer to Con‐
trol Display 18
Changes, technical, refer to Safety 6
Changing wheels/tires 239
Check Control 80
Children, transporting 52
Child restraint fixing system LATCH 53
Child restraint fixing sys‐ tems 52
Child restraint fixing systems,
mounting 52
Child safety locks 55
Child seat, mounting 52
Child seats, refer to Trans‐ porting children safely 52
Chrome parts, care 265
Cigarette lighter, connecting electrical devices 117
Cigarette lighter, refer to Lighter 117
Cigarette lighter socket 117
Circulation of air, refer to Re‐ circulated air mode 110
Cleaning, displays 266
Cleaning your BMW, refer to Care 263
Clock 71
Clock– 12h/24h format 76– Setting the time and date 76
Closing
– From the inside 35– From the outside 32
Clothes hooks 125
Cockpit 12
Cold start, refer to Starting the engine 58
Combination instrument, refer to Instrument cluster 14
Combination switch, refer to Turn signal/high beams/
headlamp flasher 62
Combination switch, refer to Washer/wiper system 62
Comfort Access
– Battery replacement 38
Comfort area, refer to Around
the center console 16
Compact wheel, inflation pressure 232
Compartment for remote control, refer to Ignition
lock 57
Compartment in floor 121
Compartments, refer to Stor‐
age compart‐
ments 123, 124
Compass, digital 115
Computer 73
Computer, displaying infor‐ mation 73
Computer, displays on the Control Display 74
Concierge service 221
Condensation under the vehi‐ cle 132
Condition Based Service CBS 247
Confirmation signals for lock‐ ing/unlocking the vehicle 33
Connecting, mobile phone, refer to Pairing the mobile
phone 197
Consumption, refer to Aver‐ age fuel consumption 73
Contacts 210, 218
Control Display 18
Control Display, care 266
Control Display, settings 77
Controller 19
Controls and displays 12
Control systems, driving sta‐ bility 97
Convenient operation– Glass sunroof 32– Window 32
Coolant 246
Coolant, checking the level 246
Coolant temperature 72
Cooling function, switching on and off 110
Cooling, maximum 109
Cooling system, refer to Cool‐ ant 246
Corrosion on brake discs 132
Courtesy lamps, refer to Inte‐ rior lamps 87
Cradle for telephone or mo‐ bile phone, refer to Snap-in
adapter 207
Seite 282ReferenceEverything from A to Z282
Online Edition for Part no. 01 40 2 911 269 - VI/13
Page 285 of 295
Fuel tank capacity, refer toFilling capacities 271
Fuel tank contents, refer to Filling capacities 271
Fuel tank, refer to Filling ca‐ pacities 271
Fuse 256
G
Garage door opener, refer to Universal Garage Door
Opener 113
Gasoline 230
Gasoline gauge, refer to Fuel gauge 72
Gasoline quality 230
Gas station recommenda‐ tion 155
Gear change– Automatic transmission with
Steptronic 66
Gear change, automatic
transmission with Step‐
tronic 69
Gear change, via shift pad‐ dles 69
Gear display, automatic trans‐ mission with Steptronic 65
General driving notes 130
Glass sunroof, electric
– Convenient operation 32– Remote control 32
Glass sunroof, refer to Panor‐
amic glass sunroof 41
Glove compartment 123
Glove compartment, light‐ ing 123
GPS navigation, refer to Navi‐ gation system 142
Gross vehicle weight, refer to Weights 270
H
Halogen headlamps
– Bulb replacement 251Hand-held transmitter, alter‐
nating code 114
Hands-free microphone 16
Hazard warning sys‐ tem 16, 257
HDC Hill Descent Control 99
HD Radio 167
Head airbags 88
Headlamp control, auto‐ matic 83, 84
Headlamp courtesy delay fea‐ ture 84
Headlamp cover, remov‐ ing 251
Headlamp flasher 62, 85
Headlamp flasher, indicator lamp 15
Headlamps 83
Headlamps– Bulb replacement 251
Headlamps, care 264
Headlamps, cleaning 64
Headlamps, cleaning, washer
fluid 65
Headliner 17
Head restraints 47
Head restraints
– Adjusting the height 47– Removing 48
Heating
– Rear window 111– Seats 46
Heating, mirrors 50
Heavy cargo, refer to Stowing cargo 135
Height adjustment
– Seats 44
Height, refer to Dimen‐
sions 270
High-beam Assistant 85
High beams 85
High beams
– Bulb replacement 251
High beams/low beams, auto‐
matic, refer to High-beam
Assistant 85
High beams, indicator
lamp 15
High-pressure washers 263
Hill Descent Control HDC 99
Hill drive-off assistant, refer to Drive-off assistant 100
Hills 132
Holder for beverages 125
Holder for remote control, re‐ fer to Ignition lock 57
Homepage 6
Hood 242
Hood, opening 242
Horn 12
Hot exhaust system 130
Hotline 223
House number, entering for navigation 145
Hydraulic brake assistant 97
Hydroplaning 131
I Ice warning, refer to External temperature warning 71
Icy roads, refer to External temperature warning 71
Identification marks, tires 237
Identification number, refer to Engine compartment 242
iDrive 18
iDrive– Changing settings 77– Changing the date and
time 76– Changing the language 77– Changing the units of meas‐
ure and display format 75– Setting the brightness 78
Ignition 58
Ignition key position 1, refer to Radio ready state 57
Ignition key position 2, refer to Ignition on 58
Ignition key, refer to Remote control with integrated
key 30
Seite 285Everything from A to ZReference285
Online Edition for Part no. 01 40 2 911 269 - VI/13
Page 286 of 295
Ignition lock 57
Ignition, switched off 58
Ignition, switched on 58
Indication of a flat tire 92, 94
Indicator and warning lamps 15
Inflation pressure monitor, re‐ fer to Flat Tire Monitor 91
Inflation pressure, refer to Tire inflation pressure 232
Information on the navigation data 142
Initialization after power fail‐ ure 255
Initializing– Compass, refer to Calibrat‐
ing 116– Panoramic glass sunroof 43– Refer to Setting the time
and date 76
Initializing, Flat Tire Monitor
FTM 91
Initializing, Tire Pressure Monitor TPM 94
Inside brake lamps
– Bulb replacement 254
Installation location, tele‐
phone 124
Instrument cluster 14
Instrument lighting 87
Instrument panel, refer to In‐ strument cluster 14
Instruments, refer to Cock‐ pit 12
Integrated key 30
Interactive map 149
Interior equipment 113
Interior lamps 87
Interior lamps
– Remote control 33
Interior mirror 50
Interior rearview mirror, auto‐ matic dimming 50
Interior rearview mirror, com‐ pass 115
Interior temperature, setting– Automatic climate con‐
trol 108
Interlock, refer to Disengag‐
ing the remote control 65
Intermediate destina‐ tions 151
Internet page 6
Intersection, entering for navi‐ gation 145
iPod/iPhone 185
J
Jacking points for the vehicle jack 255
Jack, refer to Vehicle jack 255
Joystick, refer to Selector lever 68
Jump-starting 258
K
Keyless Go, refer to Comfort Access 37
Keyless opening and closing, refer to Comfort Access 37
Key Memory, refer to Per‐ sonal Profile 30
Key, refer to Integrated key/ remote control 30
Kickdown
– Automatic transmission with
Steptronic 66, 68
Knee airbag 88
Knocking control 230
L
Label, run-flat tire 240
Lamp and bulb replacement, lamp replacement 250
Lamps 83
Lamps, automatic headlamp control 83, 84
Lamps, High-beam Assis‐
tant 85
Lamps, parking lamps/low beams 83
Lamps, replacing, refer to Lamp and bulb replace‐
ment 250
Language, changing on the Control Display 77
Lap-and-shoulder belt, refer to Safety belts 46
Lashing eyes, securing cargo 135
LATCH child restraint fixing system 53
Leather, care 264
LEDs, light-emitting di‐ odes 250
Length, refer to Dimen‐ sions 270
Letters and numbers, enter‐ ing 23
License plate lamp, bulb re‐ placement 254
Light-alloy wheels, care 265
Light-emitting diodes, LEDs 250
Lighter 117
Lighting– Instruments 87– Lamp and bulb replace‐
ment 250
Lighting, vehicle, refer to
Lamps 83
Light switch 83
Limit, refer to Speed limit 81
Load 135
Loading 134
Lock buttons, doors, refer to Locking 35
Locking
– From the inside 35– From the outside 32– Setting the confirmation
signals 33– Without remote control, re‐
fer to Comfort Access 37Seite 286ReferenceEverything from A to Z286
Online Edition for Part no. 01 40 2 911 269 - VI/13
Page 287 of 295

Locking the vehicle– From the inside 35– From the outside 32
Locks, doors, and win‐
dows 55
Longlife oils, alternative oil types 245
Longlife oils, refer to Ap‐ proved engine oils 245
Low beams 83
Low beams
– Automatic 84– Bulb replacement 251
Low beams, automatic 83
Low beams, automatic, refer to High-beam Assistant 85
Lower back support, refer to Lumbar support 45
Luggage rack
– Rear luggage rack 136
Luggage rack, refer to Roof-
mounted luggage rack 136
Lumbar support 45
M
Main inspection, refer to Service requirements 78
Maintenance 247
Maintenance, refer to Service booklet
Maintenance, refer to Service requirements 78
Maintenance require‐ ments 247
Maintenance system BMW 247
Malfunction
– Automatic transmission with
Steptronic 67– Door lock 34– Fuel filler flap 229– Tailgate 36
Malfunction warnings, refer to
Check Control 80
Manual air distribution 109
Manual mode, automatic
transmission with Step‐
tronic 66, 69
Manual operation– Door lock 34– Driver's door 34– Selector lever lock, auto‐
matic transmission 67
Manual operation, fuel filler
flap 229
Map, destination entry 149
Map display in black and white 158
Map in split screen 157
Map view 155
Marking on approved tires 240
Master key, refer to Remote control with integrated
key 30
Maximum cooling 109
Maximum speed, winter tires 240
Medical kit, refer to First aid kit 258
Memory, refer to Seat and mirror memory 48
Menus, operating, iDrive 18
Menus, refer to iDrive operat‐ ing concept 19
Message list, traffic bulle‐ tins 157
Messages 212
Microfilter
– With automatic climate con‐
trol 111
Minimum tread, tires 238
Mirror
– Mirror memory, refer to Seat
and mirror memory 48
Mirrors 49
Mirrors
– Automatic Curb Monitor 49
Mirrors, folding in and out 50
Mirrors, heating 50
Mirrors, interior mirror 50
Mobile communication devi‐
ces in the vehicle 131
Mobile phone, installation lo‐ cation, refer to Center arm‐
rest 124
Mobile phone, refer to Tele‐ phone 196
Modifications, technical, refer to Safety 6
Monitor, refer to Control Dis‐ play 18
Mounting of child restraint fix‐ ing systems 52
MP3 player 184
Multimedia 174
Music collection 179
Music search 181
Music, storing 179
N
Navigation 142
Navigation data 142
Navigation data, updat‐ ing 142
Navigation system– Destination entry by
voice 150
Neck restraints, refer to Head
restraints 47
Nets, refer to Storage com‐ partments 124
Neutral cleaner, care 265
New wheels and tires 239
Notes 6, 215
Nozzles, refer to Ventila‐ tion 111
O OBD Onboard Diagnos‐ tics 248
OBD socket, refer to Socket for OBD Onboard Diagno‐
sis 248
Octane number, refer to Fuel quality 230
Seite 287Everything from A to ZReference287
Online Edition for Part no. 01 40 2 911 269 - VI/13