2014 BMW M235I buttons
[x] Cancel search: buttonsPage 112 of 218

Indicator/warning lamps
When DSC is deactivated, DSC OFF is dis‐
played in the instrument cluster.
The indicator lamp lights up: DSC is
deactivated.
DTC Dynamic Traction
Control
The concept The DTC system is a version of the DSC in
which forward momentum is optimized.
The system ensures maximum forward mo‐
mentum on special road conditions, e.g., unp‐
lowed snowy roads, but driving stability is lim‐
ited.
It is therefore necessary to drive with appropri‐
ate caution.
You may find it useful to briefly activate DTC
under the following special circumstances:▷When driving in slush or on uncleared,
snow-covered roads.▷When rocking the vehicle or driving off in
deep snow or on loose surfaces.▷When driving with snow chains.
Deactivating/activating DTC Dynamic
Traction Control
Activating the Dynamic Traction Control DTC
provides maximum traction on loose ground.
Driving stability is limited during acceleration
and when driving in bends.
Activating DTC Press the button.
TRACTION is displayed in the instru‐
ment cluster and the indicator lamp for DSC
OFF lights up.
Deactivating DTC
Press the button again.
TRACTION and the DSC OFF indica‐
tor lamp go out.
Above 31 mph/50 km/h DTC is automatically
deactivated.
Variable sport steering The variable sport steering increases the
steering angle of the front wheels at large
steering wheel angles, e.g., in tight curves or
when parking. Steering becomes more direct.
It also varies the force required to turn the
wheels in accordance with the vehicle speed.
This results in a sporty steering response. In
addition, it becomes easier to steer during
parking and maneuvering.
Driving Dynamics Control
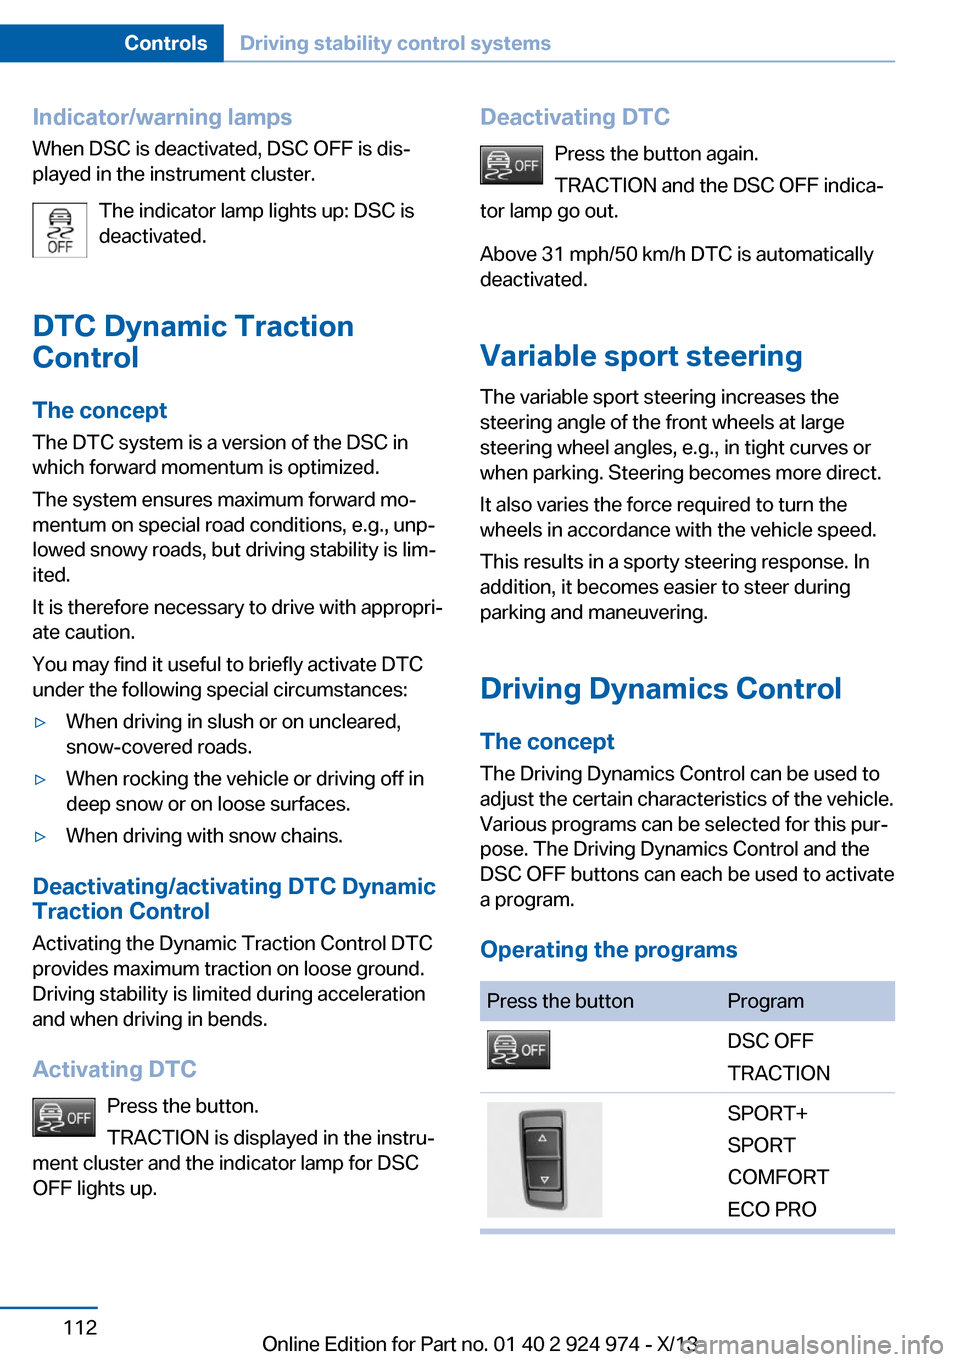
The concept The Driving Dynamics Control can be used to
adjust the certain characteristics of the vehicle.
Various programs can be selected for this pur‐
pose. The Driving Dynamics Control and the
DSC OFF buttons can each be used to activate
a program.
Operating the programsPress the buttonProgramDSC OFF
TRACTIONSPORT+
SPORT
COMFORT
ECO PROSeite 112ControlsDriving stability control systems112
Online Edition for Part no. 01 40 2 924 974 - X/13
Page 115 of 218

Driving comfortVehicle equipment
All standard, country-specific and optional
equipment that is offered in the model series is
described in this chapter. Therefore, equip‐
ment is also described that is not available in a
vehicle, e. g., because of the selected optional
equipment or country variant. This also applies
for safety-related functions and systems.
Cruise control The concept
The system is functional at speeds beginning at approx. 20 mph/30 km/h.
It maintains the speed that was set using the
control elements on the steering wheel.
The system brakes on downhill gradients if en‐
gine braking action is insufficient.
Unfavorable conditions
Do not use the system if unfavorable
conditions make it impossible to drive at a con‐
stant speed, for instance:▷On curvy roads.▷In heavy traffic.▷On slippery roads, in fog, snow or rain, or
on a loose road surface.
Otherwise, you could lose control of the vehi‐
cle and cause an accident.◀
General information
Depending on the set driving program, the
characteristics of the cruise control can
change in certain areas.
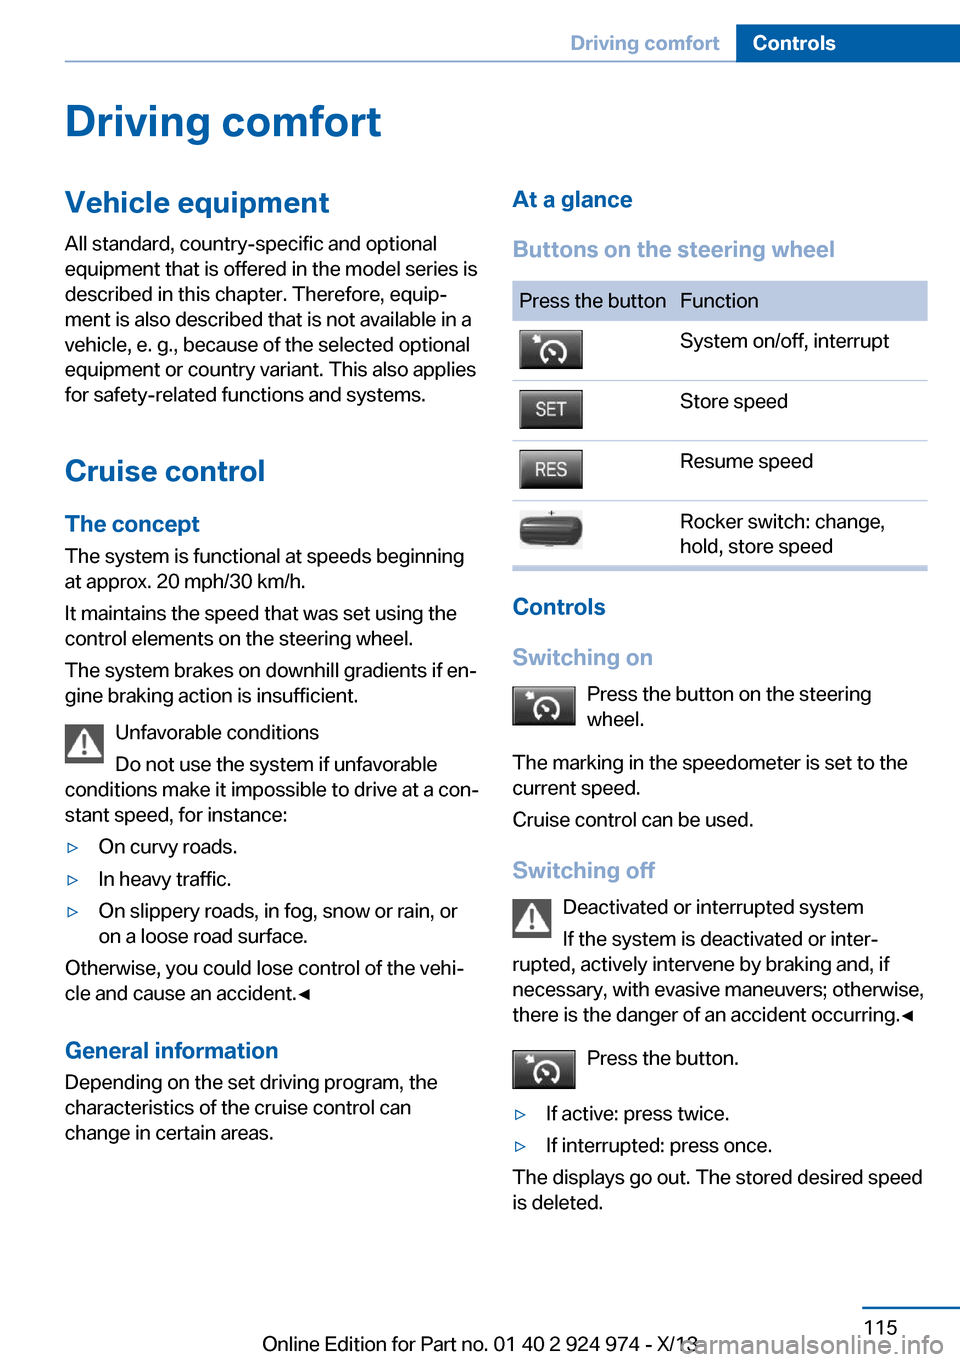
At a glance
Buttons on the steering wheelPress the buttonFunctionSystem on/off, interruptStore speedResume speedRocker switch: change,
hold, store speed
Controls
Switching on Press the button on the steering
wheel.
The marking in the speedometer is set to the
current speed.
Cruise control can be used.
Switching off Deactivated or interrupted system
If the system is deactivated or inter‐
rupted, actively intervene by braking and, if
necessary, with evasive maneuvers; otherwise,
there is the danger of an accident occurring.◀
Press the button.
▷If active: press twice.▷If interrupted: press once.
The displays go out. The stored desired speed
is deleted.
Seite 115Driving comfortControls115
Online Edition for Part no. 01 40 2 924 974 - X/13
Page 134 of 218

Interior equipmentVehicle equipmentAll standard, country-specific and optional
equipment that is offered in the model series is
described in this chapter. Therefore, equip‐
ment is also described that is not available in a
vehicle, e. g., because of the selected optional
equipment or country variant. This also applies
for safety-related functions and systems.
Universal garage door
opener
The concept
The universal garage door opener can operate
up to 3 functions of remote-controlled sys‐
tems such as garage door drives or lighting
systems. The universal garage door opener re‐
places up to 3 different hand-held transmitters.
To operate the remote control, the buttons on
the interior rearview mirror must be program‐
med with the desired functions. The hand-held
transmitter for the particular system is required
in order to program the remote control.
During programming
During programming and before activat‐
ing a device using the integrated universal re‐
mote control, ensure that there are no people,
animals, or objects in the range of movement
of the remote-controlled device; otherwise,
there is a risk of injury or damage.
Also follow the safety instructions of the hand-
held transmitter.◀
Before selling the vehicle, delete the stored
functions for the sake of security.
Compatibility If this symbol is printed on the packag‐
ing or in the instructions of the system
to be controlled, the system is gener‐ally compatible with the universal garage door
opener.
If you have any questions, please contact:▷Your service center.▷www.homelink.com on the Internet.
HomeLink is a registered trademark of John‐
son Controls, Inc.
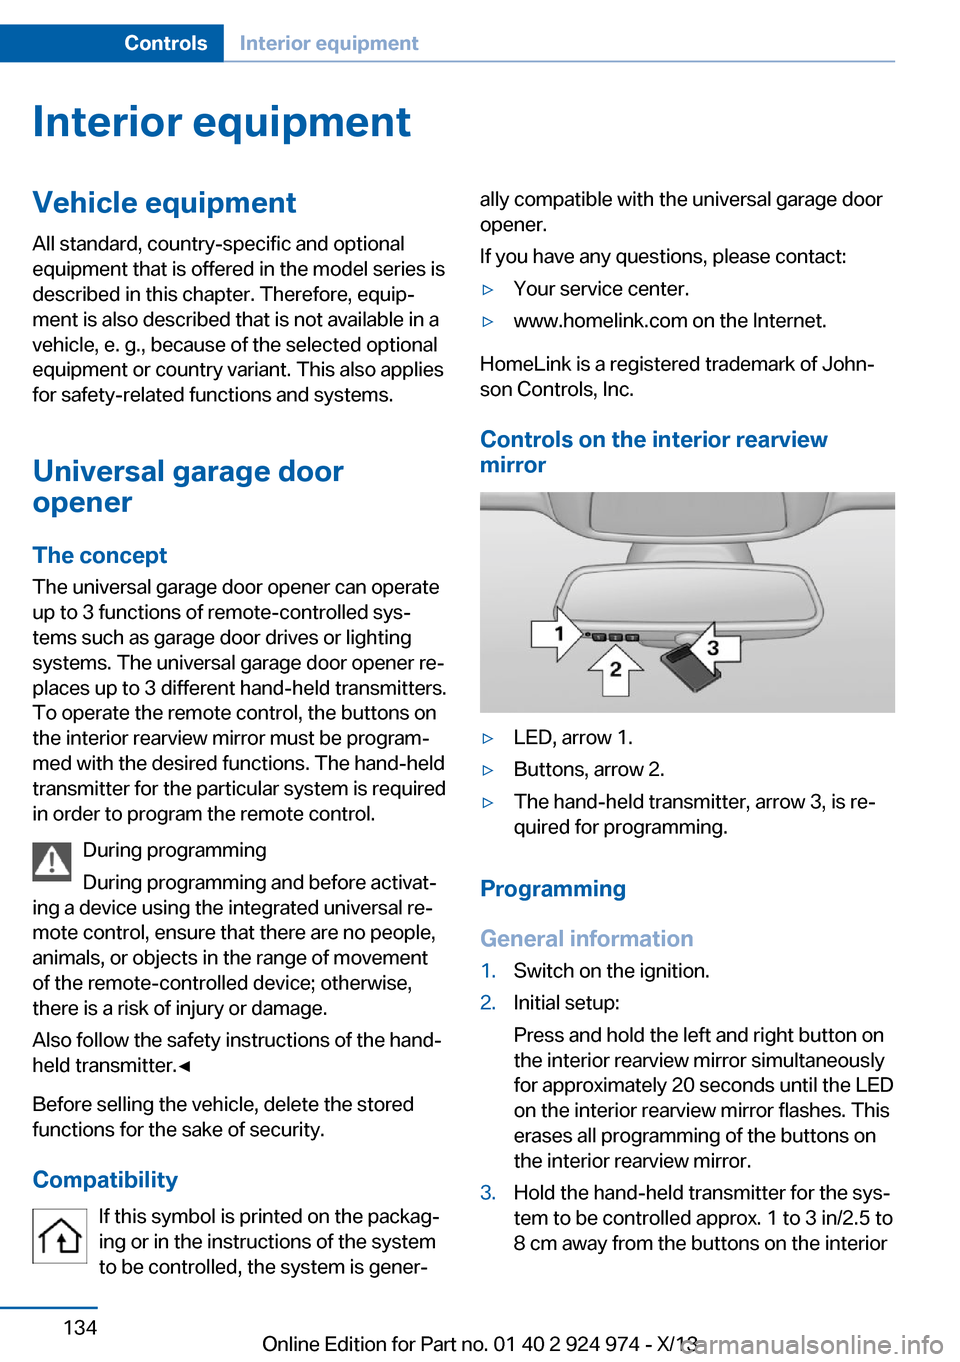
Controls on the interior rearview
mirror
▷LED, arrow 1.▷Buttons, arrow 2.▷The hand-held transmitter, arrow 3, is re‐
quired for programming.
Programming
General information
1.Switch on the ignition.2.Initial setup:
Press and hold the left and right button on
the interior rearview mirror simultaneously
for approximately 20 seconds until the LED
on the interior rearview mirror flashes. This
erases all programming of the buttons on
the interior rearview mirror.3.Hold the hand-held transmitter for the sys‐
tem to be controlled approx. 1 to 3 in/2.5 to
8 cm away from the buttons on the interiorSeite 134ControlsInterior equipment134
Online Edition for Part no. 01 40 2 924 974 - X/13
Page 135 of 218

rearview mirror. The required distance de‐
pends on the manual transmitter.4.Simultaneously press and hold the button
of the desired function on the hand-held
transmitter and the button to be program‐
med on the interior rearview mirror. The
LED on the interior rearview mirror will be‐
gin flashing slowly.5.Release both buttons as soon as the LED
flashes more rapidly. When the LED is
flashing faster, this indicates that the but‐
ton on the interior rearview mirror has been
programmed.
If the LED does not flash faster after at
least 60 seconds, change the distance be‐
tween the interior rearview mirror and the
hand-held transmitter and repeat the step.
Several more attempts at different distan‐
ces may be necessary. Wait at least
15 seconds between attempts.
Canada: if programming with the hand-
held transmitter was interrupted, hold
down the interior rearview mirror button
and repeatedly press and release the
hand-held transmitter button for 2 sec‐
onds.6.To program other functions on other but‐
tons, repeat steps 3 to 5.
The systems can be controlled using the inte‐
rior rearview mirror buttons.
Special feature of the alternating-
code wireless system
If you are unable to operate the system after
repeated programming, please check if the
system to be controlled features an alternat‐
ing-code system.
Read the system's operating manual, or press
the programmed button on the interior rear‐
view mirror longer. If the LED on the interior
rearview mirror starts flashing rapidly and then
stays lit constantly for 2 seconds, the system
features an alternating-code system. Flashing
and continuous illumination of the LED will re‐
peat for approximately 20 seconds.
For systems with an alternating-code system,
the universal garage door opener and the sys‐
tem also have to be synchronized.
Please read the operating manual of the sys‐
tem being set up for information on how to
synchronize the system.
Synchronizing is easier with the aid of a sec‐
ond person.
To synchronize:1.Park the vehicle within range of the re‐
mote-controlled system.2.Program the relevant button on the interior
rearview mirror as described.3.Locate and press the synchronizing button
on the system being programmed. You
have approx. 30 seconds for the next step.4.Hold down the programmed button on the
interior rearview mirror for approximately
3 seconds and then release it. If necessary,
repeat this work step up to three times in
order to finish synchronization. Once syn‐
chronization is complete, the programmed
function will be carried out.
Reprogramming individual buttons
1.Switch on the ignition.2.Press and hold the interior rearview mirror
button to be programmed.3.As soon as the interior rearview mirror LED
starts flashing slowly, hold the hand-held
transmitter for the system to be controlled
approx. 1 to 3 in/2.5 to 8 cm away from the
buttons on the interior rearview mirror. The
required distance depends on the manual
transmitter.4.Likewise, press and hold the button of the
desired function on the hand-held trans‐
mitter.5.Release both buttons as soon as the inte‐
rior rearview mirror LED flashes more rap‐
idly. When the LED is flashing faster, thisSeite 135Interior equipmentControls135
Online Edition for Part no. 01 40 2 924 974 - X/13
Page 213 of 218

Minimum tread, tires 172
Mirror 56
Mirror memory 55
Mobile communication devi‐ ces in the vehicle 149
Modifications, technical, refer to Safety 7
Moisture in headlamp 184
Monitor, refer to Control Dis‐ play 18
Mounting of child restraint fix‐ ing systems 59
Multifunction steering wheel, buttons 14
N Navigation, see user's manual for Navigation, Entertain‐
ment and Communication
Neck restraints, front, refer to Head restraints 53
Neck restraints, rear, refer to Head restraints 54
Neutral cleaner, see wheel cleaner 201
New wheels and tires 172
No Passing Information 83
Nylon rope for tow-starting/ towing 197
O OBD Onboard Diagnosis 181
OBD, see OBD Onboard Di‐ agnosis 181
Obstacle marking, rearview camera 121
Octane rating, refer to Gaso‐ line quality 164
Odometer 80
Office, see user's manual for Navigation, Entertainment
and Communication
Oil 177
Oil, adding 178 Oil additives 178
Oil change 179
Oil change interval, service requirements 82
Oil filler neck 178
Oil types, alternative 179
Oil types, approved 178
Old batteries, disposal 190
Onboard monitor, refer to Control Display 18
Onboard vehicle tool kit 183
Opening and closing 34
Opening and closing, from in‐ side 40
Opening and closing via door lock 39
Opening and closing, with re‐ mote control 38
Operating concept, iDrive 18
Optional equipment, standard equipment 6
Outside air, refer to Auto‐ matic recirculated-air con‐
trol 131
Overheating of engine, refer to Coolant temperature 80
P Paint, vehicle 200
Parallel parking assistant 122
Park Distance Control PDC 117
Parked-car ventilation 132
Parked vehicle, condensa‐ tion 150
Parking aid, refer to PDC 117
Parking assistant 122
Parking brake 67
Parking lamps 90
Passenger side mirror, tilting downward 56
Pathway lines, rearview cam‐ era 121
PDC Park Distance Con‐ trol 117 Pedestrian warning with city
braking function 107
Personal Profile 35
Pinch protection system, glass sunroof 46
Pinch protection system, win‐ dows 45
Plastic, care 201
Power failure 190
Power sunroof, glass 46
Power windows 45
Pressure, tire air pres‐ sure 166
Pressure warning, tires 101
Profile, refer to Personal Pro‐ file 35
Programmable memory but‐ tons, iDrive 24
Protective function, glass sunroof 46
Protective function, win‐ dows 45
Push-and-turn switch, refer to Controller 18, 19
R Radiator fluid 180
Radio-operated key, refer to Remote control 34
Radio ready state 64
Radio, see user's manual for Navigation, Entertainment
and Communication
Rain sensor 69
Rear lamps 188
Rear socket 139
Rearview camera 119
Rearview mirror 56
Rear window de‐ froster 128, 131
Recirculated-air filter 132
Recirculated-air mode 128, 131
Recommended tire brands 173 Seite 213Everything from A to ZReference213
Online Edition for Part no. 01 40 2 924 974 - X/13