2014 BMW M235I button
[x] Cancel search: buttonPage 136 of 218

indicates that the button on the interior
rearview mirror has been programmed.
The system can then be controlled by the
button on the interior rearview mirror.
If the LED does not flash faster after at
least 60 seconds, change the distance and
repeat the step. Several more attempts at
different distances may be necessary. Wait
at least 15 seconds between attempts.
Canada: if programming with the hand-
held transmitter was interrupted, hold
down the interior rearview mirror button
and repeatedly press and release the
hand-held transmitter button for 2 sec‐
onds.
Controls
Before operation
Before operating a system using the
integrated universal remote control, ensure
that there are no people, animals, or objects
within the range of movement of the remote- controlled system; otherwise, there is a risk of
injury or damage.
Also follow the safety instructions of the hand-
held transmitter.◀
The system, such as the garage door, can be
operated using the button on the interior rear‐
view mirror while the engine is running or when
the ignition is started. To do this, hold down
the button within receiving range of the system
until the function is activated. The interior rear‐ view mirror LED stays lit while the wireless sig‐
nal is being transmitted.
Deleting stored functions Press and hold the left and right button on the
interior rearview mirror simultaneously for ap‐
proximately 20 seconds until the LED flashes
rapidly. All stored functions are deleted. The
functions cannot be deleted individually.
Digital compass
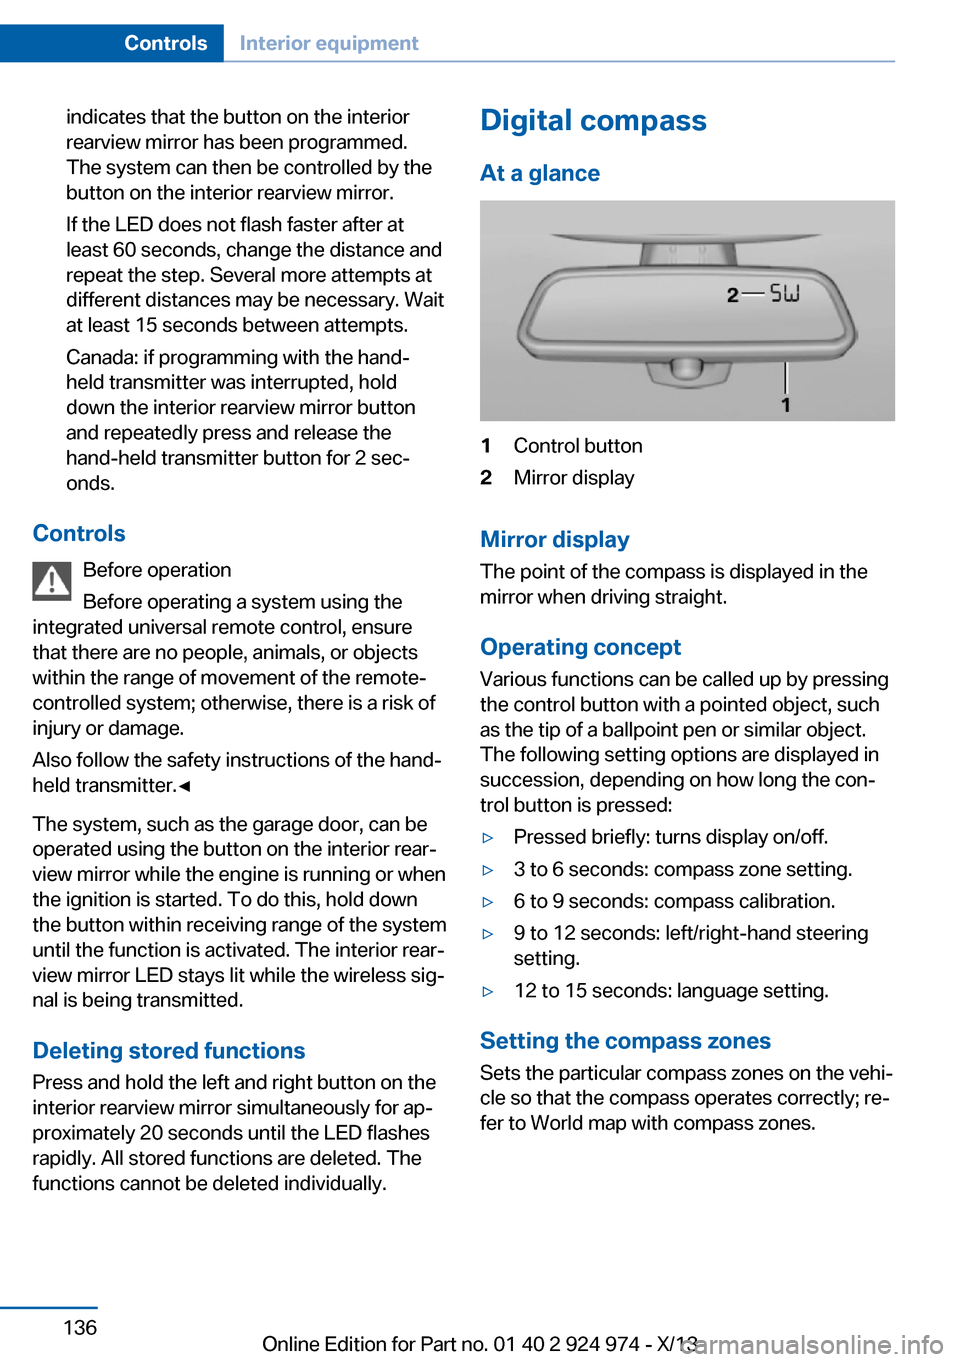
At a glance1Control button2Mirror display
Mirror display
The point of the compass is displayed in the
mirror when driving straight.
Operating concept
Various functions can be called up by pressing
the control button with a pointed object, such
as the tip of a ballpoint pen or similar object.
The following setting options are displayed in
succession, depending on how long the con‐
trol button is pressed:
▷Pressed briefly: turns display on/off.▷3 to 6 seconds: compass zone setting.▷6 to 9 seconds: compass calibration.▷9 to 12 seconds: left/right-hand steering
setting.▷12 to 15 seconds: language setting.
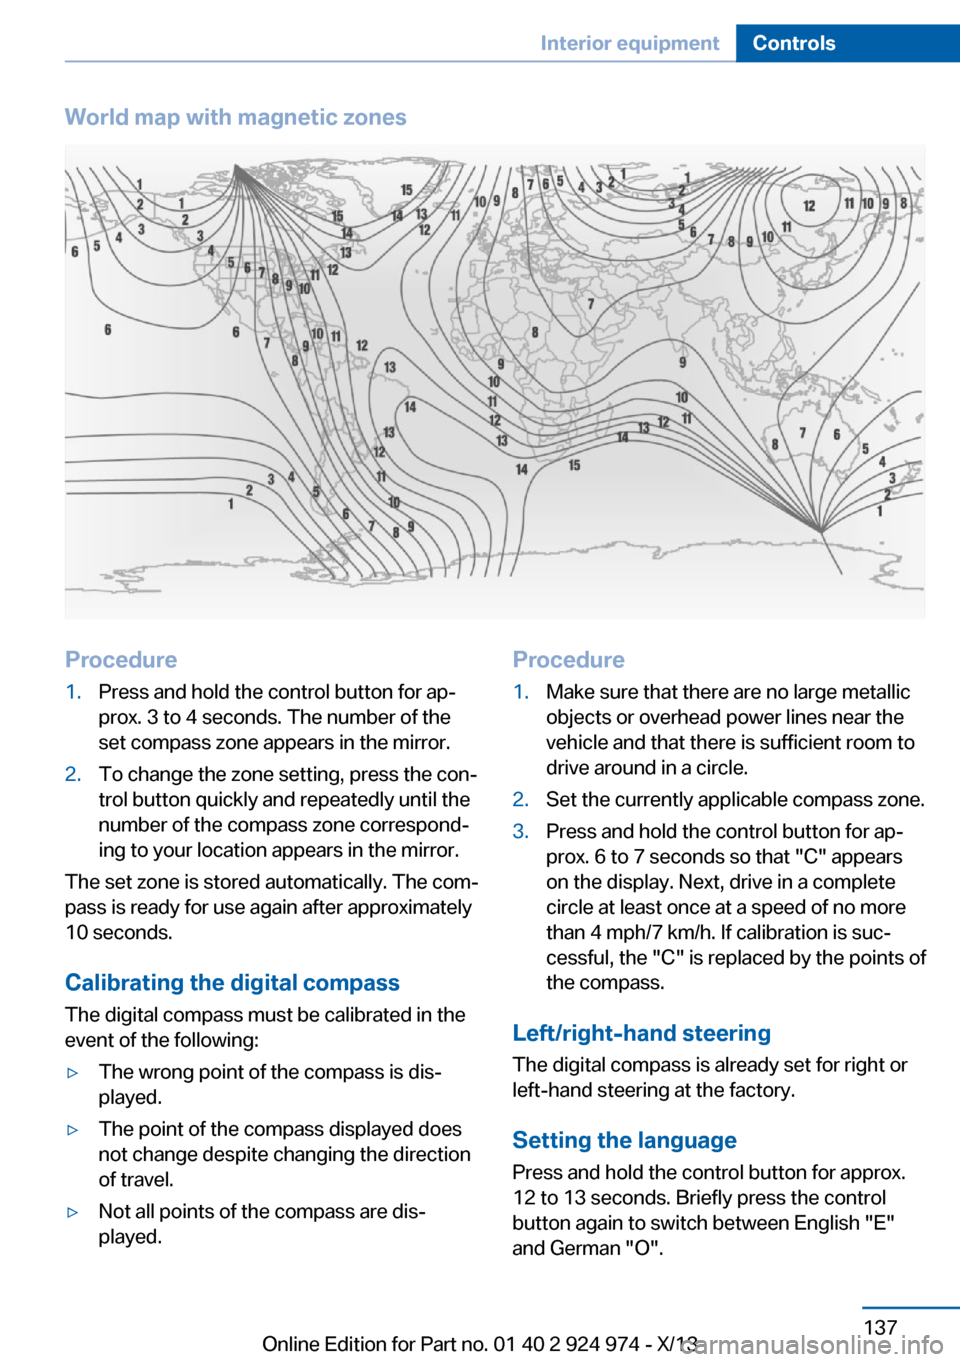
Setting the compass zones
Sets the particular compass zones on the vehi‐
cle so that the compass operates correctly; re‐
fer to World map with compass zones.
Seite 136ControlsInterior equipment136
Online Edition for Part no. 01 40 2 924 974 - X/13
Page 137 of 218

World map with magnetic zonesProcedure1.Press and hold the control button for ap‐
prox. 3 to 4 seconds. The number of the
set compass zone appears in the mirror.2.To change the zone setting, press the con‐
trol button quickly and repeatedly until the
number of the compass zone correspond‐
ing to your location appears in the mirror.
The set zone is stored automatically. The com‐
pass is ready for use again after approximately
10 seconds.
Calibrating the digital compass
The digital compass must be calibrated in the
event of the following:
▷The wrong point of the compass is dis‐
played.▷The point of the compass displayed does
not change despite changing the direction
of travel.▷Not all points of the compass are dis‐
played.Procedure1.Make sure that there are no large metallic
objects or overhead power lines near the
vehicle and that there is sufficient room to
drive around in a circle.2.Set the currently applicable compass zone.3.Press and hold the control button for ap‐
prox. 6 to 7 seconds so that "C" appears
on the display. Next, drive in a complete
circle at least once at a speed of no more
than 4 mph/7 km/h. If calibration is suc‐
cessful, the "C" is replaced by the points of
the compass.
Left/right-hand steering
The digital compass is already set for right or
left-hand steering at the factory.
Setting the language
Press and hold the control button for approx.
12 to 13 seconds. Briefly press the control
button again to switch between English "E"
and German "O".
Seite 137Interior equipmentControls137
Online Edition for Part no. 01 40 2 924 974 - X/13
Page 144 of 218

Storage compartment
between the rear seats
There is a storage compartment between the
rear seats.
Cupholders
Hints Shatter-proof containers and no hot
drinks
Use light and shatter-proof containers and do
not transport hot drinks. Otherwise, there is the increased danger of injury in an accident.◀
Unsuitable containers
Do not forcefully push unsuitable con‐
tainers into the cupholders. This may result in
damage.◀
Front
Inserts for front cupholders
Use inserts for the drink holders as additional
storage compartments. To do this, place the
inserts in the cupholders.
Only use the inserts for small objects such as
keys or the remote control.
Rear
In the center armrest.
Pull the center armrest forward at the strap.
To open: press the button.
To close: push both covers back in, one after
the other.
Pushing back the covers
Push back the covers before folding up
the center armrest; otherwise, the cupholder
could become damaged.◀
Clothes hooks
The clothes hooks are located in the rear. Do not obstruct view
When suspending clothing from the
hooks, ensure that it will not obstruct the driv‐
er's vision.◀
No heavy objects
Do not hang heavy objects from the
hooks; otherwise, they may present a danger
to passengers during braking and evasive ma‐
neuvers.◀
Storage compartments in the cargo area
Storage compartment
A storage compartment is located on the left
side.
Located on the right side is a storage compart‐
ment for the first aid kit, refer to page 194.
Seite 144ControlsStorage compartments144
Online Edition for Part no. 01 40 2 924 974 - X/13
Page 156 of 218

At a glance
The system includes the following
EfficientDynamics functions and displays:▷ECO PRO bonus range, refer to page 156.▷ECO PRO tips driving instruction, refer to
page 157▷ECO PRO climate control, refer to
page 156.
Activate ECO PRO
Press button repeatedly until ECO
PRO is displayed in the instrument
cluster.
Configuring ECO PRO
Via the Driving Dynamics Control
1.Activate ECO PRO.2."Configure ECO PRO"3.Configure the program.
Via the iDrive
1."Settings"2."ECO PRO mode"
Or
1."Settings"2."Driving mode"3."Configure ECO PRO"
Configure the program.
ECO PRO Tip
▷"Tip at:":
Set ECO Pro speed at which an ECO PRO
Tip is to be displayed.▷"ECO PRO speed warning":
A reminder is displayed if the set ECO PRO
speed is exceeded.
ECO PRO climate control
"ECO PRO climate control"
The climate control is adjusted to be fuel-effi‐
cient.
By making a slight change to the set tempera‐
ture, or slowly adjusting the rate of heating or
cooling of the passenger compartment, fuel
consumption can be economized.
The outputs of the seat heater and the exterior
mirror heating are also reduced.
The exterior mirror heating is made available
when outside temperatures are very cold.
ECO PRO potential
The percentage of potential savings that can
be achieved with the current configuration is
displayed.
Display in the instrument cluster
ECO PRO bonus range An extension of the range can
be achieved by an adjusted driv‐
ing style.
This may be displayed as the
bonus range in the instrument
cluster.
The bonus range is shown in the range display.
The bonus range is automatically reset every
time the vehicle is refueled.
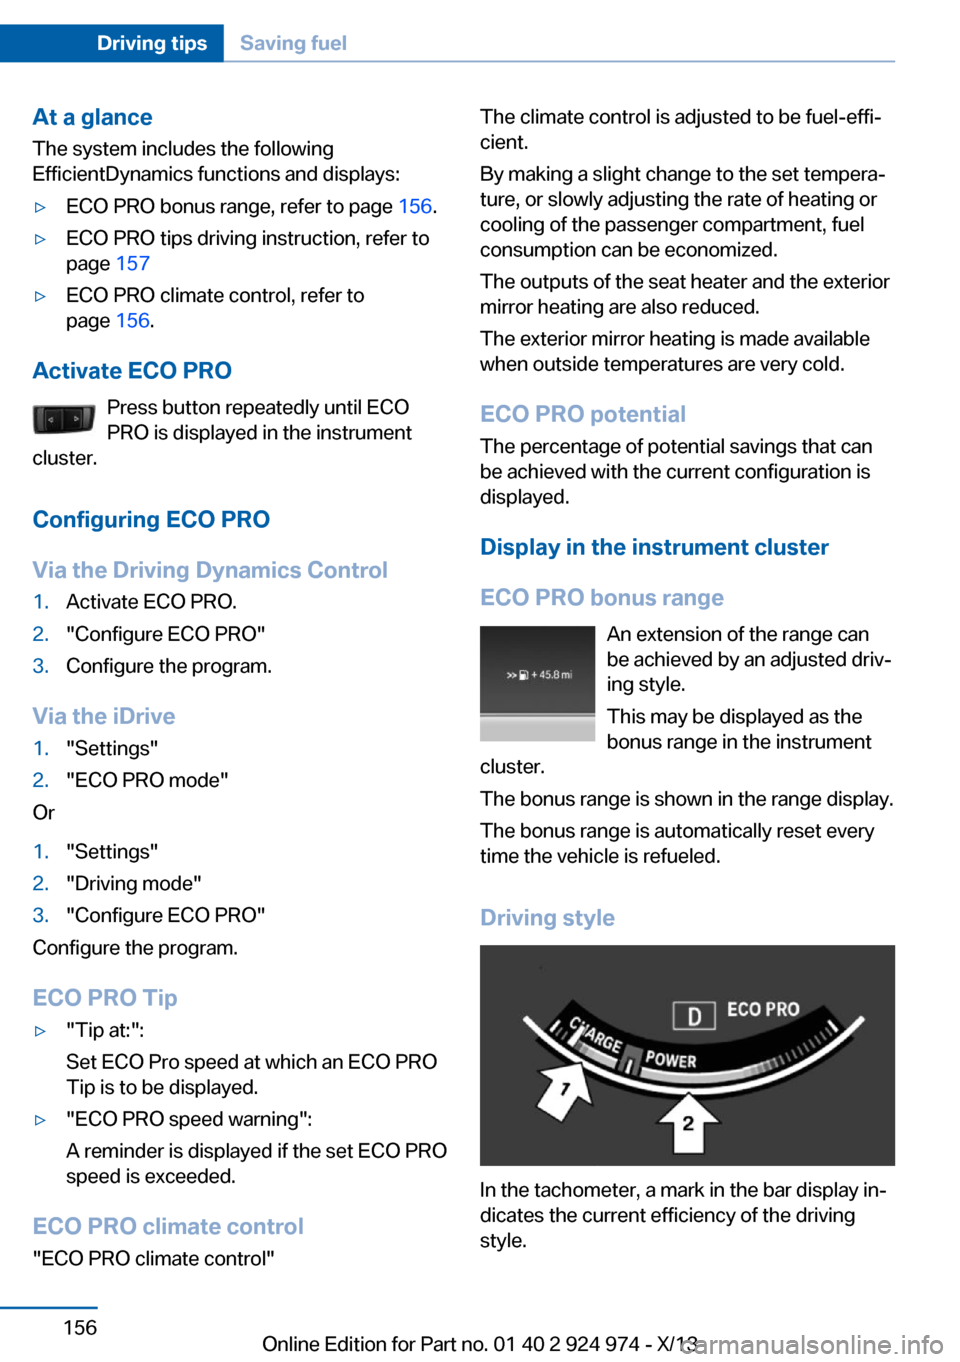
Driving style
In the tachometer, a mark in the bar display in‐
dicates the current efficiency of the driving
style.
Seite 156Driving tipsSaving fuel156
Online Edition for Part no. 01 40 2 924 974 - X/13
Page 193 of 218

Breakdown assistanceVehicle equipment
All standard, country-specific and optional
equipment that is offered in the model series is
described in this chapter. Therefore, equip‐
ment is also described that is not available in a
vehicle, e. g., because of the selected optional
equipment or country variant. This also applies
for safety-related functions and systems.
Hazard warning flashers
The button is located in the center console.
Intelligent Emergency
Request
Requirements
▷The radio ready state is switched on.▷The Assist system is functional.▷The SIM card integrated in the vehicle has
been activated.
General information
Only press the SOS button in an emergency.
Hints
Emergency Request not guaranteed
For technical reasons, the Emergency
Request cannot be guaranteed under unfavor‐
able conditions.◀
Initiating an Emergency Request1.Press the cover briefly to open it.2.Press the SOS button until the LED in the
button lights up.▷The LED lights up: an Emergency Request
was initiated.
If the situation allows, wait in your vehicle
until the voice connection has been estab‐
lished.▷The LED flashes when a connection to the
BMW Response Center has been estab‐
lished.
When the emergency request is received
at the BMW Response Center, the BMW
Response Center contacts you and takes
further steps to help you.
Even if you are unable to respond, the
BMW Response Center can take further
steps to help you under certain circum‐
stances.
For this purpose, data that are used to de‐
termine the necessary rescue measures,
such as the current position of the vehicleSeite 193Breakdown assistanceMobility193
Online Edition for Part no. 01 40 2 924 974 - X/13
Page 194 of 218

if it can be established, are transmitted to
the BMW Response Center.▷If the LED is flashing, but the BMW Re‐
sponse Center can no longer be heard via
the speaker, you can nevertheless still be
heard for the BMW Response Center.
Initiating an Emergency Request
automatically
Under certain conditions, an Emergency Re‐
quest is automatically initiated immediately af‐
ter a severe accident. Automatic Collision Noti‐
fication is not affected by pressing the SOS
button.
Warning triangle
The warning triangle is located on the inside of
the trunk lid.
To remove, loosen the bracket.
First aid kit NoteSome of the articles have a limited service life.
Check the expiration dates of the contents
regularly and replace any expired items
promptly.
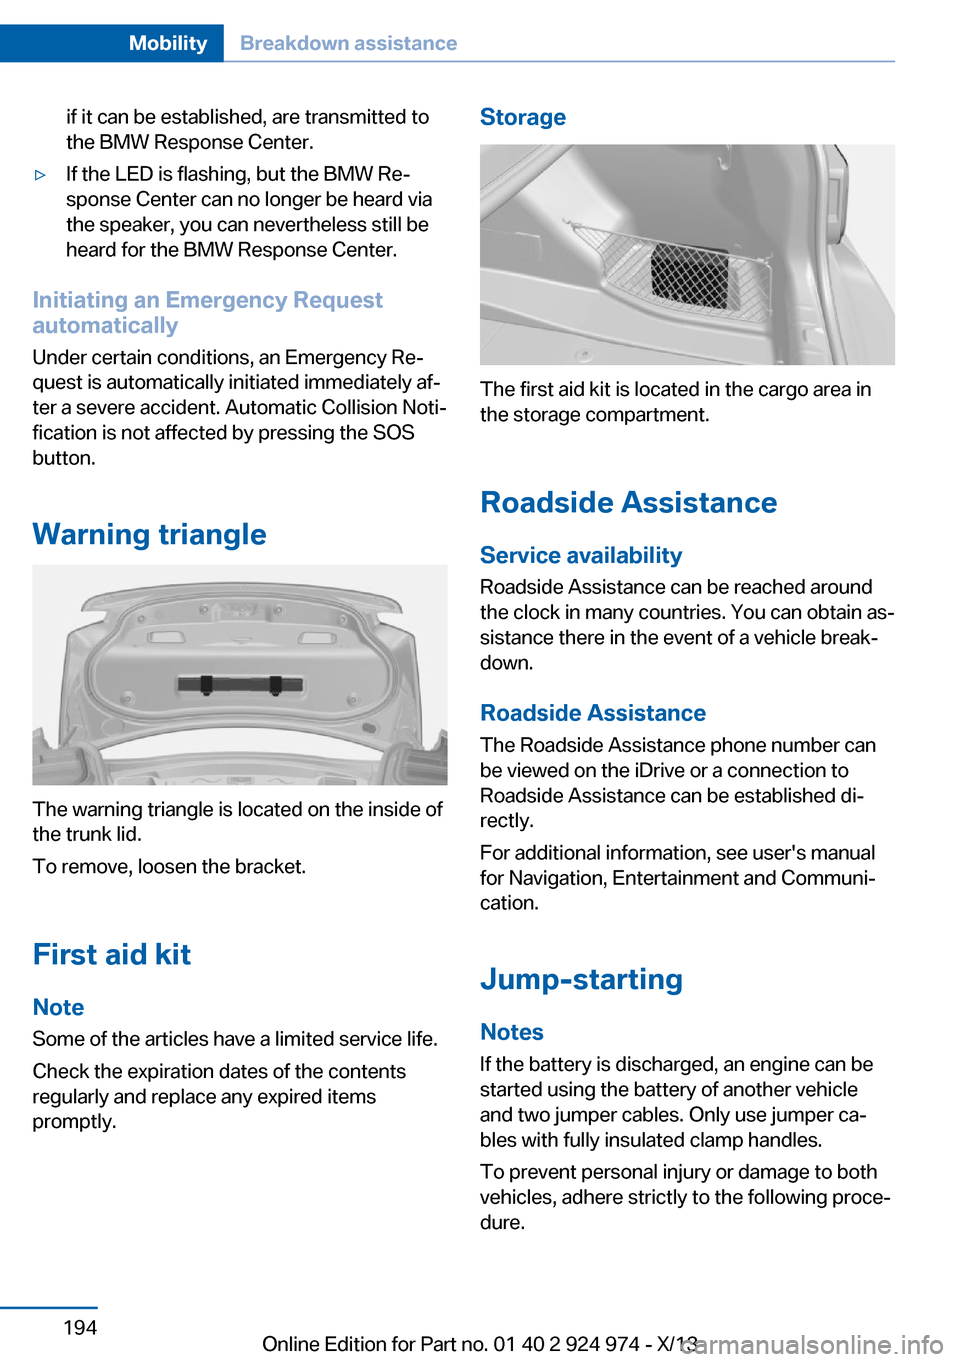
Storage
The first aid kit is located in the cargo area in
the storage compartment.
Roadside Assistance Service availability
Roadside Assistance can be reached around
the clock in many countries. You can obtain as‐
sistance there in the event of a vehicle break‐
down.
Roadside Assistance The Roadside Assistance phone number can
be viewed on the iDrive or a connection to
Roadside Assistance can be established di‐
rectly.
For additional information, see user's manual
for Navigation, Entertainment and Communi‐
cation.
Jump-starting
Notes
If the battery is discharged, an engine can be
started using the battery of another vehicle
and two jumper cables. Only use jumper ca‐
bles with fully insulated clamp handles.
To prevent personal injury or damage to both
vehicles, adhere strictly to the following proce‐
dure.
Seite 194MobilityBreakdown assistance194
Online Edition for Part no. 01 40 2 924 974 - X/13
Page 200 of 218

2.Engage transmission position N.3.Switch the engine off.
In this way, the ignition remains switched
on, and a Check-Control message is dis‐
played.
Do not turn off the ignition in the car
wash
Do not turn off the ignition in the car wash;
otherwise, the transmission position P is
engaged and damages can result.◀
To start the engine:
1.Depress the brake pedal.2.Press the Start/Stop button.
Pressing the Start/Stop button without step‐
ping on the brake turns the ignition off.
The vehicle cannot be locked from the outside
when in transmission position N. A signal is
sounded when an attempt is made to lock the
vehicle.
Transmission position
Transmission position P is engaged automati‐
cally:
▷When the ignition is switched off.▷After approx. 15 minutes.
Headlamps
▷Do not rub dry and do not use abrasive or
caustic cleansers.▷Soak areas that have been soiled e.g. due
to insects, with shampoo and wash off with
water.▷Thaw ice with deicing spray; do not use an
ice scraper.
After washing the vehicle
After washing the vehicle, apply the brakes
briefly to dry them; otherwise, braking action
can be reduced and corrosion of the brake
discs can occur.
Completely remove all residues on the win‐
dows, to minimize loss of visibility due to
smearing and to reduce wiper noises and
wiper blade wear.
Vehicle care
Car care products BMW recommends using cleaning and care
products from BMW, since these have been
tested and approved.
Car care and cleaning products
Follow the instructions on the container.
When cleaning the interior, open the doors or
windows.
Only use products intended for cleaning vehi‐
cles.
Cleansers can contain substances that are
dangerous and harmful to your health.◀
Vehicle paint
Regular care contributes to driving safety and
value retention. Environmental influences in
areas with elevated air pollution or natural con‐
taminants, such as tree resin or pollen can af‐
fect the vehicle's paintwork. Tailor the fre‐
quency and extent of your car care to these
influences.
Aggressive substances, such as spilled fuel,
oil, grease or bird droppings, must be removed
immediately to prevent the finish from being
altered or discolored.
Leather care
Remove dust from the leather often, using a
cloth or vacuum cleaner.
Otherwise, particles of dust and road grime
chafe in pores and folds, and lead to increased
wear and premature degradation of the leather
surface.Seite 200MobilityCare200
Online Edition for Part no. 01 40 2 924 974 - X/13
Page 209 of 218

Bulb replacement 183
Bulb replacement, front 184
Bulb replacement, rear 188
Bulb replacement, xenon headlamps 186
Bulbs and lamps 183
Button, Start/Stop 63
Bypassing, refer to Jump- starting 194
C
California Proposition 65 Warning 7
Camera, care 202
Camera, rearview cam‐ era 120
Can holder, refer to Cu‐ pholder 144
Car battery 190
Car care products 200
Care, displays 202
Care, vehicle 200
Cargo 151
Cargo area, enlarging 140
Cargo area lid 40
Cargo area, storage compart‐ ments 144
Cargo, securing 152
Cargo straps, securing cargo 152
Car key, refer to Remote con‐ trol 34
Carpet, care 202
Car wash 199
Catalytic converter, refer to Hot exhaust system 149
CBS Condition Based Serv‐ ice 181
CD/Multimedia, see user's manual for Navigation, En‐
tertainment and Communi‐
cation
Center armrest 143
Center console 16 Center-Lock, see button for
central locking 37
Central locking system 37
Central screen, refer to Con‐ trol Display 18
Changes, technical, refer to Safety 7
Changing parts 183
Changing wheels 189
Changing wheels/tires 172
Check Control 78
Checking the oil level elec‐ tronically 177
Children, seating position 59
Children, transporting safely 59
Child restraint fixing sys‐ tem 59
Child restraint fixing system LATCH 60
Child restraint fixing systems, mounting 59
Child seat, mounting 59
Child seats 59
Chrome parts, care 201
Cigarette lighter 138
Cleaning, displays 202
Climate control 127, 129
Clock 81
Closing/opening from in‐ side 40
Closing/opening via door lock 39
Closing/opening with remote control 38
Clothes hooks 144
Coasting 158
Coasting with engine decou‐ pled, coasting 158
Coasting with idling en‐ gine 158
Cockpit 14
Collision warning with City Braking function 104
Combination switch, refer to Turn signals 68 Combination switch, refer to
Wiper system 68
Comfort Access 41
COMFORT program, Dy‐ namic Driving Control 113
Compartments in the doors 143
Compass 136
Computer 85
Condensation on win‐ dows 131
Condensation under the vehi‐ cle 150
Condition Based Service CBS 181
Configuring drive pro‐ gram 114
Confirmation signal 42
ConnectedDrive, see user's manual for Navigation, En‐
tertainment and Communi‐
cation
ConnectedDrive Services
Connecting electrical devi‐ ces 138
Control Display 18
Control Display, settings 87
Controller 18, 19
Control systems, driving sta‐ bility 111
Convenient opening 38
Coolant 180
Coolant temperature 80
Cooling function 128, 130
Cooling, maximum 130
Cooling system 180
Corrosion on brake discs 150
Cruise control 115
Cruising range 81
Cupholder 144
Current fuel consumption 81
D
Damage, tires 172
Data, technical 206 Seite 209Everything from A to ZReference209
Online Edition for Part no. 01 40 2 924 974 - X/13