2014 BMW 750I XDRIVE cooling
[x] Cancel search: coolingPage 164 of 251
Adjust the vent to direct the air in your di‐
rection, e.g., if the vehicle interior is hot
from the sun.▷Draft-free ventilation:
Adjust the vent to let the air flow past you.
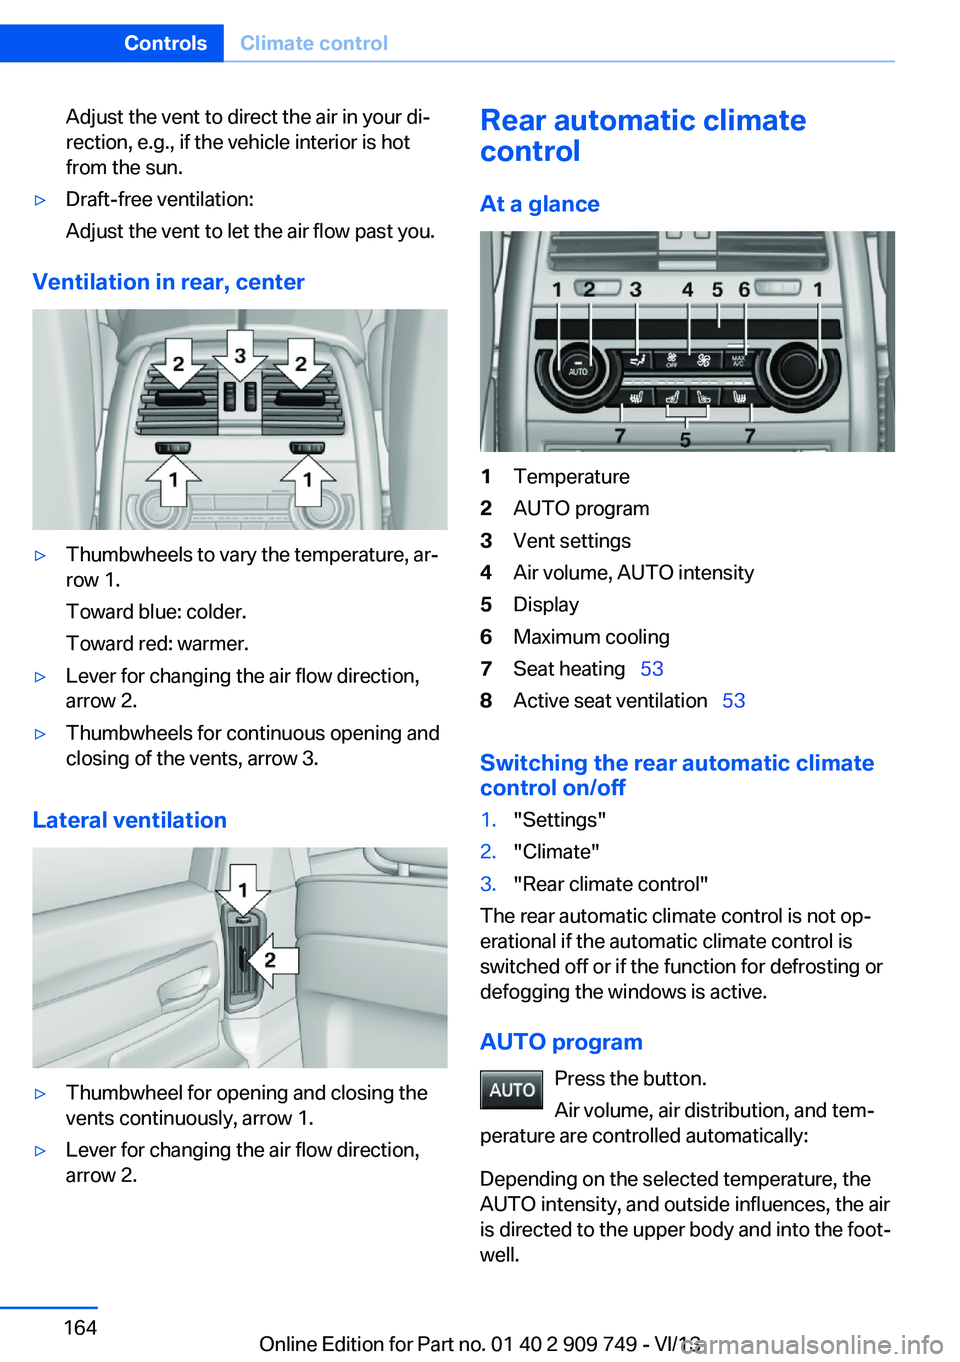
Ventilation in rear, center
▷Thumbwheels to vary the temperature, ar‐
row 1.
Toward blue: colder.
Toward red: warmer.▷Lever for changing the air flow direction,
arrow 2.▷Thumbwheels for continuous opening and
closing of the vents, arrow 3.
Lateral ventilation
▷Thumbwheel for opening and closing the
vents continuously, arrow 1.▷Lever for changing the air flow direction,
arrow 2.Rear automatic climate
control
At a glance1Temperature2AUTO program3Vent settings4Air volume, AUTO intensity5Display6Maximum cooling7Seat heating 538Active seat ventilation 53
Switching the rear automatic climate
control on/off
1."Settings"2."Climate"3."Rear climate control"
The rear automatic climate control is not op‐
erational if the automatic climate control is
switched off or if the function for defrosting or
defogging the windows is active.
AUTO program Press the button.
Air volume, air distribution, and tem‐
perature are controlled automatically:
Depending on the selected temperature, the
AUTO intensity, and outside influences, the air
is directed to the upper body and into the foot‐
well.
Seite 164ControlsClimate control164
Online Edition for Part no. 01 40 2 909 749 - VI/13
Page 165 of 251
The cooling function is switched on automati‐
cally with the AUTO program.
Intensity of the AUTO program
With the AUTO program switched on, auto‐
matic control of the air volume and air distribu‐
tion can be adjusted.
Press the left or right side of the but‐
ton: decrease or increase the inten‐
sity.
The selected intensity is shown on the display
of the automatic climate control.
Temperature Turn the wheel to set the de‐
sired temperature.
The automatic climate control achieves this
temperature as quickly as possible, if neces‐
sary with the maximum cooling or heating ca‐
pacity, and then keeps it constant.
Avoid rapidly switching between different tem‐
perature settings. The automatic climate con‐
trol will not have sufficient time to adjust the
set temperature.
Manual air distribution
The air distribution can be adjusted to individ‐
ual needs.
Press the button repeatedly to select
a program:▷Upper body region.▷Upper body region and footwell.▷Footwell.
Air volume, manual
To be able to manually adjust the air volume,
switch off the AUTO program first.
Press the left or right side of the but‐
ton: decrease or increase air volume.
The selected air volume is shown on the dis‐
play of the automatic climate control.
Switching the system on/off
Switching off Press and hold the left button.
Switching on
Press any button except:▷Left side of Air volume button.▷Seat heating.▷Seat ventilation.
Maximum cooling
Press the button.
The system is set to the lowest tem‐
perature, maximum air flow and air circulation
mode.
Air flows out of the vents for the upper body
region. Open them for this purpose.
Air is cooled as quickly as possible:
▷At an external temperature of approx.
32 ℉/0 ℃.▷When the engine is running.
Climate control operation on the
headliner
Temperature Turn the wheel to set the de‐
sired temperature.
Seite 165Climate controlControls165
Online Edition for Part no. 01 40 2 909 749 - VI/13
Page 173 of 251
▷Do not use force when plugging the con‐
nector into the USB interface.▷Do not connect devices such as fans or
lamps to the USB interface.▷Do not connect USB hard drives.▷Do not use the USB interface to recharge
external devices.
Rear cooler
Behind the center armrest
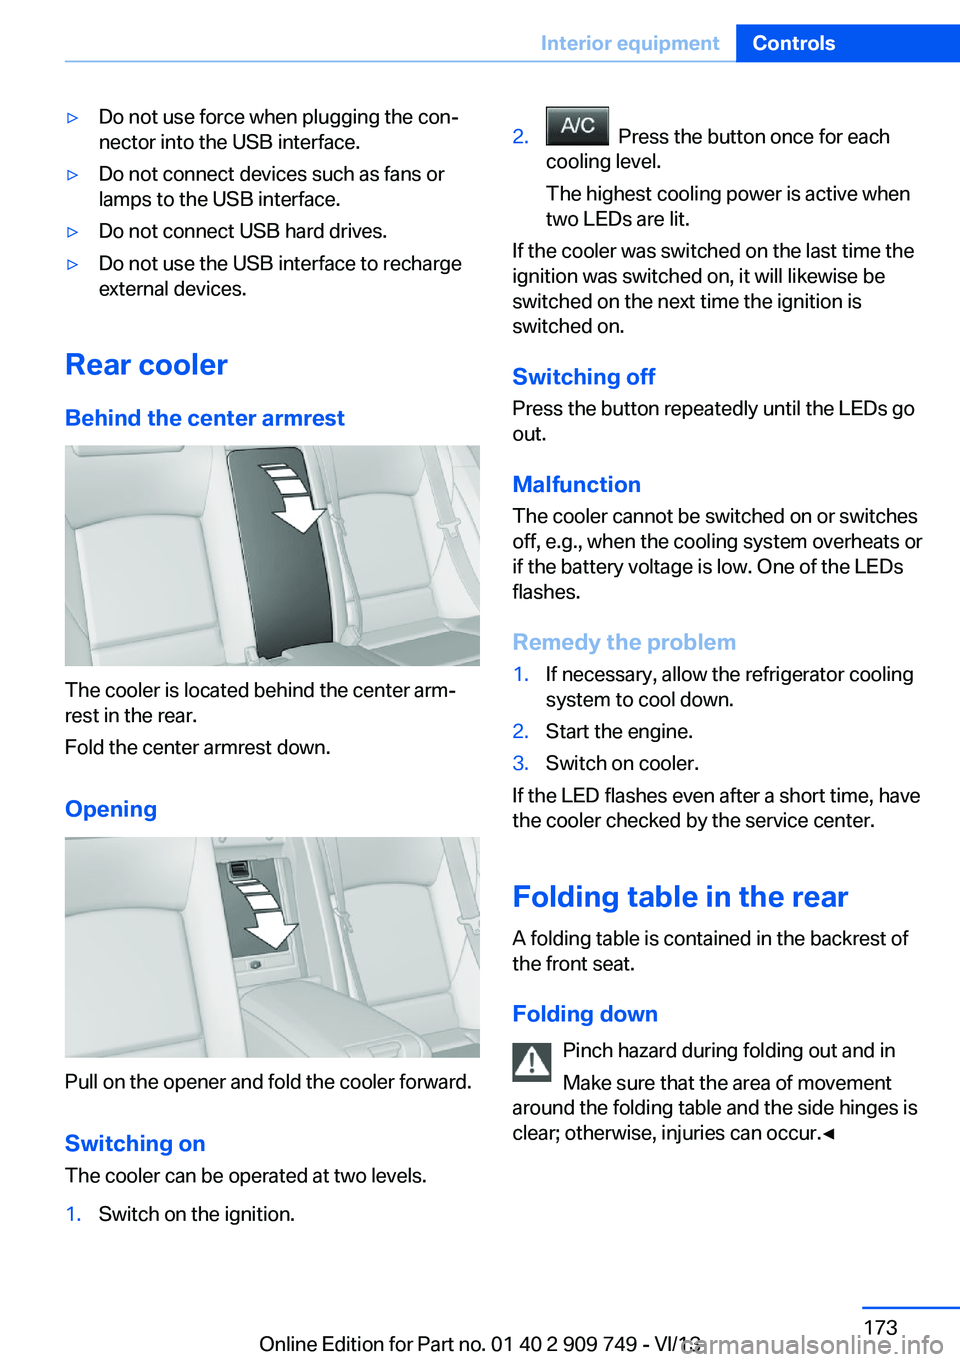
The cooler is located behind the center arm‐
rest in the rear.
Fold the center armrest down.
Opening
Pull on the opener and fold the cooler forward. Switching onThe cooler can be operated at two levels.
1.Switch on the ignition.2. Press the button once for each
cooling level.
The highest cooling power is active when
two LEDs are lit.
If the cooler was switched on the last time the
ignition was switched on, it will likewise be
switched on the next time the ignition is
switched on.
Switching off
Press the button repeatedly until the LEDs go
out.
Malfunction
The cooler cannot be switched on or switches
off, e.g., when the cooling system overheats or
if the battery voltage is low. One of the LEDs
flashes.
Remedy the problem
1.If necessary, allow the refrigerator cooling
system to cool down.2.Start the engine.3.Switch on cooler.
If the LED flashes even after a short time, have
the cooler checked by the service center.
Folding table in the rear
A folding table is contained in the backrest of
the front seat.
Folding down Pinch hazard during folding out and in
Make sure that the area of movement
around the folding table and the side hinges is
clear; otherwise, injuries can occur.◀
Seite 173Interior equipmentControls173
Online Edition for Part no. 01 40 2 909 749 - VI/13
Page 190 of 251
Activating ECO PROPress button repeatedly until ECO
PRO is displayed in the instrument
cluster.
Configuring ECO PRO
Via the Driving Dynamics Control1.Activate ECO PRO.2."Configure ECO PRO"3.Configure the program.
Via the iDrive
1."Settings"2."ECO PRO mode"
Or
1."Settings"2."Driving mode"3."Configure ECO PRO"
Configure the program.
ECO PRO Tip
▷"Tip at:":
Set ECO Pro speed at which an ECO PRO
Tip is to be displayed.▷"ECO PRO speed warning":
A reminder is displayed if the set ECO PRO
speed is exceeded.
Coasting
Fuel-efficiency can be optimized by disengag‐
ing the engine and Coasting, refer to
page 192, with the engine idling.
This function is only available in ECO PRO
mode.
ECO PRO climate control
"ECO PRO climate control"
The climate control is adjusted to be fuel-effi‐
cient.
By making a slight change to the set tempera‐
ture, or slowly adjusting the rate of heating or
cooling of the passenger compartment, fuel
consumption can be economized.
The outputs of the seat heater and the exterior
mirror heating are also reduced.
The exterior mirror heating is made available
when outside temperatures are very cold.
ECO PRO potential
The percentage of potential savings that can
be achieved with the current configuration is
displayed.
Display in the instrument cluster
Display in the instrument display
When ECO PRO mode is activated, the display
switches to a special configuration.
Some of the displays may differ from the dis‐
play in the instrument cluster.
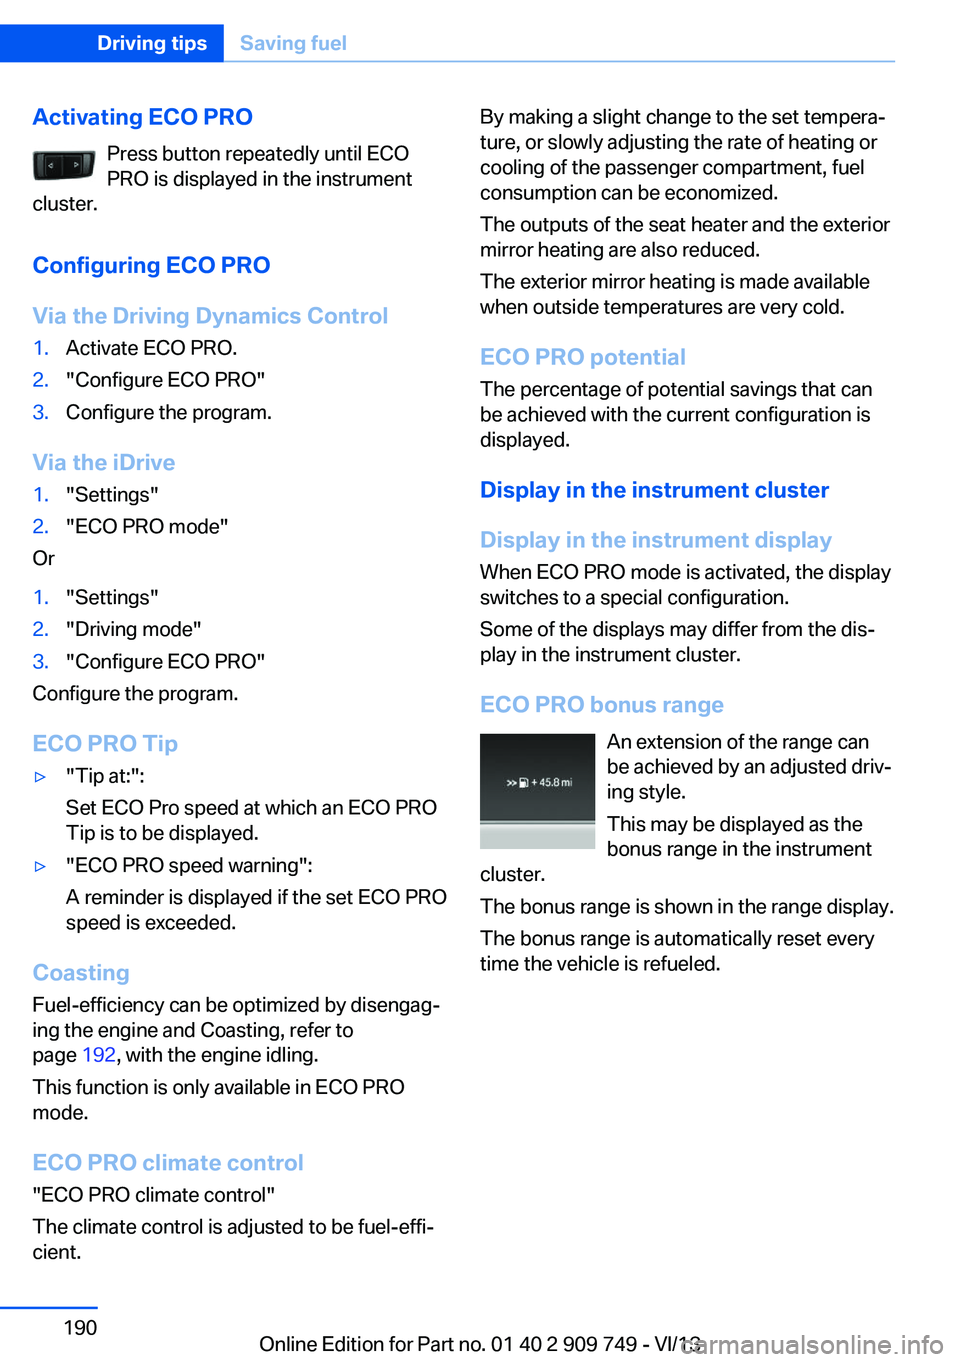
ECO PRO bonus range An extension of the range can
be achieved by an adjusted driv‐
ing style.
This may be displayed as the
bonus range in the instrument
cluster.
The bonus range is shown in the range display.
The bonus range is automatically reset every
time the vehicle is refueled.Seite 190Driving tipsSaving fuel190
Online Edition for Part no. 01 40 2 909 749 - VI/13
Page 215 of 251
CoolantVehicle equipmentAll standard, country-specific and optional
equipment that is offered in the model series is
described in this chapter. Therefore, equip‐
ment is also described that is not available in a
vehicle, e. g., because of the selected optional
equipment or country variant. This also applies
for safety-related functions and systems.
General information Danger of burns from hot engine
Do not open the cooling system while
the engine is hot; otherwise, escaping coolant may cause burns.◀
Suitable additives
Only use suitable additives; otherwise,
engine damage may occur. The additives are
harmful to your health.◀
Coolant consists of water and additives.
Not all commercially available additives are
suitable for your vehicle. Ask your service cen‐
ter for suitable additives.
Coolant level
If there is no Min. and Max. mark in the filler
neck of the coolant reservoir, have the coolant
level checked if necessary by your service cen‐
ter and add coolant as needed.
Note Depending on the engine installation, the cool‐
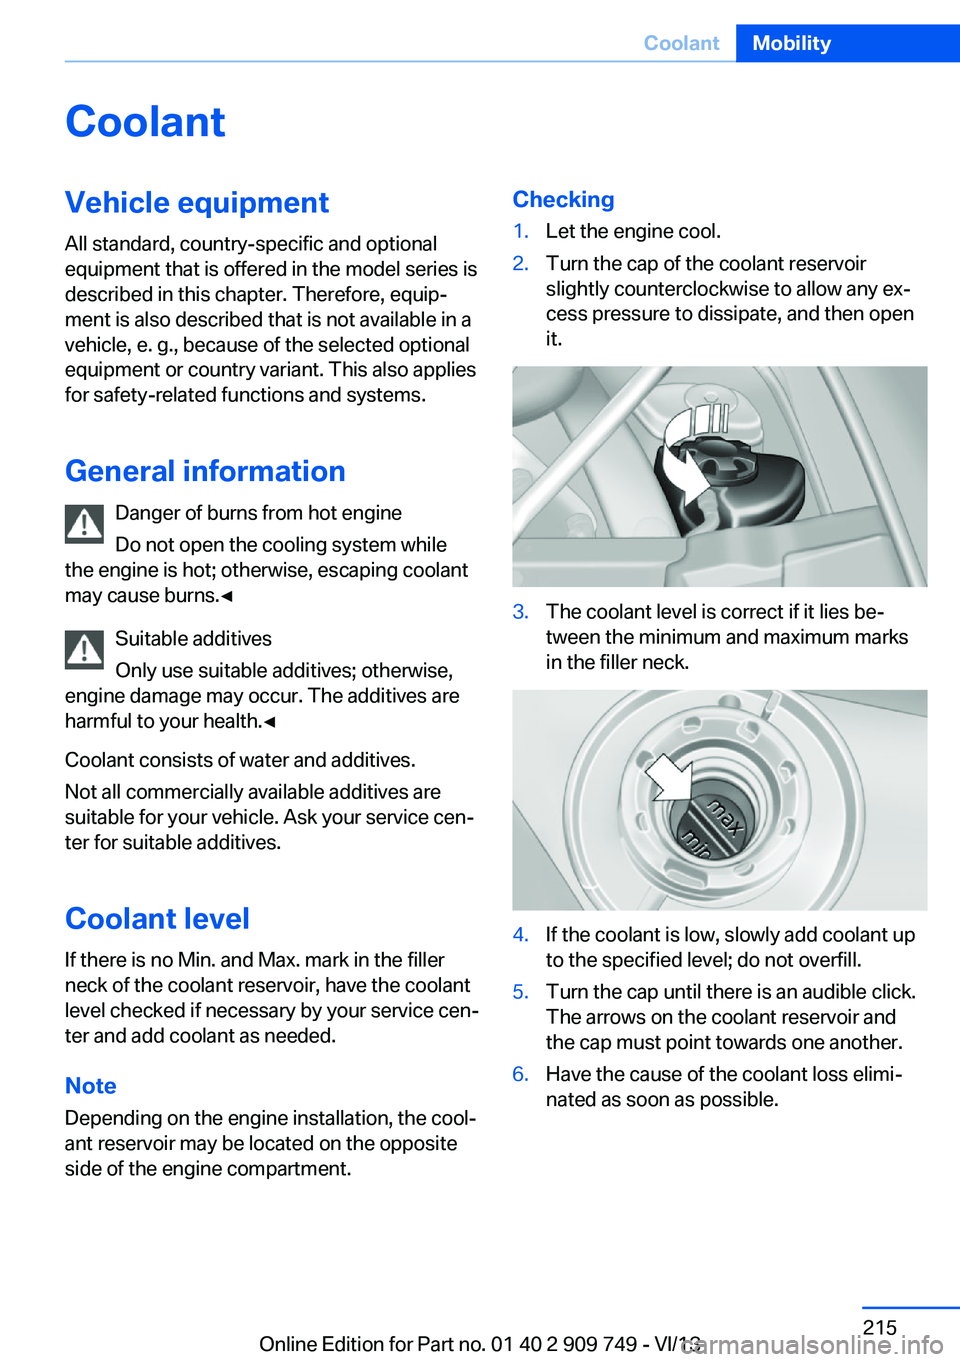
ant reservoir may be located on the opposite side of the engine compartment.Checking1.Let the engine cool.2.Turn the cap of the coolant reservoir
slightly counterclockwise to allow any ex‐
cess pressure to dissipate, and then open
it.3.The coolant level is correct if it lies be‐
tween the minimum and maximum marks
in the filler neck.4.If the coolant is low, slowly add coolant up
to the specified level; do not overfill.5.Turn the cap until there is an audible click.
The arrows on the coolant reservoir and
the cap must point towards one another.6.Have the cause of the coolant loss elimi‐
nated as soon as possible.Seite 215CoolantMobility215
Online Edition for Part no. 01 40 2 909 749 - VI/13
Page 240 of 251
Everything from A to Z
IndexA ABS, Antilock Brake Sys‐ tem 125
ACC, Active Cruise Control with Stop & Go 133
Activated-charcoal filter 163
Active Blind Spot Detec‐ tion 121
Active Cruise Control with Stop & Go, ACC 133
Active Protection 122
Active roll stabilization, see Dynamic Drive 128
Active seat, front 50
Active seat ventilation, front 50
Active seat ventilation, rear 53
Active Steering, integral 129
Adaptive brake assistant 125
Adaptive brake lights, refer to Brake force display 122
Adaptive drive 128
Adaptive light control 96
Adaptive Light Control, bulb replacement 220
Additives, oil 213
Adjust front seat 48
Adjusting, steering wheel 60
Adjustments, seats/head re‐ straints 48
After washing vehicle 231
Airbags 100
Airbags, indicator/warning light 101
Air circulation, refer to Recir‐ culated-air mode 162
Air distribution, manual 161
Air drying, refer to Cooling function 162 Air flow, automatic climate
control 161
Air pressure, tires 199
Air vents, refer to Ventila‐ tion 163
Alarm system 42
Alarm, unintentional 44
All around the center con‐ sole 14
All around the headliner 15
All around the steering wheel 12
All-season tires, refer to Win‐ ter tires 207
All-wheel-drive 127
Alternating-code hand-held transmitter 169
Alternative oil types 213
Ambient light 99
Antifreeze, washer fluid 76
Antilock Brake System, ABS 125
Anti-slip control, refer to DSC 125
Approved engine oils 213
Armrest, refer to Center arm‐ rest 177
Arrival time 92
Ashtray 170
Assistance, Roadside Assis‐ tance 226
Assistance when driving off 125
Attentiveness assistant 123
AUTO H button, refer to Au‐ tomatic Hold 72
AUTO intensity 161
Automatic car wash 230
Automatic climate con‐ trol 160 Automatic Cruise Control
with Stop & Go 133
Automatic Curb Monitor 59
Automatic deactivation, front passenger airbags 102
Automatic headlamp con‐ trol 96
Automatic Hold 72
Automatic locking 42
Automatic recirculated-air control 162
Automatic Soft Closing, doors 36
Automatic Soft Closing, trunk lid 37
Automatic tailgate 37
Automatic transmission with Steptronic 76
AUTO program, automatic cli‐ mate control 161
AUTO program, intensity 161
Auto Start/Stop function 68
Average fuel consumption 91
Average speed 91
Axle loads, weights 237
B Backrest curvature, refer to Lumbar support 49
Backrest, width 49
Back seats, adjusting 51
Backup camera 147
Band-aids, refer to First aid kit 226
Bar for tow-starting/ towing 228
Basic position, rear seats 52
Battery replacement, vehicle battery 223 Seite 240ReferenceEverything from A to Z240
Online Edition for Part no. 01 40 2 909 749 - VI/13
Page 242 of 251
Combination switch, refer toWiper system 74
COMFORT+ program, Driving Dynamics Control 131
Comfort Access 39
COMFORT program, Driving Dynamics Control 131
Computer 91
Condensation on win‐ dows 161
Condensation under the vehi‐ cle 184
Condition Based Service CBS 216
Configure driving mode 132
Confirmation signal 42
Congestion Assistant 139
ConnectedDrive, see user's manual for Navigation, En‐
tertainment and Communi‐
cation
ConnectedDrive Services
Control Display 16
Control Display, settings 93
Controller 16
Control systems, driving sta‐ bility 125
Convenient opening 34
Coolant 215
Coolant temperature 86
Cooler 173
Cooling function 162
Cooling, maximum 162
Cooling system 215
Corrosion on brake discs 184
Cruise control 142
Cruise control, active with Stop & Go 133
Cruising range 86
Cupholder 178
Curb weight 237
Current fuel consumption 87
D
Damage, tires 206 Damping Control, dy‐
namic 128
Data, technical 236
Date 86
Daytime running lights 96
Defrosting, refer to Windows, defrosting 161
Departure time, parked-car ventilation 166
Destination distance 92
Digital clock 86
Dimensions 236
Dimmable exterior mirrors 59
Dimmable interior rearview mirror 60
Direction indicator, refer to Turn signals 73
Display in windshield 157
Display lighting, refer to In‐ strument lighting 98
Displays 79, 80
Displays, cleaning 233
Disposal, vehicle battery 223
Distance control, refer to PDC 145
Distance information 158
Distance to destination 92
Divided screen view, split screen 20
Door lock, refer to Remote control 30
Doors, Automatic Soft Clos‐ ing 36
Downhill control 127
Drive-off assistant 125
Drive-off assistant, refer to DSC 125
Driver assistance, see Intelli‐ gent Safety 108
Driving Assistant, see Intelli‐ gent Safety 108
Driving Dynamics Con‐ trol 130
Driving instructions, breaking in 182
Driving mode 130 Driving notes, general 182
Driving stability control sys‐ tems 125
Driving tips 182
DSC Dynamic Stability Con‐ trol 125
DTC driving dynamics 126
DTC Dynamic Traction Con‐ trol 126
Dynamic Damping Con‐ trol 128
Dynamic Drive 128
Dynamic Stability Control DSC 125
Dynamic Traction Control DTC 126
E
ECO PRO 189
ECO PRO, bonus range 190
ECO PRO display 189
ECO PRO displays 82
ECO PRO driving mode 189
ECO PRO mode 189
ECO PRO Tip - driving in‐ struction 191
EfficientDynamics 191
Electronic displays, instru‐ ment cluster 80
Electronic Stability Program ESP, refer to DSC 125
Emergency detection, remote control 31
Emergency release, door lock 36
Emergency release, fuel filler flap 196
Emergency release, parking brake 71
Emergency Request 225
Emergency service, refer to Roadside Assistance 226
Emergency start function, en‐ gine start 31 Seite 242ReferenceEverything from A to Z242
Online Edition for Part no. 01 40 2 909 749 - VI/13
Page 245 of 251
License plate lamp, bulb re‐placement 221
Light alloy wheels, care 232
Light control 96
Light-emitting diodes, LEDs 219
Lighter, rear 171
Lighting 95
Lighting, speaker 99
Lighting via remote con‐ trol 34
Light switch 95
Load 185
Loading 185
Lock, door 35
Locking/unlocking from in‐ side 36
Locking/unlocking via door lock 35
Locking/unlocking with re‐ mote control 34
Locking, automatic 42
Locking, central 33
Locking, settings 41
Locking via trunk lid 37
Lock, power window 45
Locks, doors, and win‐ dows 65
Low beams 95
Low beams, automatic, refer to High-beam Assistant 97
Lower back support 49
Lug bolt lock 222
Luggage rack, refer to Roof- mounted luggage rack 186
Lumbar support 49
M
Maintenance 216
Maintenance require‐ ments 216
Maintenance, service require‐ ments 87
Maintenance system, BMW 216 Malfunction displays, refer to
Check Control 83
Malfunction, self-leveling sus‐ pension 130
Manual air distribution 161
Manual air flow 161
Manual brake, refer to Parking brake 70
Manual mode, transmis‐ sion 78
Manual operation, backup camera 148
Manual operation, door lock 36
Manual operation, exterior mirrors 59
Manual operation, fuel filler flap 196
Manual operation, Park Dis‐ tance Control PDC 145
Manual operation, parking brake 71
Manual operation, Side View 150
Manual operation, Top View 151
Manual operation, trunk lid 37
Marking on approved tires 207
Marking, run-flat tires 208
Massage seat, front 50
Massage seat, rear 52
Master key, refer to Remote control 30
Maximum cooling 162
Maximum speed, display 89
Maximum speed, winter tires 208
Measure, units of 93
Medical kit 226
Memory for seat, mirrors, steering wheel 57
Menu, EfficientDynamics 191
Menu in instrument clus‐ ter 90 Menus, operating, iDrive 16
Menus, refer to iDrive operat‐ ing concept 17
Messages, refer to Check Control 83
Microfilter 163
Minimum tread, tires 206
Mirror 58
Mirror memory 57
Mobile communication devi‐ ces in the vehicle 183
Modifications, technical, refer to Safety 7
Moisture in headlamp 219
Monitor, refer to Control Dis‐ play 16
Mounting of child restraint fix‐ ing systems 62
Multifunctional instrument display 80
Multifunction steering wheel, buttons 12
N Navigation, see user's manual for Navigation, Entertain‐
ment and Communication
Neck restraints, front, refer to Head restraints 55
Neck restraints, rear, refer to Head restraints 56
Neutral cleaner, see wheel cleaner 232
New wheels and tires 206
Night Vision with pedestrian detection 116
No Passing Information 89
Nylon rope for tow-starting/ towing 228
O OBD Onboard Diagnosis 217
OBD, see OBD Onboard Di‐ agnosis 217 Seite 245Everything from A to ZReference245
Online Edition for Part no. 01 40 2 909 749 - VI/13