2014 BMW 650I XDRIVE CONVERTIBLE manual transmission
[x] Cancel search: manual transmissionPage 145 of 243
Switching on/off
Switching on automatically Select transmission position R with the engine
running.
The backup camera image is displayed if the
system was switched on via the iDrive.
Automatic deactivation during forward
travel
The system switches off when a certain driving
distance or speed is exceeded.
Switch the system back on if necessary.
Switching on/off manually Press the button.▷On: the LED lights up.▷Off: the LED goes out.
The PDC is shown on the Control Display.
Switching on the rearview camera via
the iDrive
With PDC activated or Top View switched on:
"Rear view camera"
The rearview camera image is displayed. The
setting is stored for the remote control cur‐
rently in use.
Display on the Control Display
Functional requirement
▷The rearview camera is switched on.▷The trunk lid is fully closed.
Activating the assistance functions
More than one assistance function can be ac‐
tive at the same time.
▷Parking aid lines
"Parking aid lines"
Pathway and turning circle lines are dis‐
played.▷Obstacle marking
"Obstacle marking"
Spatially-shaped markings are displayed.
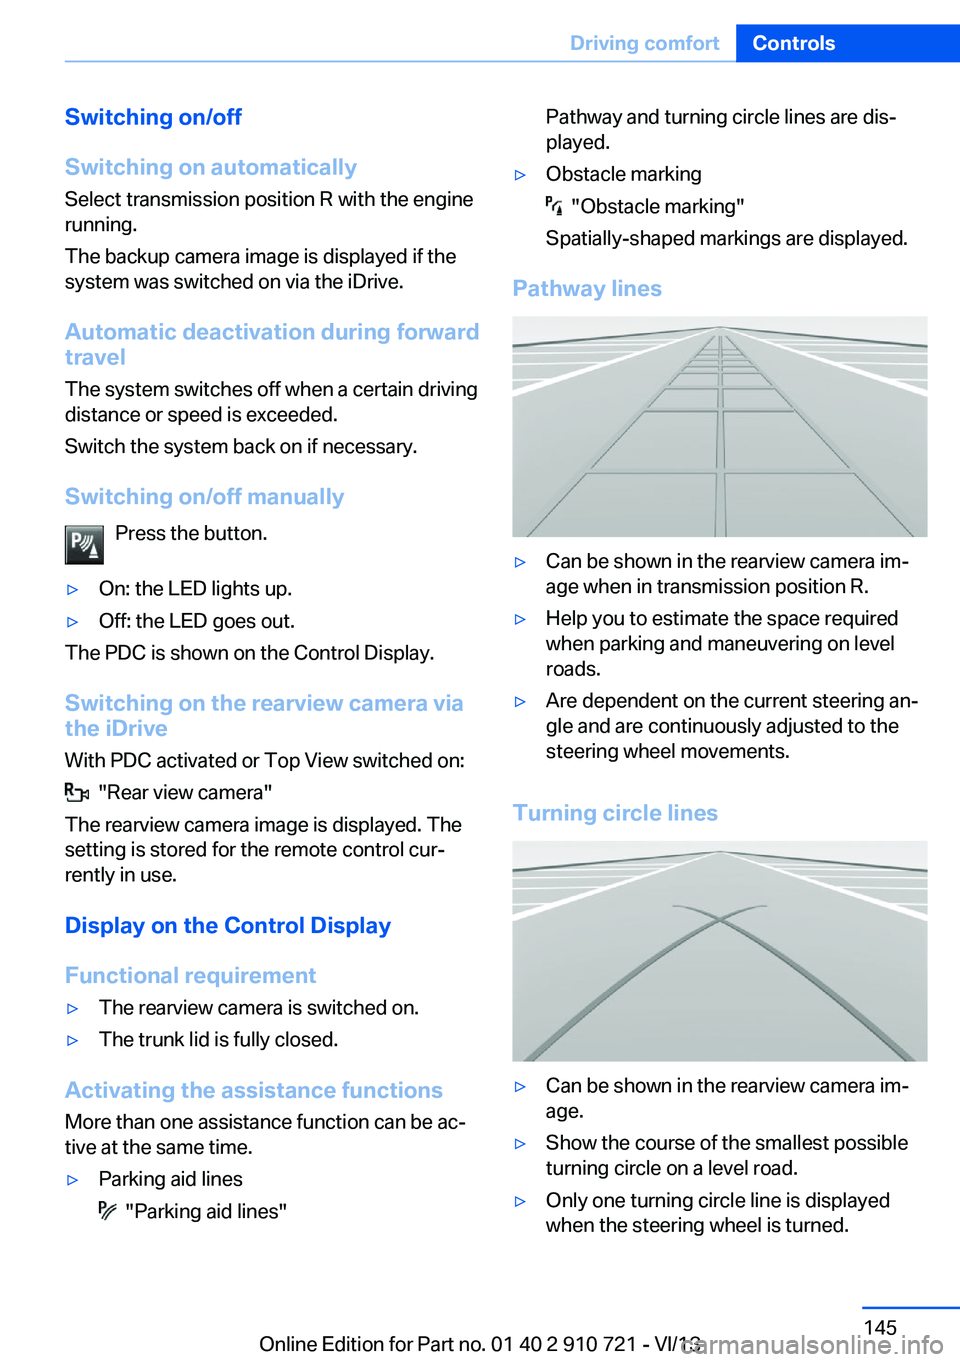
Pathway lines
▷Can be shown in the rearview camera im‐
age when in transmission position R.▷Help you to estimate the space required
when parking and maneuvering on level
roads.▷Are dependent on the current steering an‐
gle and are continuously adjusted to the
steering wheel movements.
Turning circle lines
▷Can be shown in the rearview camera im‐
age.▷Show the course of the smallest possible
turning circle on a level road.▷Only one turning circle line is displayed
when the steering wheel is turned.Seite 145Driving comfortControls145
Online Edition for Part no. 01 40 2 910 721 - VI/13
Page 147 of 243
General information
The image is captured by two cameras
integrated in the exterior mirrors and by the
backup camera.
The range is at least 7 ft/2 m to the side and
rear.
In this way, obstacles up to the height of the
exterior mirrors are detected early.
Notes Check the traffic situation as well
Check the traffic situation around the ve‐
hicle with your own eyes. Otherwise, an acci‐
dent could result from road users or objects lo‐
cated outside the picture area of the
cameras.◀
At a glance
Button in the vehicle
Top View
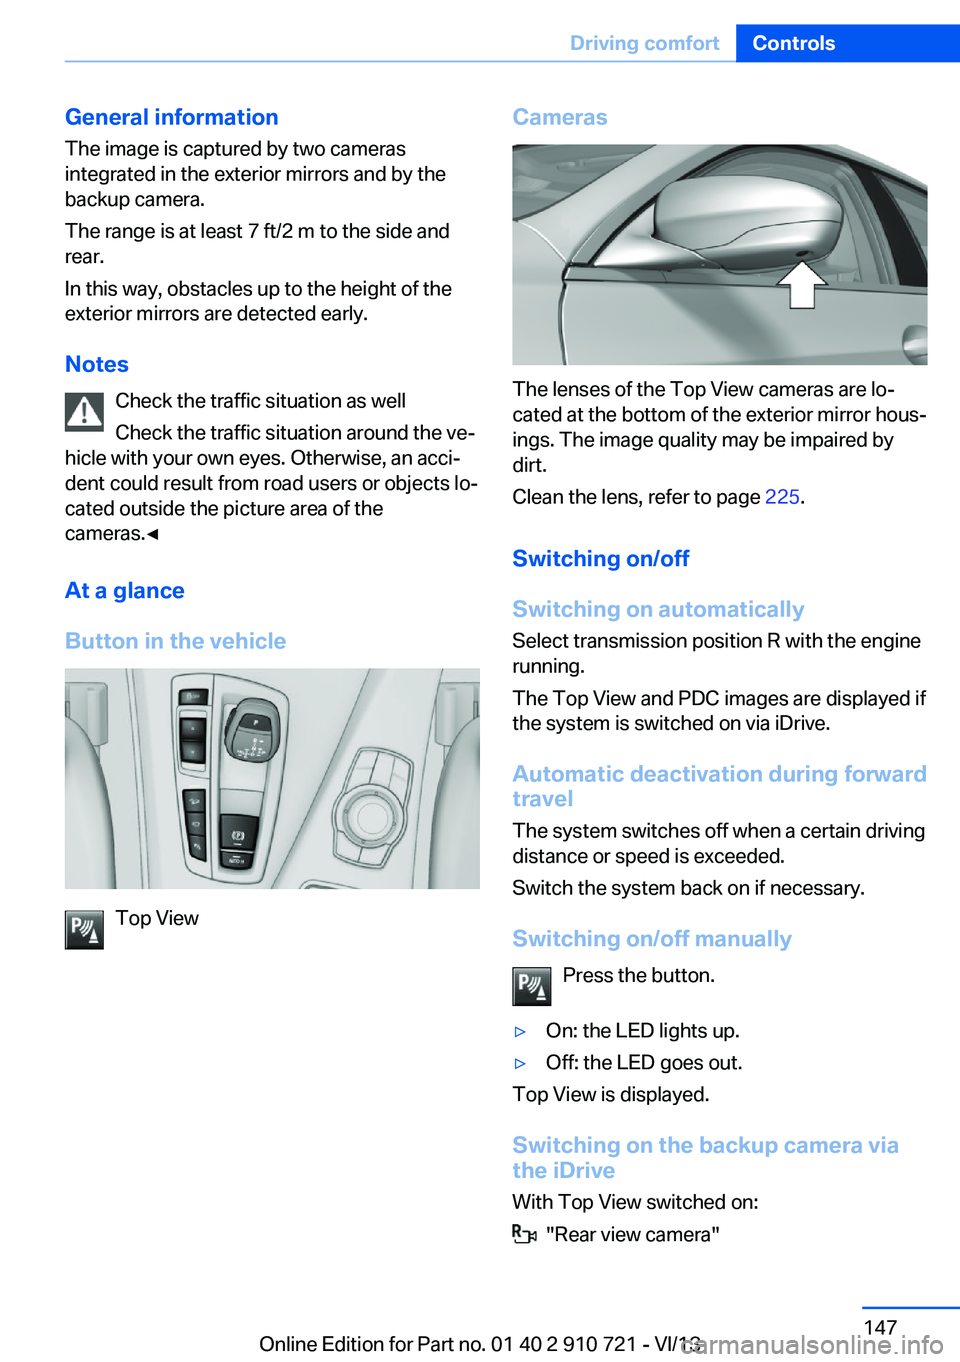
Cameras
The lenses of the Top View cameras are lo‐
cated at the bottom of the exterior mirror hous‐
ings. The image quality may be impaired by
dirt.
Clean the lens, refer to page 225.
Switching on/off
Switching on automatically Select transmission position R with the engine
running.
The Top View and PDC images are displayed if
the system is switched on via iDrive.
Automatic deactivation during forward
travel
The system switches off when a certain driving
distance or speed is exceeded.
Switch the system back on if necessary.
Switching on/off manually Press the button.
▷On: the LED lights up.▷Off: the LED goes out.
Top View is displayed.
Switching on the backup camera via
the iDrive
With Top View switched on:
"Rear view camera"
Seite 147Driving comfortControls147
Online Edition for Part no. 01 40 2 910 721 - VI/13
Page 171 of 243
Connection for an external audio
device
.
Description, see user's manual
for Navigation, Entertainment
and Communication.
Cupholders
Notes Shatter-proof containers and no hot
drinks
Use light and shatter-proof containers and do
not transport hot drinks. Otherwise, there is the increased danger of injury in an accident.◀
Unsuitable containers
Do not forcefully push unsuitable con‐
tainers into the cupholders. This may result in
damage.◀
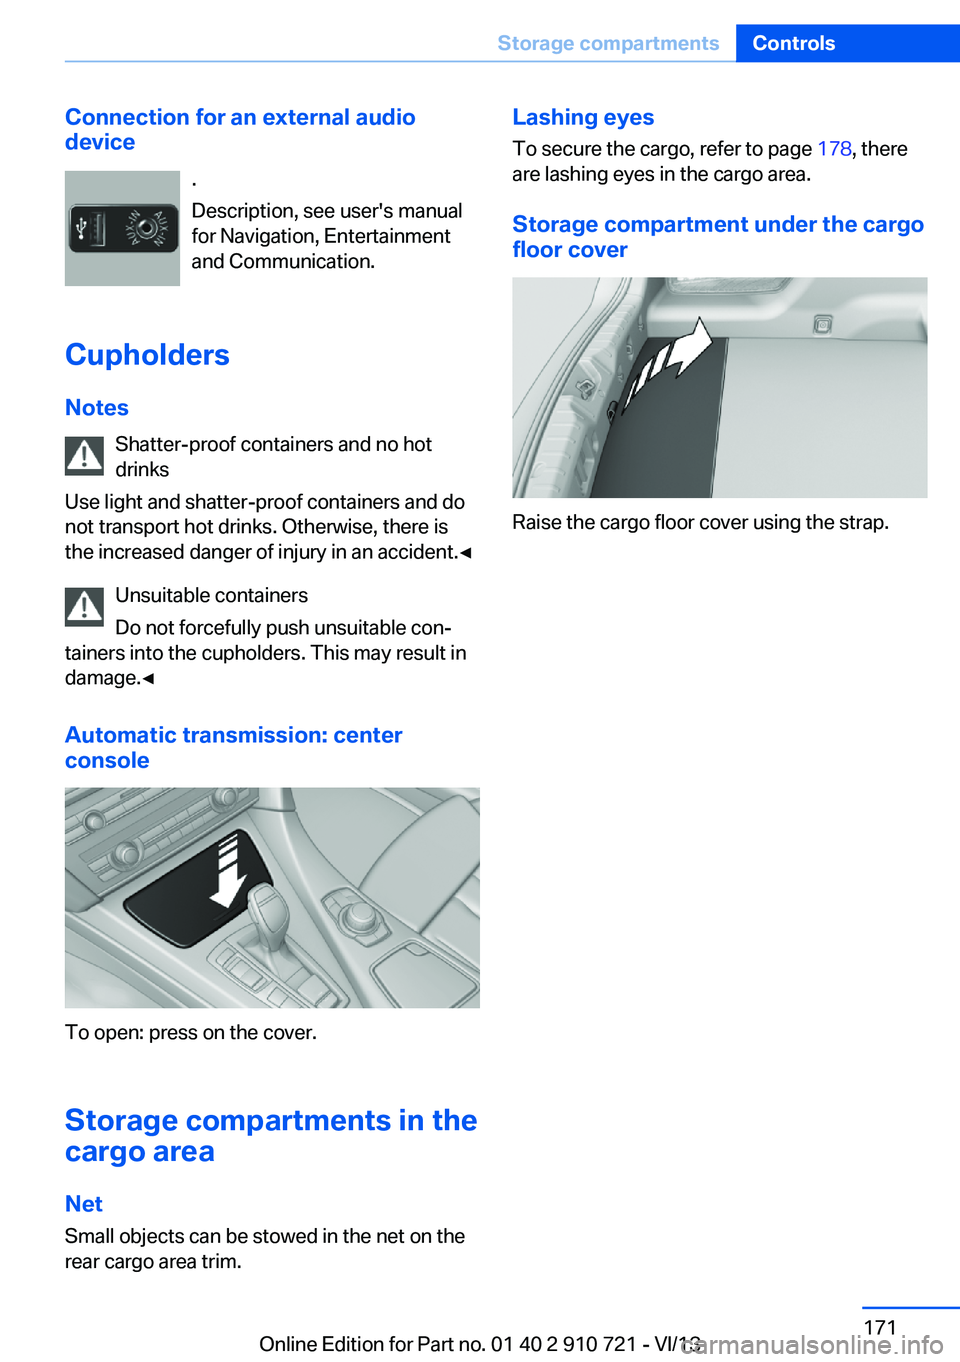
Automatic transmission: center
console
To open: press on the cover.
Storage compartments in the
cargo area
Net Small objects can be stowed in the net on the
rear cargo area trim.
Lashing eyes
To secure the cargo, refer to page 178, there
are lashing eyes in the cargo area.
Storage compartment under the cargo
floor cover
Raise the cargo floor cover using the strap.
Seite 171Storage compartmentsControls171
Online Edition for Part no. 01 40 2 910 721 - VI/13
Page 182 of 243
The display switches to blue as soon as all
conditions for fuel-economy-optimized driving
are met.
ECO PRO Tip - driving instruction The arrow indicates that the
driving style can be adjusted to
be more fuel efficient by backing
off the accelerator for instance.
Note The driving style display and ECO PRO tips in
the instrument cluster appear when the ECO
PRO display is activated.
Activating driving style and ECO PRO tips:1."Settings"2."Info display"3."ECO PRO Info"
In the instrument display:
1."Settings"2."Info display"3."Driving mode view"
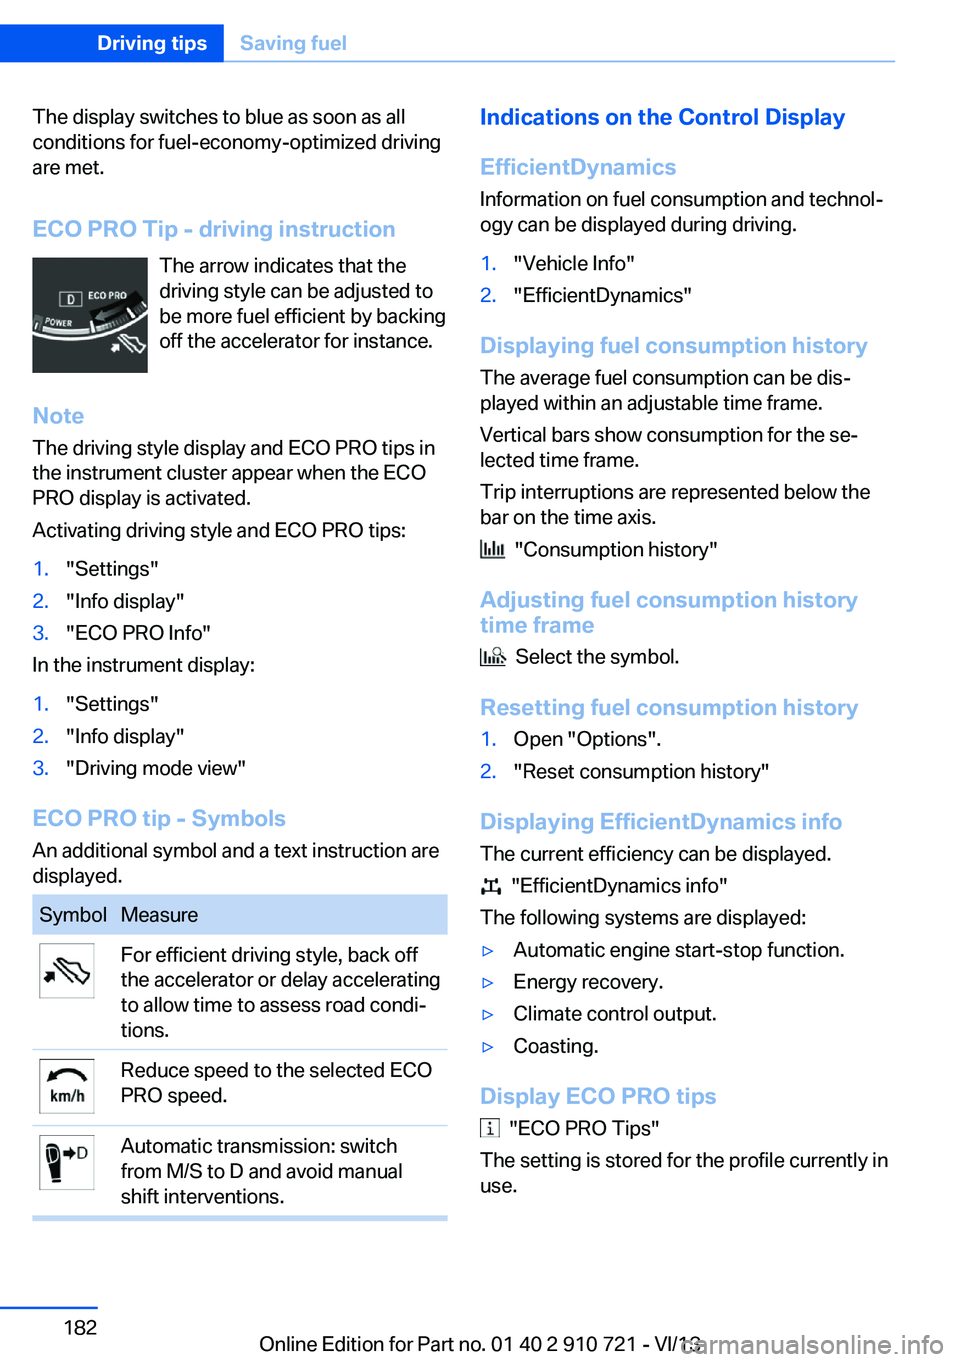
ECO PRO tip - Symbols An additional symbol and a text instruction are
displayed.
SymbolMeasureFor efficient driving style, back off
the accelerator or delay accelerating
to allow time to assess road condi‐
tions.Reduce speed to the selected ECO
PRO speed.Automatic transmission: switch
from M/S to D and avoid manual
shift interventions.Indications on the Control Display
EfficientDynamics Information on fuel consumption and technol‐
ogy can be displayed during driving.1."Vehicle Info"2."EfficientDynamics"
Displaying fuel consumption history
The average fuel consumption can be dis‐
played within an adjustable time frame.
Vertical bars show consumption for the se‐
lected time frame.
Trip interruptions are represented below the
bar on the time axis.
"Consumption history"
Adjusting fuel consumption history time frame
Select the symbol.
Resetting fuel consumption history
1.Open "Options".2."Reset consumption history"
Displaying EfficientDynamics info
The current efficiency can be displayed.
"EfficientDynamics info"
The following systems are displayed:
▷Automatic engine start-stop function.▷Energy recovery.▷Climate control output.▷Coasting.
Display ECO PRO tips
"ECO PRO Tips"
The setting is stored for the profile currently in
use.
Seite 182Driving tipsSaving fuel182
Online Edition for Part no. 01 40 2 910 721 - VI/13
Page 183 of 243
Coasting
The concept The system helps to conserve fuel.
To do this, under certain conditions the engine
is automatically decoupled from the transmis‐
sion when transmission position D is engaged.
The vehicle continues traveling with the engine
idling to reduce fuel consumption. Transmis‐
sion position D remains engaged.
This driving condition is referred to as coast‐
ing.
As soon as the brake or accelerator pedal is depressed, the engine is automatically coupled
to the transmission again.
Hints
Coasting is a component of the ECO PRO, re‐
fer to page 180, driving mode.
The function is available in a certain speed
range.
A forward-looking driving style helps the driver
to use the function as often as possible and
supports the fuel-conserving effect of coast‐
ing.
Safety mode
The function is not available if one of the fol‐
lowing conditions is satisfied.▷DSC OFF or TRACTION activated.▷Driving in the dynamic limit range and on
steep uphill or downhill grades.▷Battery charge status temporarily too low
or vehicle electrical system drawing exces‐
sive current.▷Cruise control activated.
Functional requirements
In ECO PRO mode, this function is available in
a speed range from approximately 30 mph, ap‐
prox. 50 km/h to 100 mph, approx. 160 km/h, if
the following conditions are satisfied:
▷Accelerator pedal and brake pedal are not
operated.▷The selector lever is in transmission posi‐
tion D.▷Engine and transmission are at operating
temperature.
Display
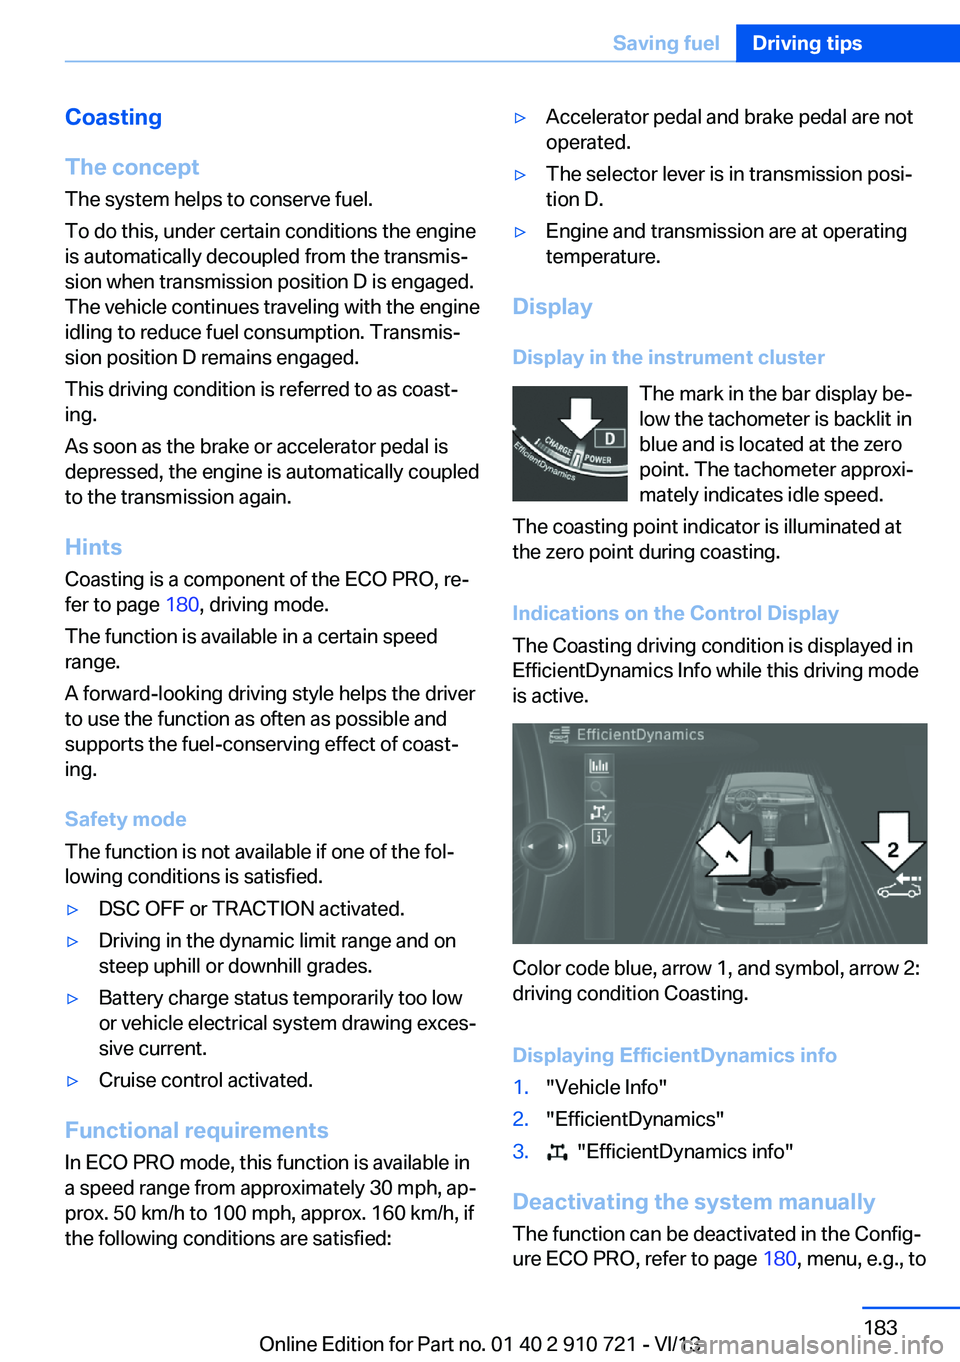
Display in the instrument cluster The mark in the bar display be‐
low the tachometer is backlit in
blue and is located at the zero
point. The tachometer approxi‐
mately indicates idle speed.
The coasting point indicator is illuminated at
the zero point during coasting.
Indications on the Control Display
The Coasting driving condition is displayed in
EfficientDynamics Info while this driving mode
is active.
Color code blue, arrow 1, and symbol, arrow 2:
driving condition Coasting.
Displaying EfficientDynamics info
1."Vehicle Info"2."EfficientDynamics"3. "EfficientDynamics info"
Deactivating the system manually The function can be deactivated in the Config‐
ure ECO PRO, refer to page 180, menu, e.g., to
Seite 183Saving fuelDriving tips183
Online Edition for Part no. 01 40 2 910 721 - VI/13
Page 221 of 243
CareVehicle equipmentAll standard, country-specific and optional
equipment that is offered in the model series is
described in this chapter. Therefore, equip‐
ment is also described that is not available in a
vehicle, e. g., because of the selected optional
equipment or country variant. This also applies
for safety-related functions and systems.
Car washes Hints Steam jets or high-pressure washers
When using steam jets or high-pressure
washers, hold them a sufficient distance away and use a maximum temperature of
140 ℉/60 ℃.
Holding them too close or using excessively
high pressures or temperatures can cause
damage or preliminary damage that may then lead to long-term damage.
Follow the user's manual for the high-pressure
washer.◀
Cleaning sensors/cameras with high-
pressure washers
When using high-pressure washers, do not
spray the exterior sensors and cameras, e.g., Park Distance Control, for extended periods of
time and only from a distance of at least
12 in/30 cm.◀
Regularly remove foreign items such as leaves
in the area below the windshield when the
hood is raised.
Wash your vehicle frequently, particularly in
winter.
Intense soiling and road salt can damage the
vehicle.Automatic car washes
Hints Do not use high pressure washing sys‐
tems
With washing systems operating at high pres‐
sures and nozzle positions close to the win‐
dows, drops of water can penetrate.◀
Note the following:▷Give preference to cloth car washes or
those that use soft brushes in order to
avoid paint damage.▷Make sure that the wheels and tires are not
damaged by the transport mechanisms.▷Fold in the exterior mirrors; otherwise, they
may be damaged, depending on the width
of the vehicle.▷Deactivate the rain sensor, refer to
page 71, to avoid unintentional wiper acti‐
vation.▷Do not treat the convertible top with wax.
Ensure that a cycle without wax or a spe‐
cial cycle for convertibles is available.▷In some cases, an unintentional alarm can
be triggered by the interior motion sensor
of the alarm system. Follow the instruc‐
tions on avoiding an unintentional alarm,
refer to page 41.
Guide rails in car washes
Avoid car washes with guide rails higher
than 4 in/10 cm; otherwise, the vehicle body
could be damaged.◀
Before driving into a car wash In order to ensure that the vehicle can roll in a
car wash, take the following steps:
Automatic transmission:
1.Drive into the car wash.Seite 221CareMobility221
Online Edition for Part no. 01 40 2 910 721 - VI/13
Page 230 of 243

640i xiDriveApproved gross vehicle weightlbs/kg5,310/2,409Loadlbs/kg770/349Approved front axle loadlbs/kg2,625/1,191Approved rear axle loadlbs/kg2,890/1,311Cargo area capacity
With cargo area partition flipped up
cu ft/l
cu ft/l
10.6/300
12.4/350
650iApproved gross vehicle weightManual transmission
Sport automatic transmission
lbs/kg
lbs/kg
5,425/2,461
5,425/2,461
Loadlbs/kg770/349Approved front axle loadlbs/kg2,700/1,225Approved rear axle loadlbs/kg2,910/1,320Cargo area capacity
With cargo area partition flipped up
cu ft/l
cu ft/l
10.6/300
12.4/350
650i xDriveApproved gross vehicle weightlbs/kg5,465/2,479Loadlbs/kg750/340Approved front axle loadlbs/kg2,755/1,250Approved rear axle loadlbs/kg2,975/1,349Cargo area capacity
With cargo area partition flipped up
cu ft/l
cu ft/l
10.6/300
12.4/350
Seite 230ReferenceTechnical data230
Online Edition for Part no. 01 40 2 910 721 - VI/13
Page 232 of 243
Everything from A to Z
IndexA ABS, Antilock Brake Sys‐ tem 122
ACC, Active Cruise Control with Stop & Go 130
Activated-charcoal filter 160
Active Blind Spot Detec‐ tion 117
Active Cruise Control with Stop & Go, ACC 130
Active Protection 119
Active roll stabilization, see Dynamic Drive 125
Active seat, front 53
Active seat ventilation, front 53
Active Steering, integral 125
Adaptive brake assistant 122
Adaptive brake lights, refer to Brake force display 119
Adaptive drive 125
Adaptive light control 92
Additives, oil 206
Adjusting, steering wheel 59
Adjustments, seats/head re‐ straints 51
After washing vehicle 222
Airbags 96
Airbags, indicator/warning light 97
Air circulation, refer to Recir‐ culated-air mode 159
Air distribution, manual 158
Air drying, refer to Cooling function 159
Air flow, automatic climate control 158
Air pressure, tires 191
Air vents, refer to Ventila‐ tion 160 Alarm system 40
Alarm, unintentional 41
All around the center con‐ sole 14
All around the interior rear‐ view mirror 15
All around the steering wheel 12
All-season tires, refer to Win‐ ter tires 200
All-wheel-drive 124
Alternating-code hand-held transmitter 165
Alternative oil types 206
Ambient light 94
Antifreeze, washer fluid 72
Antilock Brake System, ABS 122
Anti-slip control, refer to DSC 122
Approved engine oils 206
Armrest, refer to Front center armrest 170
Arrival time 88
Ashtray 166
Assistance, Roadside Assis‐ tance 217
Assistance when driving off 122
Attentiveness assistant 119
AUTO H button, refer to Au‐ tomatic Hold 68
AUTO intensity 158
Automatic car wash 221
Automatic Cruise Control with Stop & Go 130
Automatic Curb Monitor 58
Automatic deactivation, front passenger airbags 98
Automatic headlamp con‐ trol 92 Automatic Hold 68
Automatic locking 39
Automatic recirculated-air control 159
Automatic Soft Closing, doors 36
Automatic transmission with Steptronic 72
AUTO program, automatic cli‐ mate control 158
AUTO program, intensity 158
Auto Start/Stop function 65
Average fuel consumption 88
Average speed 88
Axle loads, weights 229
B Backrest curvature, refer to Lumbar support 52
Backrest, seats 51
Backrest, width 52
Backup camera 144
Band-aids, refer to First aid kit 217
Bar for tow-starting/ towing 219
Battery replacement, remote control for parked-car heat‐
ing/ventilation 162
Battery replacement, vehicle battery 214
Battery replacement, vehicle remote control 30
Battery, vehicle 214
Belts, safety belts 54
Beverage holder, cu‐ pholder 171
BMW Assist, see user's manual for Navigation, En‐Seite 232ReferenceEverything from A to Z232
Online Edition for Part no. 01 40 2 910 721 - VI/13