2014 BMW 640I CONVERTIBLE fog light
[x] Cancel search: fog lightPage 112 of 243

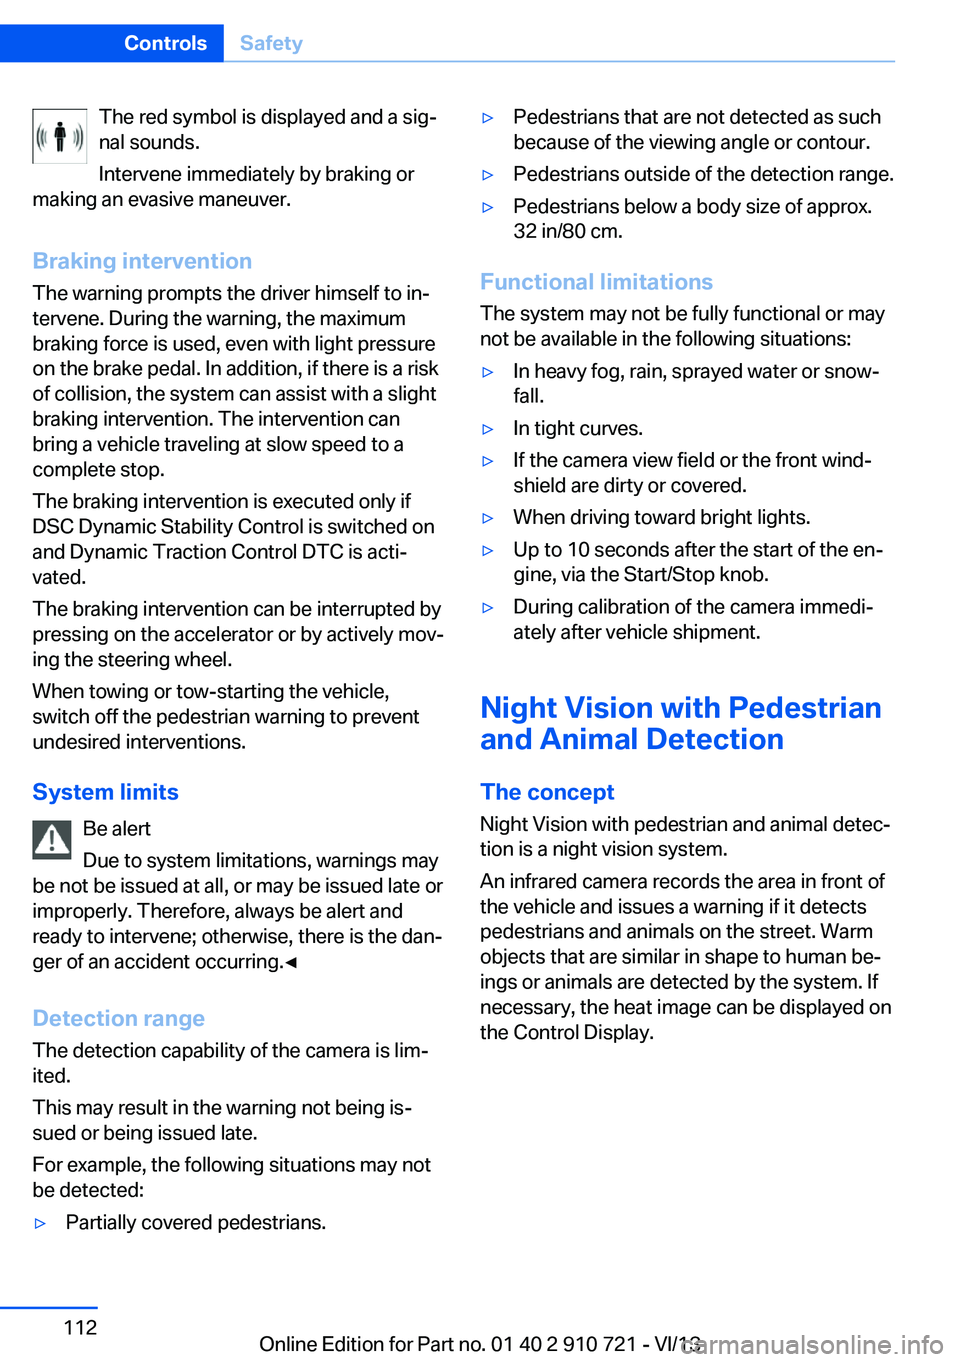
The red symbol is displayed and a sig‐
nal sounds.
Intervene immediately by braking or
making an evasive maneuver.
Braking intervention
The warning prompts the driver himself to in‐
tervene. During the warning, the maximum
braking force is used, even with light pressure
on the brake pedal. In addition, if there is a risk
of collision, the system can assist with a slight
braking intervention. The intervention can
bring a vehicle traveling at slow speed to a
complete stop.
The braking intervention is executed only if
DSC Dynamic Stability Control is switched on
and Dynamic Traction Control DTC is acti‐
vated.
The braking intervention can be interrupted by
pressing on the accelerator or by actively mov‐
ing the steering wheel.
When towing or tow-starting the vehicle,
switch off the pedestrian warning to prevent
undesired interventions.
System limits Be alert
Due to system limitations, warnings may
be not be issued at all, or may be issued late or
improperly. Therefore, always be alert and
ready to intervene; otherwise, there is the dan‐
ger of an accident occurring.◀
Detection range
The detection capability of the camera is lim‐
ited.
This may result in the warning not being is‐
sued or being issued late.
For example, the following situations may not
be detected:▷Partially covered pedestrians.▷Pedestrians that are not detected as such
because of the viewing angle or contour.▷Pedestrians outside of the detection range.▷Pedestrians below a body size of approx.
32 in/80 cm.
Functional limitations
The system may not be fully functional or may
not be available in the following situations:
▷In heavy fog, rain, sprayed water or snow‐
fall.▷In tight curves.▷If the camera view field or the front wind‐
shield are dirty or covered.▷When driving toward bright lights.▷Up to 10 seconds after the start of the en‐
gine, via the Start/Stop knob.▷During calibration of the camera immedi‐
ately after vehicle shipment.
Night Vision with Pedestrian
and Animal Detection
The concept Night Vision with pedestrian and animal detec‐
tion is a night vision system.
An infrared camera records the area in front of
the vehicle and issues a warning if it detects
pedestrians and animals on the street. Warm
objects that are similar in shape to human be‐
ings or animals are detected by the system. If necessary, the heat image can be displayed on
the Control Display.
Seite 112ControlsSafety112
Online Edition for Part no. 01 40 2 910 721 - VI/13
Page 117 of 243

▷Arrows: at least one lane marking was de‐
tected and warnings can be issued.
Display in the instrument display
▷Symbol red: system is activated.▷Symbol green: at least one lane
marking was detected and warn‐
ings can be issued.
Issued warning
If you leave the lane and if a lane marking has
been detected, the steering wheel begins vi‐
brating.
If the turn signal is set before changing the
lane, a warning is not issued.
End of warning
The warning ends:
▷Automatically after approx. 3 seconds.▷When returning to your own lane.▷When braking hard.▷When using the turn signal.
System limits
The system may not be fully functional in the
following situations:
▷In heavy fog, rain or snowfall.▷In the event of worn, poorly visible, merg‐
ing, diverging, or multiple lane markings
such as in construction areas.▷When lane markings are covered in snow,
ice, dirt or water.▷In tight curves or on narrow lanes.▷When the lane markings are covered by
objects.▷When driving very close to the vehicle in
front of you.▷When driving toward bright lights.▷When the windshield in front of the interior
rearview mirror is fogged over, dirty or cov‐
ered with stickers, etc.▷During calibration of the camera immedi‐
ately after vehicle shipment.
Active Blind Spot Detection
The concept
Two radar sensors below the rear bumper
monitor the area behind and next to the vehicle
at speeds above approx. 30 mph/50 km/h.
The system indicates whether there are vehi‐
cles in the blind spot, arrow 1, or approaching
from behind on the adjacent lane, arrow 2.
The lamp in the exterior mirror housing lights
up dimly.
Before you change lanes after setting the turn
signal, the system issues a warning in the sit‐
uations described above.
The lamp in the housing of the exterior mirror
flashes and the steering wheel vibrates.
Notes Personal responsibility
The system does not serve as a substi‐
tute for the driver's personal judgment of the
traffic situation.
Be aware of the traffic situation and the vehi‐
cle's surroundings at all times, otherwise an
accident is still possible despite all warnings.◀
Seite 117SafetyControls117
Online Edition for Part no. 01 40 2 910 721 - VI/13
Page 118 of 243

At a glance
Button in the vehicle
Active Blind Spot Detection
Radar sensors
The radar sensors are located under the rear
bumper.
Switching on/off Press the button.
▷On: the LED lights up.▷Off: the LED goes out.
The system can issue warnings at speeds
above approx. 30 mph/50 km/h.
The state is stored for the remote control cur‐
rently in use.
Display
Information stage
The dimmed lamp in the mirror housing indi‐
cates when there are vehicles in the blind spot
or approaching from behind.
Warning
If the turn signal is set while a vehicle is in the
critical zone, the steering wheel vibrates briefly
and the lamp in the mirror housing flashes
brightly.
The warning stops when the turn signal is
switched off, or the other vehicle leaves the
critical zone.
System limits
The system may not be fully functional in the
following situations:
▷When a vehicle is approaching at a speed
much faster than your own.▷In heavy fog, rain or snowfall.▷In tight curves or on narrow lanes.▷If the bumper is dirty or iced up, or covered
with stickers.
A Check Control message is displayed when
the system is not fully functional.
For US owners only The transmitter and receiver units comply with
part 15 of the FCC/Federal Communication
Commission regulations. Operation is gov‐
erned by the following:
FCC ID:
Seite 118ControlsSafety118
Online Edition for Part no. 01 40 2 910 721 - VI/13
Page 211 of 243

the service center if you are unfamiliar with
them or they are not described here.
You can obtain a selection of replacement
bulbs at the service center.
Danger of burns
Only change bulbs when they are cool;
otherwise, there is the danger of getting
burned.◀
Working on the lighting system
When working on the lighting system,
you should always switch off the lights af‐
fected to prevent short circuits.
To avoid possible injury or equipment damage
when replacing bulbs, observe any instructions
provided by the bulb manufacturer.◀
Do not perform work/bulb replacement
on xenon headlamps
Have any work on the xenon lighting system,
including bulb replacement, performed only by
a service center. Due to the high voltage
present in the system, there is the danger of
fatal injuries if work is carried out improperly.◀
Do not touch the bulbs
Do not touch the glass of new bulbs with
your bare hands, as even minute amounts of
contamination will burn into the bulb's surface
and reduce its service life.
Use a clean tissue, cloth or something similar,
or hold the bulb by its base.◀
Light-emitting diodes (LEDs)
Light-emitting diodes installed behind a cover
serve as the light source for controls, display
elements and other equipment.
These light-emitting diodes, which are related
to conventional lasers, are officially designated as Class 1 light-emitting diodes.Do not remove the covers
Do not remove the covers, and never
stare into the unfiltered light for several hours;
otherwise, irritation of the retina could result.◀
Headlamp glass
Condensation can form on the inside of the ex‐
ternal lamps in cool or humid weather. When
driving with the light switched on, the conden‐
sation evaporates after a short time. The head‐
lamp glasses do not need to be changed.
If the headlamps do not dim despite driving
with the light switched on, increasing humidity
forms, e. g. water droplets in the light, have the
service center check this.
Headlamp setting
The headlamp adjustments can be affected by
changing lamps and bulbs. Therefore after a
change, have the headlamp setting checked
and corrected by Service.
Xenon headlamps
Hints
Because of the long life of these bulbs, the
likelihood of failure is very low. Switching the
lamps on and off frequently shortens their life.
If a bulb fails, switch on the front fog lamps and
continue the trip with great care. Comply with
local regulations.
Do not perform work/bulb replacement
on xenon headlamps
Have any work on the xenon lighting system,
including bulb replacement, performed only by
a service center. Due to the high voltage
present in the system, there is the danger of
fatal injuries if work is carried out improperly.◀
For checking and adjusting headlamp aim,
please contact your BMW center.Seite 211Replacing componentsMobility211
Online Edition for Part no. 01 40 2 910 721 - VI/13
Page 212 of 243

Light-emitting diodes (LEDs)
Follow the general instructions on Lamps and
bulbs, refer to page 210.
With Xenon-headlamps, the following lamps
are designed with LED technology:▷Parking lamps and roadside parking lamps.▷Turn signals, incl. side indicators▷Daytime running lights
Contact your service center in the event of a
malfunction.
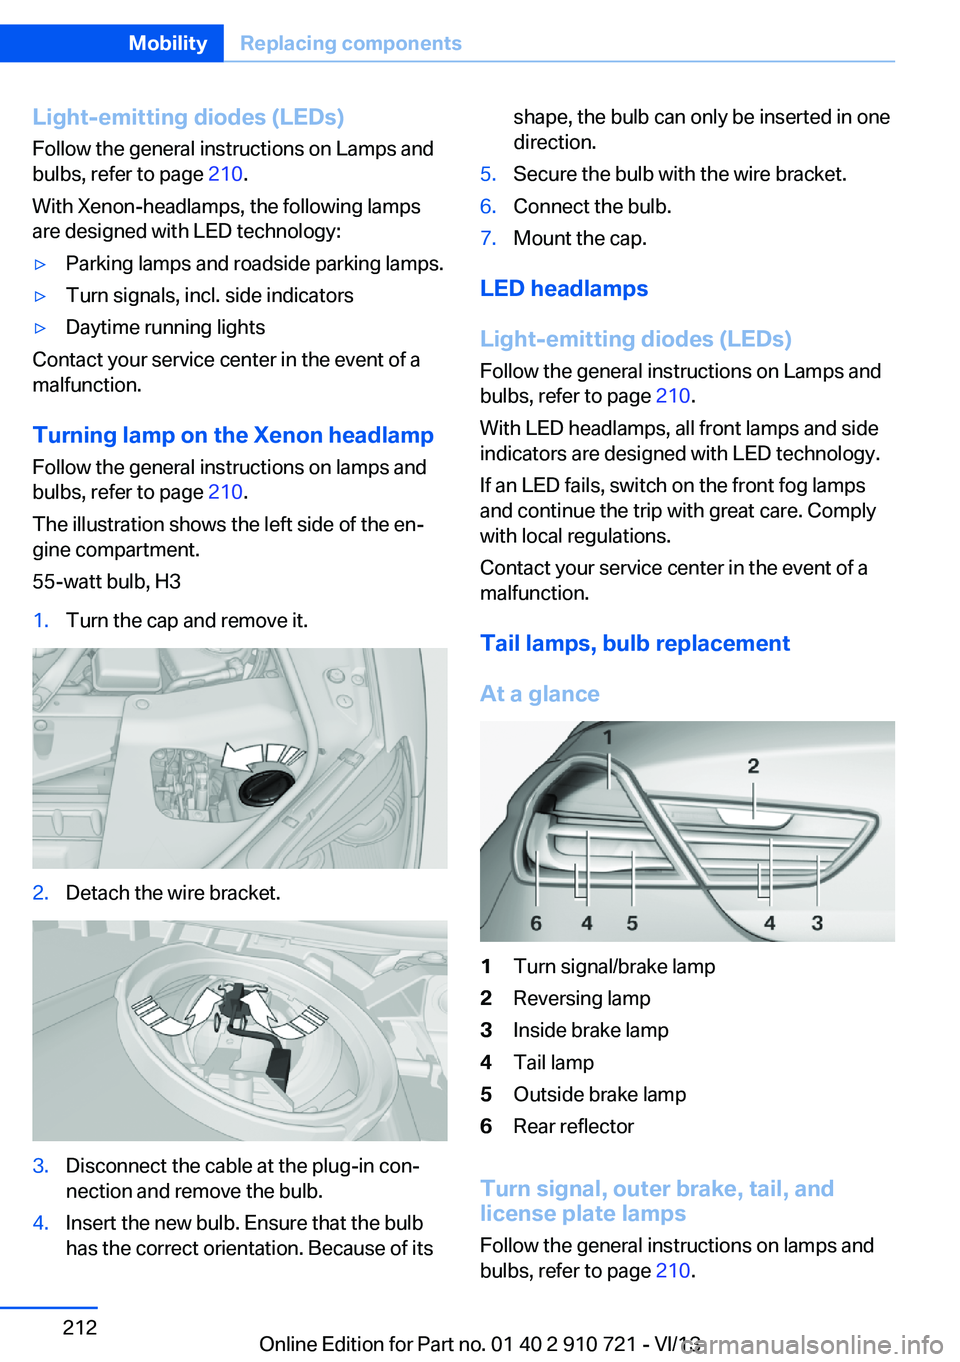
Turning lamp on the Xenon headlamp
Follow the general instructions on lamps and
bulbs, refer to page 210.
The illustration shows the left side of the en‐
gine compartment.
55-watt bulb, H3
1.Turn the cap and remove it.2.Detach the wire bracket.3.Disconnect the cable at the plug-in con‐
nection and remove the bulb.4.Insert the new bulb. Ensure that the bulb
has the correct orientation. Because of itsshape, the bulb can only be inserted in one
direction.5.Secure the bulb with the wire bracket.6.Connect the bulb.7.Mount the cap.
LED headlamps
Light-emitting diodes (LEDs)
Follow the general instructions on Lamps and
bulbs, refer to page 210.
With LED headlamps, all front lamps and side
indicators are designed with LED technology.
If an LED fails, switch on the front fog lamps
and continue the trip with great care. Comply
with local regulations.
Contact your service center in the event of a
malfunction.
Tail lamps, bulb replacement
At a glance
1Turn signal/brake lamp2Reversing lamp3Inside brake lamp4Tail lamp5Outside brake lamp6Rear reflector
Turn signal, outer brake, tail, and
license plate lamps
Follow the general instructions on lamps and
bulbs, refer to page 210.
Seite 212MobilityReplacing components212
Online Edition for Part no. 01 40 2 910 721 - VI/13
Page 235 of 243

Emergency unlocking, trunklid 38
Energy Control 84
Energy recovery 84
Engine, automatic Start/Stop function 65
Engine, automatic switch- off 65
Engine compartment 203
Engine compartment, work‐ ing in 203
Engine coolant 207
Engine idling when driving, coasting 183
Engine oil 205
Engine oil, adding 206
Engine oil additives 206
Engine oil change 206
Engine oil filler neck 206
Engine oil temperature 82
Engine oil types, alterna‐ tive 206
Engine oil types, ap‐ proved 206
Engine start during malfunc‐ tion 31
Engine start, jump-start‐ ing 218
Engine start, refer to Starting the engine 64
Engine stop 64
Engine temperature 82
Entering/exiting vehicle, as‐ sistance, steering wheel 59
Entering a car wash 221
Equipment, interior 164
ESP Electronic Stability Pro‐ gram, refer to DSC 122
Exchanging wheels/tires 199
Exhaust system 174
Exterior mirror, automatic dimming feature 58
Exterior mirrors 57
External start 218
External temperature dis‐ play 83 External temperature warn‐
ing 83
Eyes for securing cargo 178
F
Failure message, refer to Check Control 80
False alarm, refer to Uninten‐ tional alarm 41
Fan, refer to Air flow 158
Fault displays, refer to Check Control 80
Filler neck for engine oil 206
Fine wood, care 224
First aid kit 217
Fitting for towing, refer to Tow fitting 220
Flat tire, changing wheels 213
Flat Tire Monitor FTM 103
Flat tire, Tire Pressure Moni‐ tor TPM 100
Flat tire, warning lamp 101, 104
Flooding 175
Floor carpet, care 224
Floor mats, care 224
Fold-out position, windshield wipers 71
Foot brake 175
Front airbags 96
Front center armrest 170
Front fog lamps 94
Front lamps 210
Front passenger airbags, au‐ tomatic deactivation 98
Front passenger airbags, indi‐ cator lamp 98
Front seats 51
Front turn signals, refer to Light-emitting diodes,
LEDs 212
FTM Flat Tire Monitor 103
Fuel 190
Fuel cap 188 Fuel consumption, current 84
Fuel consumption, refer to Average fuel consump‐
tion 88
Fuel filler flap 188
Fuel gauge 82
Fuel quality 190
Fuel recommendation 190
Fuel, tank capacity 231
Fuse 214
G
Garage door opener, refer to Integrated universal remote
control 164
Gasoline 190
Gasoline quality 190
Gear change, automatic transmission 73
Gear shift indicator 85
General driving notes 174
Glove compartment 169
Gross vehicle weight, ap‐ proved 229
Gross weight, permissible for trailer towing 229
H
Handbrake, refer to Parking brake 67
Hand-held transmitter, alter‐ nating code 165
Hazard warning flashers 216
HDC Hill Descent Con‐ trol 124
Headlamp control, auto‐ matic 92
Headlamp courtesy delay fea‐ ture 91
Headlamp courtesy delay fea‐ ture via remote control 35
Headlamp flasher 70
Headlamp glass 211
Headlamps 210 Seite 235Everything from A to ZReference235
Online Edition for Part no. 01 40 2 910 721 - VI/13