2014 BMW 550I SEDAN manual transmission
[x] Cancel search: manual transmissionPage 160 of 267
activated. When the system is deactivated,
the displays on the Control Display are
shown in gray.
Parking using the parking assistant
Check the traffic situation as well
Loud sounds outside and within the vehi‐
cle can drown out the signal tones of the park‐
ing assistant and PDC.
Check the traffic situation around the vehicle
with your own eyes; otherwise, there is the
danger of an accident.◀
1.Switch on the parking assistant and acti‐
vate it if necessary.
The status of the parking space search is
indicated on the Control Display.2.Follow the instructions on the Control Dis‐
play.
To achieve the best possible parking posi‐
tion, wait for the automatic steering wheel
movement after the gear change when the
vehicle is stationary.
The end of the parking procedure is indi‐
cated on the Control Display.3.Adjust the parking position yourself if nec‐
essary.
Interrupting manually
The parking assistant can be interrupted at any
time:
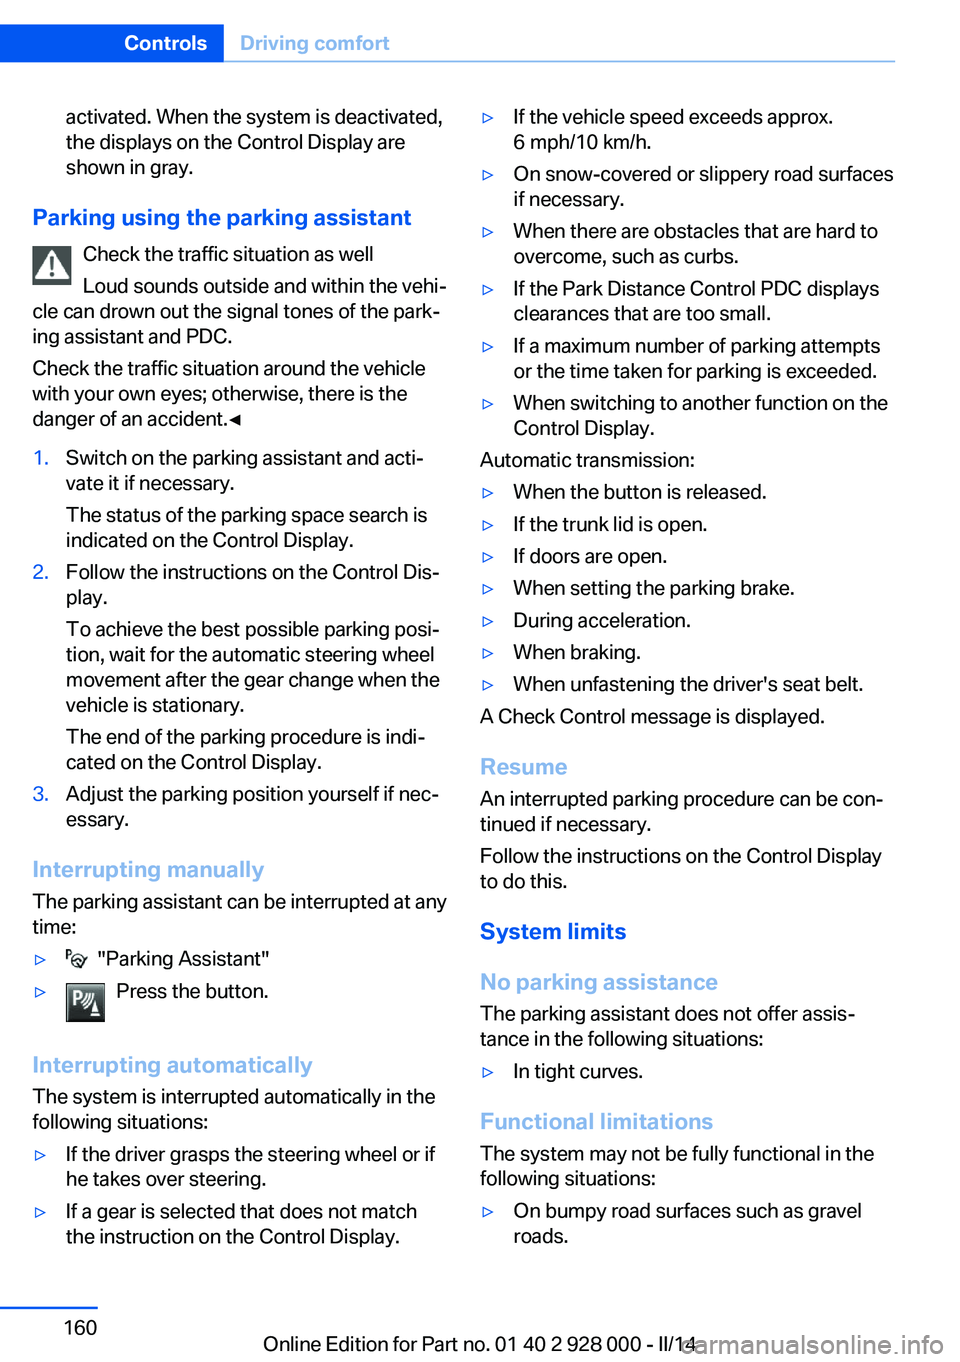
▷ "Parking Assistant"▷Press the button.
Interrupting automatically
The system is interrupted automatically in the
following situations:
▷If the driver grasps the steering wheel or if
he takes over steering.▷If a gear is selected that does not match
the instruction on the Control Display.▷If the vehicle speed exceeds approx.
6 mph/10 km/h.▷On snow-covered or slippery road surfaces
if necessary.▷When there are obstacles that are hard to
overcome, such as curbs.▷If the Park Distance Control PDC displays
clearances that are too small.▷If a maximum number of parking attempts
or the time taken for parking is exceeded.▷When switching to another function on the
Control Display.
Automatic transmission:
▷When the button is released.▷If the trunk lid is open.▷If doors are open.▷When setting the parking brake.▷During acceleration.▷When braking.▷When unfastening the driver's seat belt.
A Check Control message is displayed.
Resume An interrupted parking procedure can be con‐
tinued if necessary.
Follow the instructions on the Control Display
to do this.
System limits
No parking assistance
The parking assistant does not offer assis‐
tance in the following situations:
▷In tight curves.
Functional limitations
The system may not be fully functional in the
following situations:
▷On bumpy road surfaces such as gravel
roads.Seite 160ControlsDriving comfort160
Online Edition for Part no. 01 40 2 928 000 - II/14
Page 172 of 267
indicates that the button on the interior
rearview mirror has been programmed.
The system can then be controlled by the
button on the interior rearview mirror.
If the LED does not flash faster after at
least 60 seconds, change the distance and
repeat the step. Several more attempts at
different distances may be necessary. Wait
at least 15 seconds between attempts.
Canada: if programming with the hand-
held transmitter was interrupted, hold
down the interior rearview mirror button
and repeatedly press and release the
hand-held transmitter button for 2 sec‐
onds.
Controls
Before operation
Before operating a system using the
integrated universal remote control, ensure
that there are no people, animals, or objects
within the range of movement of the remote- controlled system; otherwise, there is a risk of
injury or damage.
Also follow the safety instructions of the hand-
held transmitter.◀
The system, such as the garage door, can be
operated using the button on the interior rear‐
view mirror while the engine is running or when
the ignition is started. To do this, hold down
the button within receiving range of the system
until the function is activated. The interior rear‐ view mirror LED stays lit while the wireless sig‐
nal is being transmitted.
Deleting stored functions Press and hold the left and right button on the
interior rearview mirror simultaneously for ap‐
proximately 20 seconds until the LED flashes
rapidly. All stored functions are deleted. The
functions cannot be deleted individually.
Ashtray/cigarette lighter
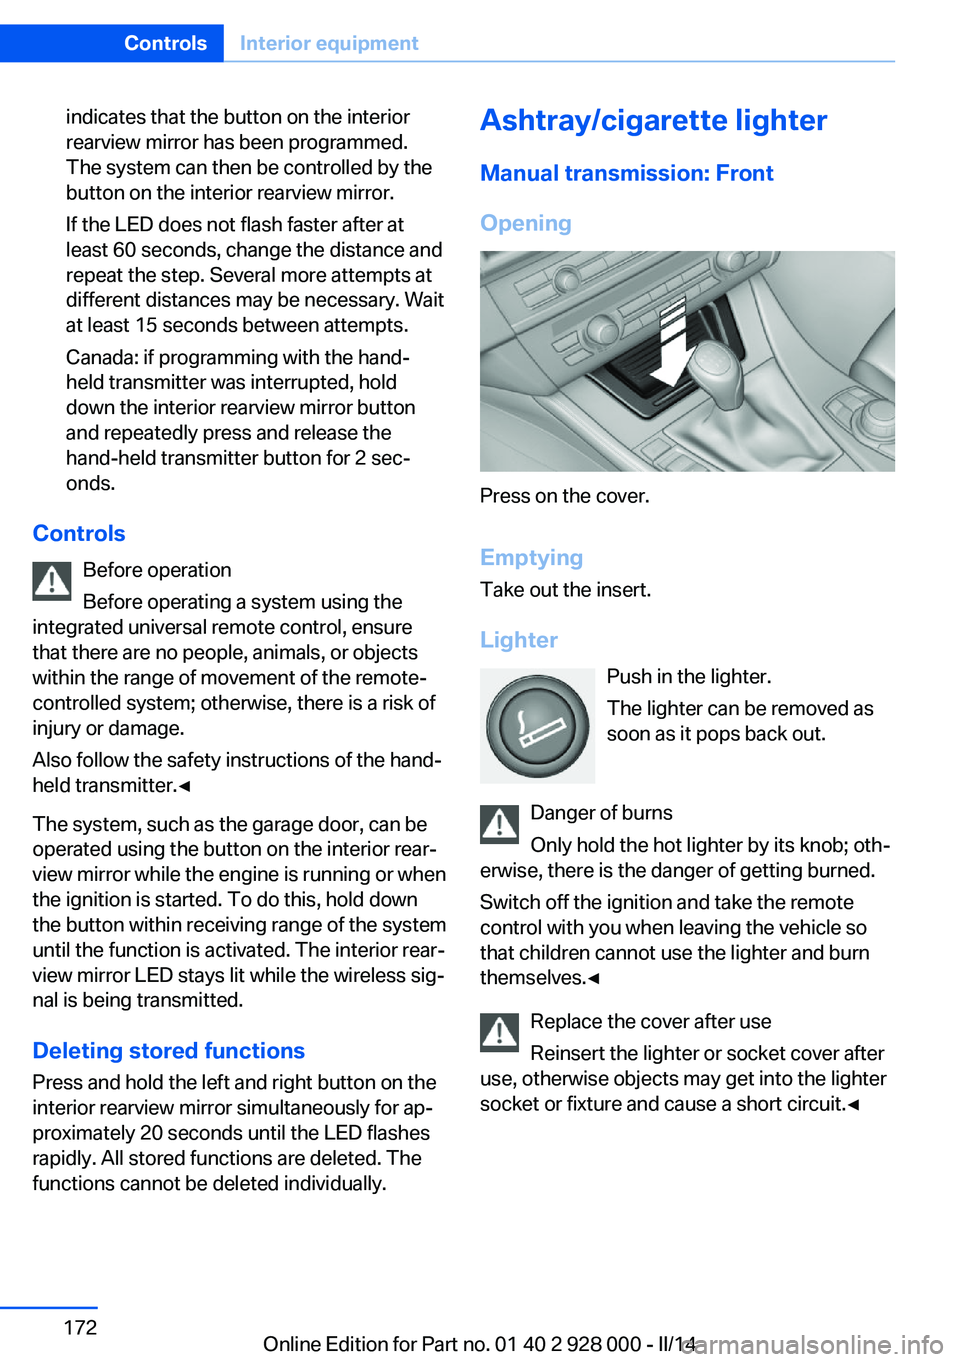
Manual transmission: Front
Opening
Press on the cover.
Emptying Take out the insert.
Lighter Push in the lighter.
The lighter can be removed as
soon as it pops back out.
Danger of burns
Only hold the hot lighter by its knob; oth‐
erwise, there is the danger of getting burned.
Switch off the ignition and take the remote
control with you when leaving the vehicle so
that children cannot use the lighter and burn
themselves.◀
Replace the cover after use
Reinsert the lighter or socket cover after
use, otherwise objects may get into the lighter
socket or fixture and cause a short circuit.◀
Seite 172ControlsInterior equipment172
Online Edition for Part no. 01 40 2 928 000 - II/14
Page 174 of 267
Replace the cover after use
Reinsert the lighter or socket cover after
use, otherwise objects may get into the lighter
socket or fixture and cause a short circuit.◀
Connecting electrical
devices
Hints Do not connect charging devices to the12 volt socket in the vehicle
Do not connect battery chargers to the fac‐
tory-installed 12 volt sockets in the vehicle as
this may damage the vehicle battery due to an
increased power consumption.◀
Replace the cover after use
Reinsert the lighter or socket cover after
use, otherwise objects may get into the lighter
socket or fixture and cause a short circuit.◀
Sockets
The lighter socket can be used as a socket for
electrical equipment while the engine is run‐
ning or when the ignition is switched on. The
total load of all sockets must not exceed
140 watts at 12 volts.
Do not damage the socket by using unsuitable
connectors.
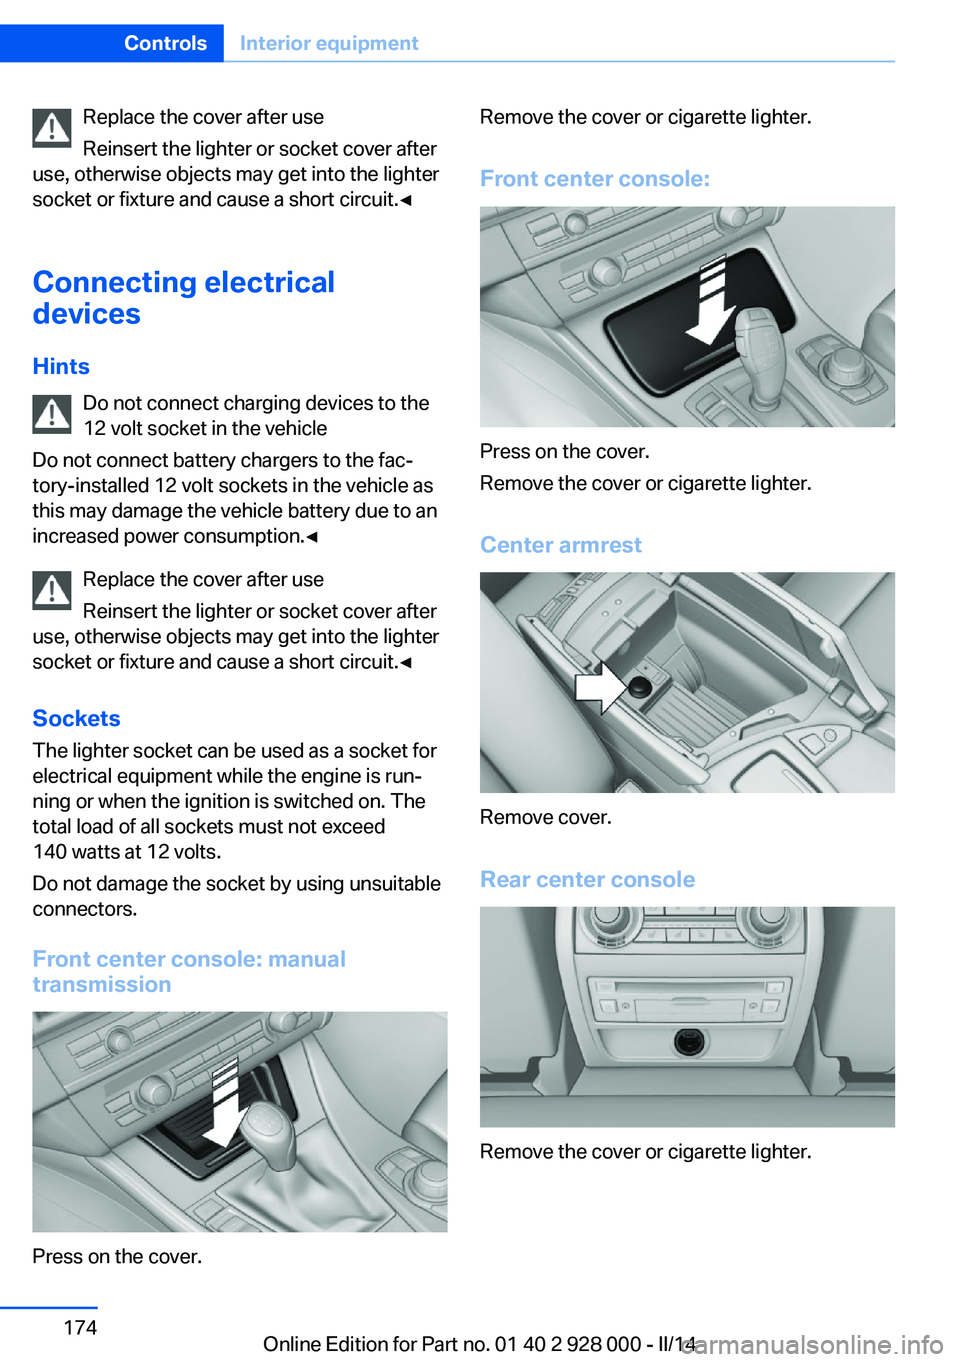
Front center console: manualtransmission
Press on the cover.
Remove the cover or cigarette lighter.
Front center console:
Press on the cover.
Remove the cover or cigarette lighter.
Center armrest
Remove cover. Rear center console
Remove the cover or cigarette lighter.
Seite 174ControlsInterior equipment174
Online Edition for Part no. 01 40 2 928 000 - II/14
Page 179 of 267
Storage compartmentsVehicle equipmentAll standard, country-specific and optional
equipment that is offered in the model series is
described in this chapter. Therefore, equip‐
ment is also described that is not available in a
vehicle, e. g., because of the selected optional
equipment or country variant. This also applies
for safety-related functions and systems.
Notes No loose objects in the passenger com‐
partment
Do not stow any objects in the passenger
compartment without securing them; other‐
wise, they may present a danger to occupants
for instance during braking and avoidance ma‐
neuvers.◀
Do not place anti-slip mats on the dash‐
board
Do not place anti-slip mats on the dashboard.
The mat materials could damage the dash‐
board.◀
Storage compartments
The following storage compartments are avail‐
able in the vehicle interior:▷Glove compartment on the driver's and
front passenger side, refer to page 179.▷Storage compartment on the center con‐
sole: manual transmission.▷Storage compartment, refer to page 182,
in the center console for remote control:
automatic transmission.▷Storage compartment in the center arm‐
rest, refer to page 180, in the front and
rear.▷Compartments in the doors.▷Pockets on the backrests of the front
seats.▷Net in the front passenger footwell.
Glove compartment
Front passenger side
Note Close the glove compartment again im‐
mediately
Close the glove compartment immediately af‐
ter use while driving; otherwise, injury may oc‐
cur during accidents.◀
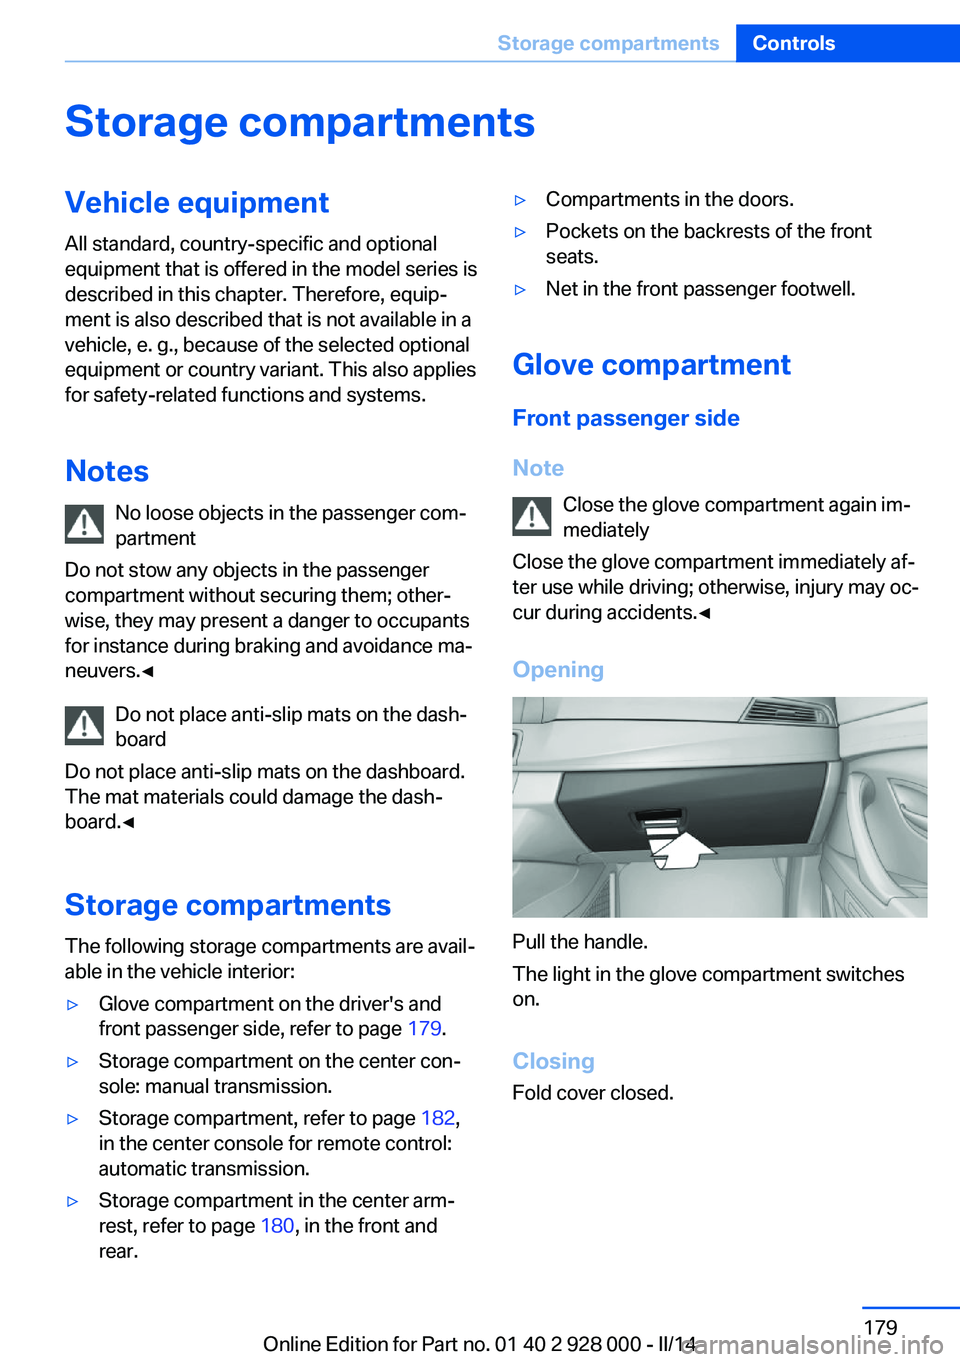
Opening
Pull the handle.
The light in the glove compartment switches
on.
ClosingFold cover closed.
Seite 179Storage compartmentsControls179
Online Edition for Part no. 01 40 2 928 000 - II/14
Page 181 of 267
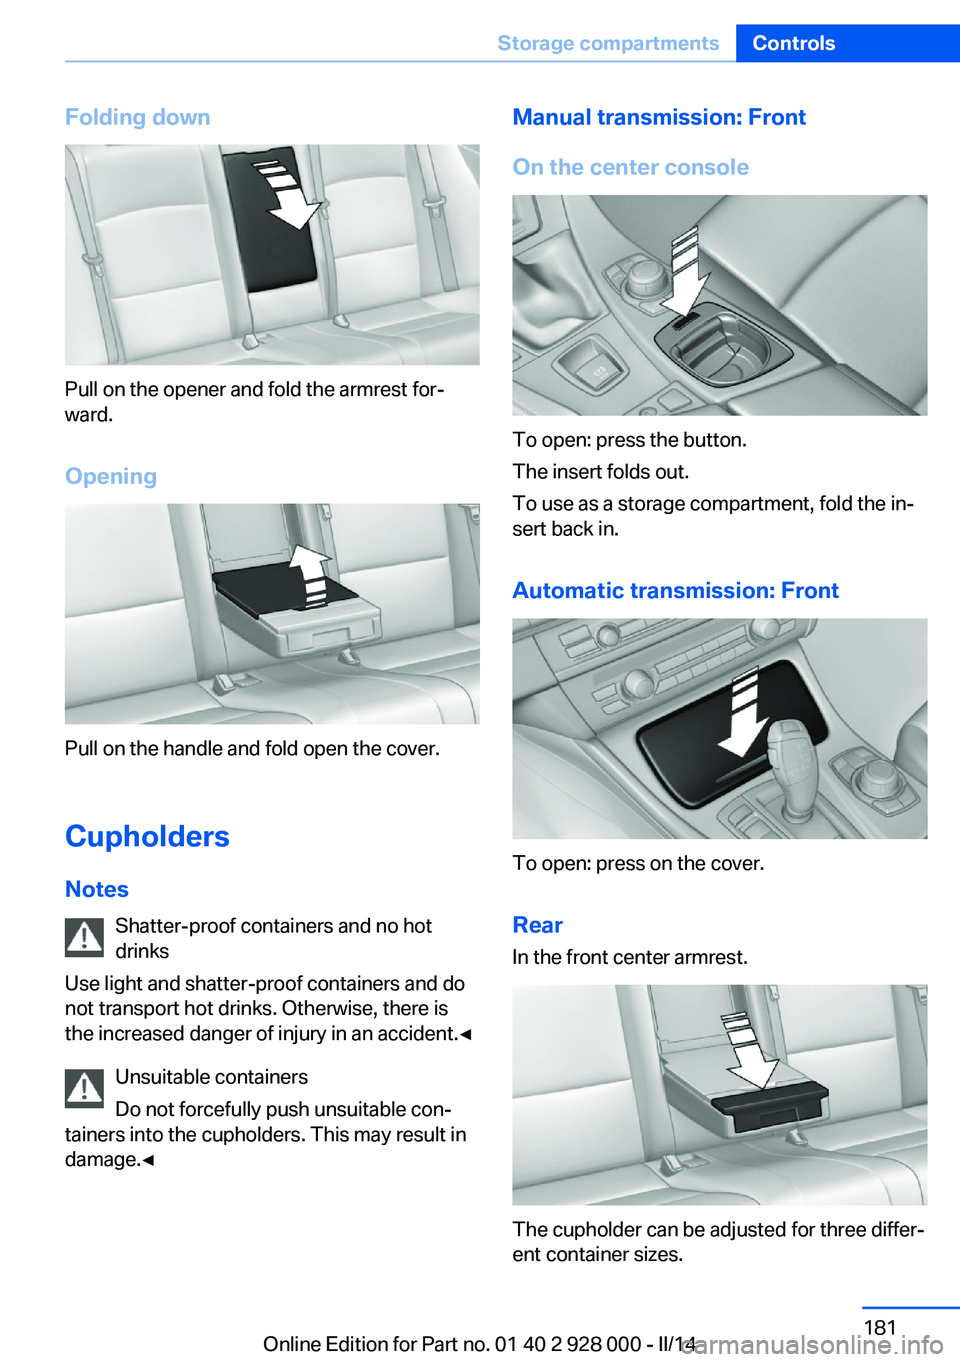
Folding down
Pull on the opener and fold the armrest for‐
ward.
Opening
Pull on the handle and fold open the cover.
Cupholders Notes Shatter-proof containers and no hot
drinks
Use light and shatter-proof containers and do
not transport hot drinks. Otherwise, there is
the increased danger of injury in an accident.◀
Unsuitable containers
Do not forcefully push unsuitable con‐
tainers into the cupholders. This may result in
damage.◀
Manual transmission: Front
On the center console
To open: press the button.
The insert folds out.
To use as a storage compartment, fold the in‐
sert back in.
Automatic transmission: Front
To open: press on the cover.Rear In the front center armrest.
The cupholder can be adjusted for three differ‐
ent container sizes.
Seite 181Storage compartmentsControls181
Online Edition for Part no. 01 40 2 928 000 - II/14
Page 196 of 267
ECO PRO bonus rangeAn extension of the range can
be achieved by an adjusted driv‐
ing style.
This may be displayed as the
bonus range in the instrument
cluster.
The bonus range is shown in the range display.
The bonus range is automatically reset every
time the vehicle is refueled.
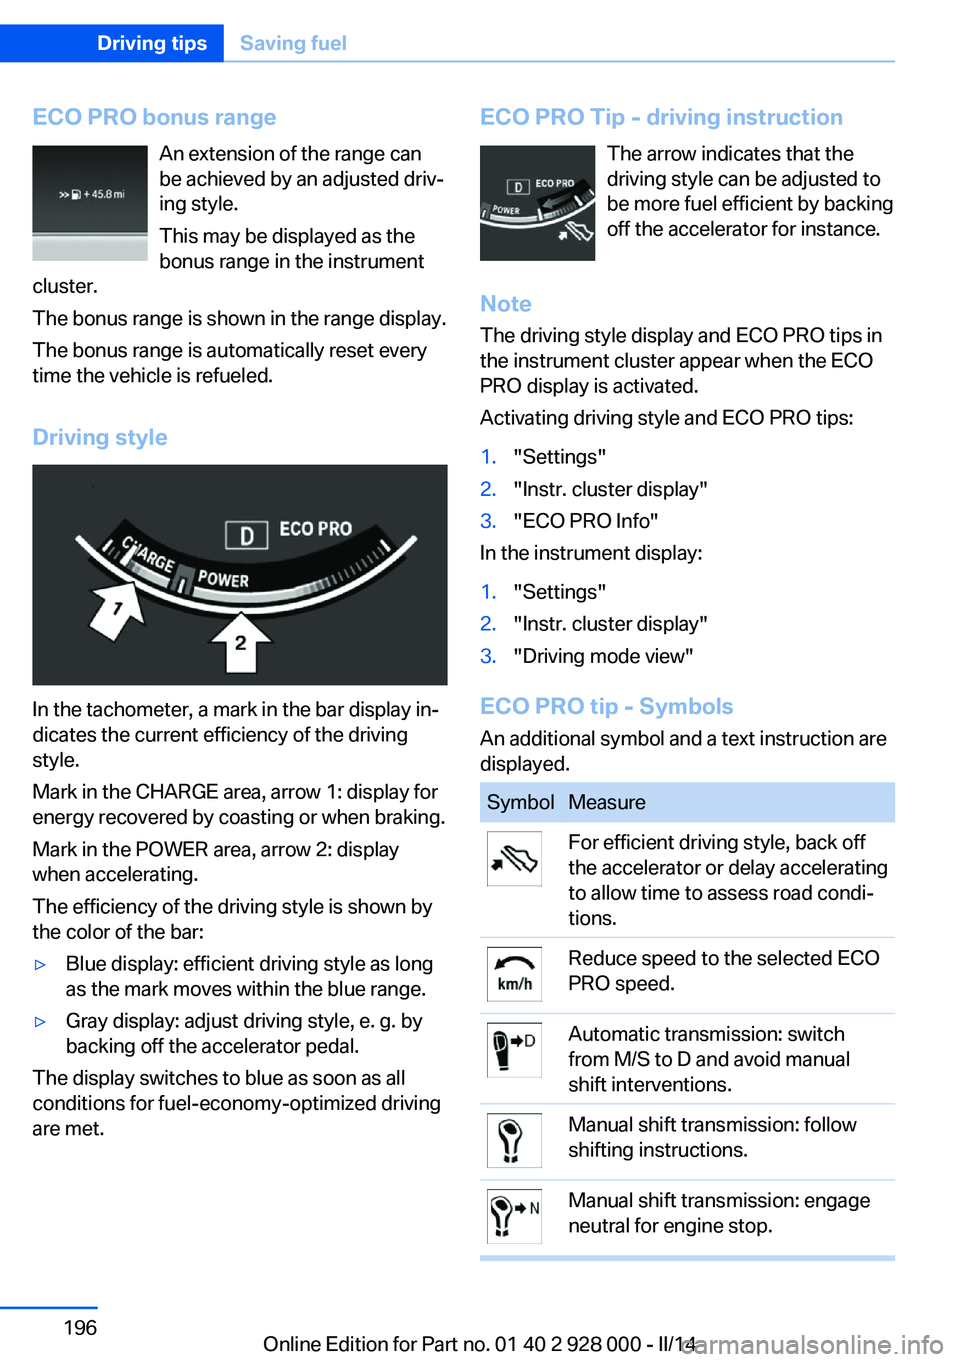
Driving style
In the tachometer, a mark in the bar display in‐
dicates the current efficiency of the driving
style.
Mark in the CHARGE area, arrow 1: display for
energy recovered by coasting or when braking.
Mark in the POWER area, arrow 2: display
when accelerating.
The efficiency of the driving style is shown by
the color of the bar:
▷Blue display: efficient driving style as long
as the mark moves within the blue range.▷Gray display: adjust driving style, e. g. by
backing off the accelerator pedal.
The display switches to blue as soon as all
conditions for fuel-economy-optimized driving
are met.
ECO PRO Tip - driving instruction
The arrow indicates that the
driving style can be adjusted to
be more fuel efficient by backing
off the accelerator for instance.
Note The driving style display and ECO PRO tips in
the instrument cluster appear when the ECO
PRO display is activated.
Activating driving style and ECO PRO tips:1."Settings"2."Instr. cluster display"3."ECO PRO Info"
In the instrument display:
1."Settings"2."Instr. cluster display"3."Driving mode view"
ECO PRO tip - Symbols An additional symbol and a text instruction are
displayed.
SymbolMeasureFor efficient driving style, back off
the accelerator or delay accelerating
to allow time to assess road condi‐
tions.Reduce speed to the selected ECO
PRO speed.Automatic transmission: switch
from M/S to D and avoid manual
shift interventions.Manual shift transmission: follow
shifting instructions.Manual shift transmission: engage
neutral for engine stop.Seite 196Driving tipsSaving fuel196
Online Edition for Part no. 01 40 2 928 000 - II/14
Page 198 of 267
prox. 50 km/h to 100 mph, approx. 160 km/h, if
the following conditions are satisfied:▷Accelerator pedal and brake pedal are not
operated.▷The selector lever is in selector lever posi‐
tion D.▷Engine and transmission are at operating
temperature.
Display
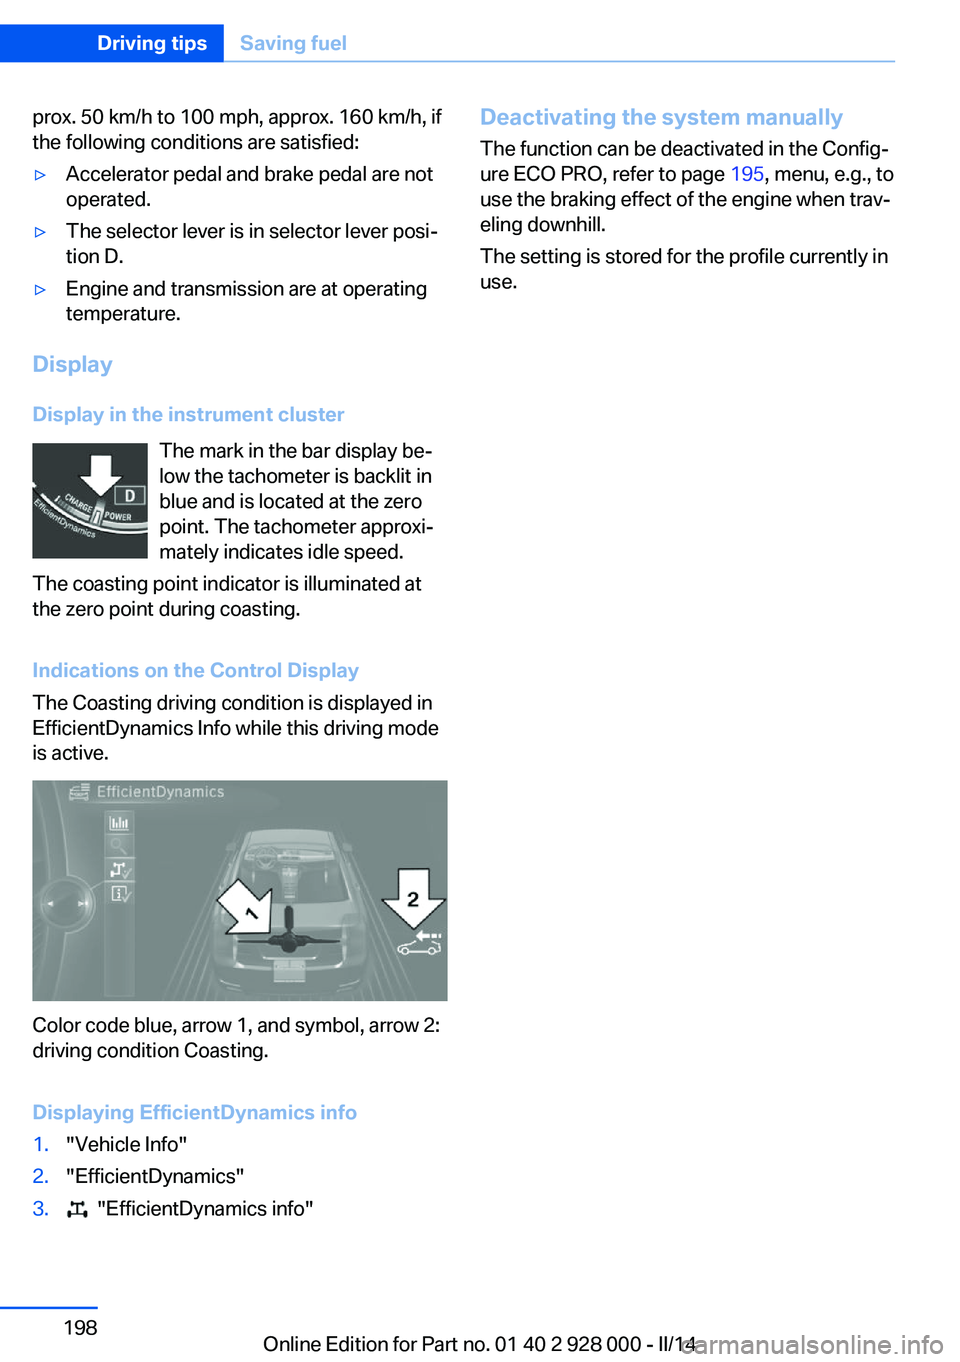
Display in the instrument cluster The mark in the bar display be‐
low the tachometer is backlit in
blue and is located at the zero
point. The tachometer approxi‐
mately indicates idle speed.
The coasting point indicator is illuminated at
the zero point during coasting.
Indications on the Control Display
The Coasting driving condition is displayed in
EfficientDynamics Info while this driving mode
is active.
Color code blue, arrow 1, and symbol, arrow 2:
driving condition Coasting.
Displaying EfficientDynamics info
1."Vehicle Info"2."EfficientDynamics"3. "EfficientDynamics info"Deactivating the system manually The function can be deactivated in the Config‐
ure ECO PRO, refer to page 195, menu, e.g., to
use the braking effect of the engine when trav‐
eling downhill.
The setting is stored for the profile currently in
use.Seite 198Driving tipsSaving fuel198
Online Edition for Part no. 01 40 2 928 000 - II/14
Page 227 of 267
General information
A detailed measurement is only possible with
certain engines.
Requirements▷Vehicle is on level road.▷Manual transmission: shift lever in neutral
position, clutch and accelerator pedals not
depressed.▷Automatic transmission: selector lever in
selector lever position N or P and accelera‐
tor pedal not depressed.▷Engine is running and is at operating tem‐
perature.
Performing a detailed measurement
In order to perform a detailed measurement of
the engine oil level:
1."Vehicle Info"2."Vehicle status"3. "Measure engine oil level"4."Start measurement"
The oil level is checked and displayed via a
scale.
Duration: approx. 1 minute.
Adding engine oil General information
Switch off the ignition and safely park the vehi‐
cle before engine oil is added.
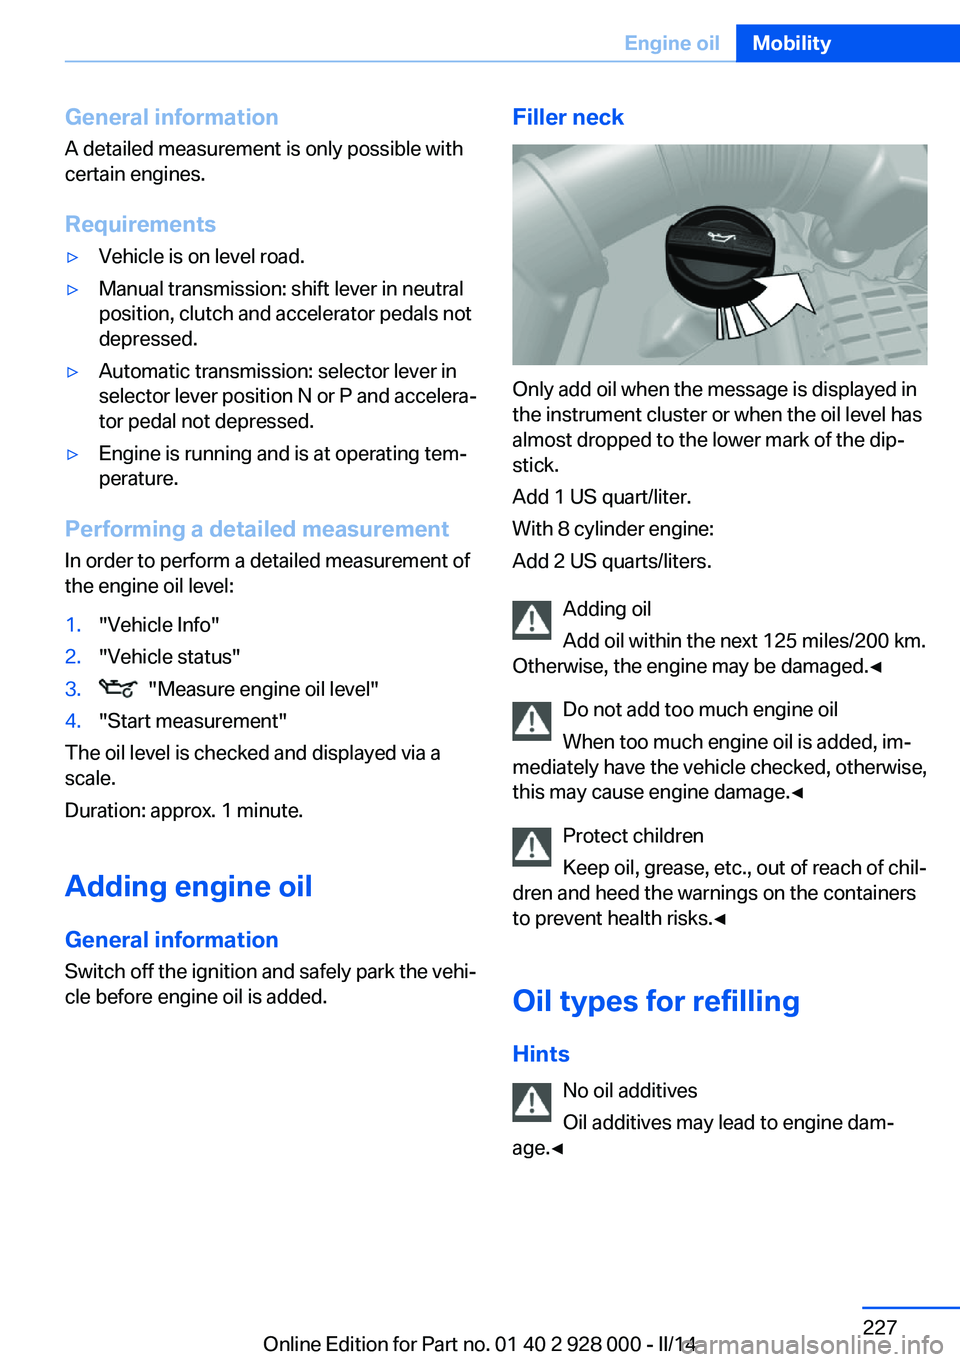
Filler neck
Only add oil when the message is displayed in
the instrument cluster or when the oil level has
almost dropped to the lower mark of the dip‐
stick.
Add 1 US quart/liter.
With 8 cylinder engine:
Add 2 US quarts/liters.
Adding oil
Add oil within the next 125 miles/200 km.
Otherwise, the engine may be damaged.◀
Do not add too much engine oil
When too much engine oil is added, im‐
mediately have the vehicle checked, otherwise,
this may cause engine damage.◀
Protect children
Keep oil, grease, etc., out of reach of chil‐
dren and heed the warnings on the containers
to prevent health risks.◀
Oil types for refilling
Hints No oil additives
Oil additives may lead to engine dam‐
age.◀
Seite 227Engine oilMobility227
Online Edition for Part no. 01 40 2 928 000 - II/14