2014 BMW 550I rear view mirror
[x] Cancel search: rear view mirrorPage 155 of 267
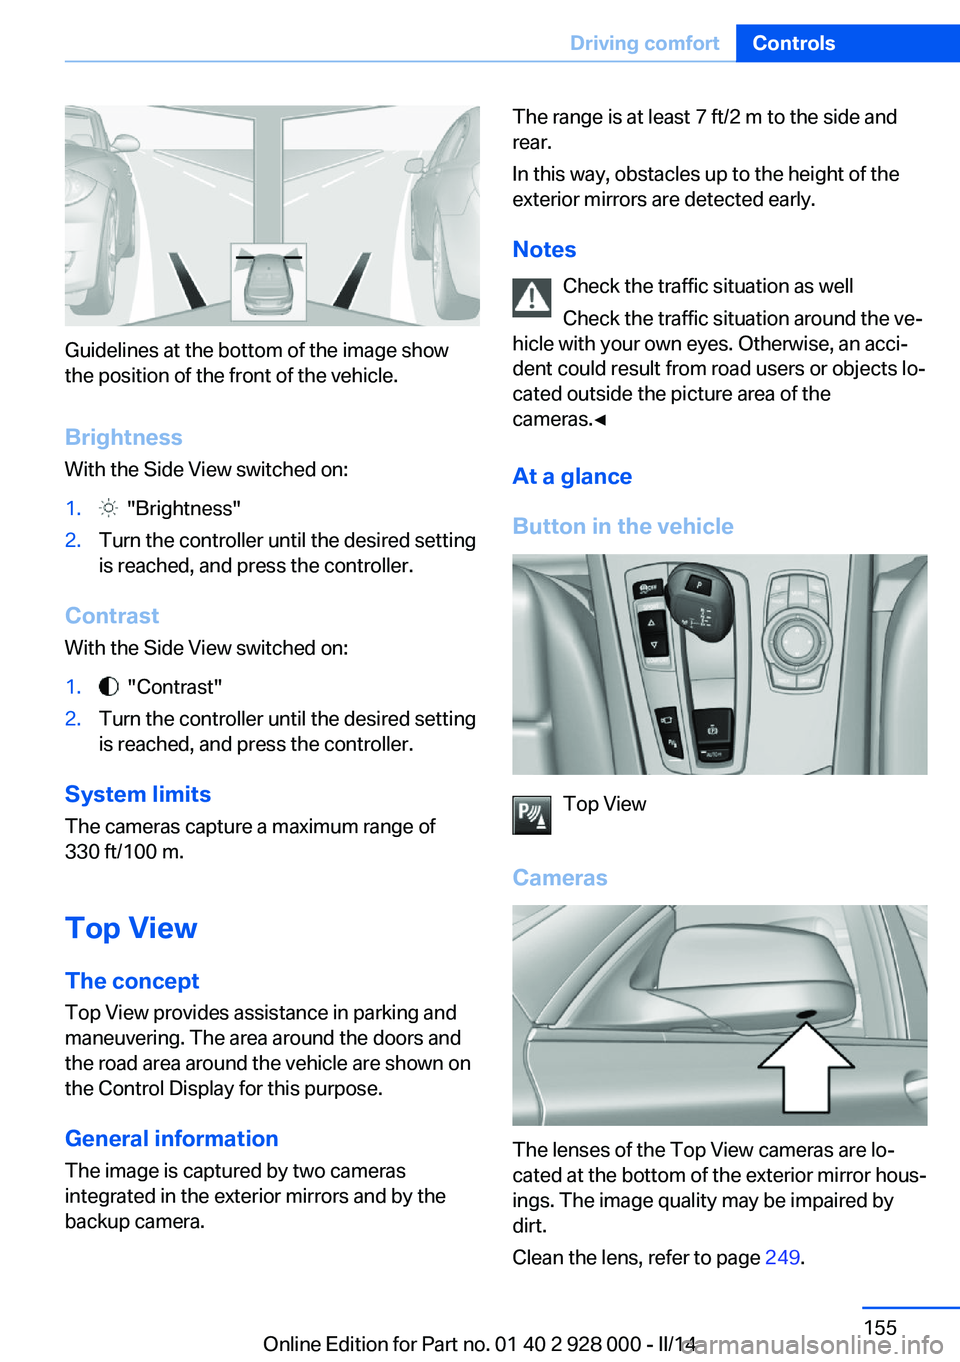
Guidelines at the bottom of the image show
the position of the front of the vehicle.
Brightness With the Side View switched on:
1. "Brightness"2.Turn the controller until the desired setting
is reached, and press the controller.
Contrast
With the Side View switched on:
1. "Contrast"2.Turn the controller until the desired setting
is reached, and press the controller.
System limits
The cameras capture a maximum range of
330 ft/100 m.
Top View
The concept Top View provides assistance in parking and
maneuvering. The area around the doors and
the road area around the vehicle are shown on
the Control Display for this purpose.
General information
The image is captured by two cameras
integrated in the exterior mirrors and by the
backup camera.
The range is at least 7 ft/2 m to the side and
rear.
In this way, obstacles up to the height of the
exterior mirrors are detected early.
Notes Check the traffic situation as well
Check the traffic situation around the ve‐
hicle with your own eyes. Otherwise, an acci‐
dent could result from road users or objects lo‐
cated outside the picture area of the
cameras.◀
At a glance
Button in the vehicle
Top View
Cameras
The lenses of the Top View cameras are lo‐
cated at the bottom of the exterior mirror hous‐
ings. The image quality may be impaired by
dirt.
Clean the lens, refer to page 249.
Seite 155Driving comfortControls155
Online Edition for Part no. 01 40 2 928 000 - II/14
Page 156 of 267

Switching on/off
Switching on automatically With the engine running, engage selector lever
position R.
The Top View and PDC images are displayed if
the system is switched on via iDrive.
Automatic deactivation during forward
travel
The system switches off when a certain driving
distance or speed is exceeded.
Switch the system back on if necessary.
Switching on/off manually Press the button.▷On: the LED lights up.▷Off: the LED goes out.
Top View is displayed.
Display
Visual warning
The approach of the vehicle to an object can
be shown on the Control Display.
When the distance to an object is small, a red
bar is shown in front of the vehicle, as it is in
the PDC display.
The display appears as soon as Top View is
activated.
When the image of the rearview camera is dis‐
played, it is possible to switch to top view:
"Rear view camera"
Brightness With Top View switched on:1. Select the symbol.2.Turn the controller until the desired setting
is reached, and press the controller.
Contrast
With Top View switched on:
1. Select the symbol.2.Turn the controller until the desired setting
is reached, and press the controller.
Displaying the turning circle and
pathway lines
▷The static, red turning circle line shows the
space needed to the side of the vehicle
when the steering wheel is turned all the
way.▷The variable, green pathway line assists
you in assessing the amount of space ac‐
tually needed to the side of the vehicle.
The lane line depends on the engaged
gear and the current steering angle. The
track line is continuously adjusted for the
steering wheel movement.
"Parking aid lines"
Turning circle and pathway lines are displayed.
System limits
Top View cannot be used in the following sit‐
uations:
▷With a door open.▷With the trunk lid open.▷With an exterior mirror folded in.▷In poor light.
A Check Control message is displayed in some
of these situations.
Seite 156ControlsDriving comfort156
Online Edition for Part no. 01 40 2 928 000 - II/14
Page 170 of 267
Interior equipmentVehicle equipmentAll standard, country-specific and optional
equipment that is offered in the model series is
described in this chapter. Therefore, equip‐
ment is also described that is not available in a
vehicle, e. g., because of the selected optional
equipment or country variant. This also applies
for safety-related functions and systems.
Universal garage door
opener
The concept
The universal garage door opener can operate
up to 3 functions of remote-controlled sys‐
tems such as garage door drives or lighting
systems. The universal garage door opener re‐
places up to 3 different hand-held transmitters.
To operate the remote control, the buttons on
the interior rearview mirror must be program‐
med with the desired functions. The hand-held
transmitter for the particular system is required
in order to program the remote control.
During programming
During programming and before activat‐
ing a device using the integrated universal re‐
mote control, ensure that there are no people,
animals, or objects in the range of movement
of the remote-controlled device; otherwise,
there is a risk of injury or damage.
Also follow the safety instructions of the hand-
held transmitter.◀
Before selling the vehicle, delete the stored
functions for the sake of security.
Compatibility If this symbol is printed on the packag‐
ing or in the instructions of the system
to be controlled, the system is gener‐ally compatible with the universal garage door
opener.
If you have any questions, please contact:▷Your service center.▷www.homelink.com on the Internet.
HomeLink is a registered trademark of John‐
son Controls, Inc.
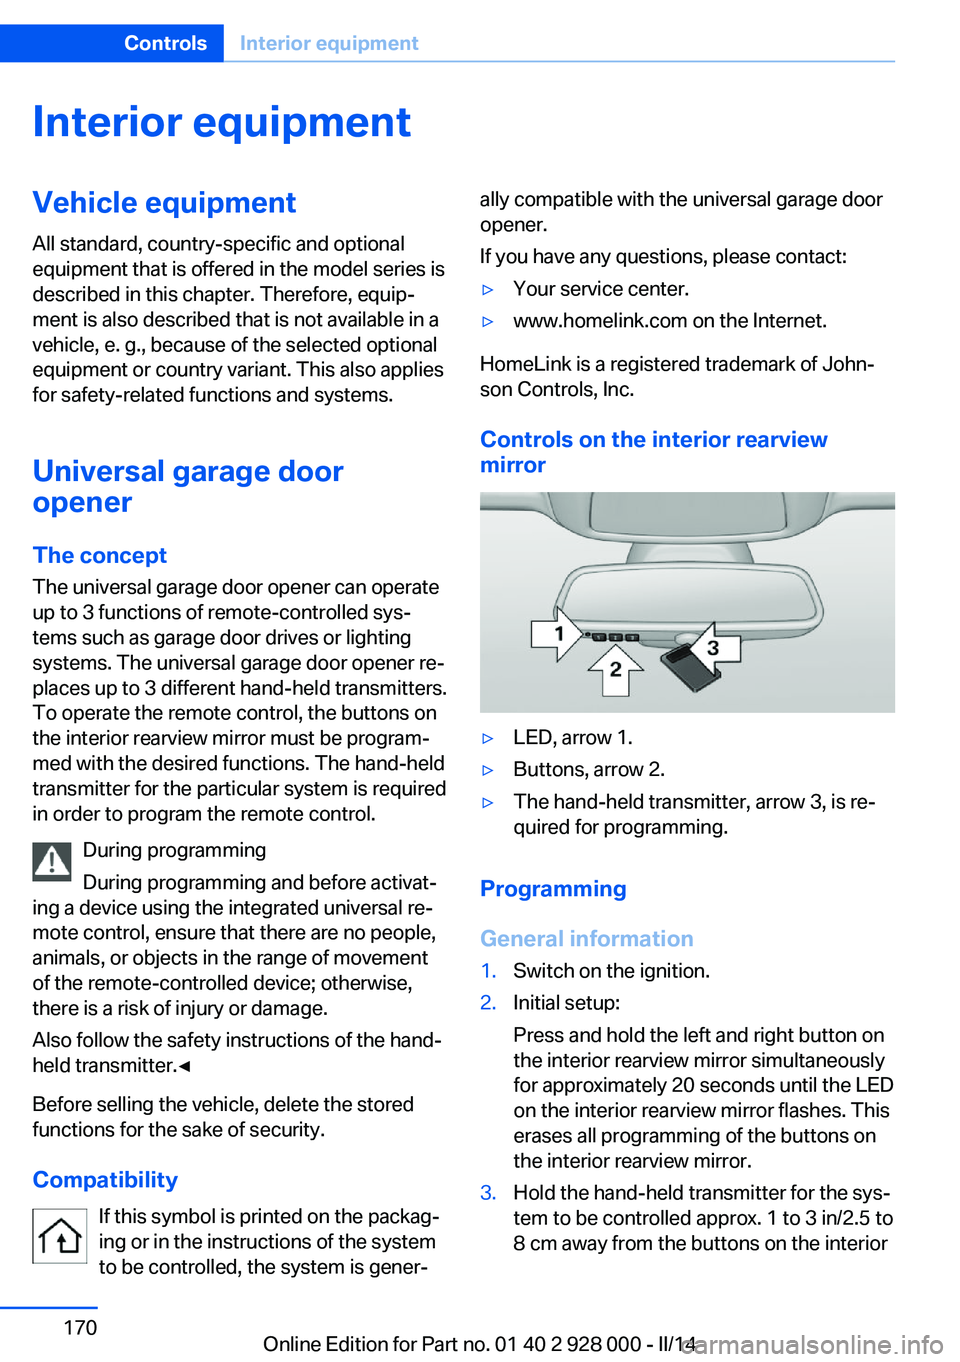
Controls on the interior rearview
mirror
▷LED, arrow 1.▷Buttons, arrow 2.▷The hand-held transmitter, arrow 3, is re‐
quired for programming.
Programming
General information
1.Switch on the ignition.2.Initial setup:
Press and hold the left and right button on
the interior rearview mirror simultaneously
for approximately 20 seconds until the LED
on the interior rearview mirror flashes. This
erases all programming of the buttons on
the interior rearview mirror.3.Hold the hand-held transmitter for the sys‐
tem to be controlled approx. 1 to 3 in/2.5 to
8 cm away from the buttons on the interiorSeite 170ControlsInterior equipment170
Online Edition for Part no. 01 40 2 928 000 - II/14
Page 171 of 267
rearview mirror. The required distance de‐
pends on the manual transmitter.4.Simultaneously press and hold the button
of the desired function on the hand-held
transmitter and the button to be program‐
med on the interior rearview mirror. The
LED on the interior rearview mirror will be‐
gin flashing slowly.5.Release both buttons as soon as the LED
flashes more rapidly. When the LED is
flashing faster, this indicates that the but‐
ton on the interior rearview mirror has been
programmed.
If the LED does not flash faster after at
least 60 seconds, change the distance be‐
tween the interior rearview mirror and the
hand-held transmitter and repeat the step.
Several more attempts at different distan‐
ces may be necessary. Wait at least
15 seconds between attempts.
Canada: if programming with the hand-
held transmitter was interrupted, hold
down the interior rearview mirror button
and repeatedly press and release the
hand-held transmitter button for 2 sec‐
onds.6.To program other functions on other but‐
tons, repeat steps 3 to 5.
The systems can be controlled using the inte‐
rior rearview mirror buttons.
Special feature of the alternating-
code wireless system
If you are unable to operate the system after
repeated programming, please check if the
system to be controlled features an alternat‐
ing-code system.
Read the system's operating manual, or press
the programmed button on the interior rear‐
view mirror longer. If the LED on the interior
rearview mirror starts flashing rapidly and then
stays lit constantly for 2 seconds, the system
features an alternating-code system. Flashing
and continuous illumination of the LED will re‐
peat for approximately 20 seconds.
For systems with an alternating-code system,
the universal garage door opener and the sys‐
tem also have to be synchronized.
Please read the operating manual of the sys‐
tem being set up for information on how to
synchronize the system.
Synchronizing is easier with the aid of a sec‐
ond person.
To synchronize:1.Park the vehicle within range of the re‐
mote-controlled system.2.Program the relevant button on the interior
rearview mirror as described.3.Locate and press the synchronizing button
on the system being programmed. You
have approx. 30 seconds for the next step.4.Hold down the programmed button on the
interior rearview mirror for approximately
3 seconds and then release it. If necessary,
repeat this work step up to three times in
order to finish synchronization. Once syn‐
chronization is complete, the programmed
function will be carried out.
Reprogramming individual buttons
1.Switch on the ignition.2.Press and hold the interior rearview mirror
button to be programmed.3.As soon as the interior rearview mirror LED
starts flashing slowly, hold the hand-held
transmitter for the system to be controlled
approx. 1 to 3 in/2.5 to 8 cm away from the
buttons on the interior rearview mirror. The
required distance depends on the manual
transmitter.4.Likewise, press and hold the button of the
desired function on the hand-held trans‐
mitter.5.Release both buttons as soon as the inte‐
rior rearview mirror LED flashes more rap‐
idly. When the LED is flashing faster, thisSeite 171Interior equipmentControls171
Online Edition for Part no. 01 40 2 928 000 - II/14
Page 172 of 267
indicates that the button on the interior
rearview mirror has been programmed.
The system can then be controlled by the
button on the interior rearview mirror.
If the LED does not flash faster after at
least 60 seconds, change the distance and
repeat the step. Several more attempts at
different distances may be necessary. Wait
at least 15 seconds between attempts.
Canada: if programming with the hand-
held transmitter was interrupted, hold
down the interior rearview mirror button
and repeatedly press and release the
hand-held transmitter button for 2 sec‐
onds.
Controls
Before operation
Before operating a system using the
integrated universal remote control, ensure
that there are no people, animals, or objects
within the range of movement of the remote- controlled system; otherwise, there is a risk of
injury or damage.
Also follow the safety instructions of the hand-
held transmitter.◀
The system, such as the garage door, can be
operated using the button on the interior rear‐
view mirror while the engine is running or when
the ignition is started. To do this, hold down
the button within receiving range of the system
until the function is activated. The interior rear‐ view mirror LED stays lit while the wireless sig‐
nal is being transmitted.
Deleting stored functions Press and hold the left and right button on the
interior rearview mirror simultaneously for ap‐
proximately 20 seconds until the LED flashes
rapidly. All stored functions are deleted. The
functions cannot be deleted individually.
Ashtray/cigarette lighter
Manual transmission: Front
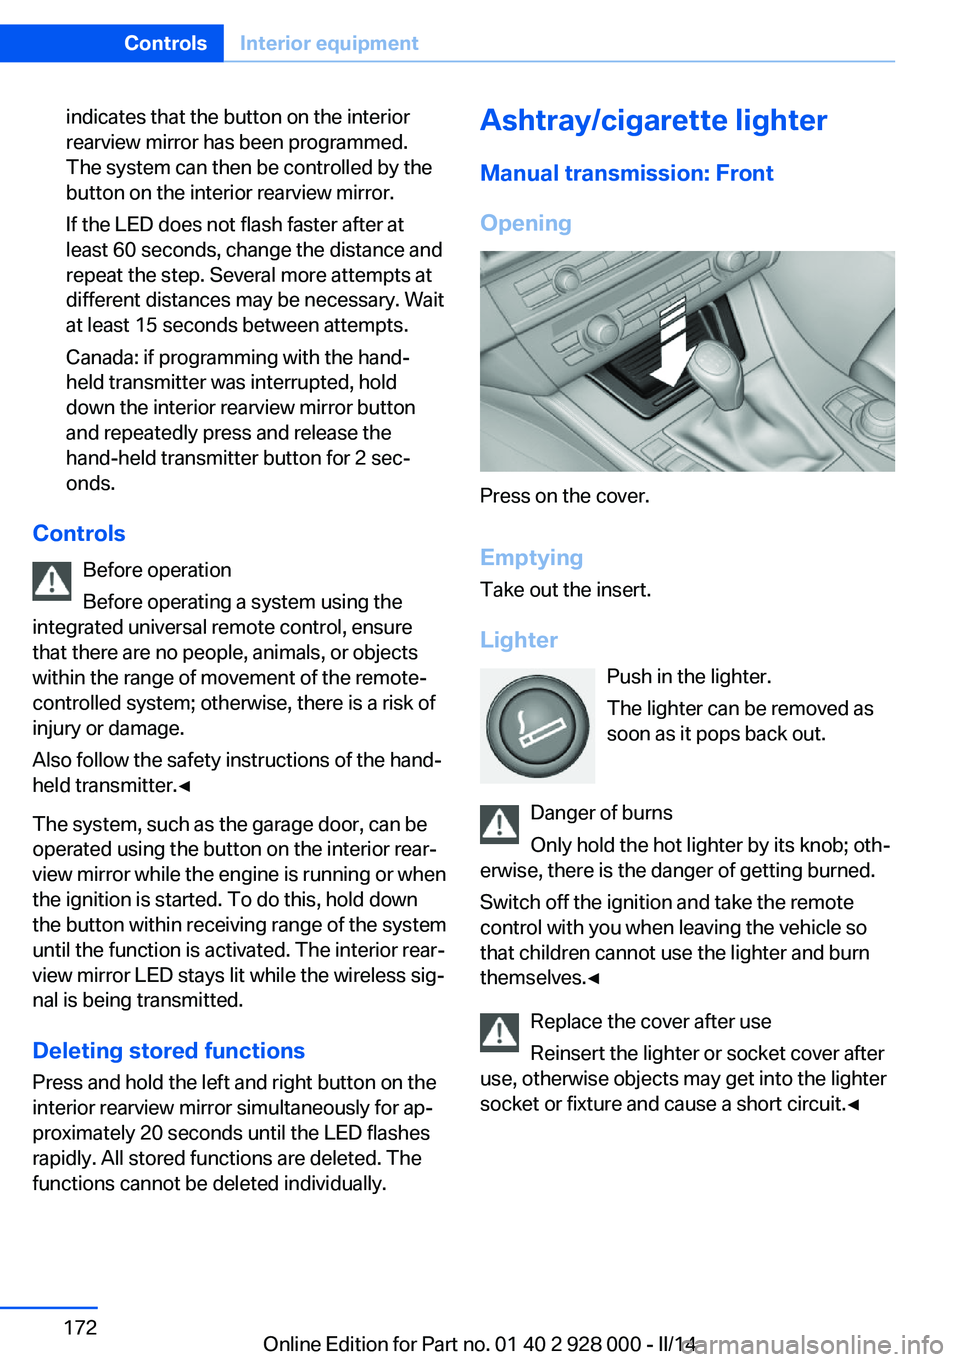
Opening
Press on the cover.
Emptying Take out the insert.
Lighter Push in the lighter.
The lighter can be removed as
soon as it pops back out.
Danger of burns
Only hold the hot lighter by its knob; oth‐
erwise, there is the danger of getting burned.
Switch off the ignition and take the remote
control with you when leaving the vehicle so
that children cannot use the lighter and burn
themselves.◀
Replace the cover after use
Reinsert the lighter or socket cover after
use, otherwise objects may get into the lighter
socket or fixture and cause a short circuit.◀
Seite 172ControlsInterior equipment172
Online Edition for Part no. 01 40 2 928 000 - II/14
Page 257 of 267
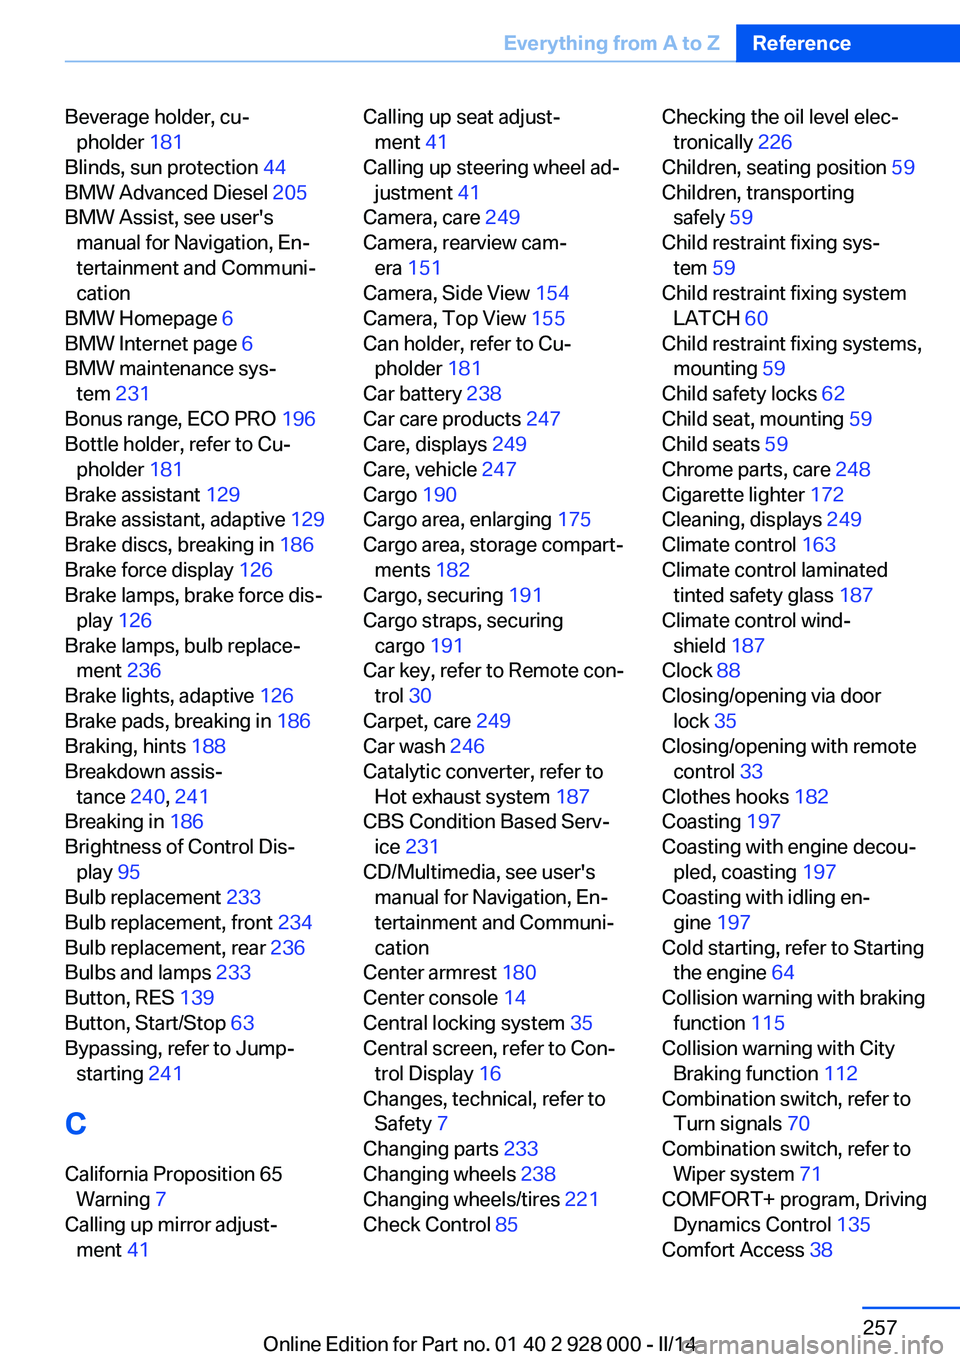
Beverage holder, cu‐pholder 181
Blinds, sun protection 44
BMW Advanced Diesel 205
BMW Assist, see user's manual for Navigation, En‐
tertainment and Communi‐
cation
BMW Homepage 6
BMW Internet page 6
BMW maintenance sys‐ tem 231
Bonus range, ECO PRO 196
Bottle holder, refer to Cu‐ pholder 181
Brake assistant 129
Brake assistant, adaptive 129
Brake discs, breaking in 186
Brake force display 126
Brake lamps, brake force dis‐ play 126
Brake lamps, bulb replace‐ ment 236
Brake lights, adaptive 126
Brake pads, breaking in 186
Braking, hints 188
Breakdown assis‐ tance 240, 241
Breaking in 186
Brightness of Control Dis‐ play 95
Bulb replacement 233
Bulb replacement, front 234
Bulb replacement, rear 236
Bulbs and lamps 233
Button, RES 139
Button, Start/Stop 63
Bypassing, refer to Jump- starting 241
C
California Proposition 65 Warning 7
Calling up mirror adjust‐ ment 41 Calling up seat adjust‐
ment 41
Calling up steering wheel ad‐ justment 41
Camera, care 249
Camera, rearview cam‐ era 151
Camera, Side View 154
Camera, Top View 155
Can holder, refer to Cu‐ pholder 181
Car battery 238
Car care products 247
Care, displays 249
Care, vehicle 247
Cargo 190
Cargo area, enlarging 175
Cargo area, storage compart‐ ments 182
Cargo, securing 191
Cargo straps, securing cargo 191
Car key, refer to Remote con‐ trol 30
Carpet, care 249
Car wash 246
Catalytic converter, refer to Hot exhaust system 187
CBS Condition Based Serv‐ ice 231
CD/Multimedia, see user's manual for Navigation, En‐
tertainment and Communi‐
cation
Center armrest 180
Center console 14
Central locking system 35
Central screen, refer to Con‐ trol Display 16
Changes, technical, refer to Safety 7
Changing parts 233
Changing wheels 238
Changing wheels/tires 221
Check Control 85 Checking the oil level elec‐
tronically 226
Children, seating position 59
Children, transporting safely 59
Child restraint fixing sys‐ tem 59
Child restraint fixing system LATCH 60
Child restraint fixing systems, mounting 59
Child safety locks 62
Child seat, mounting 59
Child seats 59
Chrome parts, care 248
Cigarette lighter 172
Cleaning, displays 249
Climate control 163
Climate control laminated tinted safety glass 187
Climate control wind‐ shield 187
Clock 88
Closing/opening via door lock 35
Closing/opening with remote control 33
Clothes hooks 182
Coasting 197
Coasting with engine decou‐ pled, coasting 197
Coasting with idling en‐ gine 197
Cold starting, refer to Starting the engine 64
Collision warning with braking function 115
Collision warning with City Braking function 112
Combination switch, refer to Turn signals 70
Combination switch, refer to Wiper system 71
COMFORT+ program, Driving Dynamics Control 135
Comfort Access 38 Seite 257Everything from A to ZReference257
Online Edition for Part no. 01 40 2 928 000 - II/14
Page 258 of 267
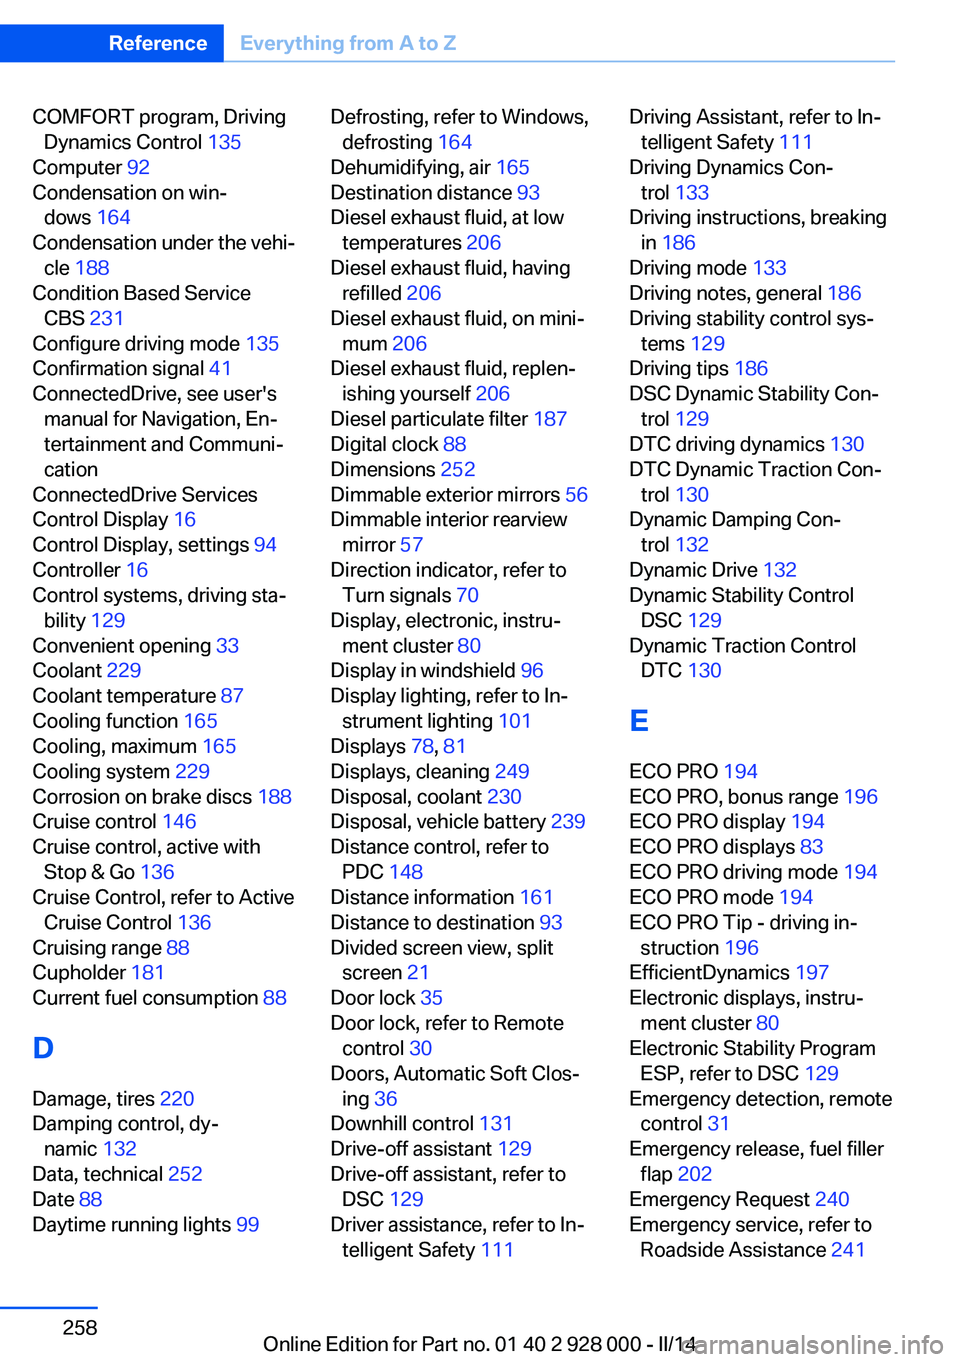
COMFORT program, DrivingDynamics Control 135
Computer 92
Condensation on win‐ dows 164
Condensation under the vehi‐ cle 188
Condition Based Service CBS 231
Configure driving mode 135
Confirmation signal 41
ConnectedDrive, see user's manual for Navigation, En‐
tertainment and Communi‐
cation
ConnectedDrive Services
Control Display 16
Control Display, settings 94
Controller 16
Control systems, driving sta‐ bility 129
Convenient opening 33
Coolant 229
Coolant temperature 87
Cooling function 165
Cooling, maximum 165
Cooling system 229
Corrosion on brake discs 188
Cruise control 146
Cruise control, active with Stop & Go 136
Cruise Control, refer to Active Cruise Control 136
Cruising range 88
Cupholder 181
Current fuel consumption 88
D
Damage, tires 220
Damping control, dy‐ namic 132
Data, technical 252
Date 88
Daytime running lights 99 Defrosting, refer to Windows,
defrosting 164
Dehumidifying, air 165
Destination distance 93
Diesel exhaust fluid, at low temperatures 206
Diesel exhaust fluid, having refilled 206
Diesel exhaust fluid, on mini‐ mum 206
Diesel exhaust fluid, replen‐ ishing yourself 206
Diesel particulate filter 187
Digital clock 88
Dimensions 252
Dimmable exterior mirrors 56
Dimmable interior rearview mirror 57
Direction indicator, refer to Turn signals 70
Display, electronic, instru‐ ment cluster 80
Display in windshield 96
Display lighting, refer to In‐ strument lighting 101
Displays 78, 81
Displays, cleaning 249
Disposal, coolant 230
Disposal, vehicle battery 239
Distance control, refer to PDC 148
Distance information 161
Distance to destination 93
Divided screen view, split screen 21
Door lock 35
Door lock, refer to Remote control 30
Doors, Automatic Soft Clos‐ ing 36
Downhill control 131
Drive-off assistant 129
Drive-off assistant, refer to DSC 129
Driver assistance, refer to In‐ telligent Safety 111 Driving Assistant, refer to In‐
telligent Safety 111
Driving Dynamics Con‐ trol 133
Driving instructions, breaking in 186
Driving mode 133
Driving notes, general 186
Driving stability control sys‐ tems 129
Driving tips 186
DSC Dynamic Stability Con‐ trol 129
DTC driving dynamics 130
DTC Dynamic Traction Con‐ trol 130
Dynamic Damping Con‐ trol 132
Dynamic Drive 132
Dynamic Stability Control DSC 129
Dynamic Traction Control DTC 130
E ECO PRO 194
ECO PRO, bonus range 196
ECO PRO display 194
ECO PRO displays 83
ECO PRO driving mode 194
ECO PRO mode 194
ECO PRO Tip - driving in‐ struction 196
EfficientDynamics 197
Electronic displays, instru‐ ment cluster 80
Electronic Stability Program ESP, refer to DSC 129
Emergency detection, remote control 31
Emergency release, fuel filler flap 202
Emergency Request 240
Emergency service, refer to Roadside Assistance 241 Seite 258ReferenceEverything from A to Z258
Online Edition for Part no. 01 40 2 928 000 - II/14
Page 260 of 267
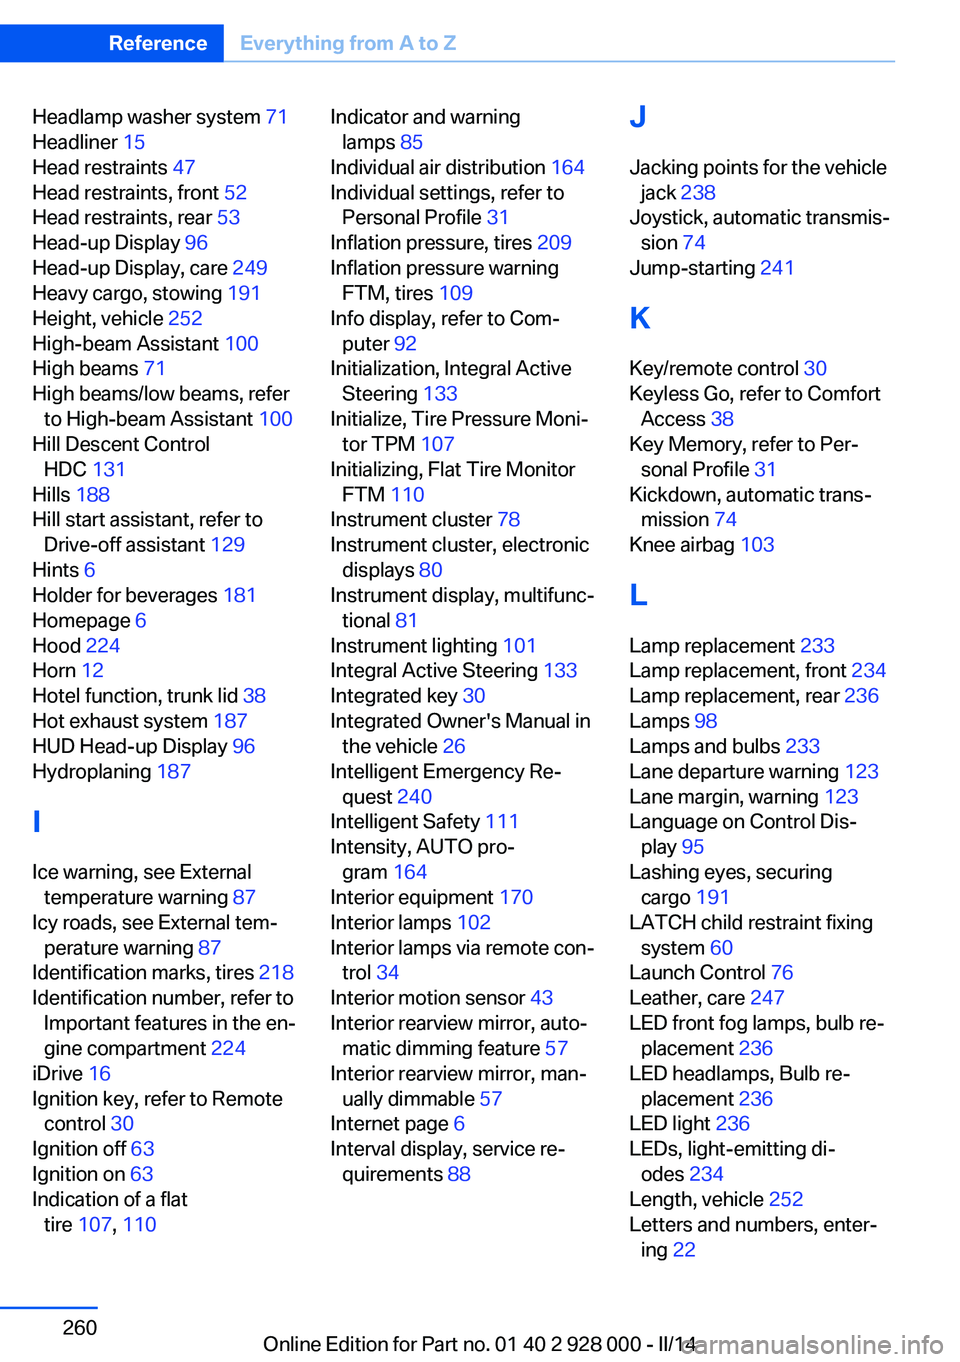
Headlamp washer system 71
Headliner 15
Head restraints 47
Head restraints, front 52
Head restraints, rear 53
Head-up Display 96
Head-up Display, care 249
Heavy cargo, stowing 191
Height, vehicle 252
High-beam Assistant 100
High beams 71
High beams/low beams, refer to High-beam Assistant 100
Hill Descent Control HDC 131
Hills 188
Hill start assistant, refer to Drive-off assistant 129
Hints 6
Holder for beverages 181
Homepage 6
Hood 224
Horn 12
Hotel function, trunk lid 38
Hot exhaust system 187
HUD Head-up Display 96
Hydroplaning 187
I Ice warning, see External temperature warning 87
Icy roads, see External tem‐ perature warning 87
Identification marks, tires 218
Identification number, refer to Important features in the en‐
gine compartment 224
iDrive 16
Ignition key, refer to Remote control 30
Ignition off 63
Ignition on 63
Indication of a flat tire 107 , 110 Indicator and warning
lamps 85
Individual air distribution 164
Individual settings, refer to Personal Profile 31
Inflation pressure, tires 209
Inflation pressure warning FTM, tires 109
Info display, refer to Com‐ puter 92
Initialization, Integral Active Steering 133
Initialize, Tire Pressure Moni‐ tor TPM 107
Initializing, Flat Tire Monitor FTM 110
Instrument cluster 78
Instrument cluster, electronic displays 80
Instrument display, multifunc‐ tional 81
Instrument lighting 101
Integral Active Steering 133
Integrated key 30
Integrated Owner's Manual in the vehicle 26
Intelligent Emergency Re‐ quest 240
Intelligent Safety 111
Intensity, AUTO pro‐ gram 164
Interior equipment 170
Interior lamps 102
Interior lamps via remote con‐ trol 34
Interior motion sensor 43
Interior rearview mirror, auto‐ matic dimming feature 57
Interior rearview mirror, man‐ ually dimmable 57
Internet page 6
Interval display, service re‐ quirements 88 J
Jacking points for the vehicle jack 238
Joystick, automatic transmis‐ sion 74
Jump-starting 241
K
Key/remote control 30
Keyless Go, refer to Comfort Access 38
Key Memory, refer to Per‐ sonal Profile 31
Kickdown, automatic trans‐ mission 74
Knee airbag 103
L Lamp replacement 233
Lamp replacement, front 234
Lamp replacement, rear 236
Lamps 98
Lamps and bulbs 233
Lane departure warning 123
Lane margin, warning 123
Language on Control Dis‐ play 95
Lashing eyes, securing cargo 191
LATCH child restraint fixing system 60
Launch Control 76
Leather, care 247
LED front fog lamps, bulb re‐ placement 236
LED headlamps, Bulb re‐ placement 236
LED light 236
LEDs, light-emitting di‐ odes 234
Length, vehicle 252
Letters and numbers, enter‐ ing 22 Seite 260ReferenceEverything from A to Z260
Online Edition for Part no. 01 40 2 928 000 - II/14