2014 BMW 550I GRAN TURISMO check engine light
[x] Cancel search: check engine lightPage 153 of 251
System limits
The cameras capture a maximum range of
330 ft/100 m.
Top View
The concept Top View assists you in parking and maneu‐
vering. The area around the doors and the road
area around the vehicle are shown on the Con‐
trol Display for this purpose.
General information
The image is captured by two cameras integrated in the exterior mirrors and by the
backup camera.
The range is at least 7 ft/2 m to the side and
rear.
In this way, obstacles up to the height of the
exterior mirrors are detected early.
Notes Check the traffic situation as well
Check the traffic situation around the ve‐
hicle with your own eyes. Otherwise, an acci‐
dent could result from road users or objects lo‐
cated outside the picture area of the
cameras.◀
At a glance
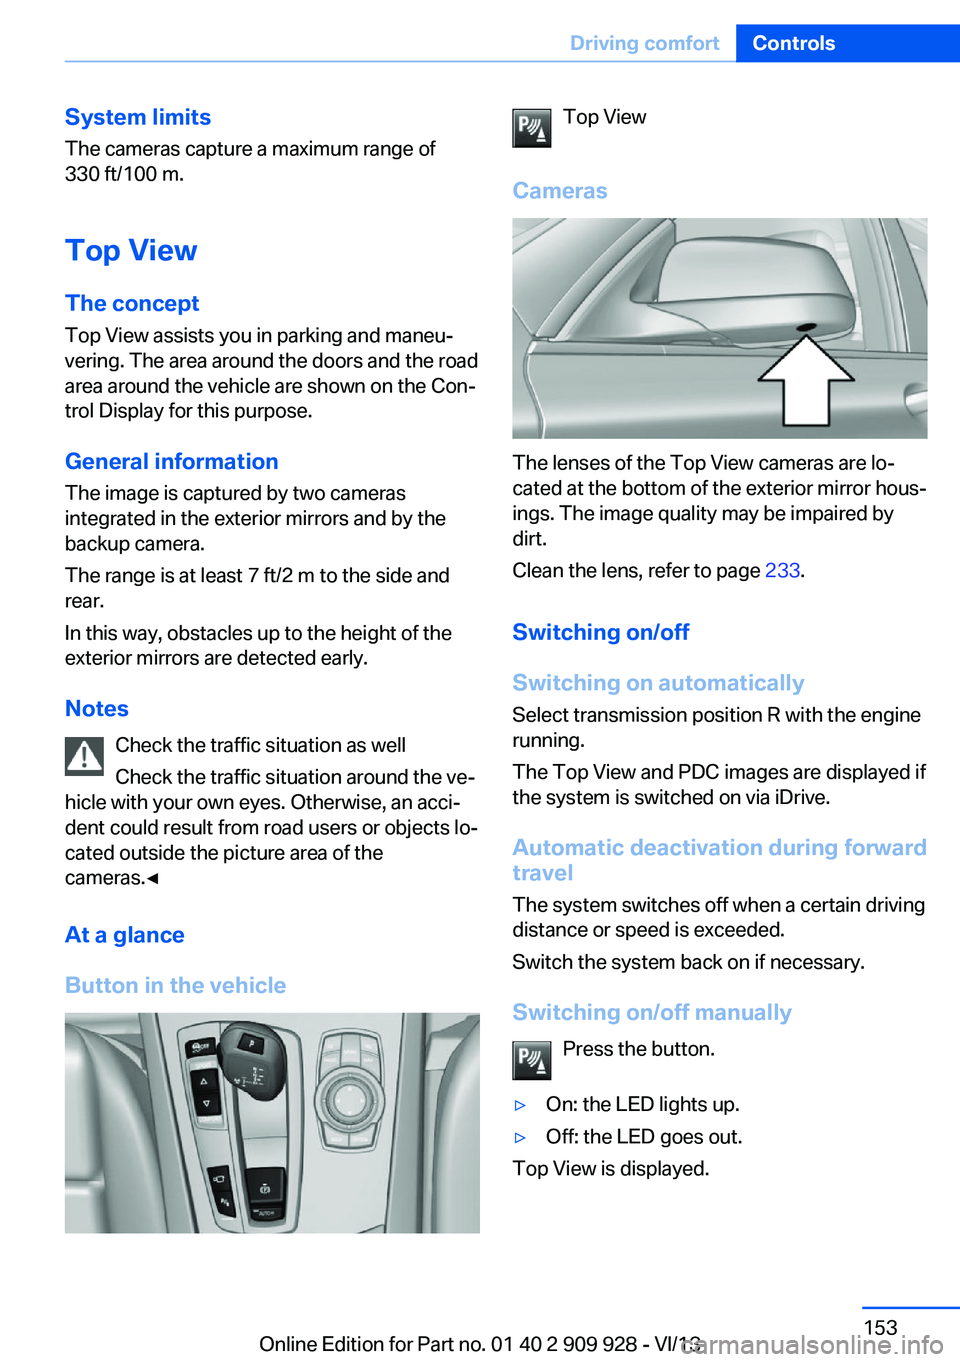
Button in the vehicleTop View
Cameras
The lenses of the Top View cameras are lo‐
cated at the bottom of the exterior mirror hous‐
ings. The image quality may be impaired by
dirt.
Clean the lens, refer to page 233.
Switching on/off
Switching on automatically Select transmission position R with the engine
running.
The Top View and PDC images are displayed if
the system is switched on via iDrive.
Automatic deactivation during forward
travel
The system switches off when a certain driving
distance or speed is exceeded.
Switch the system back on if necessary.
Switching on/off manually Press the button.
▷On: the LED lights up.▷Off: the LED goes out.
Top View is displayed.
Seite 153Driving comfortControls153
Online Edition for Part no. 01 40 2 909 928 - VI/13
Page 214 of 251
3. "Measure engine oil level"4."Start measurement"
The oil level is checked and displayed via a
scale.
Duration: approx. 1 minute.
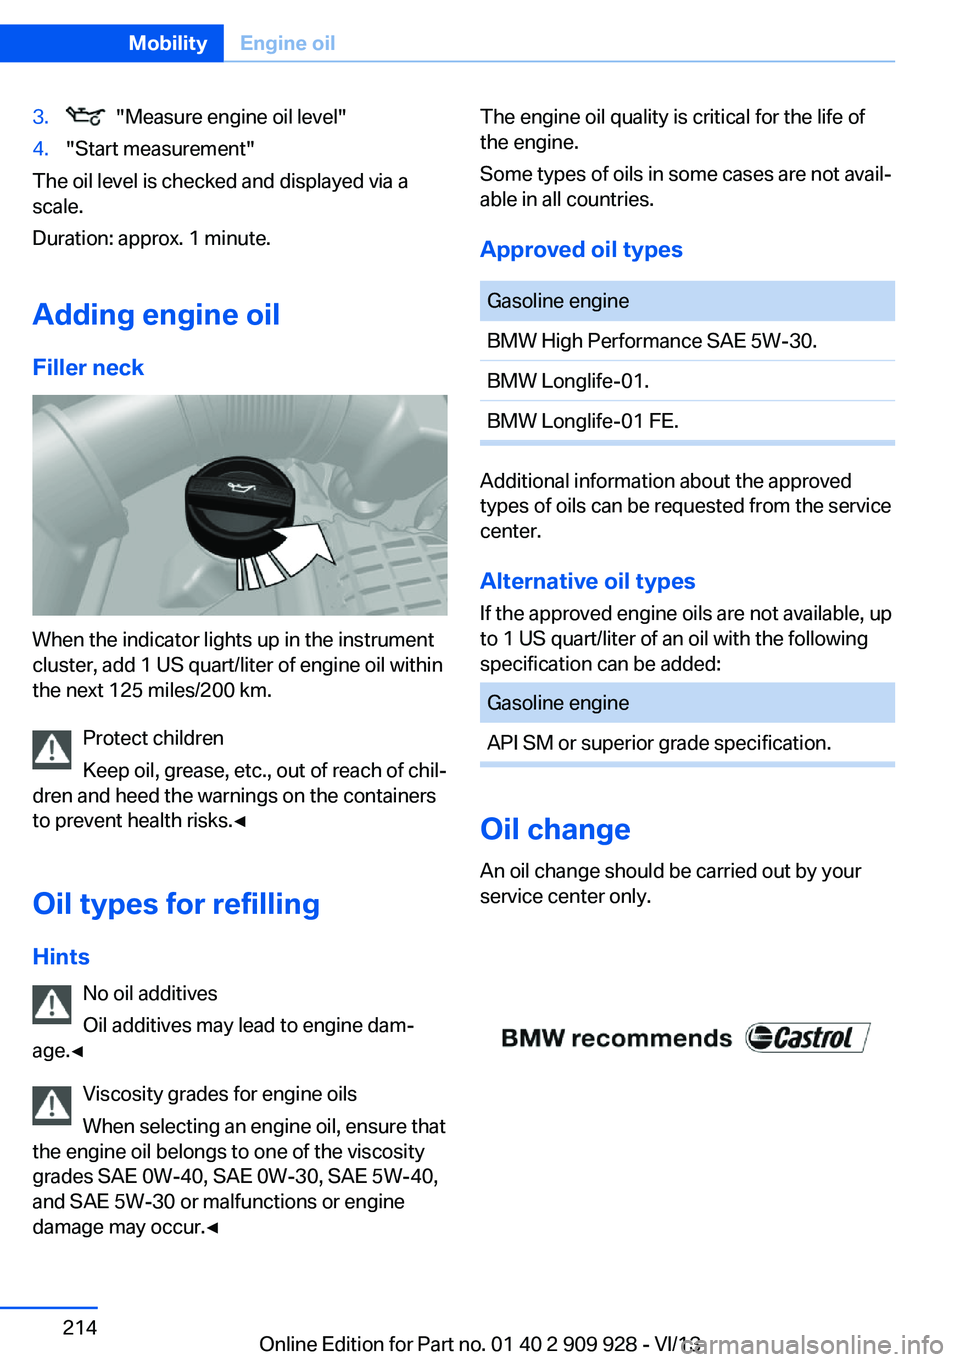
Adding engine oil Filler neck
When the indicator lights up in the instrument
cluster, add 1 US quart/liter of engine oil within
the next 125 miles/200 km.
Protect children
Keep oil, grease, etc., out of reach of chil‐
dren and heed the warnings on the containers
to prevent health risks.◀
Oil types for refilling
Hints No oil additives
Oil additives may lead to engine dam‐
age.◀
Viscosity grades for engine oils
When selecting an engine oil, ensure that
the engine oil belongs to one of the viscosity
grades SAE 0W-40, SAE 0W-30, SAE 5W-40,
and SAE 5W-30 or malfunctions or engine
damage may occur.◀
The engine oil quality is critical for the life of
the engine.
Some types of oils in some cases are not avail‐
able in all countries.
Approved oil typesGasoline engineBMW High Performance SAE 5W-30.BMW Longlife-01.BMW Longlife-01 FE.
Additional information about the approved
types of oils can be requested from the service
center.
Alternative oil types If the approved engine oils are not available, up
to 1 US quart/liter of an oil with the following
specification can be added:
Gasoline engineAPI SM or superior grade specification.
Oil change
An oil change should be carried out by your
service center only.
Seite 214MobilityEngine oil214
Online Edition for Part no. 01 40 2 909 928 - VI/13
Page 215 of 251
CoolantVehicle equipmentAll standard, country-specific and optional
equipment that is offered in the model series is
described in this chapter. Therefore, equip‐
ment is also described that is not available in a
vehicle, e. g., because of the selected optional
equipment or country variant. This also applies
for safety-related functions and systems.
General information Danger of burns from hot engine
Do not open the cooling system while
the engine is hot; otherwise, escaping coolant may cause burns.◀
Suitable additives
Only use suitable additives; otherwise,
engine damage may occur. The additives are
harmful to your health.◀
Coolant consists of water and additives.
Not all commercially available additives are
suitable for your vehicle. Ask your service cen‐
ter for suitable additives.
Coolant level
If there is no Min. and Max. mark in the filler
neck of the coolant reservoir, have the coolant
level checked if necessary by your service cen‐
ter and add coolant as needed.
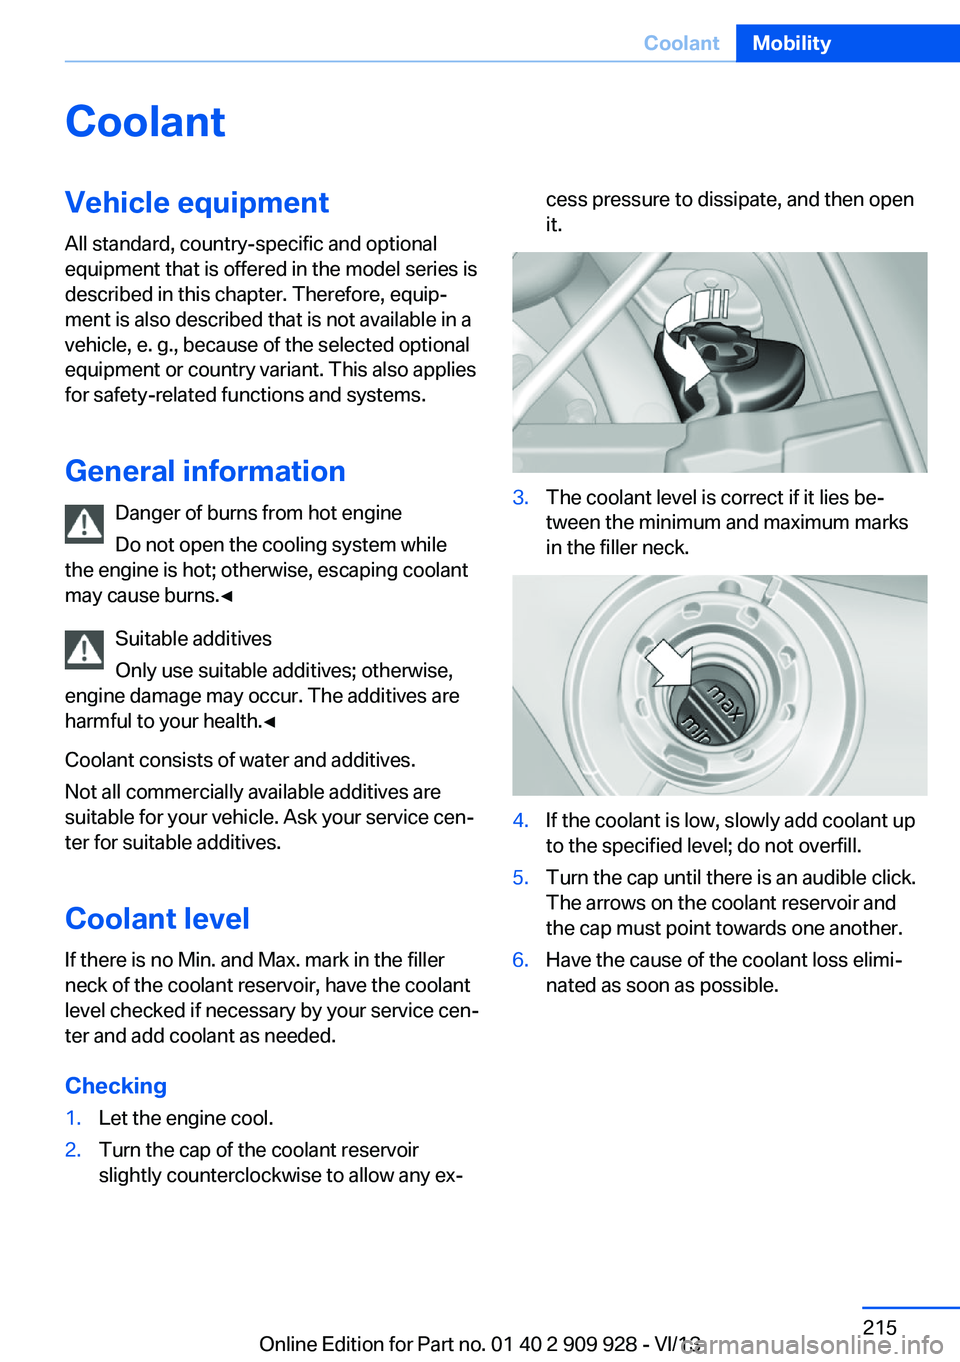
Checking1.Let the engine cool.2.Turn the cap of the coolant reservoir
slightly counterclockwise to allow any ex‐cess pressure to dissipate, and then open
it.3.The coolant level is correct if it lies be‐
tween the minimum and maximum marks
in the filler neck.4.If the coolant is low, slowly add coolant up
to the specified level; do not overfill.5.Turn the cap until there is an audible click.
The arrows on the coolant reservoir and
the cap must point towards one another.6.Have the cause of the coolant loss elimi‐
nated as soon as possible.Seite 215CoolantMobility215
Online Edition for Part no. 01 40 2 909 928 - VI/13
Page 217 of 251
Socket for OBD Onboard
Diagnosis
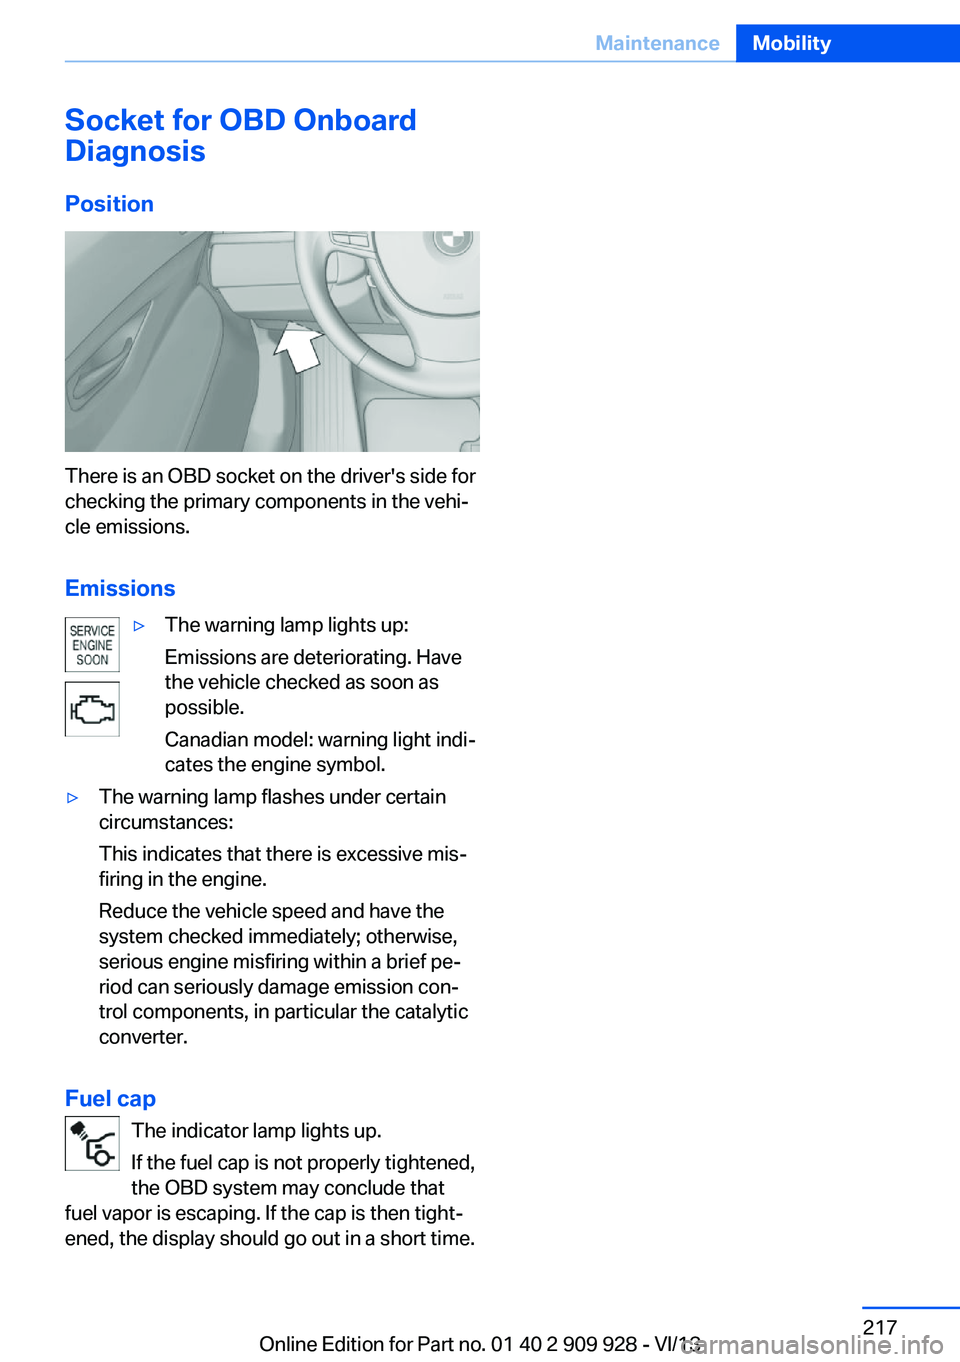
Position
There is an OBD socket on the driver's side for
checking the primary components in the vehi‐
cle emissions.
Emissions
▷The warning lamp lights up:
Emissions are deteriorating. Have
the vehicle checked as soon as
possible.
Canadian model: warning light indi‐
cates the engine symbol.▷The warning lamp flashes under certain
circumstances:
This indicates that there is excessive mis‐
firing in the engine.
Reduce the vehicle speed and have the
system checked immediately; otherwise,
serious engine misfiring within a brief pe‐
riod can seriously damage emission con‐
trol components, in particular the catalytic
converter.
Fuel cap
The indicator lamp lights up.
If the fuel cap is not properly tightened,
the OBD system may conclude that
fuel vapor is escaping. If the cap is then tight‐
ened, the display should go out in a short time.
Seite 217MaintenanceMobility217
Online Edition for Part no. 01 40 2 909 928 - VI/13
Page 220 of 251
If a bulb fails, switch on the front fog lamps and
continue the trip with great care. Comply with
local regulations.
Do not perform work/bulb replacement
on xenon headlamps
Have any work on the xenon lighting system,
including bulb replacement, performed only by
a service center. Due to the high voltage
present in the system, there is the danger of
fatal injuries if work is carried out improperly.◀
For checking and adjusting headlamp aim,
please contact your BMW center.
Parking lamps and roadside parkinglamps, turn signal lamp
Follow the general instructions on Lamps and
bulbs, refer to page 218.
These lights feature LED technology.
Contact your service center in the event of a
malfunction.
Corner-illuminating lamps
Follow the general instructions on lamps and
bulbs, refer to page 218.
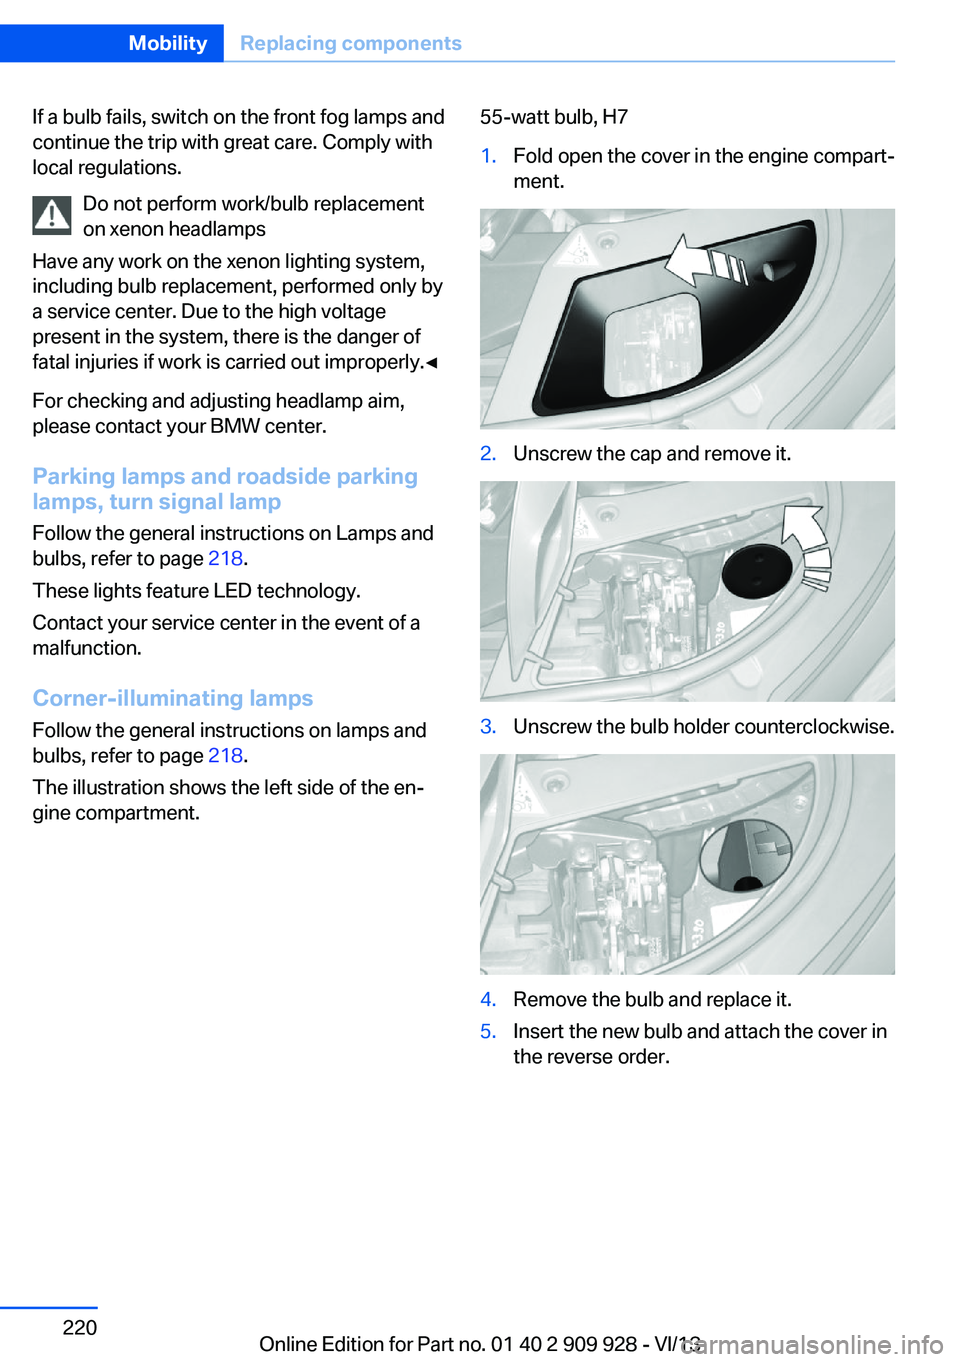
The illustration shows the left side of the en‐
gine compartment.55-watt bulb, H71.Fold open the cover in the engine compart‐
ment.2.Unscrew the cap and remove it.3.Unscrew the bulb holder counterclockwise.4.Remove the bulb and replace it.5.Insert the new bulb and attach the cover in
the reverse order.Seite 220MobilityReplacing components220
Online Edition for Part no. 01 40 2 909 928 - VI/13
Page 228 of 251
corresponding engine or body ground of
the vehicle to be started.
Starting the engine
Never use spray fluids to start the engine.
1.Start the engine of the assisting vehicle
and let it run for several minutes at an in‐
creased idle speed.2.Start the engine of the vehicle being
started in the usual way.
If the first starting attempt is not success‐
ful, wait a few minutes before making an‐
other attempt in order to allow the dis‐
charged battery to recharge.3.Let both engines run for several minutes.4.Disconnect the jumper cables in the re‐
verse order.
Check the battery and recharge if necessary.
Tow-starting and towing Transporting your vehicle
Note
Your vehicle is not permitted to be towed.
Therefore, contact a service center in the
event of a breakdown.
Do not have the vehicle towed
Have your vehicle transported on a load‐
ing platform only; otherwise, damage may oc‐
cur.◀
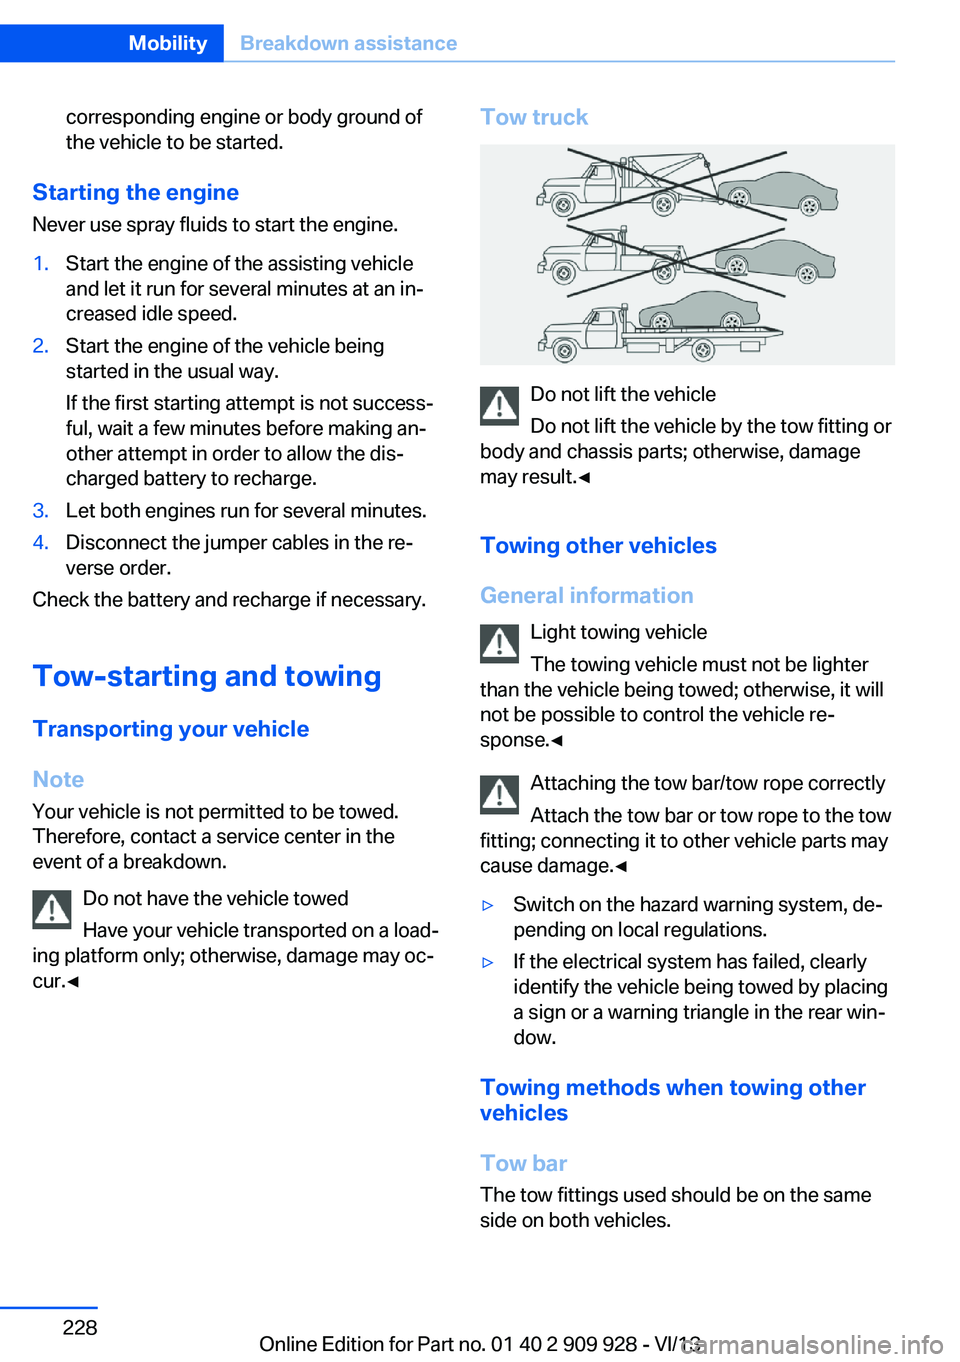
Tow truck
Do not lift the vehicle
Do not lift the vehicle by the tow fitting or
body and chassis parts; otherwise, damage
may result.◀
Towing other vehicles
General information Light towing vehicle
The towing vehicle must not be lighter
than the vehicle being towed; otherwise, it will
not be possible to control the vehicle re‐
sponse.◀
Attaching the tow bar/tow rope correctly
Attach the tow bar or tow rope to the tow
fitting; connecting it to other vehicle parts may
cause damage.◀
▷Switch on the hazard warning system, de‐
pending on local regulations.▷If the electrical system has failed, clearly
identify the vehicle being towed by placing
a sign or a warning triangle in the rear win‐
dow.
Towing methods when towing other
vehicles
Tow bar The tow fittings used should be on the same
side on both vehicles.
Seite 228MobilityBreakdown assistance228
Online Edition for Part no. 01 40 2 909 928 - VI/13
Page 241 of 251
BMW Assist, see user'smanual for Navigation, En‐
tertainment and Communi‐
cation
BMW Homepage 6
BMW Internet page 6
BMW maintenance sys‐ tem 216
Bonus range, ECO PRO 192
Bottle holder, refer to Cu‐ pholder 179
Brake assistant 127
Brake assistant, adaptive 127
Brake discs, breaking in 184
Brake force display 124
Brake lamps, brake force dis‐ play 124
Brake lamps, bulb replace‐ ment 221
Brake lights, adaptive 124
Brake pads, breaking in 184
Braking, hints 185
Breakdown assis‐ tance 225, 226
Breaking in 184
Brightness of Control Dis‐ play 96
Bulb replacement, rear 221
Bulb replacement, see lamp and bulb replacement 218
Button assignment for remote control 30
Button, RES 138
Button, Start/Stop 67
Bypassing, refer to Jump- starting 227
C
California Proposition 65 Warning 7
Calling up mirror adjust‐ ment 43
Calling up seat adjust‐ ment 43 Calling up steering wheel ad‐
justment 43
Camera, backup camera 149
Camera, care 233
Camera, Side View 152
Camera, Top View 153
Can holder, refer to Cu‐ pholder 179
Car battery 222
Car care products 231
Care, displays 233
Care, vehicle 231
Cargo 187
Cargo area 174
Cargo area, enlarging 174
Cargo area lid 37
Cargo area, storage compart‐ ments 180
Cargo cover 174
Cargo partition 175
Cargo, securing 188
Cargo straps, securing cargo 188
Car key, refer to Remote con‐ trol 30
Carpet, care 233
Car wash 230
Catalytic converter, refer to Hot exhaust system 184
CBS Condition Based Serv‐ ice 216
CD/Multimedia, see user's manual for Navigation, En‐
tertainment and Communi‐
cation
Center armrest 178
Center console 14
Center-Lock, see button for central locking 34
Central locking system 33
Central screen, refer to Con‐ trol Display 16
Changes, technical, refer to Safety 7
Changing parts 218
Changing wheels 222 Changing wheels/tires 207
Check Control 85
Checking the oil level elec‐ tronically 213
Children, seating position 61
Children, transporting safely 61
Child restraint fixing sys‐ tem 61
Child restraint fixing system LATCH 62
Child restraint fixing systems, mounting 61
Child safety locks 66
Child seat, mounting 61
Child seats 61
Chrome parts, care 232
Cigarette lighter 171
Cleaning, displays 233
Climate control 162
Climate control laminated tinted safety glass 185
Climate control wind‐ shield 185
Clock 88
Closing/opening from in‐ side 36
Closing/opening via door lock 35
Closing/opening with remote control 34
Clothes hooks 180
Coasting 194
Coasting with engine decou‐ pled, coasting 194
Coasting with idling en‐ gine 194
Collision warning with braking function 113
Collision warning with City Braking function 111
Combination switch, refer to Turn signals 74
Combination switch, refer to Wiper system 75 Seite 241Everything from A to ZReference241
Online Edition for Part no. 01 40 2 909 928 - VI/13