2014 BMW 535I XDRIVE rear seats
[x] Cancel search: rear seatsPage 47 of 267
AdjustingVehicle equipment
All standard, country-specific and optional
equipment that is offered in the model series is
described in this chapter. Therefore, equip‐
ment is also described that is not available in a
vehicle, e. g., because of the selected optional
equipment or country variant. This also applies
for safety-related functions and systems.
Sitting safely The ideal seating position can make a vital
contribution to relaxed, fatigue-free driving.
The seating position plays an important role in
an accident in combination with:▷Safety belts, refer to page 51.▷Head restraints, refer to page 52.▷Airbags, refer to page 103.
Seats
Hints Do not adjust the seat while driving
Do not adjust the driver's seat while driv‐
ing, or the seat could respond with unexpected
movement and the ensuing loss of vehicle
control could lead to an accident.◀
Do not incline the backrest too far to the
rear
Also on the front passenger side, do not incline
the backrest on the front passenger side too far to the rear during driving, or there is a risk of
slipping under the safety belt in the event of an
accident. This would eliminate the protection
normally provided by the belt.◀
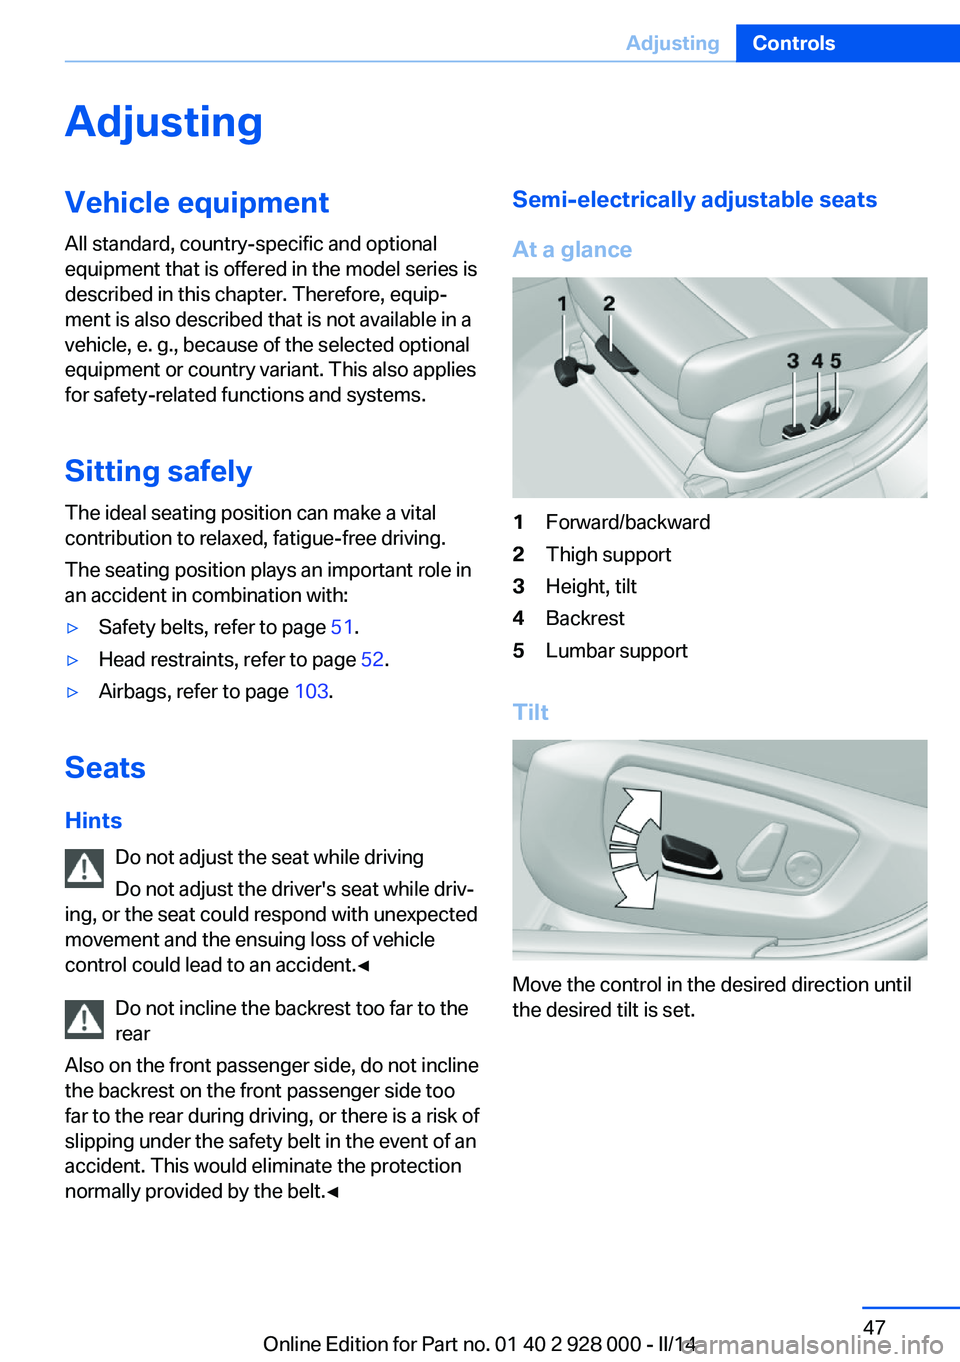
Semi-electrically adjustable seats
At a glance1Forward/backward2Thigh support3Height, tilt4Backrest5Lumbar support
Tilt
Move the control in the desired direction until
the desired tilt is set.
Seite 47AdjustingControls47
Online Edition for Part no. 01 40 2 928 000 - II/14
Page 51 of 267
If the drive is continued within approx. 15 mi‐
nutes, the seat heating is activated automati‐
cally with the temperature selected last.
When ECO PRO, refer to page 194, is acti‐
vated, the heater output is reduced.
Switching off Press the button longer.
The LEDs go out.
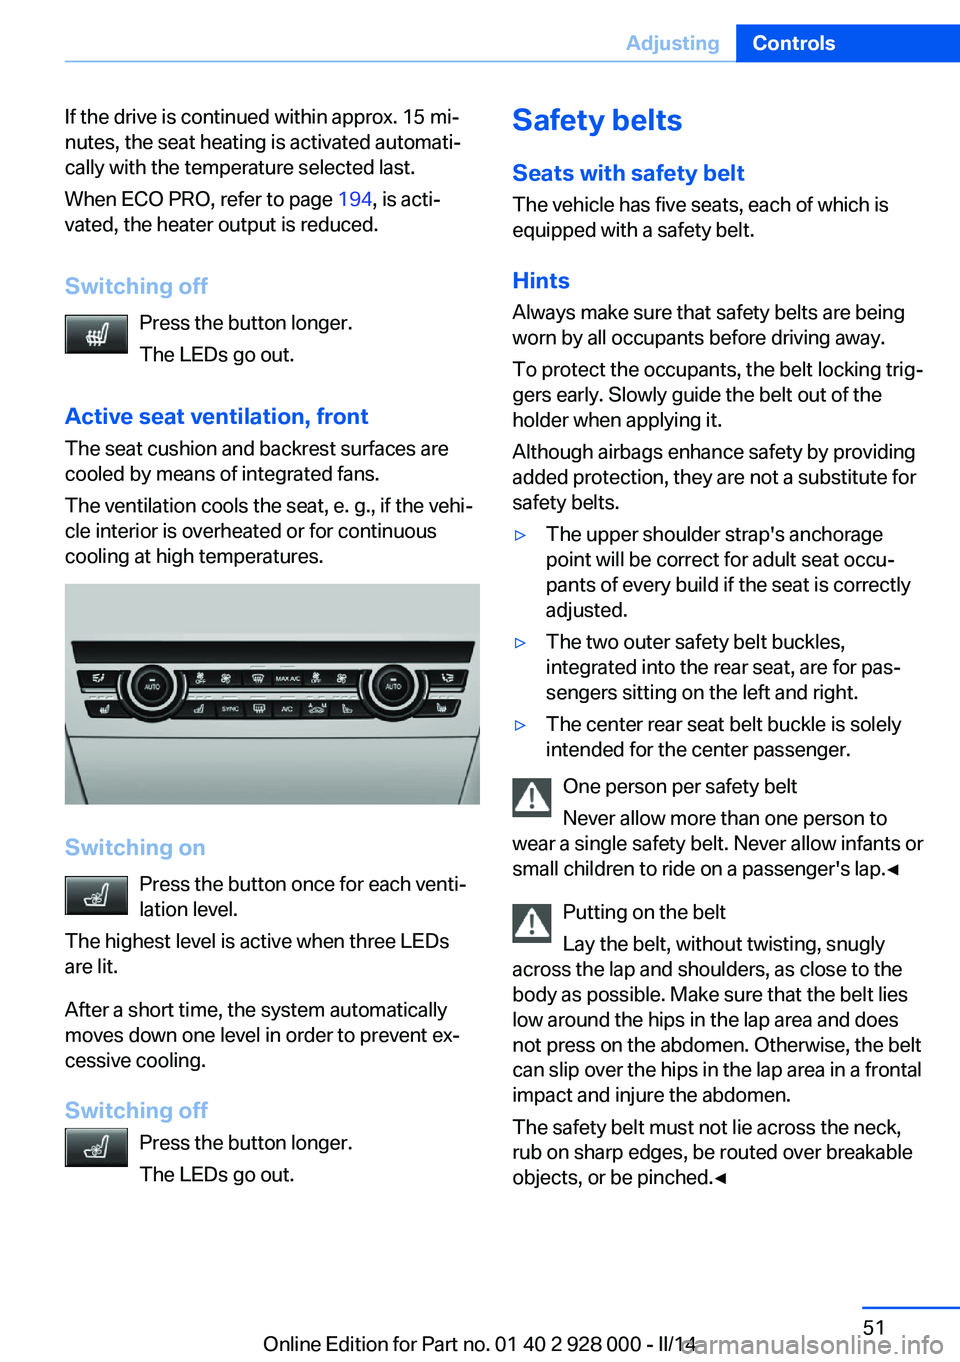
Active seat ventilation, front The seat cushion and backrest surfaces are
cooled by means of integrated fans.
The ventilation cools the seat, e. g., if the vehi‐
cle interior is overheated or for continuous
cooling at high temperatures.
Switching on
Press the button once for each venti‐
lation level.
The highest level is active when three LEDs
are lit.
After a short time, the system automatically
moves down one level in order to prevent ex‐
cessive cooling.
Switching off Press the button longer.
The LEDs go out.
Safety belts
Seats with safety belt
The vehicle has five seats, each of which is
equipped with a safety belt.
Hints
Always make sure that safety belts are being
worn by all occupants before driving away.
To protect the occupants, the belt locking trig‐
gers early. Slowly guide the belt out of the
holder when applying it.
Although airbags enhance safety by providing
added protection, they are not a substitute for
safety belts.▷The upper shoulder strap's anchorage
point will be correct for adult seat occu‐
pants of every build if the seat is correctly
adjusted.▷The two outer safety belt buckles,
integrated into the rear seat, are for pas‐
sengers sitting on the left and right.▷The center rear seat belt buckle is solely
intended for the center passenger.
One person per safety belt
Never allow more than one person to
wear a single safety belt. Never allow infants or
small children to ride on a passenger's lap.◀
Putting on the belt
Lay the belt, without twisting, snugly
across the lap and shoulders, as close to the
body as possible. Make sure that the belt lies
low around the hips in the lap area and does
not press on the abdomen. Otherwise, the belt
can slip over the hips in the lap area in a frontal
impact and injure the abdomen.
The safety belt must not lie across the neck,
rub on sharp edges, be routed over breakable
objects, or be pinched.◀
Seite 51AdjustingControls51
Online Edition for Part no. 01 40 2 928 000 - II/14
Page 52 of 267
Reduction of restraining effect
Avoid wearing bulky clothing, and pull
the shoulder belt periodically to readjust the
tension. Make sure that the belt is not jammed;
otherwise, the belt can be damaged and the
restraining effect reduced.◀
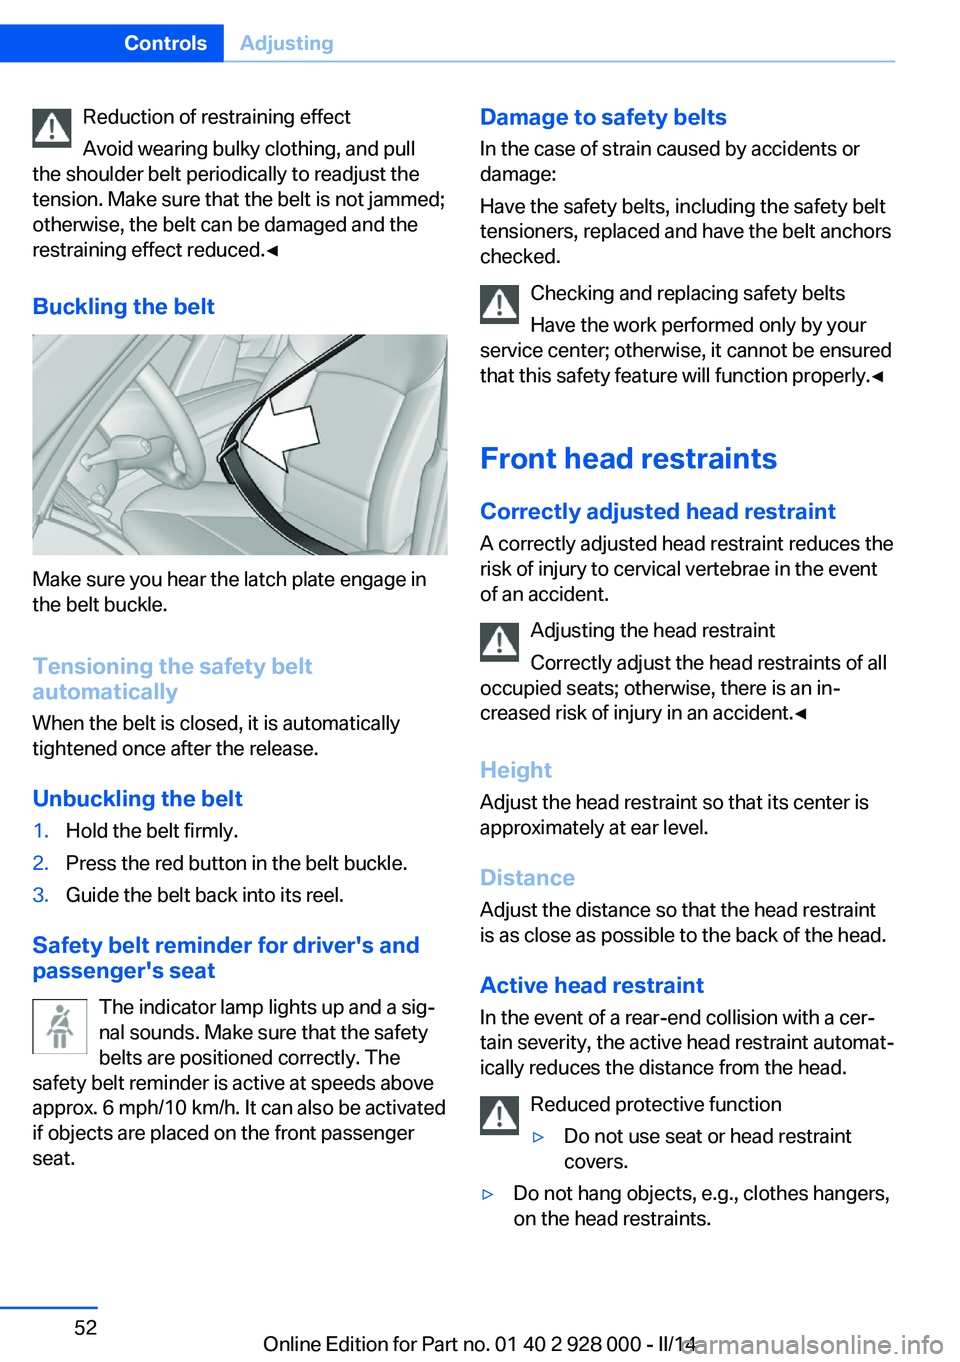
Buckling the belt
Make sure you hear the latch plate engage in
the belt buckle.
Tensioning the safety belt
automatically
When the belt is closed, it is automatically
tightened once after the release.
Unbuckling the belt
1.Hold the belt firmly.2.Press the red button in the belt buckle.3.Guide the belt back into its reel.
Safety belt reminder for driver's and
passenger's seat
The indicator lamp lights up and a sig‐
nal sounds. Make sure that the safety
belts are positioned correctly. The
safety belt reminder is active at speeds above
approx. 6 mph/10 km/h. It can also be activated
if objects are placed on the front passenger
seat.
Damage to safety belts
In the case of strain caused by accidents or
damage:
Have the safety belts, including the safety belt
tensioners, replaced and have the belt anchors
checked.
Checking and replacing safety belts
Have the work performed only by your
service center; otherwise, it cannot be ensured
that this safety feature will function properly.◀
Front head restraints
Correctly adjusted head restraint A correctly adjusted head restraint reduces the
risk of injury to cervical vertebrae in the event
of an accident.
Adjusting the head restraint
Correctly adjust the head restraints of all
occupied seats; otherwise, there is an in‐
creased risk of injury in an accident.◀
Height
Adjust the head restraint so that its center is
approximately at ear level.
Distance Adjust the distance so that the head restraint
is as close as possible to the back of the head.
Active head restraint In the event of a rear-end collision with a cer‐
tain severity, the active head restraint automat‐
ically reduces the distance from the head.
Reduced protective function▷Do not use seat or head restraint
covers.▷Do not hang objects, e.g., clothes hangers,
on the head restraints.Seite 52ControlsAdjusting52
Online Edition for Part no. 01 40 2 928 000 - II/14
Page 104 of 267

Protective action
Airbags are not triggered in every impact situa‐
tion, e.g., in less severe accidents or rear-end
collisions.
Information on how to ensure the optimal
protective effect of the airbags▷Keep at a distance from the airbags.▷Always grasp the steering wheel on the
steering wheel rim, holding your hands at
the 3 o'clock and 9 o'clock positions, to
keep the danger of injury to your hands or
arms as low as possible if the airbag is trig‐
gered.▷There should be no people, animals, or ob‐
jects between an airbag and a person.▷Do not use the cover of the front airbag on
the front passenger side as a storage area.▷Keep the dashboard and window on the
front passenger side clear, i.e. do not cover
with adhesive labels or coverings, and do
not attach holders such as for navigation
instruments and mobile phones.▷Make sure that the front passenger is sit‐
ting correctly, i.e., keeps his or her feet and
legs in the footwell; otherwise, leg injuries
can occur if the front airbag is triggered.▷Do not place slip covers, seat cushions or
other objects on the front passenger seat
that are not approved specifically for seats
with integrated side airbags.▷Do not hang pieces of clothing, such as
jackets, over the backrests.▷Make sure that occupants keep their heads
away from the side airbag and do not rest
against the head airbag; otherwise, injuries
can occur if the airbags are triggered.▷Do not remove the airbag restraint system.▷Do not remove the steering wheel.▷Do not apply adhesive materials to the air‐
bag cover panels, cover them or modify
them in any way.▷Never modify either the individual compo‐
nents or the wiring in the airbag system.
This also applies to steering wheel covers,
the dashboard, the seats, the roof pillars
and the sides of the headliner.◀
Even when all instructions are followed closely,
injury from contact with the airbags cannot be
ruled out in certain situations.
The ignition and inflation noise may lead to
short-term and, in most cases, temporary
hearing impairment in sensitive individuals.
In the case of a malfunction, deactivation
and after triggering of the airbags
Do not touch the individual components imme‐
diately after the system has been triggered;
otherwise, there is the danger of burns.
Only have the airbags checked, repaired or dis‐
mantled and the airbag generator scrapped by
the service center or a workshop that has the
necessary authorization for handling explo‐
sives.
Non-professional attempts to service the sys‐
tem could lead to failure in an emergency or
undesired triggering of the airbag, either of
which could result in injury.◀
Warnings and information on the airbags are
also found on the sun visors.
Functional readiness of the airbag
system
When the ignition is switched on, the
warning lamp in the instrument cluster
lights up briefly and thereby indicates
the operational readiness of the entire airbag
system and the belt tensioner.
Airbag system malfunctioning
▷Warning lamp does not come on when the
ignition is turned on.▷The warning lamp lights up continuously.Seite 104ControlsSafety104
Online Edition for Part no. 01 40 2 928 000 - II/14
Page 176 of 267
middle section is folded down. Otherwise, in‐
jury or damage may result.◀
Ensuring the stability of the child seat
When installing child restraint fixing sys‐
tems, make sure that the child seat is securely
fastened to the backrest of the seat. The angle
of the backrest may need to be adjusted and,
where necessary, the headrest height may also
need to be adjusted, or if possible removed.
Make sure that all backrests are securely
locked. Otherwise, the stability of the child
seat is limited, and there is an increased risk of
injury because of unexpected movement of the
rear seat backrest.◀
Opening Move the front seats to an upright posi‐
tion
Before folding down the rear backrests, ensure
that the front seats are moved forward slightly
and are in an upright position. Otherwise, the
head restraint and screen could be damaged.◀1.Unlock the belt lock of the center safety
belt in the rear using the latch plate of an‐
other safety belt.2.Insert the latch plate at the end of the belt
into the specially designated fixture on the
rear window shelf.3.Push the corresponding head restraint
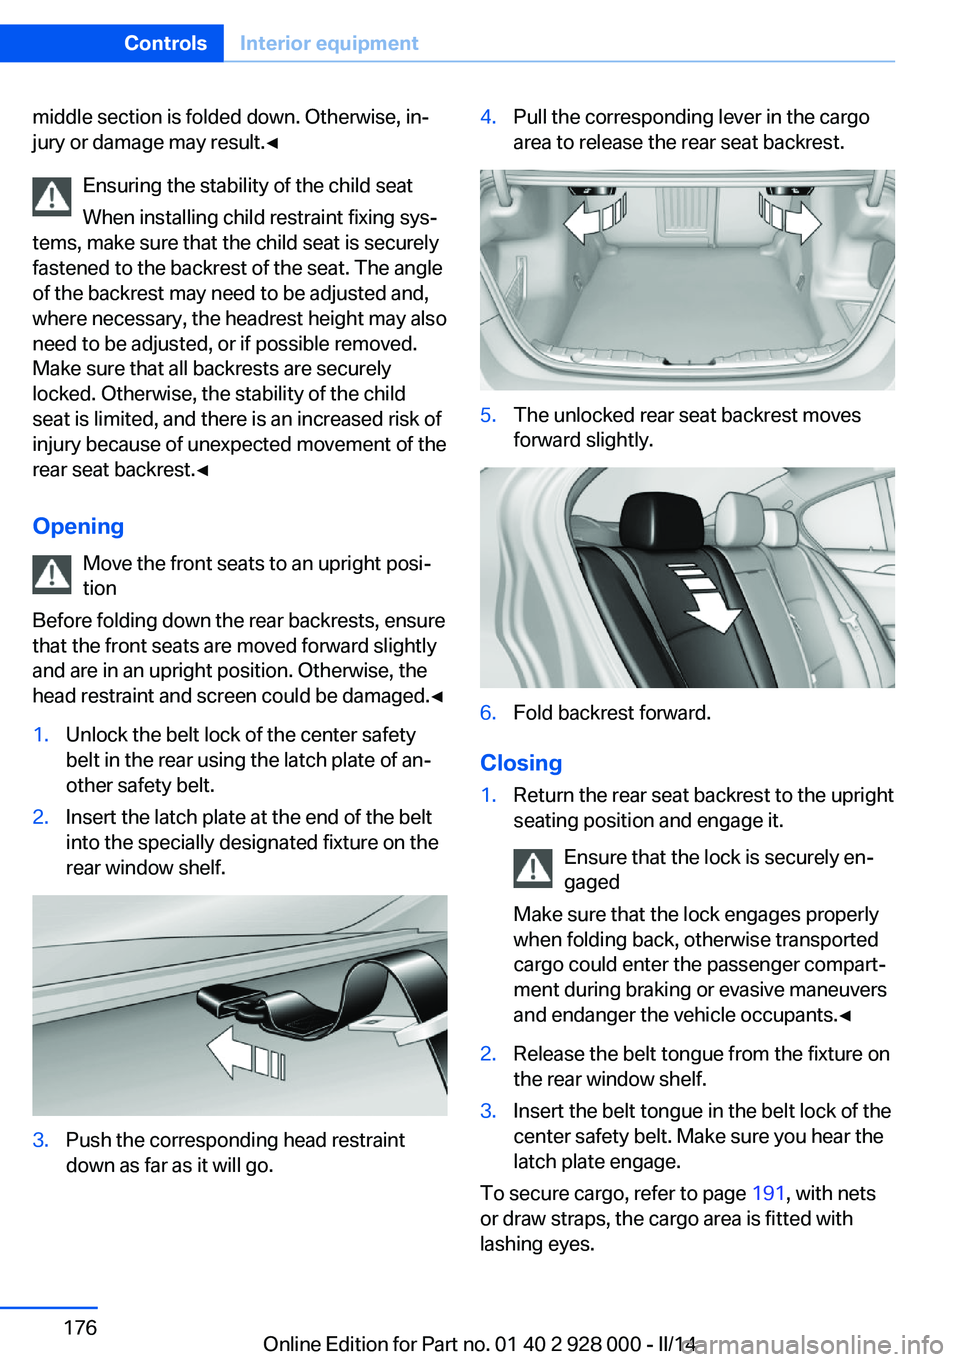
down as far as it will go.4.Pull the corresponding lever in the cargo
area to release the rear seat backrest.5.The unlocked rear seat backrest moves
forward slightly.6.Fold backrest forward.
Closing
1.Return the rear seat backrest to the upright
seating position and engage it.
Ensure that the lock is securely en‐
gaged
Make sure that the lock engages properly
when folding back, otherwise transported
cargo could enter the passenger compart‐
ment during braking or evasive maneuvers
and endanger the vehicle occupants.◀2.Release the belt tongue from the fixture on
the rear window shelf.3.Insert the belt tongue in the belt lock of the
center safety belt. Make sure you hear the
latch plate engage.
To secure cargo, refer to page 191, with nets
or draw straps, the cargo area is fitted with
lashing eyes.
Seite 176ControlsInterior equipment176
Online Edition for Part no. 01 40 2 928 000 - II/14
Page 179 of 267
Storage compartmentsVehicle equipmentAll standard, country-specific and optional
equipment that is offered in the model series is
described in this chapter. Therefore, equip‐
ment is also described that is not available in a
vehicle, e. g., because of the selected optional
equipment or country variant. This also applies
for safety-related functions and systems.
Notes No loose objects in the passenger com‐
partment
Do not stow any objects in the passenger
compartment without securing them; other‐
wise, they may present a danger to occupants
for instance during braking and avoidance ma‐
neuvers.◀
Do not place anti-slip mats on the dash‐
board
Do not place anti-slip mats on the dashboard.
The mat materials could damage the dash‐
board.◀
Storage compartments
The following storage compartments are avail‐
able in the vehicle interior:▷Glove compartment on the driver's and
front passenger side, refer to page 179.▷Storage compartment on the center con‐
sole: manual transmission.▷Storage compartment, refer to page 182,
in the center console for remote control:
automatic transmission.▷Storage compartment in the center arm‐
rest, refer to page 180, in the front and
rear.▷Compartments in the doors.▷Pockets on the backrests of the front
seats.▷Net in the front passenger footwell.
Glove compartment
Front passenger side
Note Close the glove compartment again im‐
mediately
Close the glove compartment immediately af‐
ter use while driving; otherwise, injury may oc‐
cur during accidents.◀
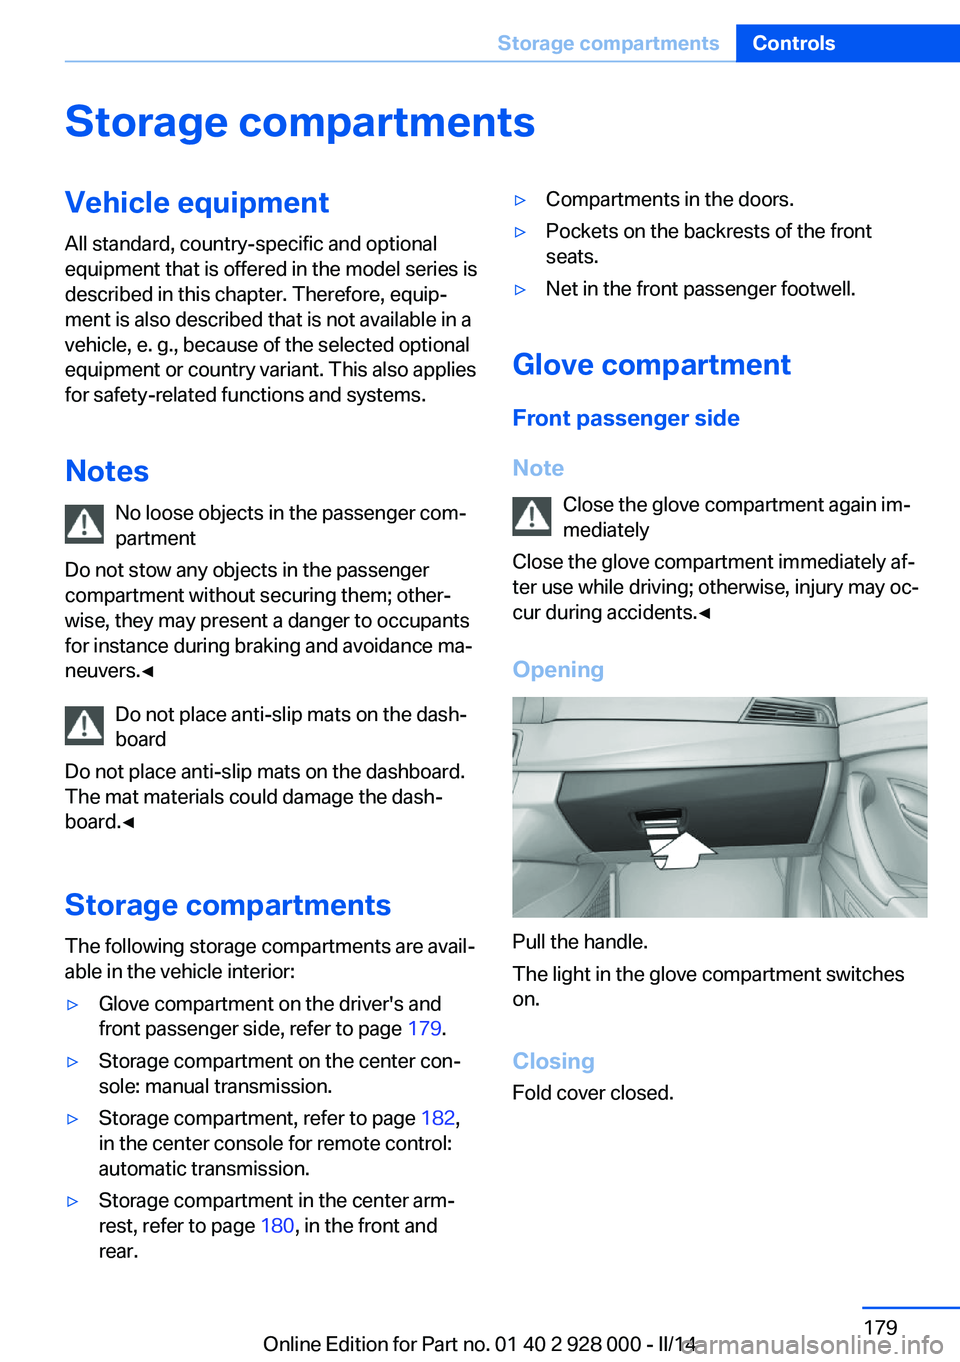
Opening
Pull the handle.
The light in the glove compartment switches
on.
ClosingFold cover closed.
Seite 179Storage compartmentsControls179
Online Edition for Part no. 01 40 2 928 000 - II/14
Page 180 of 267
Driver's side
Note Close the glove compartment again im‐
mediately
Close the glove compartment immediately af‐
ter use while driving; otherwise, injury may oc‐
cur during accidents.◀
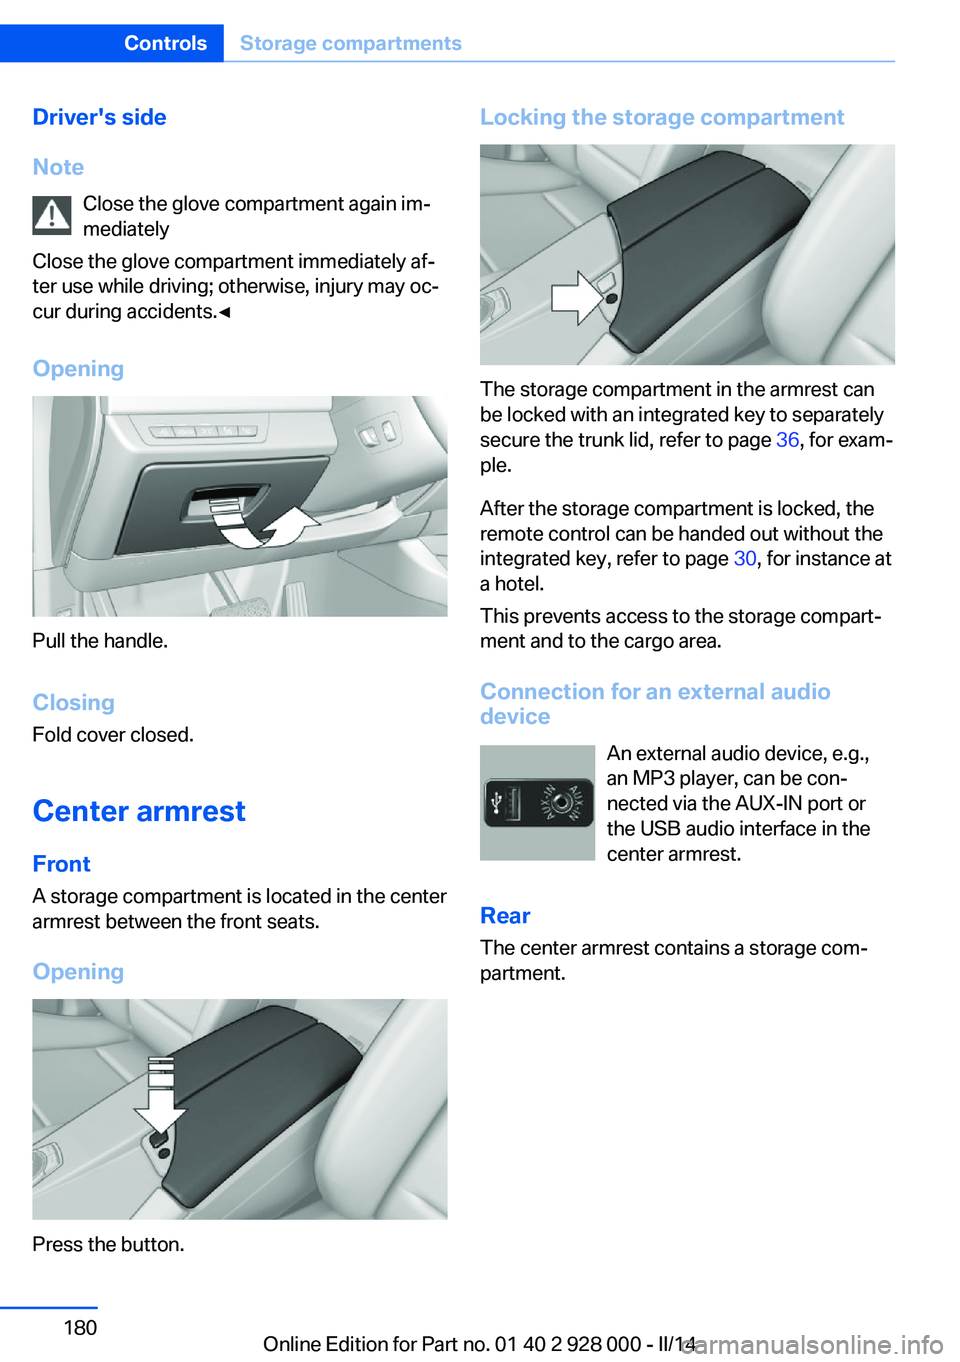
Opening
Pull the handle.
ClosingFold cover closed.
Center armrest
Front
A storage compartment is located in the center
armrest between the front seats.
Opening
Press the button.
Locking the storage compartment
The storage compartment in the armrest can
be locked with an integrated key to separately
secure the trunk lid, refer to page 36, for exam‐
ple.
After the storage compartment is locked, the
remote control can be handed out without the
integrated key, refer to page 30, for instance at
a hotel.
This prevents access to the storage compart‐
ment and to the cargo area.
Connection for an external audio
device
An external audio device, e.g.,
an MP3 player, can be con‐
nected via the AUX-IN port or
the USB audio interface in the center armrest.
Rear
The center armrest contains a storage com‐
partment.
Seite 180ControlsStorage compartments180
Online Edition for Part no. 01 40 2 928 000 - II/14
Page 256 of 267
Everything from A to Z
IndexA ABS, Antilock Brake Sys‐ tem 129
ACC, Active Cruise Control with Stop & Go 136
Acceleration Assistant, refer to Launch Control 76
Accessories and parts 7
Activated-charcoal filter 166
Active Blind Spot Detec‐ tion 124
Active Cruise Control with Stop & Go, ACC 136
Active Protection 126
Active seat, front 50
Active seat ventilation, front 51
Active Steering, integral 133
Adaptive brake assistant 129
Adaptive brake lights, refer to Brake force display 126
Adaptive drive 132
Adaptive light control 99
Additives, oil 227
Adjustments, seats/head re‐ straints 47
After washing vehicle 247
Airbags 103
Airbags, indicator/warning light 104
Air circulation, refer to Recir‐ culated-air mode 165
Air, dehumidifying, refer to Cooling function 165
Air distribution, manual 164
Air flow, automatic climate control 164
Air pressure, tires 209
Air vents, refer to Ventila‐ tion 166 Alarm system 41
Alarm, unintentional 43
All around the center con‐ sole 14
All around the headliner 15
All around the steering wheel 12
All-season tires, refer to Win‐ ter tires 222
All-wheel-drive 131
Alternating-code hand-held transmitter 171
Alternative oil types 228
Ambient light 102
Animal detection, see Night Vision 120
Antifreeze, washer fluid 73
Antilock Brake System, ABS 129
Anti-slip control, refer to DSC 129
Approved axle load 252
Approved engine oils 228
Armrest, refer to Center arm‐ rest 180
Arrival time 93
Ashtray 172
Ashtray, front 172, 173
Ashtray, rear 173
Assistance, Roadside Assis‐ tance 241
Assistance when driving off 129
Attentiveness assistant 126
AUTO H button, refer to Au‐ tomatic Hold 68
AUTO intensity 164
Automatic car wash 246
Automatic climate con‐ trol 163 Automatic Cruise Control
with Stop & Go 136
Automatic Curb Monitor 56
Automatic deactivation, front passenger airbags 105
Automatic headlamp con‐ trol 99
Automatic Hold 68
Automatic locking 41
Automatic recirculated-air control 165
Automatic Soft Closing, doors 36
Automatic transmission with Steptronic 74
Automatic trunk lid 37
AUTO program, automatic cli‐ mate control 164
AUTO program, intensity 164
Auto Start/Stop function 65
Average fuel consumption 93
Average speed 93
Axle loads, weights 252
B Backrest curvature, refer to Lumbar support 49
Backrest, width 49
Backup camera 151
Band-aids, refer to First aid kit 241
Bar for tow-starting/ towing 244
Battery replacement, vehicle battery 238
Battery replacement, vehicle remote control 30
Battery, vehicle 238
Belts, safety belts 51 Seite 256ReferenceEverything from A to Z256
Online Edition for Part no. 01 40 2 928 000 - II/14