2014 BMW 535D SEDAN hood open
[x] Cancel search: hood openPage 14 of 267
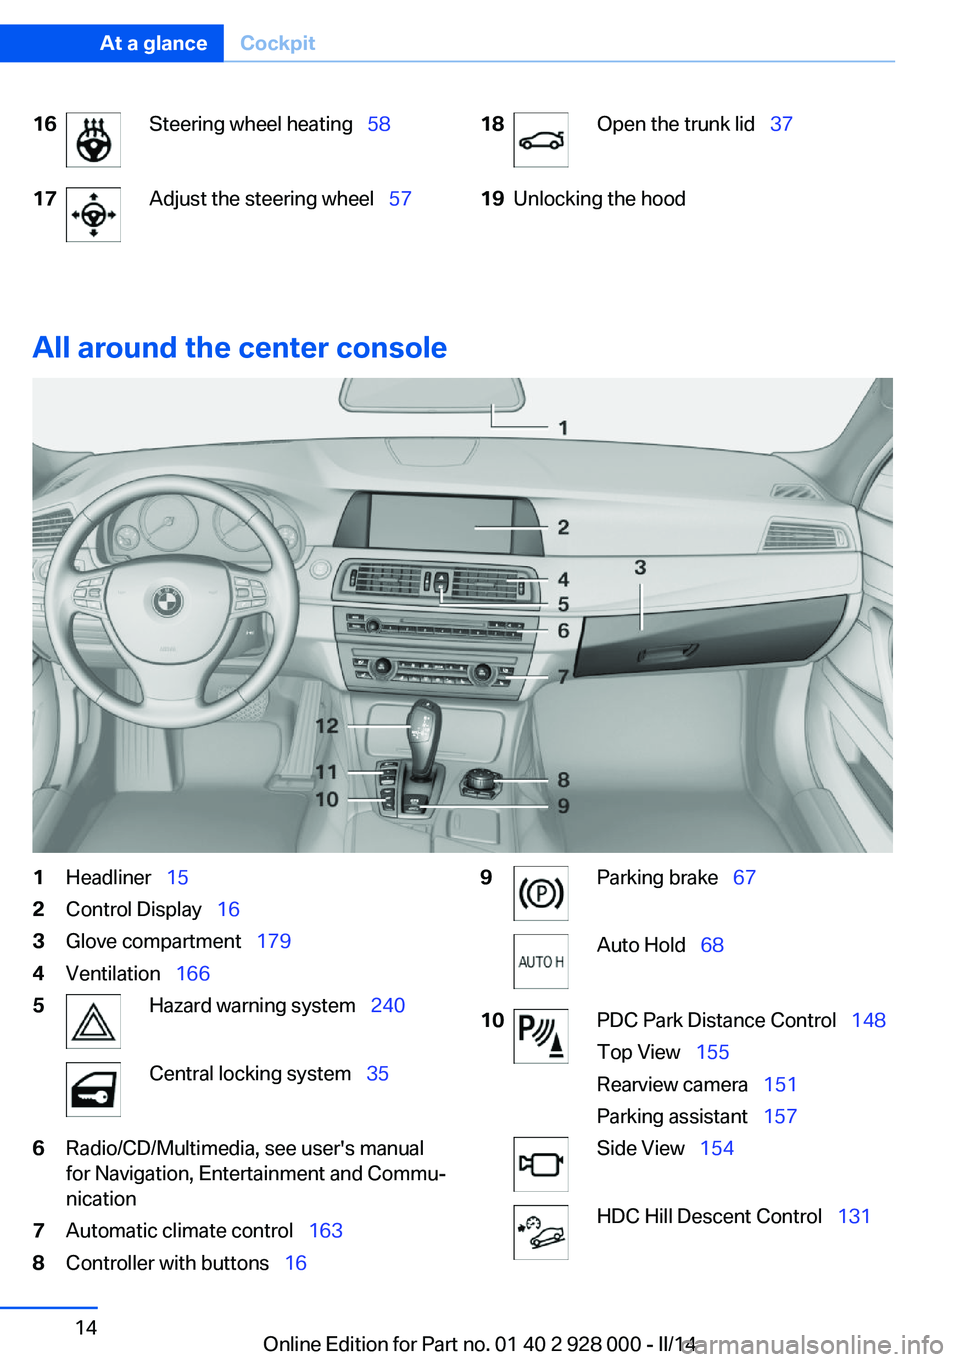
16Steering wheel heating 5817Adjust the steering wheel 5718Open the trunk lid 3719Unlocking the hood
All around the center console
1Headliner 152Control Display 163Glove compartment 1794Ventilation 1665Hazard warning system 240Central locking system 356Radio/CD/Multimedia, see user's manual
for Navigation, Entertainment and Commu‐
nication7Automatic climate control 1638Controller with buttons 169Parking brake 67Auto Hold 6810PDC Park Distance Control 148
Top View 155
Rearview camera 151
Parking assistant 157Side View 154HDC Hill Descent Control 131Seite 14At a glanceCockpit14
Online Edition for Part no. 01 40 2 928 000 - II/14
Page 41 of 267
If there is a malfunction, open the trunk lid with
the remote control button or with the button on
the trunk lid.
Adjusting
Unlocking The setting is stored for the remote control
currently in use.1."Settings"2."Doors/key"3. Select symbol or "Unlock button:"4.Select the desired function:▷"Driver's door only"
Only the driver's door and the fuel filler
flap are unlocked. Pressing again un‐
locks the entire vehicle.▷"All doors"
The entire vehicle is unlocked.
Depending on how the vehicle is equipped or
the country-specific variant, you can set
whether the doors are also unlocked with the
button on the remote control.
Confirmation signals from the vehicle
The setting is stored for the remote control
currently in use.
1."Settings"2."Doors/key"3.Deactivate or activate the desired confir‐
mation signals.▷"Acoustic sig. lock/unlock"▷"Flash when lock/unlock"
Automatic locking
The setting is stored for the remote control
currently in use.
1."Settings"2."Doors/key"3.Select the desired function:▷"Lock if no door is opened"
The vehicle locks automatically after a
short period of time if a door is not
opened.▷"Lock after start driving"
The vehicle locks automatically after
you drive away.
Retrieving the seat, mirror, and
steering wheel settings
The driver's seat, exterior mirror, and steering
wheel positions selected last are stored for the
currently used remote control.
When the vehicle is unlocked, these positions
are automatically retrieved if this function was
activated.
Pinch hazard when moving back the seat
If this function is used, first make sure
that the footwell behind the driver's seat is
empty. Otherwise, people can be injured or ob‐
jects damaged when the seat is moved back.◀
The adjustment procedure is interrupted:
▷When a seat position switch is pressed.▷When a button of the seat, mirror, and
steering wheel memory is pressed briefly.
Activating the setting
1."Settings"2."Doors/key"3."Last seat position autom."
Alarm system
The conceptThe vehicle alarm system responds to:
▷Opening of a door, the hood or the trunk
lid.▷Movements in the vehicle.Seite 41Opening and closingControls41
Online Edition for Part no. 01 40 2 928 000 - II/14
Page 42 of 267
▷Changes in the vehicle tilt, e.g., during at‐
tempts to steal a wheel or when towing the
car.▷Interruptions in battery voltage.
The alarm system briefly indicates tampering:
▷By sounding an acoustic alarm.▷By switching on the hazard warning sys‐
tem.▷By flashing the daytime running lights.
Arming and disarming the alarm
system
General information
When you lock or unlock the vehicle, either
with the remote control, Comfort Access or at
the door lock the alarm system is armed or dis‐
armed at the same time.
Door lock and armed alarm systemUnlocking via the door lock will trigger the
alarm on some country-specific versions.
In order to terminate this alarm, unlock vehicle
with the remote control or switch on the igni‐
tion, if necessary, by emergency detection of
the remote control.
Trunk lid and armed alarm system The trunk lid can be opened even when the
alarm system is armed.
After the trunk lid is closed, it is locked and
monitored again if the doors are locked. The
hazard warning system flashes once.
Panic mode
You can trigger the alarm system if you find
yourself in a dangerous situation.
Press the button on the remote con‐
trol for at least 3 seconds.
To switch off the alarm: press any button.
Switching off the alarm To terminate the alarm:▷Unlock the vehicle using the remote con‐
trol.▷With Comfort Access: If you are carrying
the remote control with you, grasp the
driver side or front passenger side door
handle completely.
Indicator lamp on the interior rearview
mirror
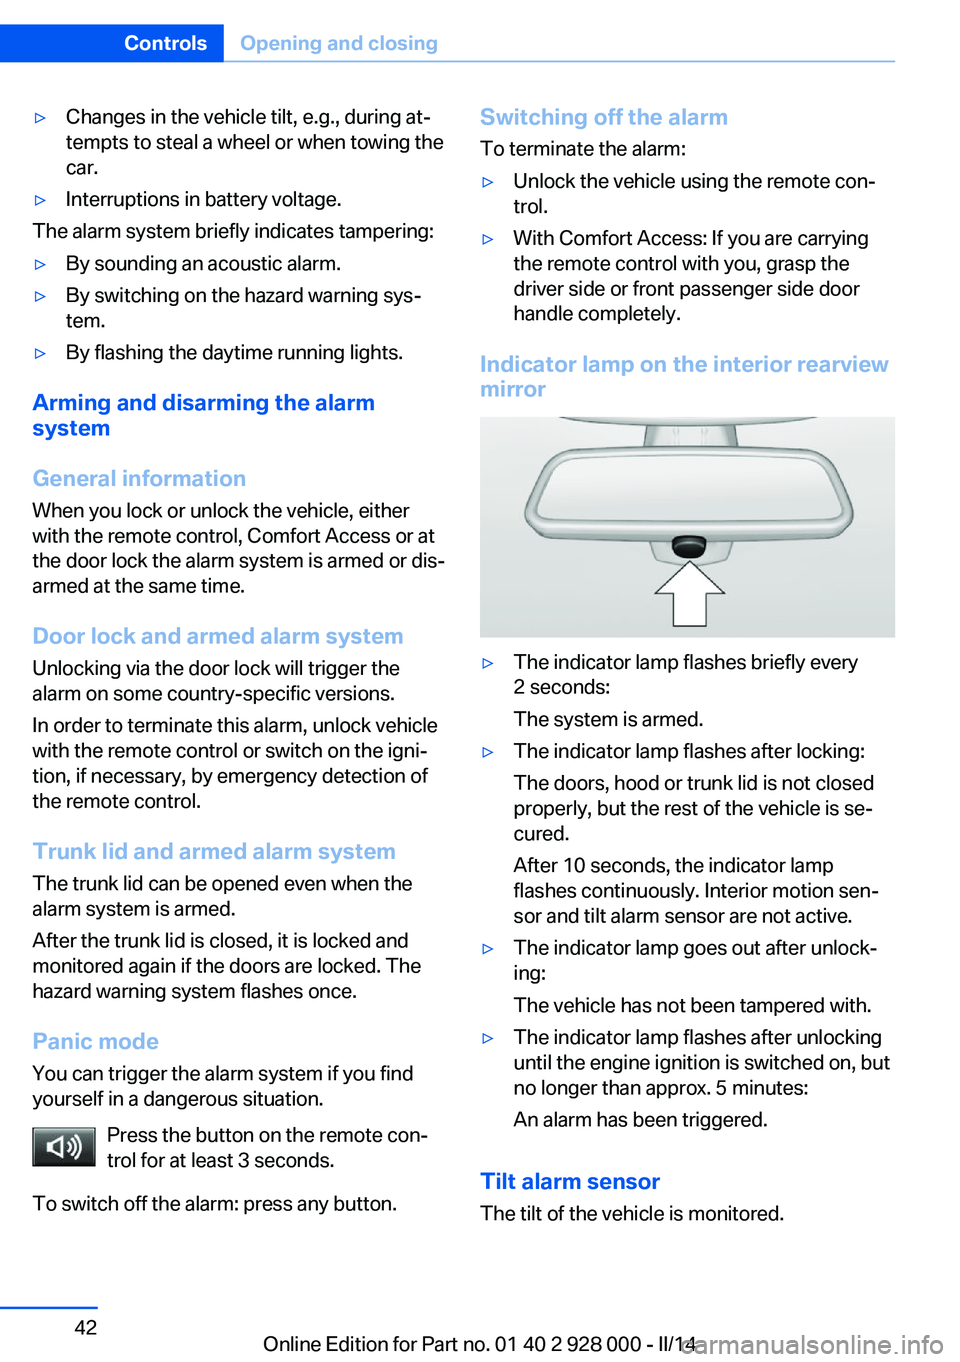
▷The indicator lamp flashes briefly every
2 seconds:
The system is armed.▷The indicator lamp flashes after locking:
The doors, hood or trunk lid is not closed
properly, but the rest of the vehicle is se‐
cured.
After 10 seconds, the indicator lamp
flashes continuously. Interior motion sen‐
sor and tilt alarm sensor are not active.▷The indicator lamp goes out after unlock‐
ing:
The vehicle has not been tampered with.▷The indicator lamp flashes after unlocking
until the engine ignition is switched on, but
no longer than approx. 5 minutes:
An alarm has been triggered.
Tilt alarm sensor The tilt of the vehicle is monitored.
Seite 42ControlsOpening and closing42
Online Edition for Part no. 01 40 2 928 000 - II/14
Page 66 of 267
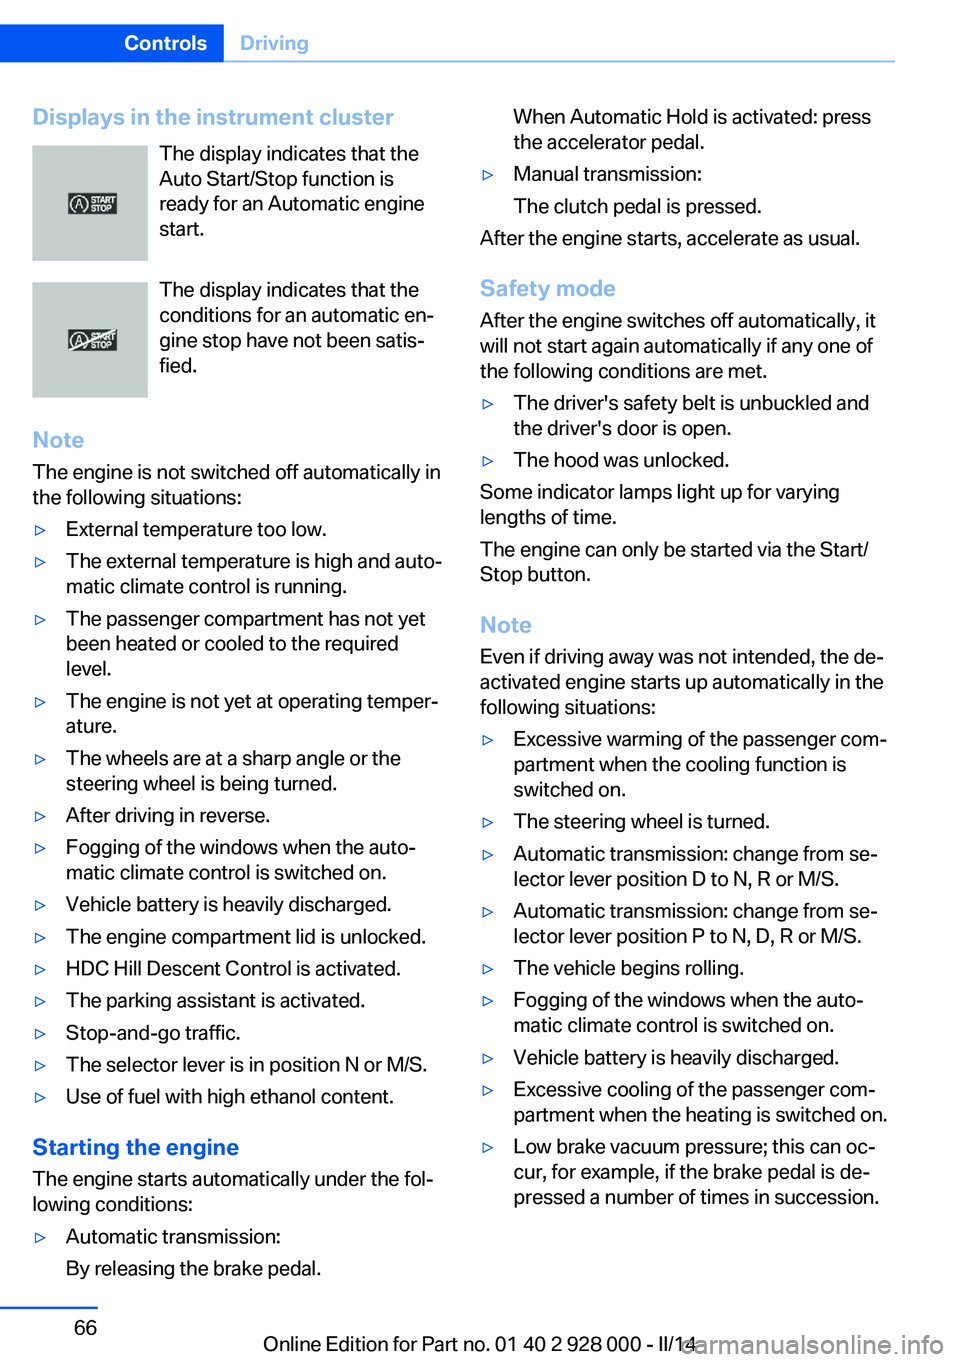
Displays in the instrument clusterThe display indicates that the
Auto Start/Stop function is
ready for an Automatic engine
start.
The display indicates that the
conditions for an automatic en‐
gine stop have not been satis‐
fied.
Note The engine is not switched off automatically in
the following situations:▷External temperature too low.▷The external temperature is high and auto‐
matic climate control is running.▷The passenger compartment has not yet
been heated or cooled to the required
level.▷The engine is not yet at operating temper‐
ature.▷The wheels are at a sharp angle or the
steering wheel is being turned.▷After driving in reverse.▷Fogging of the windows when the auto‐
matic climate control is switched on.▷Vehicle battery is heavily discharged.▷The engine compartment lid is unlocked.▷HDC Hill Descent Control is activated.▷The parking assistant is activated.▷Stop-and-go traffic.▷The selector lever is in position N or M/S.▷Use of fuel with high ethanol content.
Starting the engine
The engine starts automatically under the fol‐
lowing conditions:
▷Automatic transmission:
By releasing the brake pedal.When Automatic Hold is activated: press
the accelerator pedal.▷Manual transmission:
The clutch pedal is pressed.
After the engine starts, accelerate as usual.
Safety mode
After the engine switches off automatically, it
will not start again automatically if any one of
the following conditions are met.
▷The driver's safety belt is unbuckled and
the driver's door is open.▷The hood was unlocked.
Some indicator lamps light up for varying
lengths of time.
The engine can only be started via the Start/
Stop button.
Note Even if driving away was not intended, the de‐
activated engine starts up automatically in the
following situations:
▷Excessive warming of the passenger com‐
partment when the cooling function is
switched on.▷The steering wheel is turned.▷Automatic transmission: change from se‐
lector lever position D to N, R or M/S.▷Automatic transmission: change from se‐
lector lever position P to N, D, R or M/S.▷The vehicle begins rolling.▷Fogging of the windows when the auto‐
matic climate control is switched on.▷Vehicle battery is heavily discharged.▷Excessive cooling of the passenger com‐
partment when the heating is switched on.▷Low brake vacuum pressure; this can oc‐
cur, for example, if the brake pedal is de‐
pressed a number of times in succession.Seite 66ControlsDriving66
Online Edition for Part no. 01 40 2 928 000 - II/14
Page 224 of 267
Engine compartmentVehicle equipmentAll standard, country-specific and optional
equipment that is offered in the model series is
described in this chapter. Therefore, equip‐ment is also described that is not available in a
vehicle, e. g., because of the selected optional
equipment or country variant. This also applies
for safety-related functions and systems.
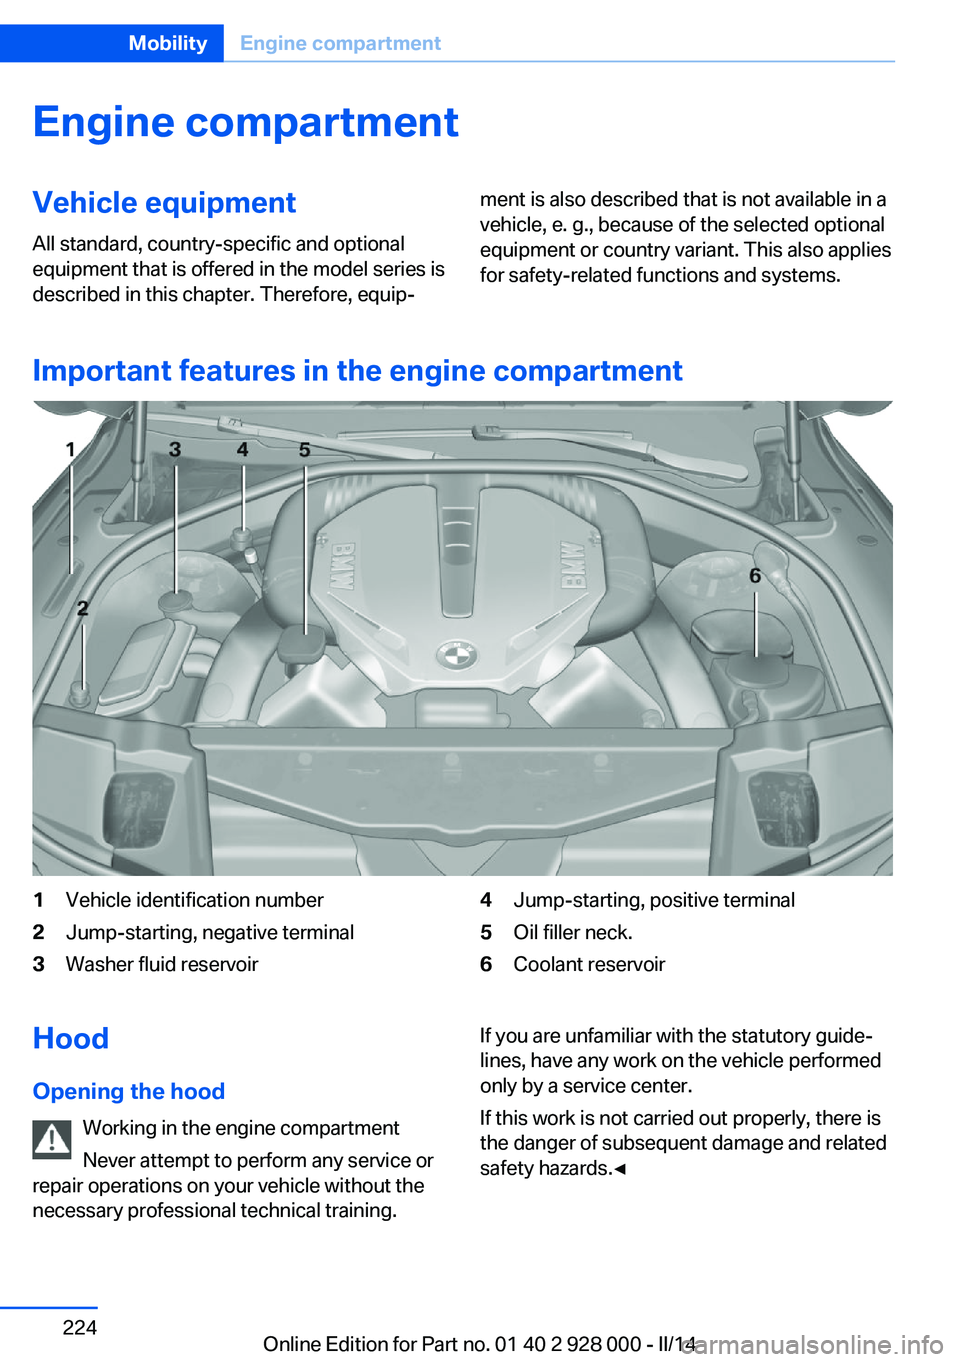
Important features in the engine compartment
1Vehicle identification number2Jump-starting, negative terminal3Washer fluid reservoir4Jump-starting, positive terminal5Oil filler neck.6Coolant reservoirHood
Opening the hood Working in the engine compartment
Never attempt to perform any service or
repair operations on your vehicle without the necessary professional technical training.If you are unfamiliar with the statutory guide‐
lines, have any work on the vehicle performed
only by a service center.
If this work is not carried out properly, there is
the danger of subsequent damage and related
safety hazards.◀Seite 224MobilityEngine compartment224
Online Edition for Part no. 01 40 2 928 000 - II/14
Page 225 of 267
Never reach into the engine compart‐
ment
Never reach into the intermediate spaces or
gaps in the engine compartment. Otherwise,
there is risk of injury, e.g., from rotating or hot
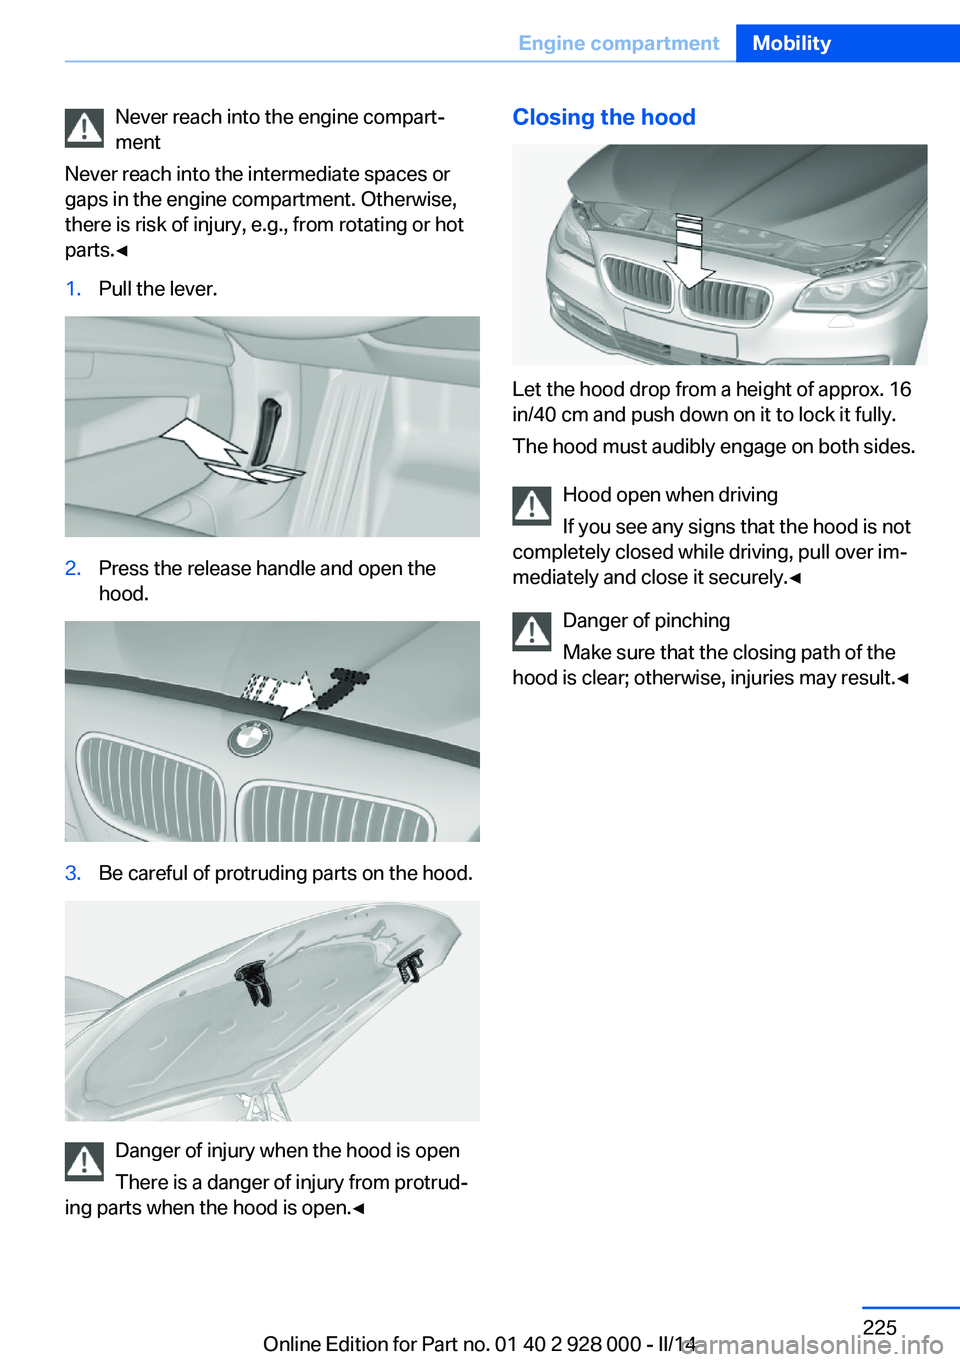
parts.◀1.Pull the lever.2.Press the release handle and open the
hood.3.Be careful of protruding parts on the hood.
Danger of injury when the hood is open
There is a danger of injury from protrud‐
ing parts when the hood is open.◀
Closing the hood
Let the hood drop from a height of approx. 16
in/40 cm and push down on it to lock it fully.
The hood must audibly engage on both sides.
Hood open when driving
If you see any signs that the hood is not
completely closed while driving, pull over im‐
mediately and close it securely.◀
Danger of pinching
Make sure that the closing path of the
hood is clear; otherwise, injuries may result.◀
Seite 225Engine compartmentMobility225
Online Edition for Part no. 01 40 2 928 000 - II/14
Page 235 of 267
Hints
Because of the long life of these bulbs, the
likelihood of failure is very low. Switching the
lamps on and off frequently shortens their life.
If a bulb fails, switch on the front fog lamps and
continue the trip with great care. Comply with
local regulations.
Do not perform work/bulb replacement
on xenon headlamps
Have any work on the xenon lighting system,
including bulb replacement, performed only by
a service center. Due to the high voltage
present in the system, there is the danger of
fatal injuries if work is carried out improperly.◀
For checking and adjusting headlamp aim,
please contact your BMW center.
Parking lamps and roadside parking lamps,
turn signal lamp
Follow general instructions, refer to page 233.
These lights feature LED technology.
Contact your service center in the event of a
malfunction.
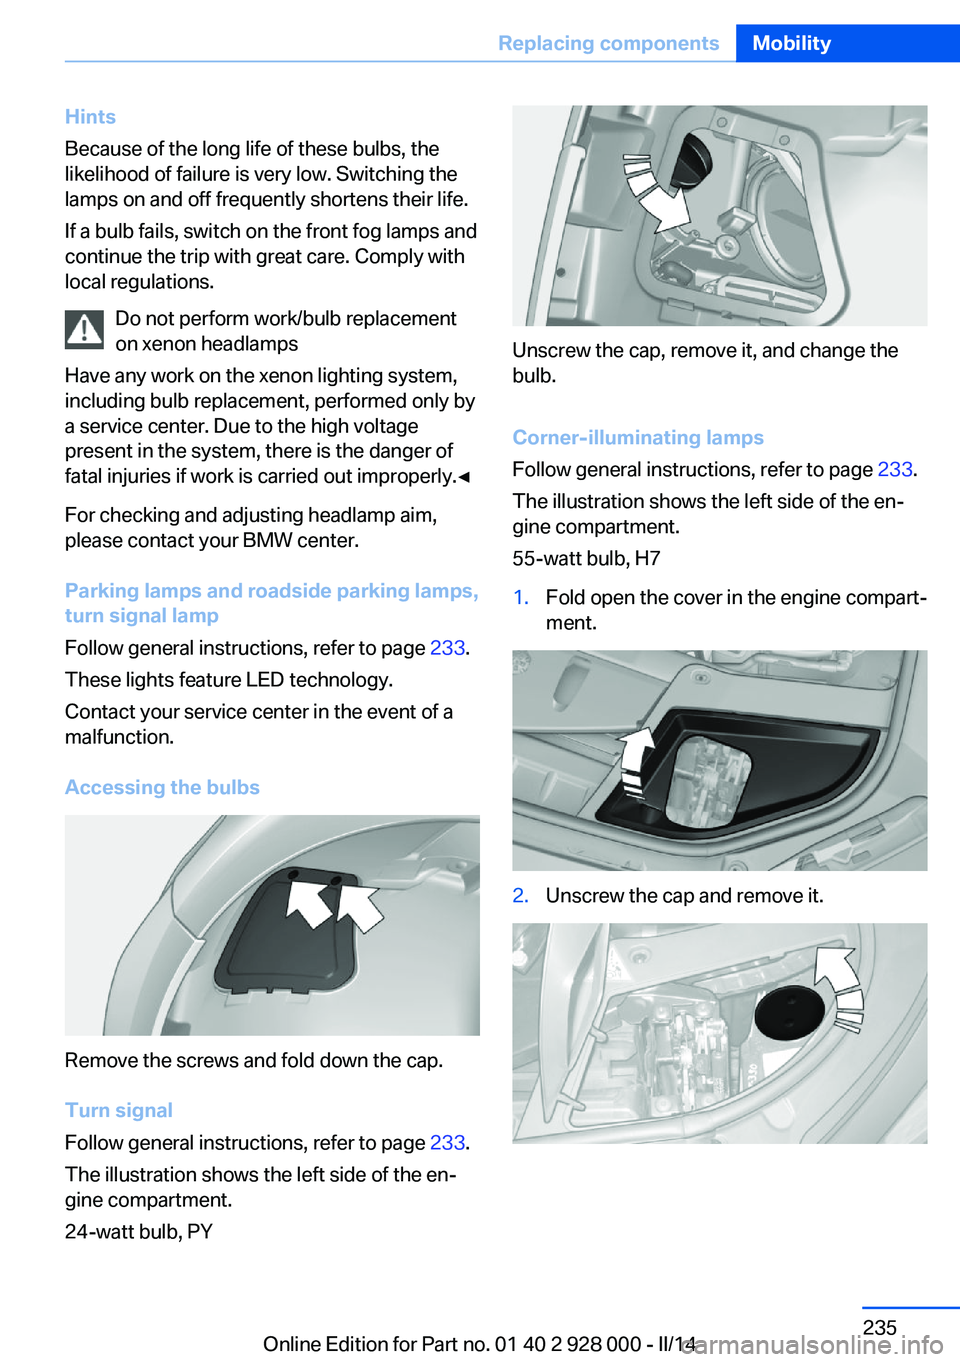
Accessing the bulbs
Remove the screws and fold down the cap.
Turn signal
Follow general instructions, refer to page 233.
The illustration shows the left side of the en‐
gine compartment.
24-watt bulb, PY
Unscrew the cap, remove it, and change the
bulb.
Corner-illuminating lamps
Follow general instructions, refer to page 233.
The illustration shows the left side of the en‐
gine compartment.
55-watt bulb, H7
1.Fold open the cover in the engine compart‐
ment.2.Unscrew the cap and remove it.Seite 235Replacing componentsMobility235
Online Edition for Part no. 01 40 2 928 000 - II/14