Page 178 of 259
Cargo area
Cargo cover
Note Do not deposit heavy objects
Do not deposit heavy or hard objects on
the cargo cover. Otherwise, they may pose a
risk to occupants, such as during braking and
evasive maneuvers.◀
General information The cargo cover is in two parts.
It can be removed and stowed in the rear stor‐
age compartment when transporting bulky
items.
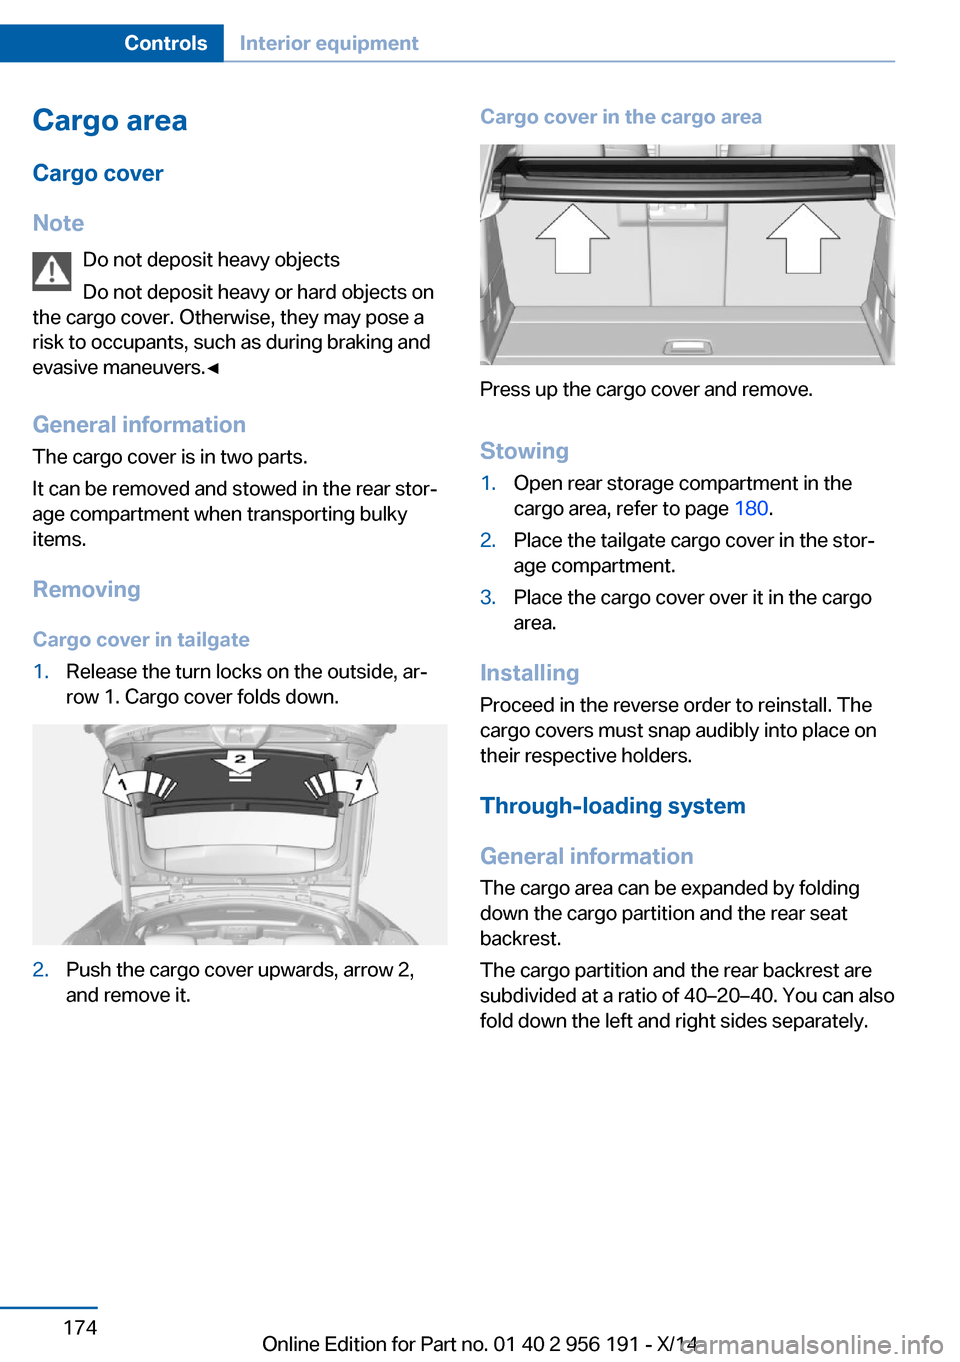
Removing Cargo cover in tailgate1.Release the turn locks on the outside, ar‐
row 1. Cargo cover folds down.2.Push the cargo cover upwards, arrow 2,
and remove it.Cargo cover in the cargo area
Press up the cargo cover and remove.
Stowing
1.Open rear storage compartment in the
cargo area, refer to page 180.2.Place the tailgate cargo cover in the stor‐
age compartment.3.Place the cargo cover over it in the cargo
area.
Installing
Proceed in the reverse order to reinstall. The
cargo covers must snap audibly into place on
their respective holders.
Through-loading system
General information
The cargo area can be expanded by folding
down the cargo partition and the rear seat
backrest.
The cargo partition and the rear backrest are
subdivided at a ratio of 40–20–40. You can also
fold down the left and right sides separately.
Seite 174ControlsInterior equipment174
Online Edition for Part no. 01 40 2 956 191 - X/14
Page 179 of 259
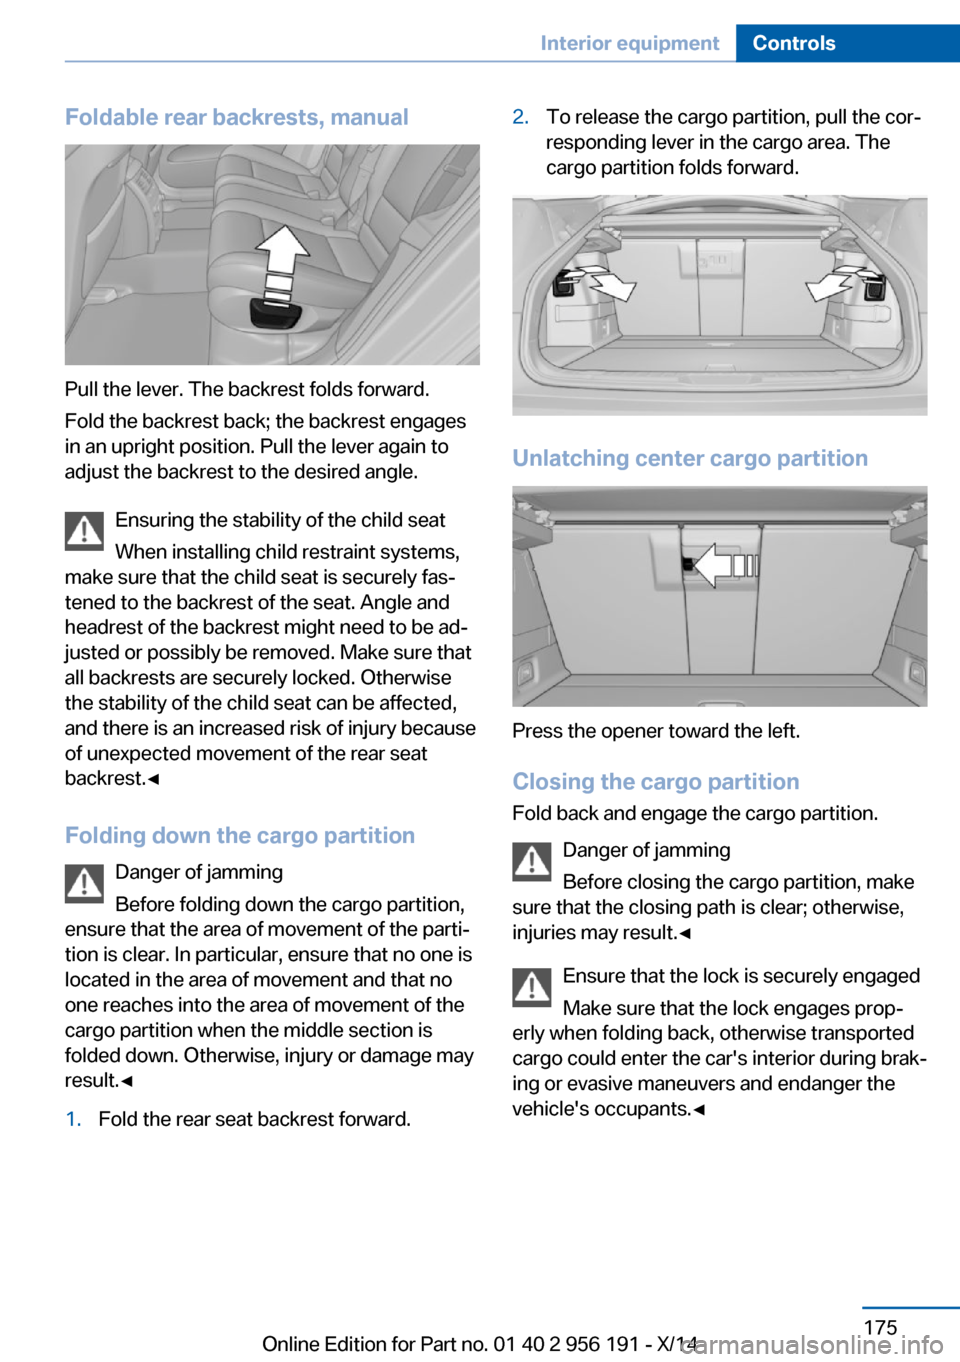
Foldable rear backrests, manual
Pull the lever. The backrest folds forward.
Fold the backrest back; the backrest engages
in an upright position. Pull the lever again to
adjust the backrest to the desired angle.
Ensuring the stability of the child seat
When installing child restraint systems,
make sure that the child seat is securely fas‐
tened to the backrest of the seat. Angle and
headrest of the backrest might need to be ad‐
justed or possibly be removed. Make sure that
all backrests are securely locked. Otherwise
the stability of the child seat can be affected,
and there is an increased risk of injury because
of unexpected movement of the rear seat
backrest.◀
Folding down the cargo partition Danger of jamming
Before folding down the cargo partition,
ensure that the area of movement of the parti‐
tion is clear. In particular, ensure that no one is
located in the area of movement and that no
one reaches into the area of movement of the
cargo partition when the middle section is
folded down. Otherwise, injury or damage may
result.◀
1.Fold the rear seat backrest forward.2.To release the cargo partition, pull the cor‐
responding lever in the cargo area. The
cargo partition folds forward.
Unlatching center cargo partition
Press the opener toward the left.
Closing the cargo partition Fold back and engage the cargo partition.
Danger of jamming
Before closing the cargo partition, make
sure that the closing path is clear; otherwise,
injuries may result.◀
Ensure that the lock is securely engaged
Make sure that the lock engages prop‐
erly when folding back, otherwise transported
cargo could enter the car's interior during brak‐
ing or evasive maneuvers and endanger the
vehicle's occupants.◀
Seite 175Interior equipmentControls175
Online Edition for Part no. 01 40 2 956 191 - X/14
Page 182 of 259
Opening
Pull the handle.ClosingFold cover closed.
Center armrest
Front
A storage compartment is located in the center
armrest between the front seats.
Opening
Press buttons next to the lock.
Locking the storage compartment
The storage compartment in the armrest can
be locked with an integrated key to separately
secure the tailgate, refer to page 43, e.g.
After the storage compartment is locked, the
remote control can be handed out without the
integrated key, refer to page 34, for instance at
a hotel.
This prevents access to the storage compart‐
ment and to the cargo area.
Connection for an external audio
device
An external audio device, e.g.,
an MP3 player, can be con‐
nected via the AUX-IN port or
the USB audio interface in the center armrest.
Rear
A storage compartment is located in the center
armrest between the seats.
Seite 178ControlsStorage compartments178
Online Edition for Part no. 01 40 2 956 191 - X/14
Page 184 of 259
Clothes hooks
The clothes hooks are located next to the grab
handles in the rear and on the door pillar in the
rear.
Do not obstruct view
When suspending clothing from the
hooks, ensure that it will not obstruct the driv‐
er's view.◀
No heavy objects
Do not hang heavy objects from the
hooks; otherwise, they may present a danger
to passengers during braking and evasive ma‐
neuvers.◀
Storage compartments in the
cargo area
Retaining straps
Retaining straps on the left and right side trim
for fastening small objects.
Multi-function hook
There are two multi-function hooks on the
cargo area walls.1.Open the holder by pressing on the button.2.Press the bag handle into the holder from
above.Light and suitable objects only
Only hang light bags or suitable objects
from the holders. Otherwise, there is a danger
of objects flying about during braking and eva‐
sive maneuvers.
Only transport heavy luggage in the cargo area
if it has been appropriately secured.◀
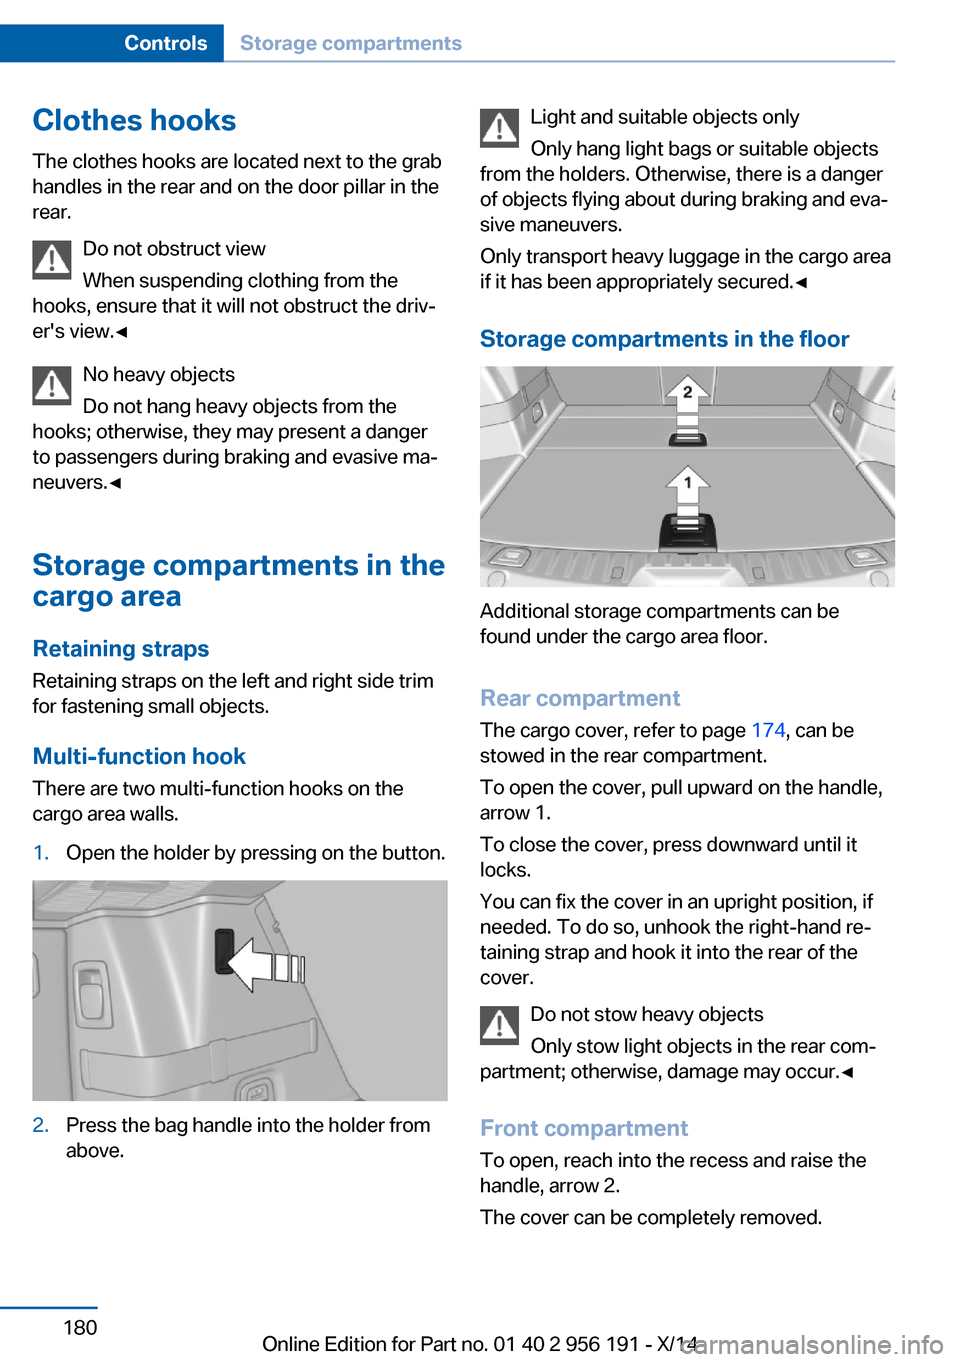
Storage compartments in the floor
Additional storage compartments can be
found under the cargo area floor.
Rear compartment
The cargo cover, refer to page 174, can be
stowed in the rear compartment.
To open the cover, pull upward on the handle,
arrow 1.
To close the cover, press downward until it
locks.
You can fix the cover in an upright position, if
needed. To do so, unhook the right-hand re‐
taining strap and hook it into the rear of the
cover.
Do not stow heavy objects
Only stow light objects in the rear com‐
partment; otherwise, damage may occur.◀
Front compartment To open, reach into the recess and raise the
handle, arrow 2.
The cover can be completely removed.
Seite 180ControlsStorage compartments180
Online Edition for Part no. 01 40 2 956 191 - X/14
Page 202 of 259
RefuelingVehicle features and options
This chapter describes all standard, country-
specific and optional features offered with the
series. It also describes features that are not
necessarily available in your car, e. g., due to
the selected options or country versions. This
also applies to safety-related functions and
systems.
Hints Refuel promptly
Refuel no later than at a range of
30 miles/50 km or engine operation might fail
and damage might occur.◀
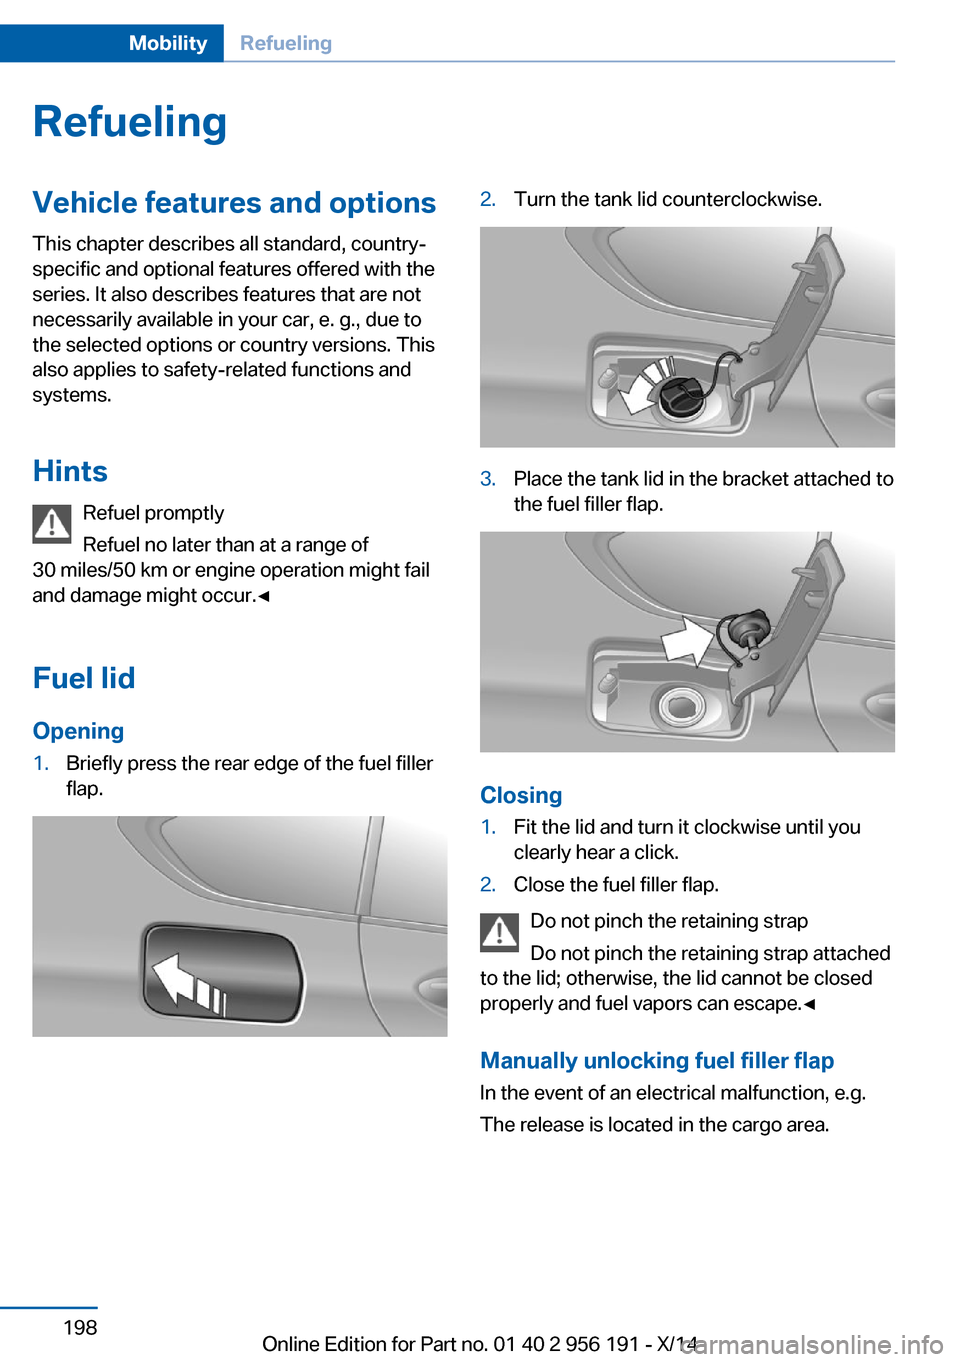
Fuel lid
Opening1.Briefly press the rear edge of the fuel filler
flap.2.Turn the tank lid counterclockwise.3.Place the tank lid in the bracket attached to
the fuel filler flap.
Closing
1.Fit the lid and turn it clockwise until you
clearly hear a click.2.Close the fuel filler flap.
Do not pinch the retaining strap
Do not pinch the retaining strap attached
to the lid; otherwise, the lid cannot be closed
properly and fuel vapors can escape.◀
Manually unlocking fuel filler flap In the event of an electrical malfunction, e.g.
The release is located in the cargo area.
Seite 198MobilityRefueling198
Online Edition for Part no. 01 40 2 956 191 - X/14
Page 217 of 259
Never reach into the engine compart‐
ment
Never reach into spaces or gaps in the engine
compartment; otherwise, there is a risk of in‐
jury, e.g., from rotating or hot parts.◀
Danger of injury when the hood is open
There is a danger of injury from protrud‐
ing parts when the hood is open.◀1.Pull the lever.2.Press the release handle and open the
hood.3.Be careful of protruding parts on the hood.Closing the hood
Hood open when driving
If you see any signs that the hood is not
completely closed while driving, pull over im‐
mediately and close it securely.◀
Danger of jamming
Make sure that the closing path of the
hood is clear; otherwise, injuries may result.◀
Let the hood drop from a height of approx. 16
in/40 cm and push down on it to lock it fully.
The hood must audibly engage on both sides.
Seite 213Engine compartmentMobility213
Online Edition for Part no. 01 40 2 956 191 - X/14
Page 221 of 259
CoolantVehicle features and optionsThis chapter describes all standard, country-
specific and optional features offered with the
series. It also describes features that are not
necessarily available in your car, e. g., due to
the selected options or country versions. This
also applies to safety-related functions and
systems.
Hints Danger of burns from hot engine
Do not open the cooling system while
the engine is hot; otherwise, esliding coolant
may cause burns.◀
Suitable additives
Only use suitable additives; otherwise,
engine damage may occur. The additives are
harmful to your health.◀
Coolant consists of water and additives.
Not all commercially available additives are
suitable for the vehicle. Information about the
suitable additives are available from the service
center.
Coolant level
General information If there is no Min. and Max. mark in the filler
neck of the coolant reservoir, have the coolant
level checked if needed by your service center
and add coolant as needed.
Depending on the engine installation, the cool‐
ant reservoir is located on the right side or the
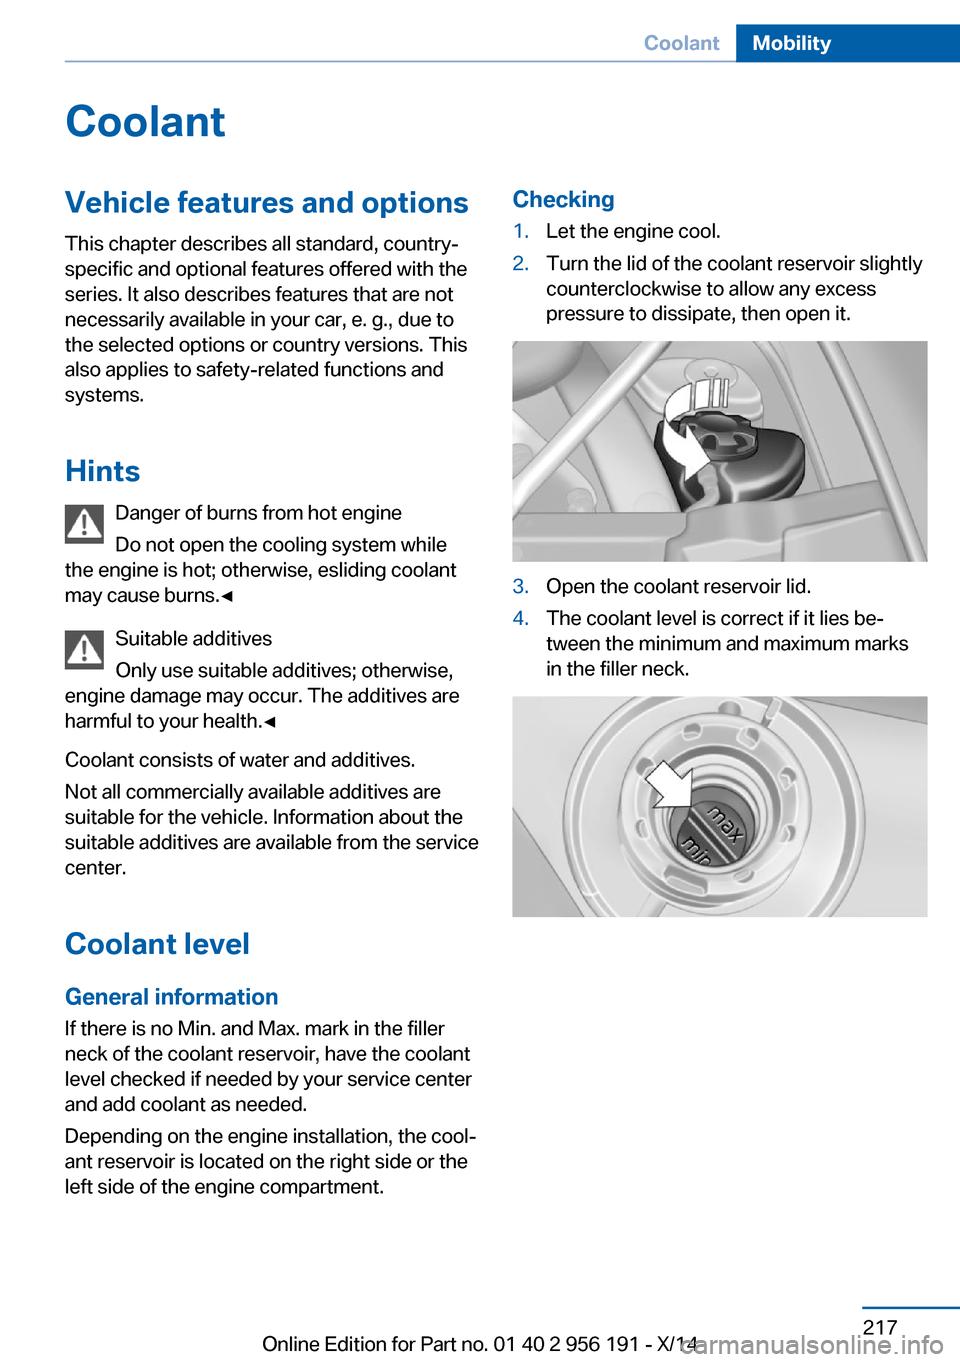
left side of the engine compartment.Checking1.Let the engine cool.2.Turn the lid of the coolant reservoir slightly
counterclockwise to allow any excess
pressure to dissipate, then open it.3.Open the coolant reservoir lid.4.The coolant level is correct if it lies be‐
tween the minimum and maximum marks
in the filler neck.Seite 217CoolantMobility217
Online Edition for Part no. 01 40 2 956 191 - X/14
Page 222 of 259
Adding1.Let the engine cool.2.Turn the lid of the coolant reservoir slightly
counterclockwise to allow any excess
pressure to dissipate, then open it.3.If the coolant is low, slowly add coolant up
to the specified level; do not overfill.4.Turn the lid until there is an audible click.
The arrows on the coolant reservoir and
the lid must point towards one another.5.Have the cause of the coolant loss elimi‐
nated as soon as possible.
Disposal
Comply with the relevant environmen‐
tal protection regulations when dispos‐
ing of coolant and coolant additives.
Seite 218MobilityCoolant218
Online Edition for Part no. 01 40 2 956 191 - X/14