2014 BMW 435I COUPE phone
[x] Cancel search: phonePage 26 of 236
Notes on Emergency
Requests
Do not use the voice activation system to ini‐
tiate an Emergency Request. In stressful situa‐
tions, the voice and vocal pitch can change.
This can unnecessarily delay the establish‐
ment of a telephone connection.
Instead, use the SOS button, refer to
page 210, in the vicinity of the interior mirror.
Environmental conditions▷Say the commands, numbers, and letters
smoothly and with normal volume, empha‐
sis, and speed.▷Always say commands in the language of
the voice activation system.▷Keep the doors, windows, and glass sun‐
roof closed to prevent noise interference.▷Avoid making other noise in the vehicle
while speaking.Seite 26At a glanceVoice activation system26
Online Edition for Part no. 0140 2 909 827 - VI/13
Page 36 of 236

Opening and closing: from
the outside
Using the remote control
General information Take the remote control with you
People or animals left unattended in a
parked vehicle can lock the doors from the in‐
side. Always take the remote control with you
when leaving the vehicle so that the vehicle
can then be opened from the outside.◀
Unlocking Press the button on the remote con‐
trol.
The vehicle is unlocked.
Welcome lamps, interior lamp and courtesy
lamps are switched on.
You can set how the vehicle is to be unlocked.
Create the settings, refer to page 41.
Convenient opening The remote control can be used to simultane‐
ously open the windows and the glass sunroof.
Press and hold the button on the re‐
mote control.
The windows and the glass sunroof open.
Releasing the button stops the motion.
Locking Press the button on the remote control.
Locking from the outside
Do not lock the vehicle from the outside
if there are people in it, as the vehicle cannot
be unlocked from inside without special knowl‐
edge.◀Switching on interior lamps and
courtesy lamps
Press the button on the remote control
with the vehicle locked.
Panic mode
You can trigger the alarm system if you find
yourself in a dangerous situation.
Press the button on the remote con‐
trol for at least 3 seconds.
To switch off the alarm: press any button.
Opening the trunk lid Press the button on the remote con‐
trol for approx. 1 second.
The trunk lid opens, regardless of whether it
was previously locked or unlocked.
During opening, the trunk lid pivots back and
up. Ensure that adequate clearance is available
before opening.
In some vehicle equipment variants, the trunk
lid can only be opened using the remote con‐
trol if the vehicle has been unlocked.
Do not place the remote control in the
cargo area
Take the remote control with you and do not
leave it in the cargo area; otherwise, the re‐
mote control is locked inside the vehicle when
the trunk lid is closed.◀
The trunk lid is locked again as soon as it is
pushed closed.
Malfunction If the vehicle can no longer be locked or un‐
locked with the remote control, the battery
may be discharged or there may be interfer‐
ence from external sources such as mobile
phones, metal objects, overhead power lines,
transmission towers, etc.Seite 36ControlsOpening and closing36
Online Edition for Part no. 0140 2 909 827 - VI/13
Page 41 of 236
Opening
The trunk lid opens, regardless of whether it
was previously locked or unlocked.
During opening, the trunk lid pivots back and
up. Ensure that adequate clearance is available
before opening.
Before the opening, the hazard warning sys‐
tem flashes.
Preventing inadvertent opening
In situations where the trunk lid should is
not to be opened with no-touch activation, en‐
sure that the remote control is located beyond
the range of the sensor, at least 5 ft/1.50 m
from the rear of the car.
Otherwise, the trunk lid may be opened inad‐
vertently, for example by an unintentional or
misinterpreted movement of the foot.◀
Malfunction
Comfort Access may not function properly if it
experiences interference from external sour‐
ces such as mobile phones, metal objects,
overhead power lines, transmission towers,
etc.
In this case, open or close the vehicle using the
buttons on the remote control or use the
integrated key in the door lock.
If there is a malfunction, open the trunk lid with
the remote control button or with the button on
the trunk lid.
Adjusting
Unlocking The setting is stored for the remote control
currently in use.1."Settings"2."Doors/key"3. Select symbol or "Unlock button:"4.Select the desired function:▷"Driver's door only"
Only the driver's door and the fuel filler
flap are unlocked. Pressing again un‐
locks the entire vehicle.▷"All doors"
The entire vehicle is unlocked.
Depending on how the vehicle is equipped or
the country-specific variant, you can set
whether the doors are also unlocked with the
button on the remote control.
Confirmation signals from the vehicle
1."Settings"2."Doors/key"3.Deactivate or activate the desired confir‐
mation signals.▷"Acoustic sig. lock/unlock"▷"Flash when lock/unlock"
Automatic locking
The setting is stored for the remote control
currently in use.
1."Settings"2."Doors/key"3.Select the desired function:▷"Lock if no door opened"
The vehicle locks automatically after a
short period of time if a door is not
opened.▷"Lock after start driving"
The vehicle locks automatically after
you drive away.
Retrieving the seat and mirror settings
The driver's seat and exterior mirror positions
used last are stored for the remote control cur‐
rently in use.
When the vehicle is unlocked, these positions
are automatically retrieved if this function was
activated.
Seite 41Opening and closingControls41
Online Edition for Part no. 0140 2 909 827 - VI/13
Page 84 of 236
Selection lists in the
instrument cluster
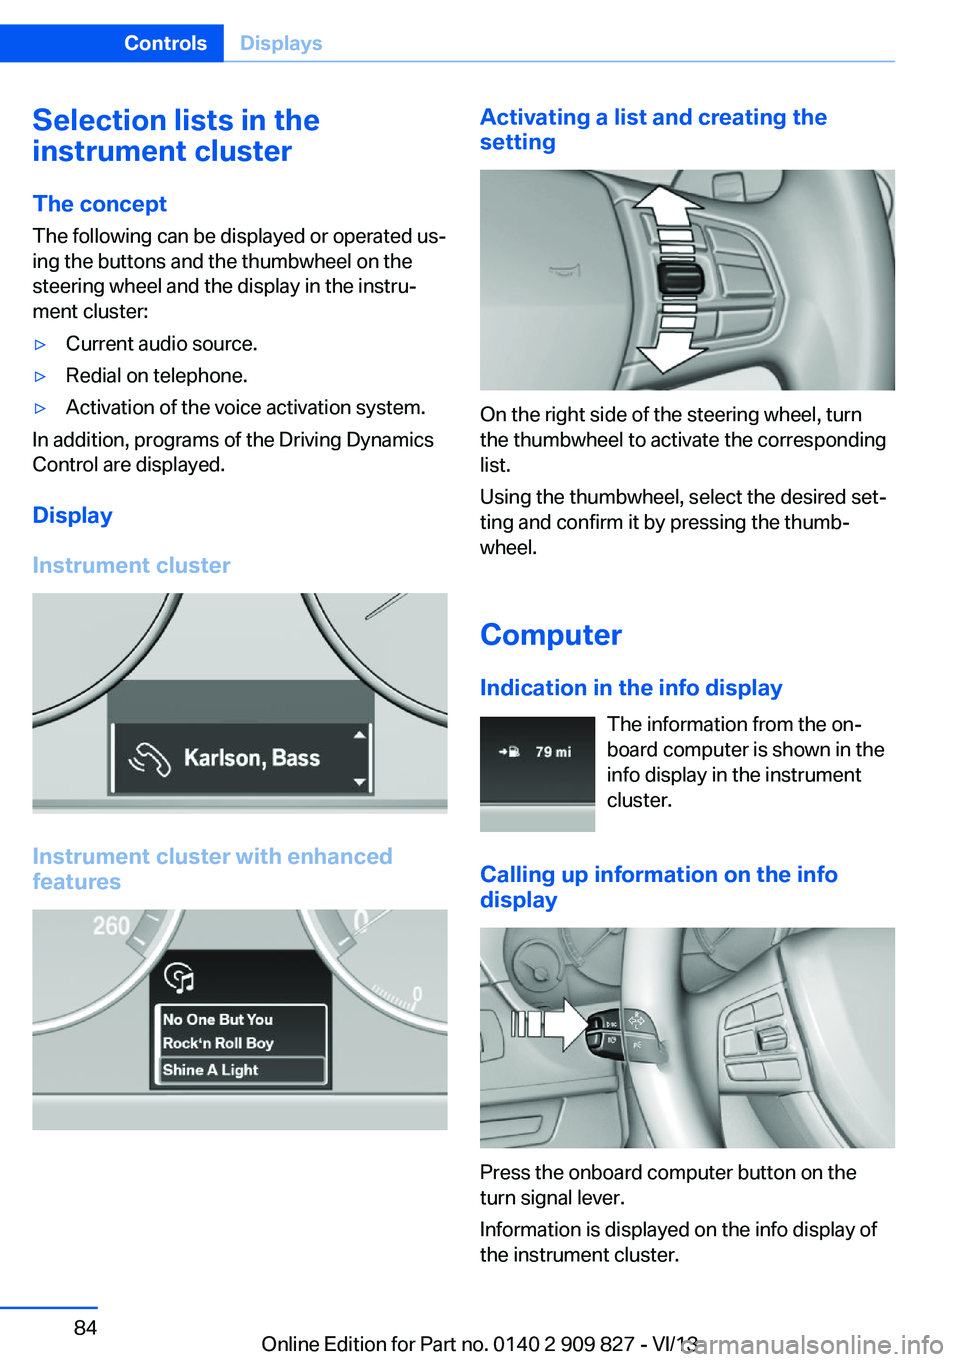
The concept The following can be displayed or operated us‐
ing the buttons and the thumbwheel on the
steering wheel and the display in the instru‐
ment cluster:▷Current audio source.▷Redial on telephone.▷Activation of the voice activation system.
In addition, programs of the Driving Dynamics
Control are displayed.
Display
Instrument cluster
Instrument cluster with enhanced
features
Activating a list and creating the
setting
On the right side of the steering wheel, turn
the thumbwheel to activate the corresponding
list.
Using the thumbwheel, select the desired set‐
ting and confirm it by pressing the thumb‐
wheel.
Computer
Indication in the info display The information from the on‐
board computer is shown in the
info display in the instrument
cluster.
Calling up information on the info
display
Press the onboard computer button on the
turn signal lever.
Information is displayed on the info display of
the instrument cluster.
Seite 84ControlsDisplays84
Online Edition for Part no. 0140 2 909 827 - VI/13
Page 95 of 236

Protective action
Airbags are not triggered in every impact situa‐
tion, e.g., in less severe accidents or rear-end
collisions.
Information on how to ensure the optimal
protective effect of the airbags▷Keep at a distance from the airbags.▷Always grasp the steering wheel on the
steering wheel rim, holding your hands at
the 3 o'clock and 9 o'clock positions, to
keep the danger of injury to your hands or
arms as low as possible if the airbag is trig‐
gered.▷There should be no people, animals, or ob‐
jects between an airbag and a person.▷Do not use the cover of the front airbag on
the front passenger side as a storage area.▷Keep the dashboard and window on the
front passenger side clear, i.e., do not
cover with adhesive labels or coverings,
and do not attach holders such as for navi‐
gation instruments and mobile phones.▷Make sure that the front passenger is sit‐
ting correctly, i.e., keeps his or her feet and
legs in the footwell; otherwise, leg injuries
can occur if the front airbag is triggered.▷Do not place slip covers, seat cushions or
other objects on the front passenger seat
that are not approved specifically for seats
with integrated side airbags.▷Do not hang pieces of clothing, such as
jackets, over the backrests.▷Make sure that occupants keep their heads
away from the side airbag and do not rest
against the head airbag; otherwise, injuries
can occur if the airbags are triggered.▷Do not remove the airbag restraint system.▷Do not remove the steering wheel.▷Do not apply adhesive materials to the air‐
bag cover panels, cover them or modify
them in any way.▷Never modify either the individual compo‐
nents or the wiring in the airbag system.
This also applies to steering wheel covers,
the dashboard, the seats, the roof pillars
and the sides of the headliner.◀
Even when all instructions are followed closely,
injury from contact with the airbags cannot be
ruled out in certain situations.
The ignition and inflation noise may lead to
short-term and, in most cases, temporary
hearing impairment in sensitive individuals.
In the case of a malfunction, deactivation
and after triggering of the airbags
Do not touch the individual components imme‐
diately after the system has been triggered;
otherwise, there is the danger of burns.
Only have the airbags checked, repaired or dis‐
mantled and the airbag generator scrapped by
your service center or a workshop that has the
necessary authorization for handling explo‐
sives.
Non-professional attempts to service the sys‐
tem could lead to failure in an emergency or
undesired triggering of the airbag, either of
which could result in injury.◀
Warnings and information on the airbags are
also found on the sun visors.
Functional readiness of the airbag
system
When the ignition is switch on, the
warning lamp in the instrument cluster
lights up briefly and thereby indicates
the operational readiness of the entire airbag
system and the belt tensioner.
Airbag system malfunctioning
▷Warning lamp does not come on when the
ignition is turned on.▷The warning lamp lights up continuously.Seite 95SafetyControls95
Online Edition for Part no. 0140 2 909 827 - VI/13
Page 165 of 236
Hot exhaust systemHot exhaust system
High temperatures are generated in the
exhaust system.
Do not remove the heat shields installed and
never apply undercoating to them. Make sure
that flammable materials, e. g. hay, leaves,
grass, etc. do not come in contact with the hot
exhaust system during driving, while in idle po‐
sition mode, or when parked. Such contact
could lead to a fire, and with it the risk of seri‐
ous personal injury as well as property dam‐
age.
Do not touch hot exhaust pipes; otherwise,
there is the danger of getting burned.◀
Mobile communication devices in the
vehicle
Mobile communication devices in the ve‐
hicle
It is advised that you do not use mobile com‐
munication devices, e.g., mobile phones, in‐
side the vehicle without connecting them di‐
rectly to the external antenna. Otherwise, the
vehicle electronics and mobile communication
devices can interfere with each other. In addi‐
tion, there is no assurance that the radiation
generated during transmission will be dis‐
charged from the vehicle interior.◀
Hydroplaning
On wet or slushy roads, a wedge of water can
form between the tires and road surface.
This phenomenon is referred to as hydroplan‐
ing. It is characterized by a partial or complete loss of contact between the tires and the road
surface, ultimately undermining your ability to
steer and brake the vehicle.
Hydroplaning
When driving on wet or slushy roads, re‐
duce your speed to prevent hydroplaning.◀Driving through water
Drive though calm water only and only if it is
not deeper than. 9.8 inches/25 cm and at this
height, no faster than walking speed, up to 6 mph/10 km/h.
Adhere to water depth and speed limita‐
tions
Do not exceed this water depth and walking
speed; otherwise, the vehicle's engine, the
electrical systems and the transmission may
be damaged.◀
Braking safely
Your vehicle is equipped with ABS as a stand‐
ard feature.
Applying the brakes fully is the most effective
way of braking in situations when this is neces‐
sary.
The vehicle maintains steering responsive‐
ness. You can still avoid any obstacles with a
minimum of steering effort.
Pulsation of the brake pedal and sounds from
the hydraulic circuits indicate that ABS is in its
active mode.
Objects in the area around the pedals No objects in the area around the pedals
Keep floor mats, carpets, and any other
objects out of the area of motion of the pedals;
otherwise, the function of the pedals could be
impeded while driving
Do not place additional floor mats over existing
mats or other objects.
Only use floor mats that have been approved
for the vehicle and can be properly fixed in
place.
Ensure that the floor mats are securely fas‐
tened again after they were removed for clean‐
ing, for example.◀Seite 165Things to remember when drivingDriving tips165
Online Edition for Part no. 0140 2 909 827 - VI/13
Page 211 of 236
if it can be established, are transmitted to
the BMW Response Center.▷If the LED is flashing, but the BMW Re‐
sponse Center can no longer be heard via
the speaker, you can nevertheless still be
heard for the BMW Response Center.
Initiating an Emergency Request
automatically
Under certain conditions, an Emergency Re‐
quest is automatically initiated immediately af‐
ter a severe accident. Automatic Collision Noti‐
fication is not affected by pressing the SOS
button.
Warning triangle
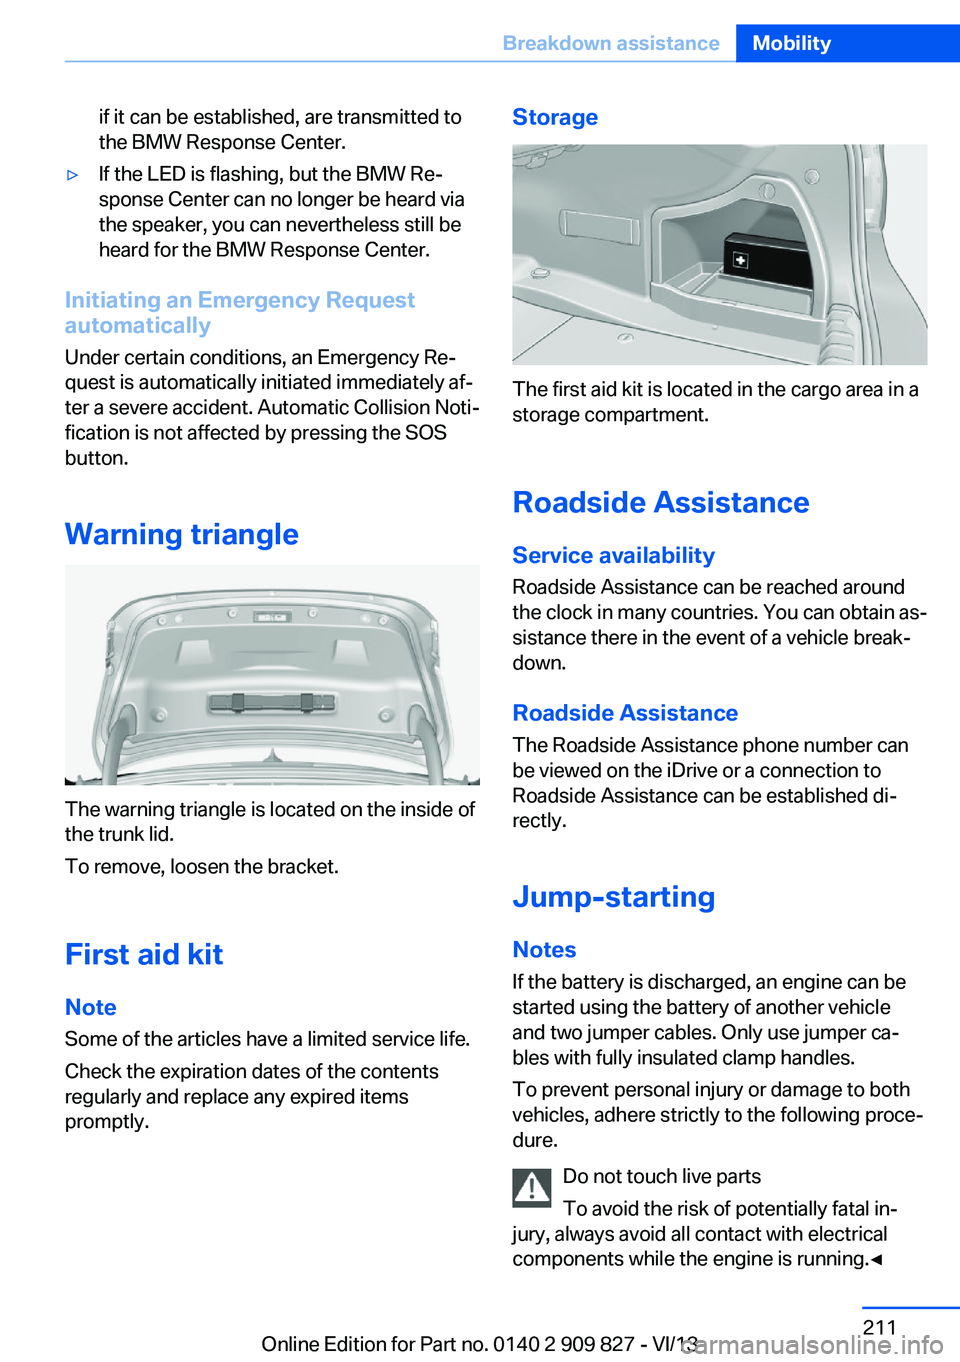
The warning triangle is located on the inside of
the trunk lid.
To remove, loosen the bracket.
First aid kit NoteSome of the articles have a limited service life.
Check the expiration dates of the contents
regularly and replace any expired items
promptly.
Storage
The first aid kit is located in the cargo area in a
storage compartment.
Roadside Assistance
Service availability
Roadside Assistance can be reached around
the clock in many countries. You can obtain as‐
sistance there in the event of a vehicle break‐
down.
Roadside Assistance The Roadside Assistance phone number can
be viewed on the iDrive or a connection to
Roadside Assistance can be established di‐
rectly.
Jump-starting
Notes If the battery is discharged, an engine can be
started using the battery of another vehicle
and two jumper cables. Only use jumper ca‐
bles with fully insulated clamp handles.
To prevent personal injury or damage to both
vehicles, adhere strictly to the following proce‐
dure.
Do not touch live parts
To avoid the risk of potentially fatal in‐
jury, always avoid all contact with electrical
components while the engine is running.◀
Seite 211Breakdown assistanceMobility211
Online Edition for Part no. 0140 2 909 827 - VI/13
Page 233 of 236
Signaling, horn 12
Signals when unlocking 41
Sitting safely 47
Size 222
Slide/tilt glass roof 45
Smallest turning circle 223
Snow chains 188
Socket 153
Socket, OBD Onboard Diag‐ nostics 197
SOS button 210
Spare fuse 208
Specified engine oil types 193
Speed, average 85
Speed limit detection, on‐ board computer 85
Speed limiter, display 82
Speed Limit Information 82
Speed limit in the com‐ puter 85
Split screen 21
SPORT+ - program, Dynamic Driving Control 117
Sport automatic transmis‐ sion 71
Sport displays, torque dis‐ play, performance dis‐
play 86
SPORT program, Dynamic Driving Control 117
Sport program, transmis‐ sion 70
Sport steering, variable 117
Stability control systems 115
Start/stop, automatic func‐ tion 63
Start/Stop button 61
Start function during malfunc‐ tion 33
Starting the engine 62
Status display, tires 97
Status information, iDrive 20
Status of Owner's Manual 6
Steering wheel, adjusting 56
Steering wheel heating 56 Steptronic, automatic trans‐
mission 69
Stopping the engine 62
Storage compartments 157
Storage compartments, loca‐ tions 157
Storage, tires 188
Storing the vehicle 219
Summer tires, tread 186
Supplementary text mes‐ sage 77
Surround View 131
Switch for Dynamic Driv‐ ing 117
Switch-on times, parked-car ventilation 148
Switch, refer to Cockpit 12
Symbols 6
T Tachometer 78
Tailgate 38
Tailgate opening with no- touch activation 40
Tailgate via remote con‐ trol 36
Tail lamps 204
Technical changes, refer to Safety 7
Technical data 222
Telephone, see user's manual for Navigation, Entertain‐
ment and Communication
Temperature, automatic cli‐ mate control 143, 145
Temperature display, external temperature 79
Temperature, engine oil 78
Tempomat, refer to Active Cruise Control 120
Terminal, starting aid 212
Text message, supplemen‐ tary 77
Theft alarm system, refer to Alarm system 42 Theft protection, refer to
Central locking system 35
Thigh support 49
Through-loading system 155
Tilt alarm sensor 43
Time of arrival 85
Tire damage 186
Tire identification marks 184
Tire inflation pressure 181
Tire inflation pressure moni‐ tor, refer to FTM 100
Tire Pressure Monitor TPM 97
Tires, changing 187
Tires, everything on wheels and tires 181
Tires, run-flat tires 188
Tire tread 186
Tone, see user's manual for Navigation, Entertainment
and Communication
Tools 198
Top View 135
Total vehicle weight 223
Touchpad 19
Tow fitting 214
Towing 213
Tow-starting 213
Tow truck 213
TPM Tire Pressure Moni‐ tor 97
Traction control 116
TRACTION program, Dy‐ namic Driving Control 116
Transmission, automatic 69
Transmission, manual 69
Transporting children safely 57
Tread, tires 186
Trip computer 86
Triple turn signal activa‐ tion 66
Trip odometer 79
Truck for tow-starting/ towing 213
Trunk lid 38 Seite 233Everything from A to ZReference233
Online Edition for Part no. 0140 2 909 827 - VI/13