2014 BMW 335I XDRIVE GRAN TURISMO steering wheel
[x] Cancel search: steering wheelPage 12 of 240
CockpitVehicle equipment
All standard, country-specific and optional
equipment that is offered in the model series is
described in this chapter. Therefore, equip‐ment is also described that is not available in a
vehicle, e. g., because of the selected optional
equipment or country variant. This also applies
for safety-related functions and systems.
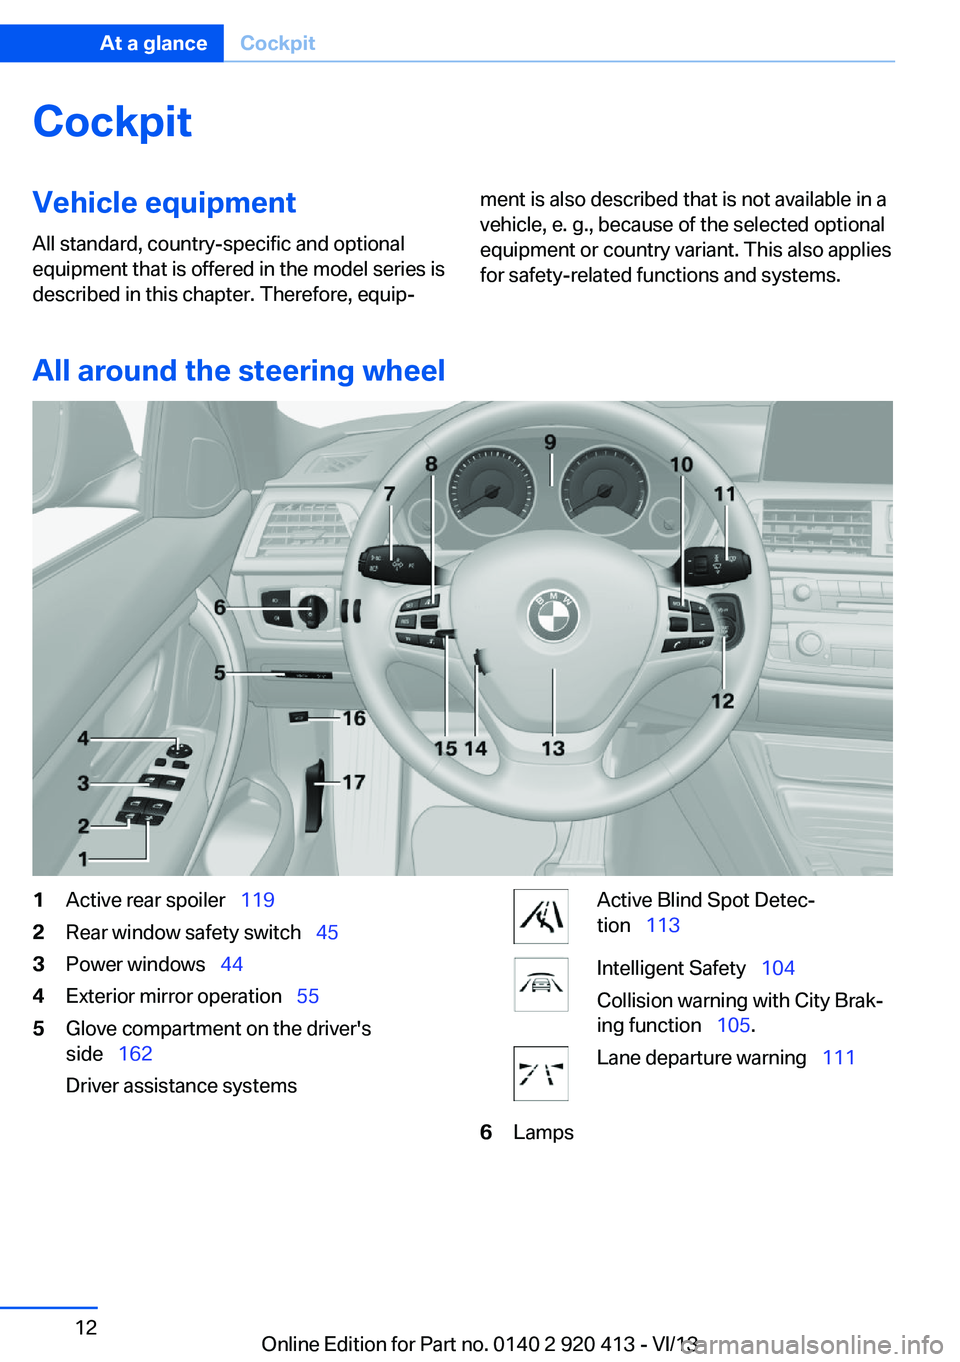
All around the steering wheel
1Active rear spoiler 1192Rear window safety switch 453Power windows 444Exterior mirror operation 555Glove compartment on the driver's
side 162
Driver assistance systemsActive Blind Spot Detec‐
tion 113Intelligent Safety 104
Collision warning with City Brak‐
ing function 105.Lane departure warning 1116LampsSeite 12At a glanceCockpit12
Online Edition for Part no. 0140 2 920 413 - VI/13
Page 13 of 240
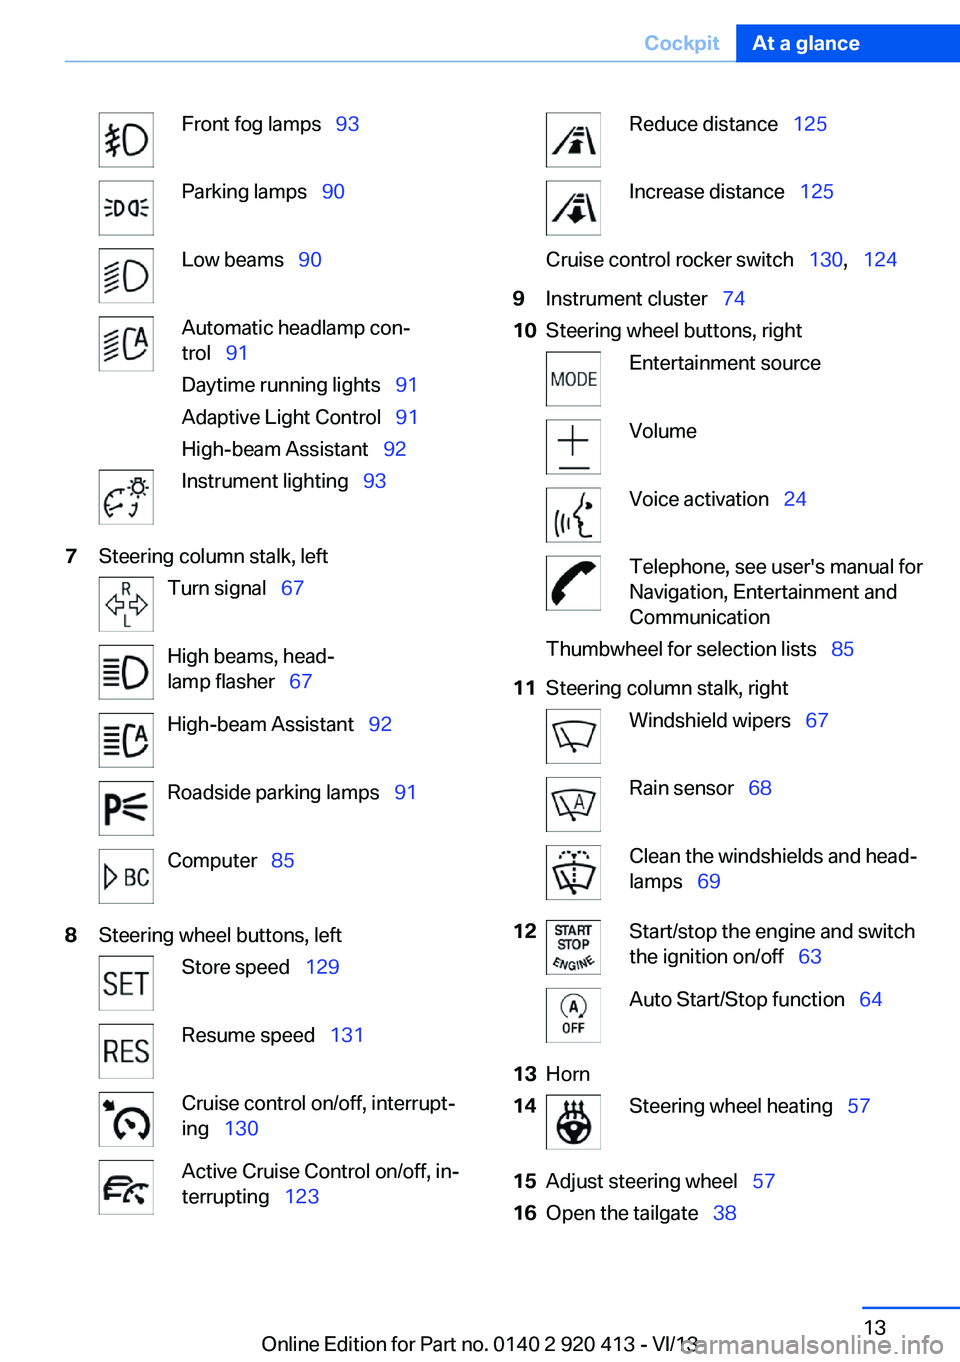
Front fog lamps 93Parking lamps 90Low beams 90Automatic headlamp con‐
trol 91
Daytime running lights 91
Adaptive Light Control 91
High-beam Assistant 92Instrument lighting 937Steering column stalk, leftTurn signal 67High beams, head‐
lamp flasher 67High-beam Assistant 92Roadside parking lamps 91Computer 858Steering wheel buttons, leftStore speed 129Resume speed 131Cruise control on/off, interrupt‐
ing 130Active Cruise Control on/off, in‐
terrupting 123Reduce distance 125Increase distance 125Cruise control rocker switch 130, 1249Instrument cluster 7410Steering wheel buttons, rightEntertainment sourceVolumeVoice activation 24Telephone, see user's manual for
Navigation, Entertainment and
CommunicationThumbwheel for selection lists 8511Steering column stalk, rightWindshield wipers 67Rain sensor 68Clean the windshields and head‐
lamps 6912Start/stop the engine and switch
the ignition on/off 63Auto Start/Stop function 6413Horn14Steering wheel heating 5715Adjust steering wheel 5716Open the tailgate 38Seite 13CockpitAt a glance13
Online Edition for Part no. 0140 2 920 413 - VI/13
Page 24 of 240
Voice activation systemVehicle equipment
All standard, country-specific and optional
equipment that is offered in the model series is
described in this chapter. Therefore, equip‐
ment is also described that is not available in a
vehicle, e. g., because of the selected optional
equipment or country variant. This also applies
for safety-related functions and systems.
The concept▷Most functions that are displayed on the
Control Display can be operated by spoken
commands via the voice activation system.
The system prompts you to make your en‐
tries.▷Functions that can only be used when the
vehicle is stationary cannot be operated
using the voice activation system.▷The system uses a special microphone on
the driver's side.▷›...‹ Verbal instructions in the Owner's
Manual to use with the voice activation
system.
Requirements
Via the Control Display, set a language that is
also supported by the voice activation system
so that the spoken commands can be identi‐
fied.
Set the language, refer to page 88.
Using voice activation
Activating the voice activation system1. Press the button on the steering
wheel.2.Wait for the signal.3.Say the command.
The command is displayed in the instru‐
ment cluster.
This symbol in the instrument cluster indi‐
cates that the voice activation system is active.
If no other commands are available, operate
the function in this case via iDrive.
Terminating the voice activation
system
Briefly press the button on the steer‐
ing wheel or ›Cancel‹.
Possible commands Most menu items on the Control Display can
be voiced as commands.
The available commands depend on which
menu is currently displayed on the Control Dis‐
play.
Short commands exist for many functions.
Some list entries, e.g., Phone book entries, can
also be selected via the voice activation sys‐
tem. Speak these list entries exactly as they
are displayed in the respective list.
Having possible commands read aloud
You can have the available commands read out
loud for you: ›Voice commands‹
For example, if the "Settings" menu is dis‐
played, the commands for the settings are
read out loud.
Seite 24At a glanceVoice activation system24
Online Edition for Part no. 0140 2 920 413 - VI/13
Page 25 of 240
Executing functions using short
commands
Functions on the main menu can be performed
directly by means of short commands, nearly
irrespective of which menu item is currently
selected, e.g., ›Vehicle status‹.
List of short commands of the voice activation
system, see Navigation, Entertainment, Com‐
munication Owner's Manual.
Help dialog for the voice activation
system
Calling up help dialog: ›Help‹
Additional commands for the help dialog:▷›Help with examples‹: information about the
current operating options and the most im‐
portant commands for them are an‐
nounced.▷›Help with voice activation‹: information
about the principle of operation for the
voice activation system is announced.
Example: playing back a CD
Via the main menu The commands of the menu items are spoken
just as they are selected via the controller.
1.Switch on the Entertainment sound output
if necessary.2. Press the button on the steering
wheel.3.›Multimedia‹
The medium last played is played back.4.›C D‹5.›C D drive‹6.›Track ...‹, e.g., CD track 4.Via short command
Playback of the CD can also be started via a
short command.1.Switch on the Entertainment sound output
if necessary.2. Press the button on the steering
wheel.3.›C D drive track ...‹, e.g., CD track 4.
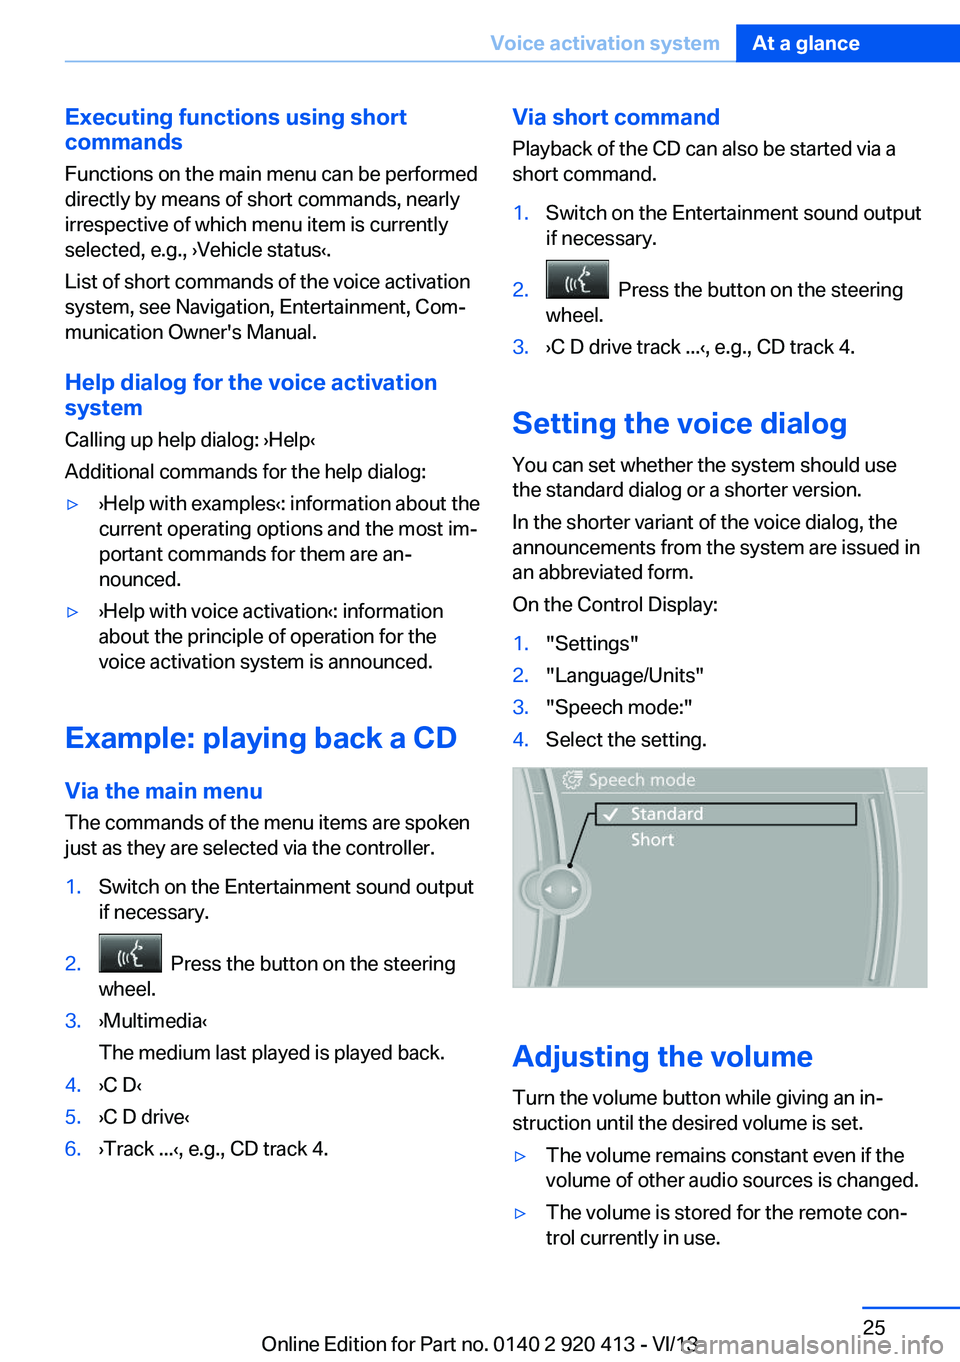
Setting the voice dialog
You can set whether the system should use
the standard dialog or a shorter version.
In the shorter variant of the voice dialog, the
announcements from the system are issued in
an abbreviated form.
On the Control Display:
1."Settings"2."Language/Units"3."Speech mode:"4.Select the setting.
Adjusting the volume
Turn the volume button while giving an in‐
struction until the desired volume is set.
▷The volume remains constant even if the
volume of other audio sources is changed.▷The volume is stored for the remote con‐
trol currently in use.Seite 25Voice activation systemAt a glance25
Online Edition for Part no. 0140 2 920 413 - VI/13
Page 54 of 240
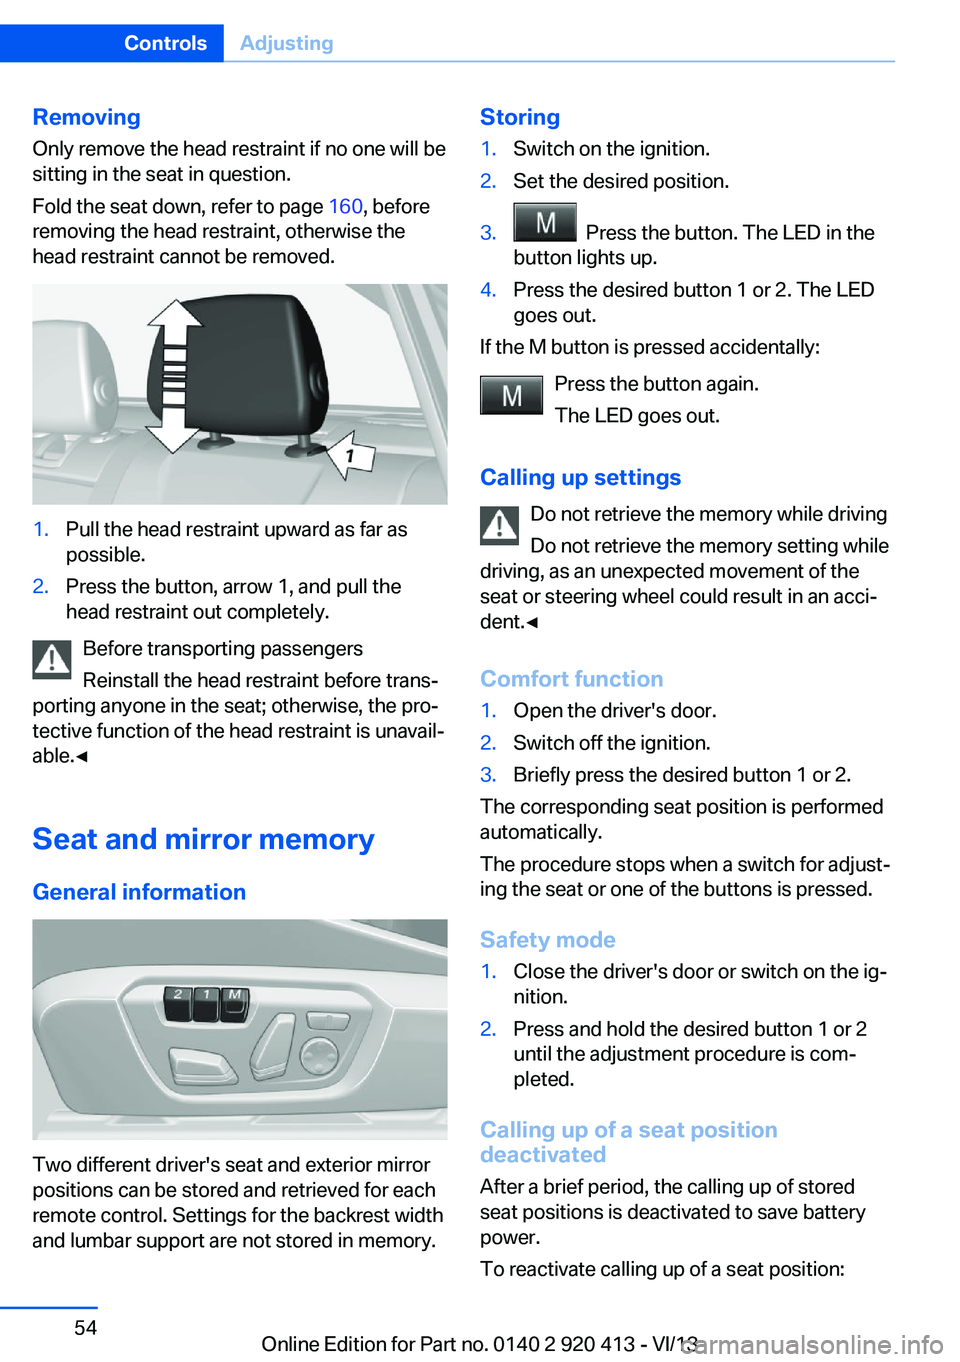
RemovingOnly remove the head restraint if no one will be
sitting in the seat in question.
Fold the seat down, refer to page 160, before
removing the head restraint, otherwise the
head restraint cannot be removed.1.Pull the head restraint upward as far as
possible.2.Press the button, arrow 1, and pull the
head restraint out completely.
Before transporting passengers
Reinstall the head restraint before trans‐
porting anyone in the seat; otherwise, the pro‐
tective function of the head restraint is unavail‐
able.◀
Seat and mirror memory
General information
Two different driver's seat and exterior mirror
positions can be stored and retrieved for each
remote control. Settings for the backrest width
and lumbar support are not stored in memory.
Storing1.Switch on the ignition.2.Set the desired position.3. Press the button. The LED in the
button lights up.4.Press the desired button 1 or 2. The LED
goes out.
If the M button is pressed accidentally:
Press the button again.
The LED goes out.
Calling up settings Do not retrieve the memory while driving
Do not retrieve the memory setting while
driving, as an unexpected movement of the
seat or steering wheel could result in an acci‐
dent.◀
Comfort function
1.Open the driver's door.2.Switch off the ignition.3.Briefly press the desired button 1 or 2.
The corresponding seat position is performed
automatically.
The procedure stops when a switch for adjust‐
ing the seat or one of the buttons is pressed.
Safety mode
1.Close the driver's door or switch on the ig‐
nition.2.Press and hold the desired button 1 or 2
until the adjustment procedure is com‐
pleted.
Calling up of a seat position
deactivated
After a brief period, the calling up of stored
seat positions is deactivated to save battery
power.
To reactivate calling up of a seat position:
Seite 54ControlsAdjusting54
Online Edition for Part no. 0140 2 920 413 - VI/13
Page 56 of 240
Fold in the mirror in a car wash
Before washing the car in an automatic
car wash, fold in the exterior mirrors by hand or
with the button; otherwise, the mirrors could
be damaged, depending on the width of the
vehicle.◀
Automatic heating
Both exterior mirrors are automatically heated
whenever the engine is running.
Automatic dimming feature Both exterior mirrors are automatically dim‐
med. Photocells are used for control in the In‐
terior rear view mirror, refer to page 56.
Interior rearview mirror
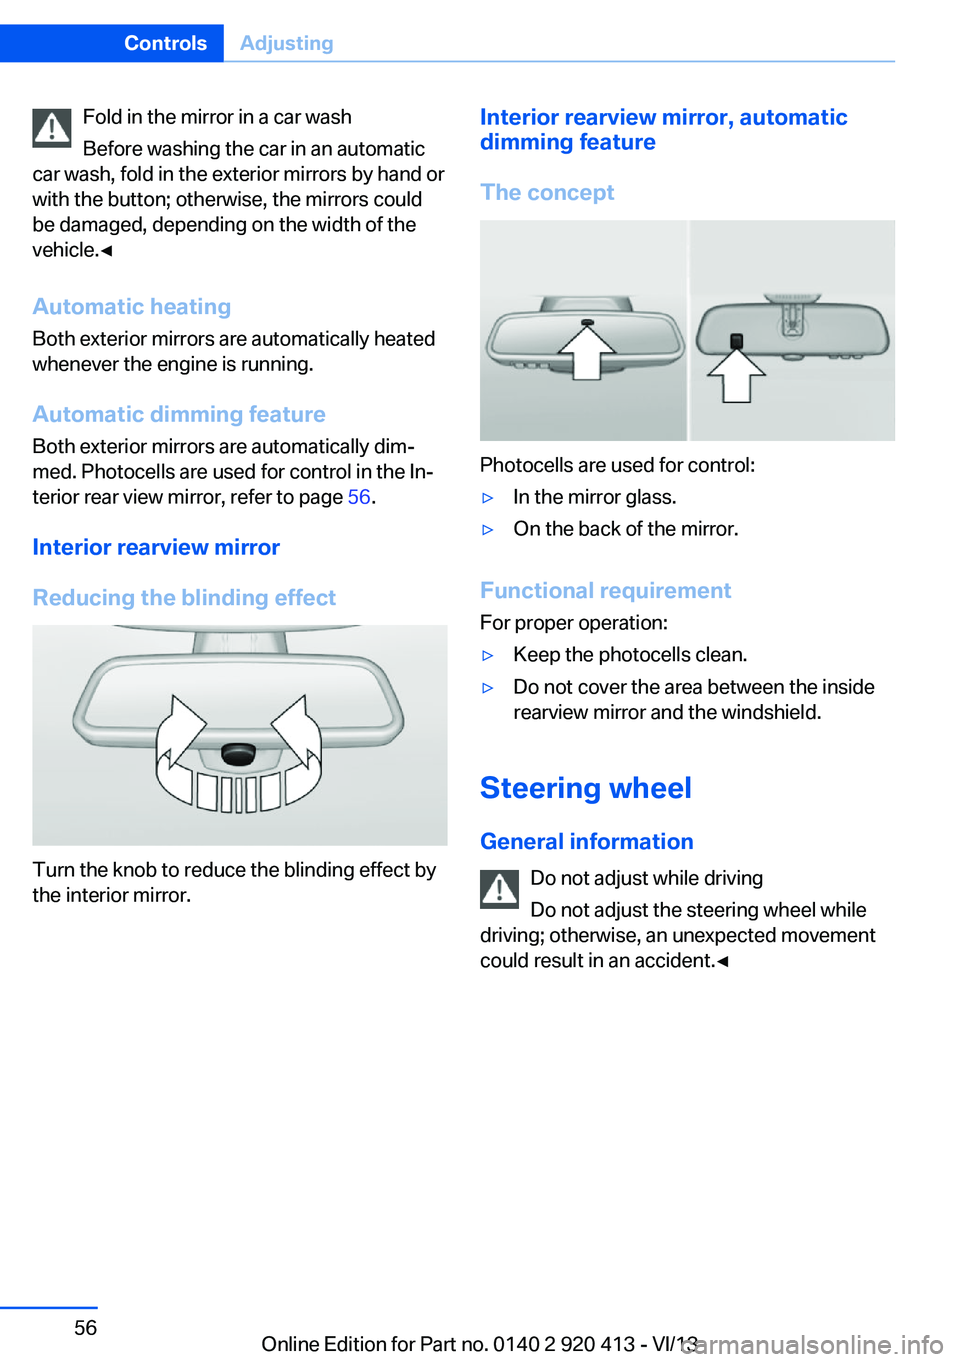
Reducing the blinding effect
Turn the knob to reduce the blinding effect by
the interior mirror.
Interior rearview mirror, automatic
dimming feature
The concept
Photocells are used for control:
▷In the mirror glass.▷On the back of the mirror.
Functional requirement For proper operation:
▷Keep the photocells clean.▷Do not cover the area between the inside
rearview mirror and the windshield.
Steering wheel
General information Do not adjust while driving
Do not adjust the steering wheel while
driving; otherwise, an unexpected movement
could result in an accident.◀
Seite 56ControlsAdjusting56
Online Edition for Part no. 0140 2 920 413 - VI/13
Page 57 of 240
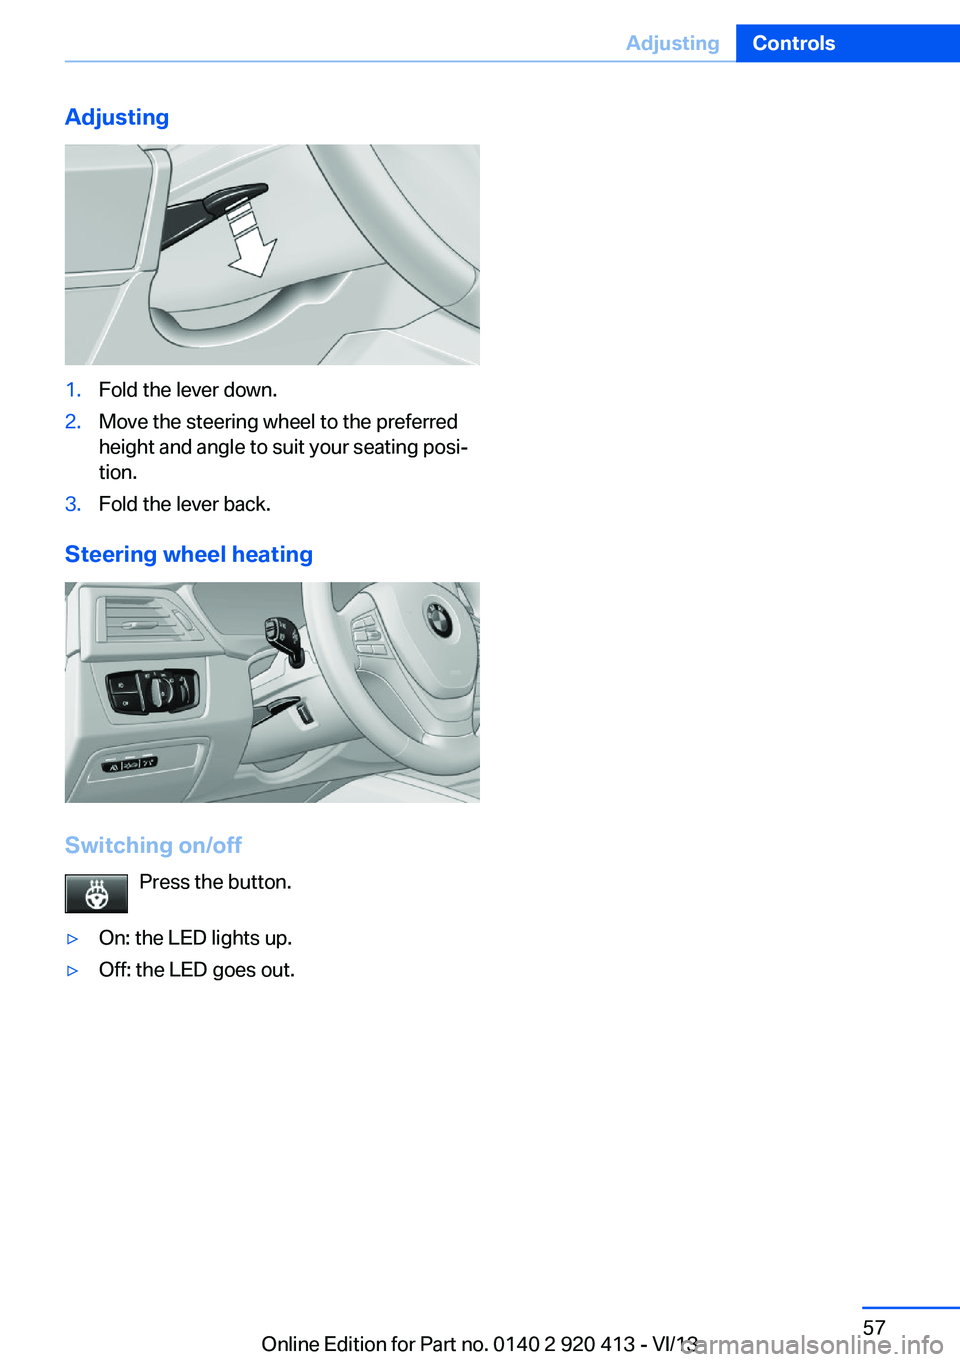
Adjusting1.Fold the lever down.2.Move the steering wheel to the preferred
height and angle to suit your seating posi‐
tion.3.Fold the lever back.
Steering wheel heating
Switching on/off
Press the button.
▷On: the LED lights up.▷Off: the LED goes out.Seite 57AdjustingControls57
Online Edition for Part no. 0140 2 920 413 - VI/13
Page 64 of 240
Set the parking brake and further secure
the vehicle as required
Set the parking brake firmly when parking; oth‐
erwise, the vehicle could roll. On steep upward
and downward inclines, further secure the ve‐
hicle, for example, by turning the steering
wheel in the direction of the curb. ◀
Before driving into a car wash In order for the vehicle to be able to roll into a
car wash, heed the information regarding
Washing in automatic car washes, refer to
page 220.
Manual transmission
Switching off the engine1.With the vehicle at a standstill, press the
Start/Stop button.2.Shift into first gear or reverse.3.Set the parking brake.
Automatic transmission
Switching off the engine
1.Engage transmission position P with the
vehicle stopped.2.Press the Start/Stop button.
The engine is switched off.
The radio ready state is switched on.3.Set the parking brake.
Automatic Engine Start/Stop
Function
The concept The Auto Start/Stop function helps save fuel.
The system switches off the engine during a
stop, e.g., in a traffic congestion or at traffic
lights. The ignition remains switched on. The
engine starts again automatically for driving
off.
Certain vehicle components may experience
additional wear as a result of this system.
Automatic mode
The Auto Start/Stop function is operational af‐
ter each engine start.
This function is activated at speeds faster than
about 3 mph, approx. 5 km/h.
Engine stop
The engine is switched off automatically dur‐
ing a stop under the following conditions:
Manual transmission:▷Neutral is engaged and the clutch pedal is
not pressed.▷The driver's seat belt is buckled or the driv‐
er's door is closed.
Automatic transmission:
▷The selector lever is in transmission posi‐
tion D.▷Brake pedal remains depressed while the
vehicle is stopped.▷The driver's seat belt is buckled or the driv‐
er's door is closed.
The air volume of the air conditioner is reduced
when the engine is switched off.
Displays in the instrument cluster The READY display in the tach‐
ometer signals that the Auto
Start/Stop function is ready to
start the engine automatically.
The display indicates that the
conditions for an automatic en‐
gine stop have not been satis‐
fied.
Note The engine is not switched off automatically in
the following situations:
Seite 64ControlsDriving64
Online Edition for Part no. 0140 2 920 413 - VI/13