2014 BMW 328I XDRIVE SPORTS WAGON wipers
[x] Cancel search: wipersPage 13 of 244
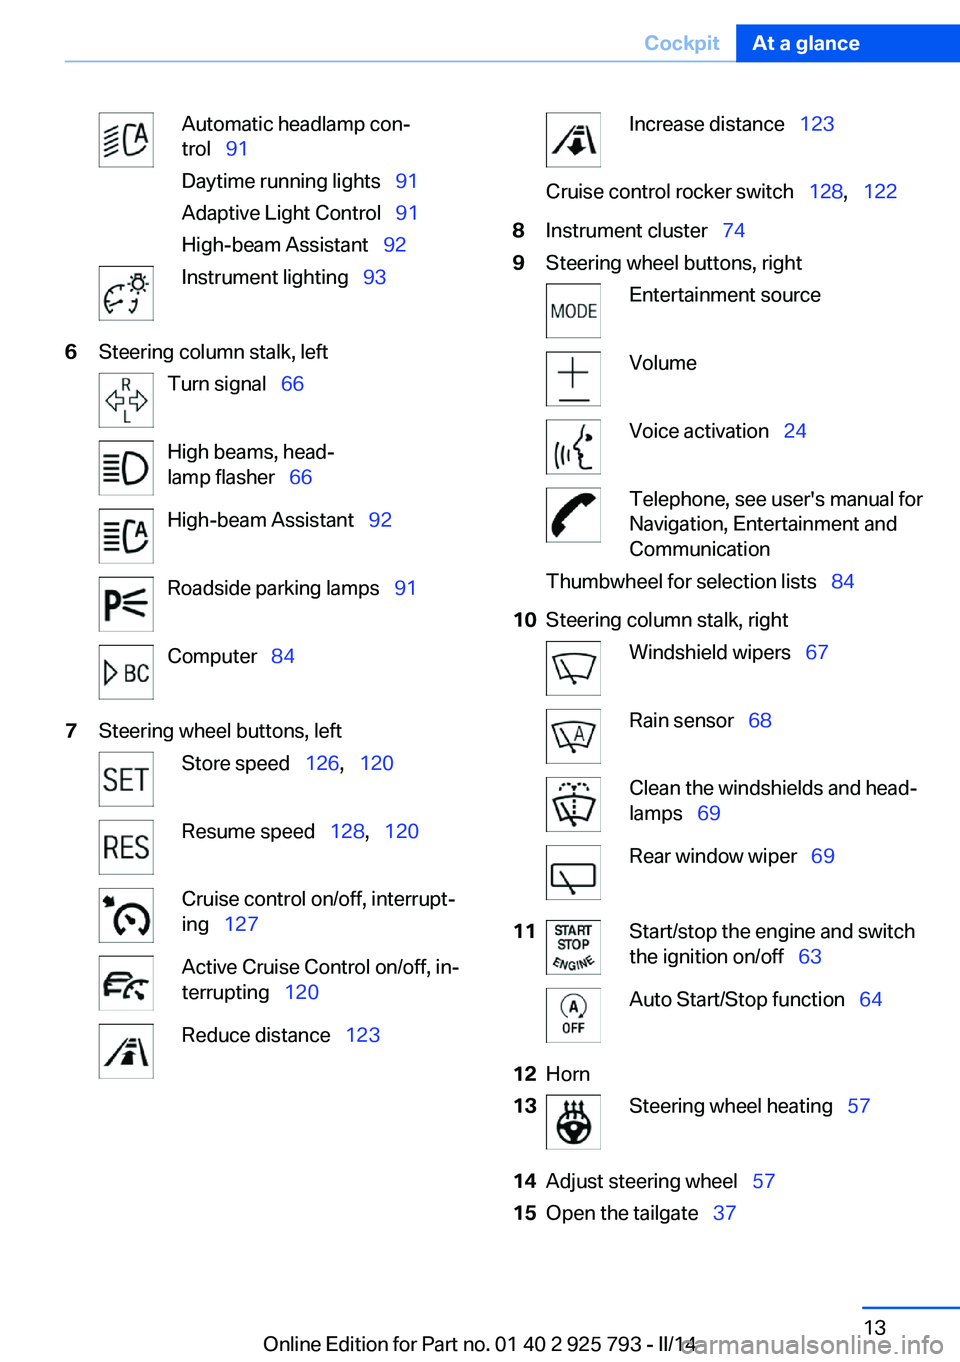
Automatic headlamp con‐
trol 91
Daytime running lights 91
Adaptive Light Control 91
High-beam Assistant 92Instrument lighting 936Steering column stalk, leftTurn signal 66High beams, head‐
lamp flasher 66High-beam Assistant 92Roadside parking lamps 91Computer 847Steering wheel buttons, leftStore speed 126, 120Resume speed 128, 120Cruise control on/off, interrupt‐
ing 127Active Cruise Control on/off, in‐
terrupting 120Reduce distance 123Increase distance 123Cruise control rocker switch 128, 1228Instrument cluster 749Steering wheel buttons, rightEntertainment sourceVolumeVoice activation 24Telephone, see user's manual for
Navigation, Entertainment and
CommunicationThumbwheel for selection lists 8410Steering column stalk, rightWindshield wipers 67Rain sensor 68Clean the windshields and head‐
lamps 69Rear window wiper 6911Start/stop the engine and switch
the ignition on/off 63Auto Start/Stop function 6412Horn13Steering wheel heating 5714Adjust steering wheel 5715Open the tailgate 37Seite 13CockpitAt a glance13
Online Edition for Part no. 01 40 2 925 793 - II/14
Page 67 of 244
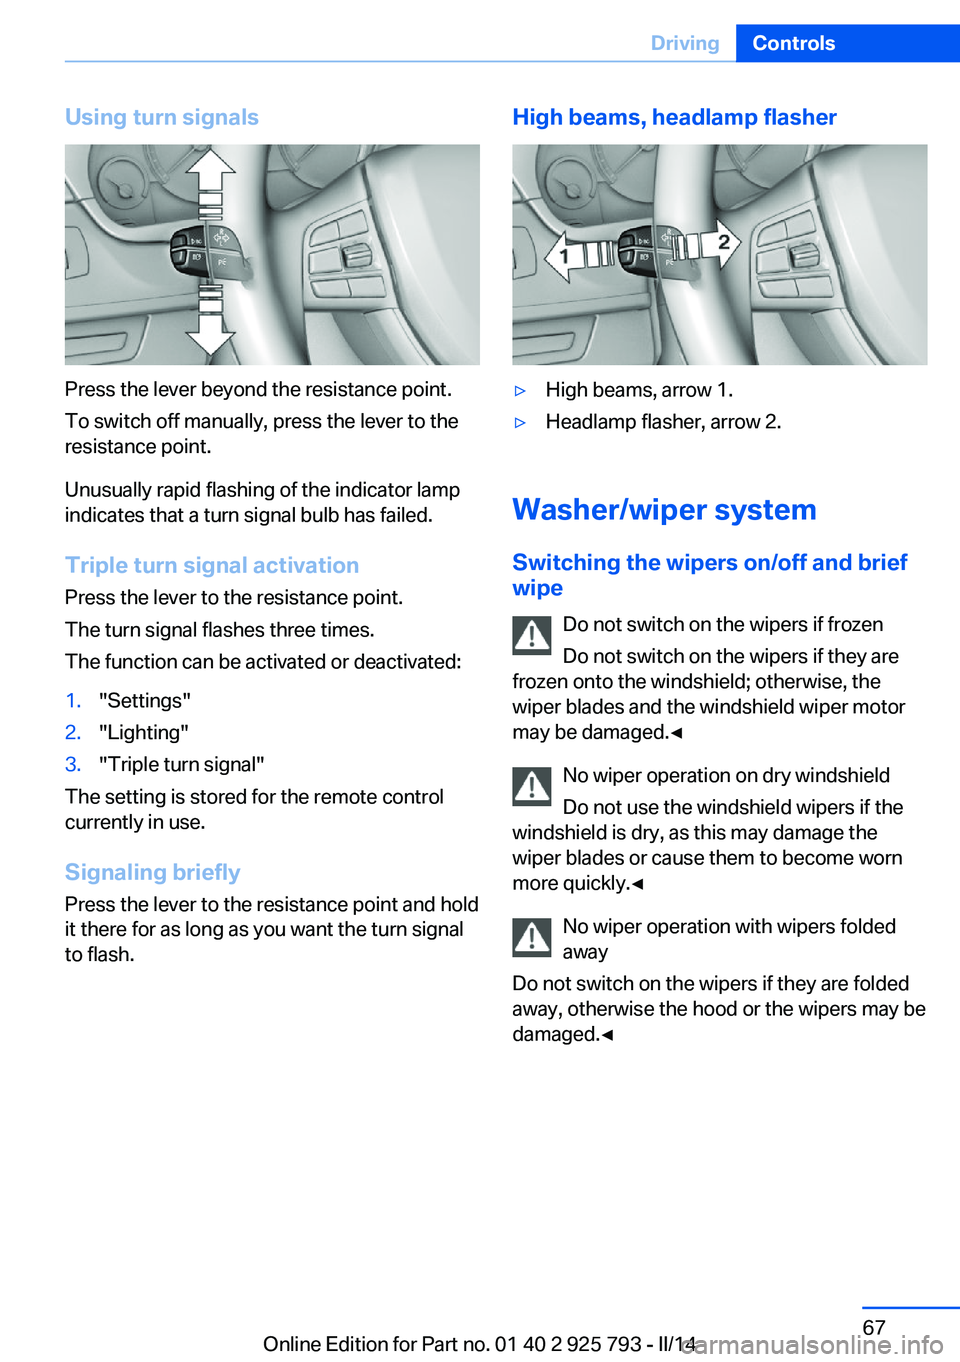
Using turn signals
Press the lever beyond the resistance point.
To switch off manually, press the lever to the
resistance point.
Unusually rapid flashing of the indicator lamp
indicates that a turn signal bulb has failed.
Triple turn signal activation Press the lever to the resistance point.
The turn signal flashes three times.
The function can be activated or deactivated:
1."Settings"2."Lighting"3."Triple turn signal"
The setting is stored for the remote control
currently in use.
Signaling briefly
Press the lever to the resistance point and hold
it there for as long as you want the turn signal
to flash.
High beams, headlamp flasher▷High beams, arrow 1.▷Headlamp flasher, arrow 2.
Washer/wiper system
Switching the wipers on/off and brief
wipe
Do not switch on the wipers if frozen
Do not switch on the wipers if they are
frozen onto the windshield; otherwise, the wiper blades and the windshield wiper motor
may be damaged.◀
No wiper operation on dry windshield
Do not use the windshield wipers if the
windshield is dry, as this may damage the
wiper blades or cause them to become worn
more quickly.◀
No wiper operation with wipers folded
away
Do not switch on the wipers if they are folded
away, otherwise the hood or the wipers may be
damaged.◀
Seite 67DrivingControls67
Online Edition for Part no. 01 40 2 925 793 - II/14
Page 68 of 244
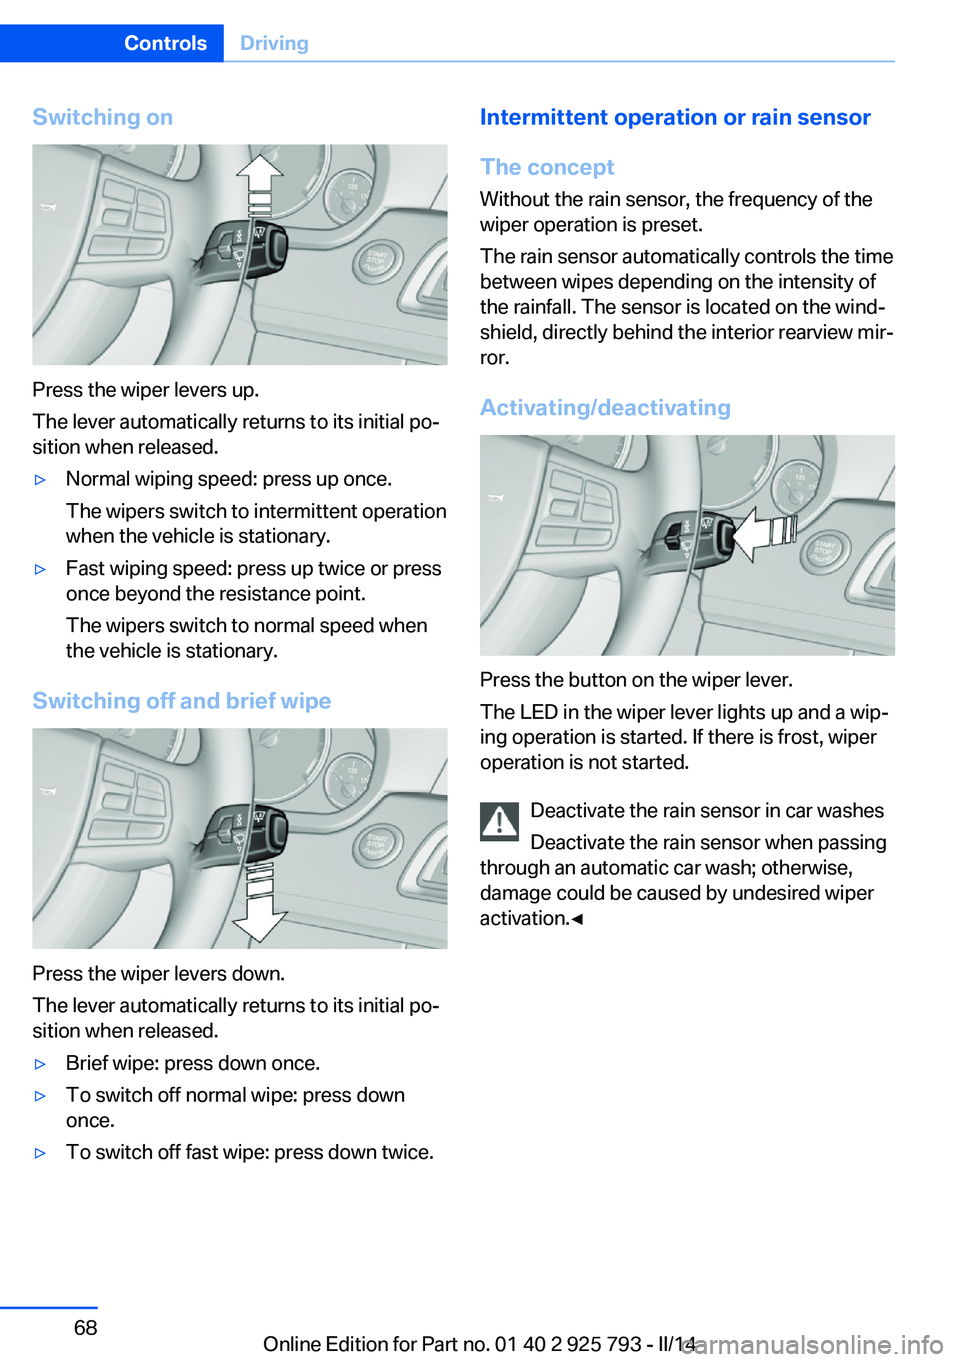
Switching on
Press the wiper levers up.
The lever automatically returns to its initial po‐
sition when released.
▷Normal wiping speed: press up once.
The wipers switch to intermittent operation
when the vehicle is stationary.▷Fast wiping speed: press up twice or press
once beyond the resistance point.
The wipers switch to normal speed when
the vehicle is stationary.
Switching off and brief wipe
Press the wiper levers down.
The lever automatically returns to its initial po‐
sition when released.
▷Brief wipe: press down once.▷To switch off normal wipe: press down
once.▷To switch off fast wipe: press down twice.Intermittent operation or rain sensor
The concept Without the rain sensor, the frequency of the
wiper operation is preset.
The rain sensor automatically controls the time
between wipes depending on the intensity of the rainfall. The sensor is located on the wind‐
shield, directly behind the interior rearview mir‐
ror.
Activating/deactivating
Press the button on the wiper lever.
The LED in the wiper lever lights up and a wip‐
ing operation is started. If there is frost, wiper
operation is not started.
Deactivate the rain sensor in car washes
Deactivate the rain sensor when passing
through an automatic car wash; otherwise,
damage could be caused by undesired wiper
activation.◀
Seite 68ControlsDriving68
Online Edition for Part no. 01 40 2 925 793 - II/14
Page 69 of 244
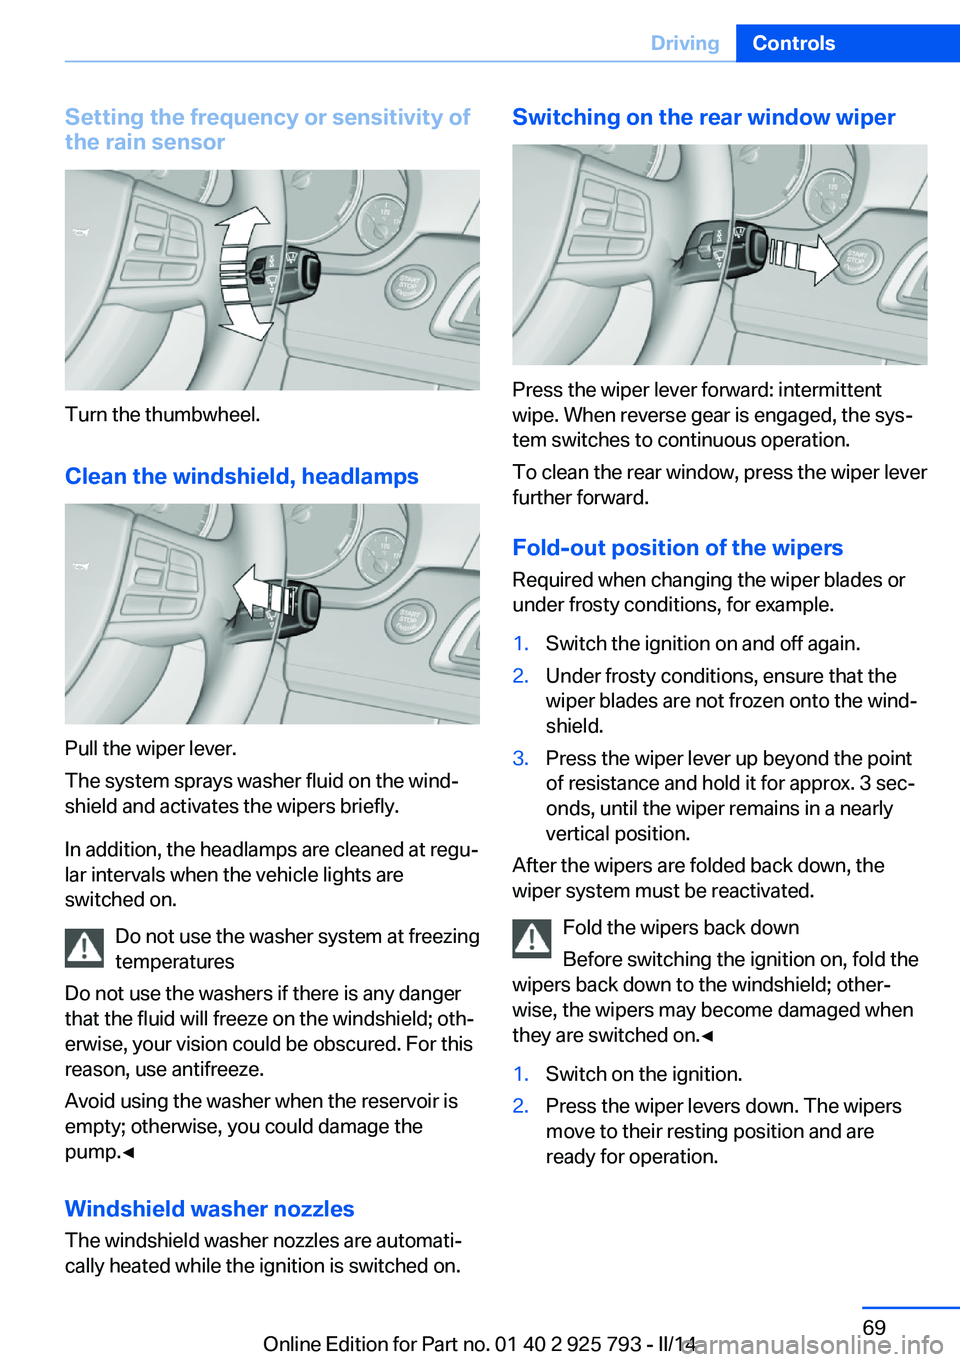
Setting the frequency or sensitivity of
the rain sensor
Turn the thumbwheel.
Clean the windshield, headlamps
Pull the wiper lever.
The system sprays washer fluid on the wind‐
shield and activates the wipers briefly.
In addition, the headlamps are cleaned at regu‐
lar intervals when the vehicle lights are
switched on.
Do not use the washer system at freezing
temperatures
Do not use the washers if there is any danger
that the fluid will freeze on the windshield; oth‐
erwise, your vision could be obscured. For this
reason, use antifreeze.
Avoid using the washer when the reservoir is
empty; otherwise, you could damage the
pump.◀
Windshield washer nozzles
The windshield washer nozzles are automati‐
cally heated while the ignition is switched on.
Switching on the rear window wiper
Press the wiper lever forward: intermittent
wipe. When reverse gear is engaged, the sys‐
tem switches to continuous operation.
To clean the rear window, press the wiper lever
further forward.
Fold-out position of the wipers
Required when changing the wiper blades or
under frosty conditions, for example.
1.Switch the ignition on and off again.2.Under frosty conditions, ensure that the
wiper blades are not frozen onto the wind‐
shield.3.Press the wiper lever up beyond the point
of resistance and hold it for approx. 3 sec‐
onds, until the wiper remains in a nearly
vertical position.
After the wipers are folded back down, the
wiper system must be reactivated.
Fold the wipers back down
Before switching the ignition on, fold the
wipers back down to the windshield; other‐
wise, the wipers may become damaged when
they are switched on.◀
1.Switch on the ignition.2.Press the wiper levers down. The wipers
move to their resting position and are
ready for operation.Seite 69DrivingControls69
Online Edition for Part no. 01 40 2 925 793 - II/14
Page 207 of 244
Replacing componentsVehicle equipmentAll standard, country-specific and optional
equipment that is offered in the model series is
described in this chapter. Therefore, equip‐
ment is also described that is not available in a
vehicle, e. g., because of the selected optional
equipment or country variant. This also applies
for safety-related functions and systems.
Onboard vehicle tool kit
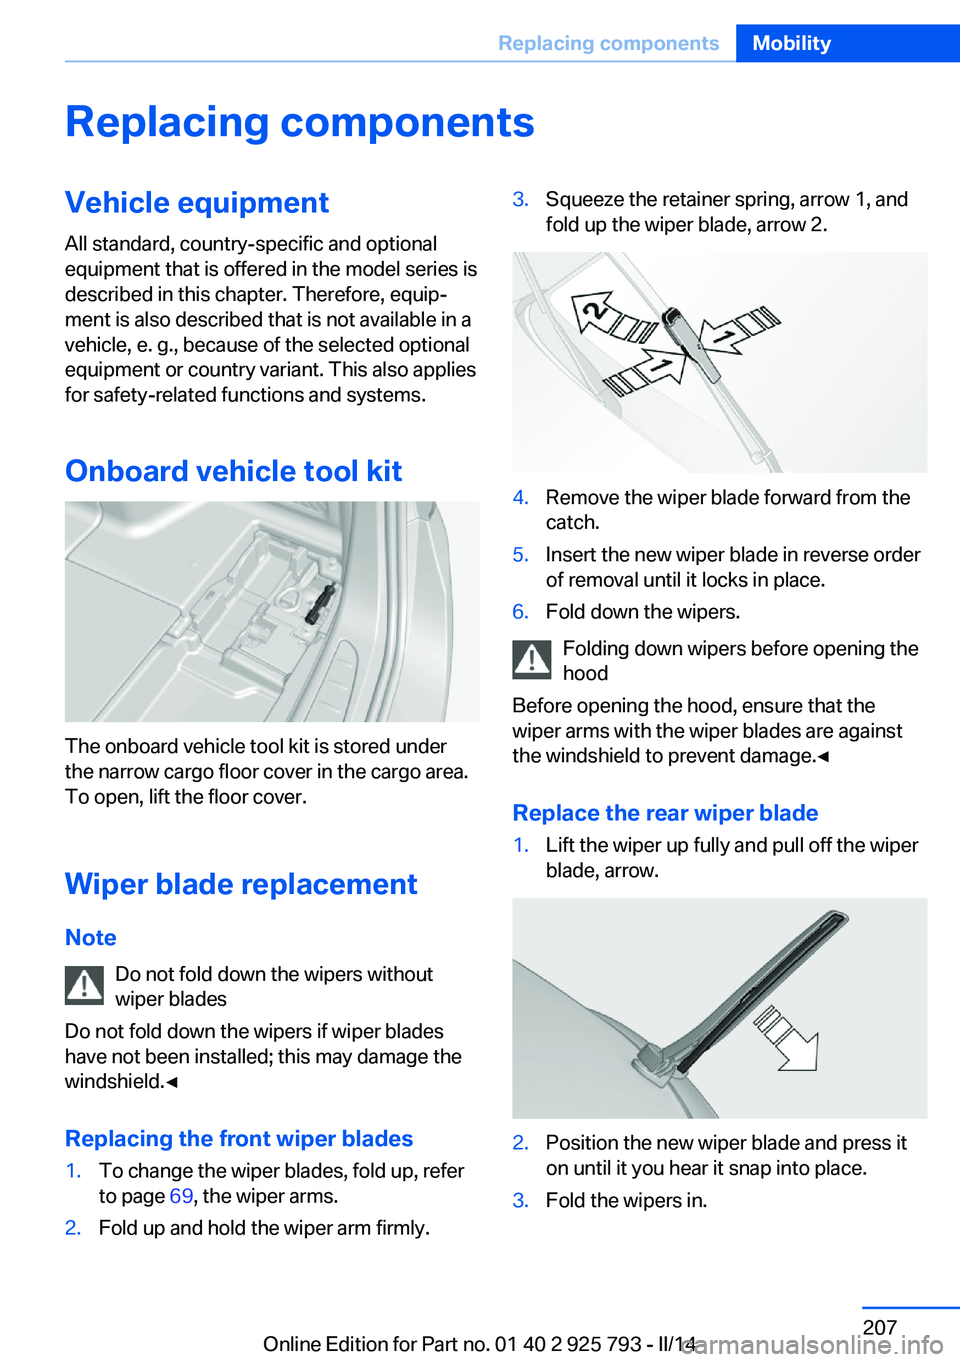
The onboard vehicle tool kit is stored under
the narrow cargo floor cover in the cargo area.
To open, lift the floor cover.
Wiper blade replacement Note Do not fold down the wipers without
wiper blades
Do not fold down the wipers if wiper blades
have not been installed; this may damage the
windshield.◀
Replacing the front wiper blades
1.To change the wiper blades, fold up, refer
to page 69, the wiper arms.2.Fold up and hold the wiper arm firmly.3.Squeeze the retainer spring, arrow 1, and
fold up the wiper blade, arrow 2.4.Remove the wiper blade forward from the
catch.5.Insert the new wiper blade in reverse order
of removal until it locks in place.6.Fold down the wipers.
Folding down wipers before opening the hood
Before opening the hood, ensure that the
wiper arms with the wiper blades are against
the windshield to prevent damage.◀
Replace the rear wiper blade
1.Lift the wiper up fully and pull off the wiper
blade, arrow.2.Position the new wiper blade and press it
on until it you hear it snap into place.3.Fold the wipers in.Seite 207Replacing componentsMobility207
Online Edition for Part no. 01 40 2 925 793 - II/14
Page 222 of 244
If the first starting attempt is not success‐
ful, wait a few minutes before making an‐
other attempt in order to allow the dis‐
charged battery to recharge.3.Let both engines run for several minutes.4.Disconnect the jumper cables in the re‐
verse order.
Check the battery and recharge if necessary.
Tow-starting and towing Note Tow-starting and towing
When tow-starting and towing the vehi‐
cle, switch off the Intelligent Safety systems;
otherwise, improper behavior of the braking
function of individual systems could result in
an accident.◀
Switching off Intelligent Safety systems, refer
to page 103.
Manual transmission Gearshift lever in neutral position.
Towing Follow the towing instructions
Follow all towing instructions; otherwise,
vehicle damage or accidents may occur.◀
▷Make sure that the ignition is switched on;
otherwise, the low beams, tail lamps, turn
signals, and windshield wipers may be un‐
available.▷Do not tow the vehicle with the rear axle
tilted, as the front wheels could turn.▷When the engine is stopped, there is no
power assist. Consequently, more force
needs to be applied when braking and
steering.▷Larger steering wheel movements are re‐
quired.▷The towing vehicle must not be lighter
than the vehicle being towed; otherwise,
it will not be possible to control the vehicle
response.
Tow truck
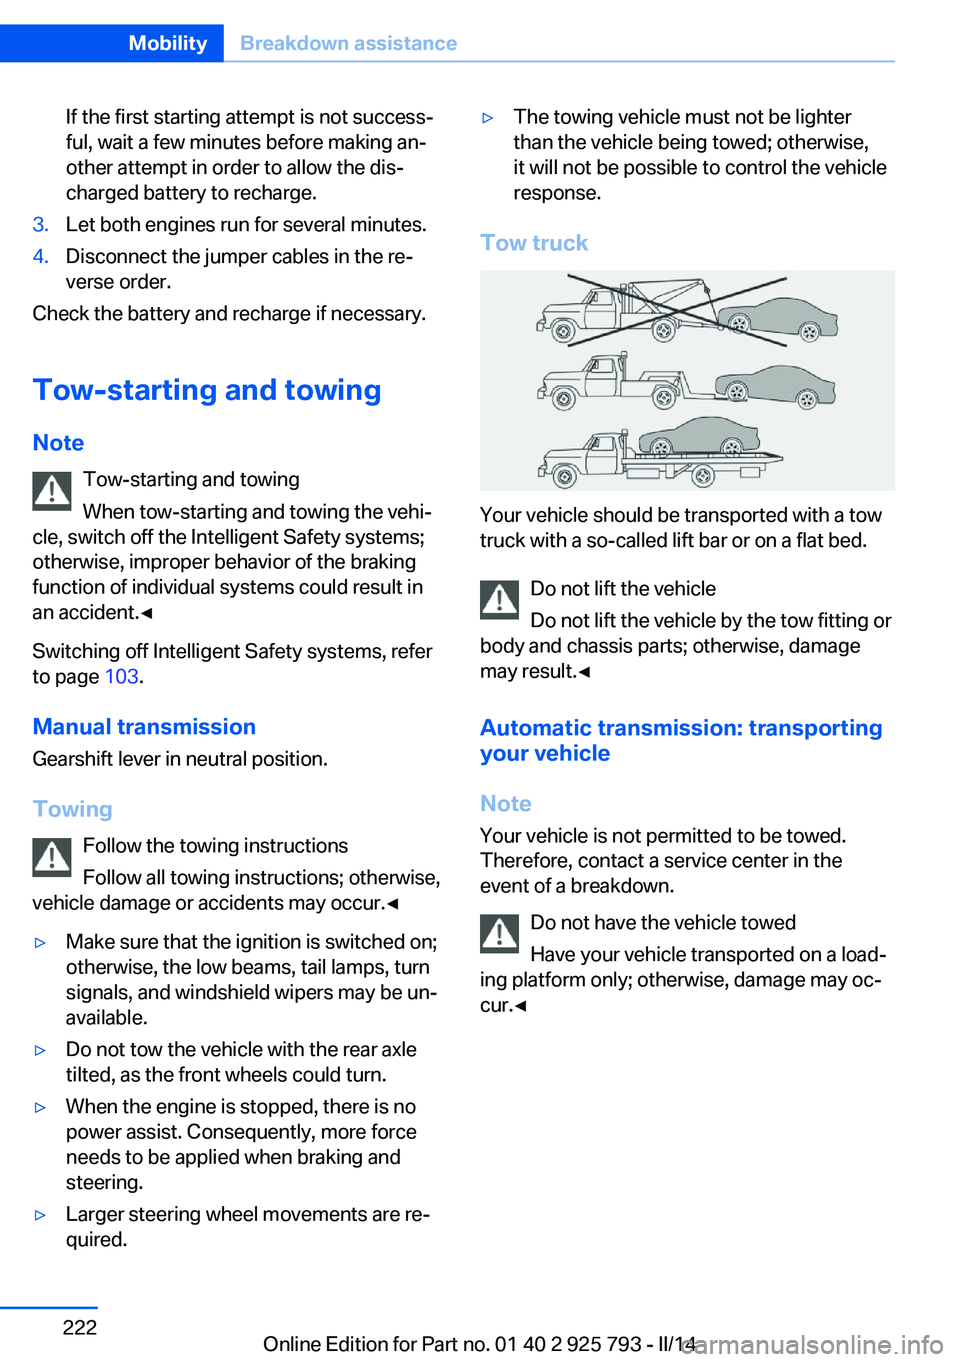
Your vehicle should be transported with a tow
truck with a so-called lift bar or on a flat bed.
Do not lift the vehicle
Do not lift the vehicle by the tow fitting or
body and chassis parts; otherwise, damage
may result.◀
Automatic transmission: transporting
your vehicle
Note Your vehicle is not permitted to be towed.
Therefore, contact a service center in the
event of a breakdown.
Do not have the vehicle towed
Have your vehicle transported on a load‐
ing platform only; otherwise, damage may oc‐
cur.◀
Seite 222MobilityBreakdown assistance222
Online Edition for Part no. 01 40 2 925 793 - II/14
Page 237 of 244
Engine oil filler neck 202
Engine oil temperature 79
Engine oil types, alterna‐ tive 203
Engine oil types, ap‐ proved 203
Engine start during malfunc‐ tion 33
Engine start, jump-start‐ ing 220
Engine start, refer to Starting the engine 63
Engine stop 63
Engine temperature 79
Entering a car wash 225
Equipment, interior 149
ESP Electronic Stability Pro‐ gram, refer to DSC 115
Exchanging wheels/tires 196
Exhaust system 169
Exterior mirror, automatic dimming feature 56
Exterior mirrors 55
External start 220
External temperature dis‐ play 80
External temperature warn‐ ing 80
Eyes for securing cargo 172
F
Failure message, refer to Check Control 77
False alarm, refer to Uninten‐ tional alarm 43
Fan, refer to Air flow 143, 147
Fault displays, refer to Check Control 77
Filler neck for engine oil 202
Fine wood, care 227
First aid kit 220
Fitting for towing, refer to Tow fitting 223 Flat tire, changing
wheels 216
Flat Tire Monitor FTM 101
Flat tire, Tire Pressure Moni‐ tor TPM 98
Flat tire, warning lamp 99, 102
Flooding 169
Floor carpet, care 228
Floor mats, care 228
Fogged up windows 143
Fold-out position, windshield wipers 69
Foot brake 169
Front airbags 95
Front fog lamps 93
Front fog lamps, bulb replace‐ ment 212
Front lamps 209
Front passenger airbags, au‐ tomatic deactivation 97
Front passenger airbags, indi‐ cator lamp 97
FTM Flat Tire Monitor 101
Fuel 186
Fuel cap 184
Fuel consumption, current 81
Fuel consumption, refer to Average fuel consump‐
tion 85
Fuel filler flap 184
Fuel gauge 79
Fuel quality 186
Fuel recommendation 186
Fuel, tank capacity 233
Fuse 217
G
Garage door opener, refer to Universal garage door
opener 149
Gasoline 186
Gear change, automatic transmission 71
Gear shift indicator 82 General driving notes 168
Glass sunroof, refer to Panor‐ amic glass sunroof 45
Glove compartment 159
Gross vehicle weight, ap‐ proved 232
H
Handbrake, refer to parking brake 66
Hand-held transmitter, alter‐ nating code 150
Hazard warning flashers 219
Head airbags 95
Headlamp control, auto‐ matic 91
Headlamp courtesy delay fea‐ ture 90
Headlamp flasher 67
Headlamp glass 208
Headlamps 209
Headlamps, care 226
Headlamp washer system 67
Headliner 15
Head restraints 48
Head restraints, front 52
Head restraints, rear 53
Head-up Display 88
Head-up Display, care 228
Heavy cargo, stowing 172
Height, vehicle 232
High-beam Assistant 92
High beams 67
High beams/low beams, refer to High-beam Assistant 92
Hills 170
Hill start assistant, refer to Drive-off assistant 119
Hints 6
Holder for beverages 161
Homepage 6
Hood 200
Horn 12
Hot exhaust system 169
HUD Head-up Display 88 Seite 237Everything from A to ZReference237
Online Edition for Part no. 01 40 2 925 793 - II/14
Page 242 of 244
Traction control 116
TRACTION program, Dy‐ namic Driving Control 116
Transmission, automatic 70
Transmission, manual 70
Transporting children safely 58
Tread, tires 195
Trip computer 86
Triple turn signal activa‐ tion 67
Trip odometer 80
Truck for tow-starting/ towing 222
Turning circle 232
Turning circle lines, rearview camera 133
Turn signals, operation 66
U Unintentional alarm 43
Units of measure 88
Universal remote control 149
Unlock button, automatic transmission 71
Unlocking/locking via door lock 36
Unlocking/locking with re‐ mote control 35
Unlocking, settings 41
Updates made after the edito‐ rial deadline 6
Upholstery care 227
USB interface 154
V Variable sport steering 117
Vehicle battery 216
Vehicle battery, replac‐ ing 216
Vehicle, breaking in 168
Vehicle care 226
Vehicle equipment 6 Vehicle identification number,
refer to Identification num‐
ber in the engine compart‐
ment 199
Vehicle jack 216
Vehicle paint 226
Vehicle storage 228
Vehicle wash 225
Ventilation 147
Ventilation, refer to Parked- car ventilation 148
Voice activation system 24
W Warning indicators 77
Warning lamps 77
Warning messages, refer to Check Control 77
Warning triangle 220
Washer fluid 70
Washer nozzles, wind‐ shield 69
Washer system 67
Washing, vehicle 225
Water on roads 169
Weights 232
Welcome lamps 90
Wheel base, vehicle 232
Wheel cleaner 227
Wheels, changing 196
Wheels, everything on wheels and tires 191
Wheels, Flat Tire Monitor FTM 101
Wheels, Tire Pressure Moni‐ tor TPM 98
Width, vehicle 232
Window defroster, rear 143, 147
Windows, powered 44
Windshield washer fluid 70
Windshield washer noz‐ zles 69
Windshield washer sys‐ tem 67 Windshield wiper 67
Windshield wipers, fold-out position 69
Winter diesel 187
Winter storage, care 228
Winter tires, suitable tires 197
Winter tires, tread 195
Wiper blades, replacing 207
Wiper fluid 70
Wiper system 67
Wood, care 227
Word match concept, naviga‐ tion 23
Wrench, see Onboard vehicle tool kit 207
X
xDrive 116
Xenon headlamps, bulb re‐ placement 211 Seite 242ReferenceEverything from A to Z242
Online Edition for Part no. 01 40 2 925 793 - II/14