2014 BMW 3 SERIES SPORTS WAGON pre heat
[x] Cancel search: pre heatPage 42 of 253
Opening the tailgateNote the opening height of the tailgate
The tailgate swings back and up when it
opens. Ensure that there is sufficient clearance
when the tailgate opens; otherwise, damage
may result.◀
Press button on the remote control for
approx. 1 second.
The closed tailgate opens automatically, re‐
gardless of whether the vehicle is locked or un‐
locked.
Depending on the features and the country
version, it is also possible to have door un‐
locked. Create the settings, refer to page 44.
If the doors were not unlocked, the tailgate is
locked again as soon as it closes.
Do not place the remote control in the
cargo area
Take the remote control with you and do not
leave it in the cargo area; otherwise, the re‐
mote control is locked inside the vehicle when
the tailgate is closed.◀
Provide edge protection
Sharp objects or those with edges can
hit the rear window while driving and damage the heat conductors of the rear window. Pro‐
vide edge protection.◀
Malfunction
Remote control detection by the vehicle can
among others be malfunctioning under the fol‐
lowing circumstances:▷Interference of the radio connection from
transmission towers or other equipment
with high transmit power.▷Shielding of the remote control due to
metal objects.▷Interference of the radio connection from
mobile phones or other electronic devices
in direct proximity.Do not transport the remote control together
with metal objects or electronic devices.
In the case of interference, the vehicle can also
be unlocked and locked from the outside with‐
out remote control, refer to page 38.
For US owners only
The transmitter and receiver units comply with
part 15 of the FCC/Federal Communication
Commission regulations. Operation is gov‐
erned by the following:
FCC ID:▷LX8766S.▷LX8766E.▷LX8CAS.▷LX8CAS2.▷MYTCAS4.
Compliance statement:
This device complies with part 15 of the FCC
Rules. Operation is subject to the following
two conditions:
▷This device may not cause harmful inter‐
ference, and▷this device must accept any interference
received, including interference that may
cause undesired operation.
Any unauthorized modifications or changes to
these devices could void the user's authority to
operate this equipment.
Without remote control
From the outside Locking from the outside
Do not lock the vehicle from the outside
with people inside the car, as the vehicle can‐
not be unlocked from inside without special
knowledge.◀
Seite 38ControlsOpening and closing38
Online Edition for Part no. 01 40 2 956 752 - X/14
Page 44 of 253
TailgateAutomatic tailgate operation
Adjusting the opening height
You can set how far the tailgate should open.
Adjusting the opening height
When adjusting the opening height, en‐
sure that there is a clearance of at least
4 in/10 cm above the tailgate. Otherwise, the
ceiling may not be high enough for the open
tailgate if the loading situation changes.◀1."Settings"2."Tailgate"3.Turn the controller until the desired open‐
ing height is selected.
Opening
Note the opening height of the tailgate
The tailgate swings back and up when it
opens. Ensure that there is sufficient clearance
when the tailgate opens; otherwise, damage
may result.
Adjust the opening height of the tailgate ac‐
cording to the given situation.◀
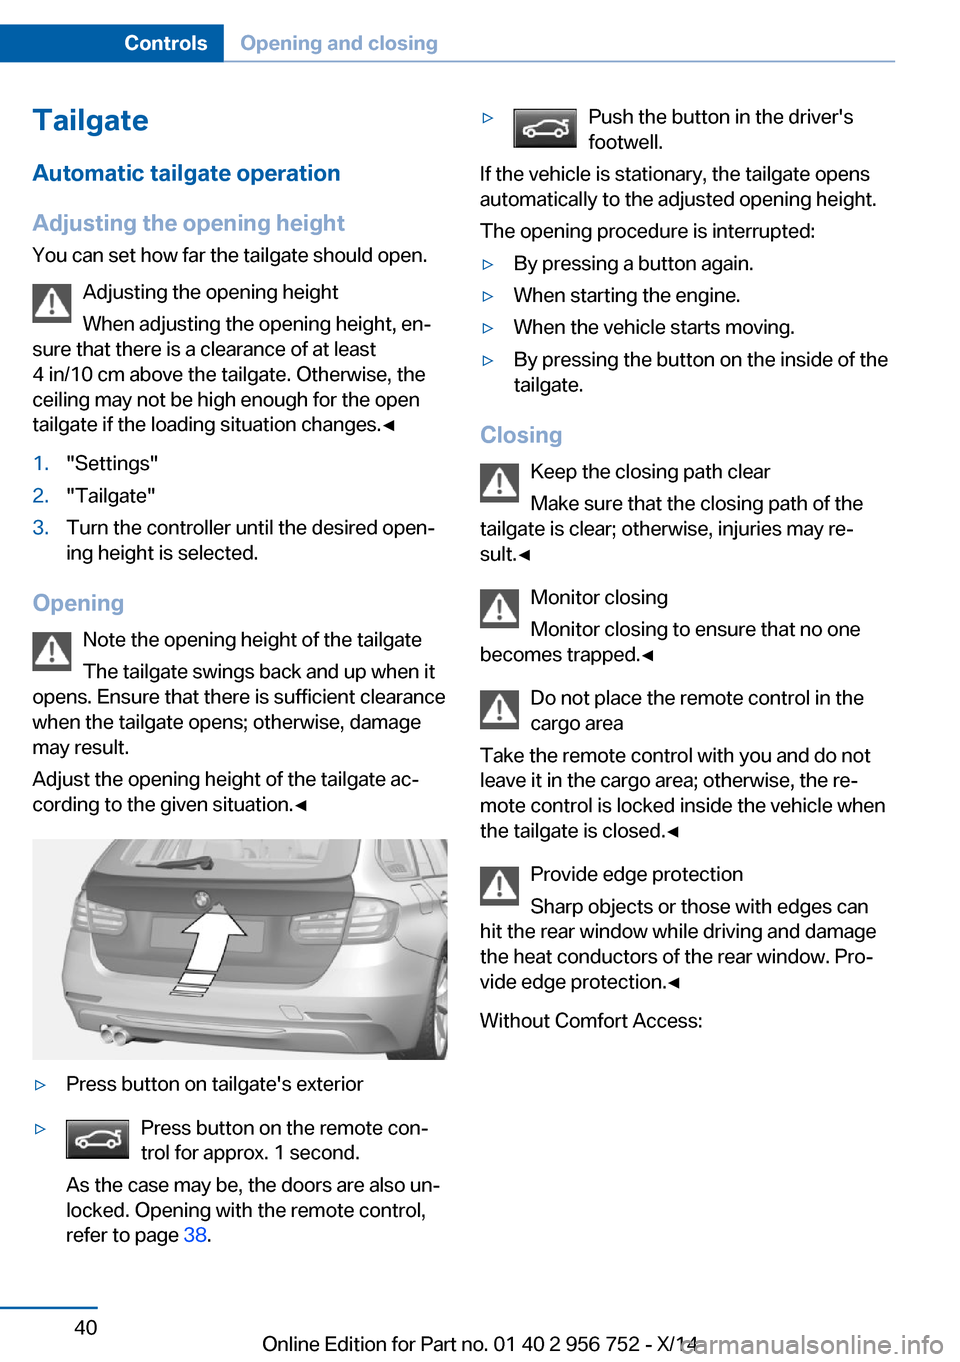
▷Press button on tailgate's exterior▷Press button on the remote con‐
trol for approx. 1 second.
As the case may be, the doors are also un‐
locked. Opening with the remote control,
refer to page 38.▷Push the button in the driver's
footwell.
If the vehicle is stationary, the tailgate opens
automatically to the adjusted opening height.
The opening procedure is interrupted:
▷By pressing a button again.▷When starting the engine.▷When the vehicle starts moving.▷By pressing the button on the inside of the
tailgate.
Closing
Keep the closing path clear
Make sure that the closing path of the
tailgate is clear; otherwise, injuries may re‐
sult.◀
Monitor closing
Monitor closing to ensure that no one
becomes trapped.◀
Do not place the remote control in the
cargo area
Take the remote control with you and do not
leave it in the cargo area; otherwise, the re‐
mote control is locked inside the vehicle when the tailgate is closed.◀
Provide edge protection
Sharp objects or those with edges can
hit the rear window while driving and damage the heat conductors of the rear window. Pro‐
vide edge protection.◀
Without Comfort Access:
Seite 40ControlsOpening and closing40
Online Edition for Part no. 01 40 2 956 752 - X/14
Page 45 of 253
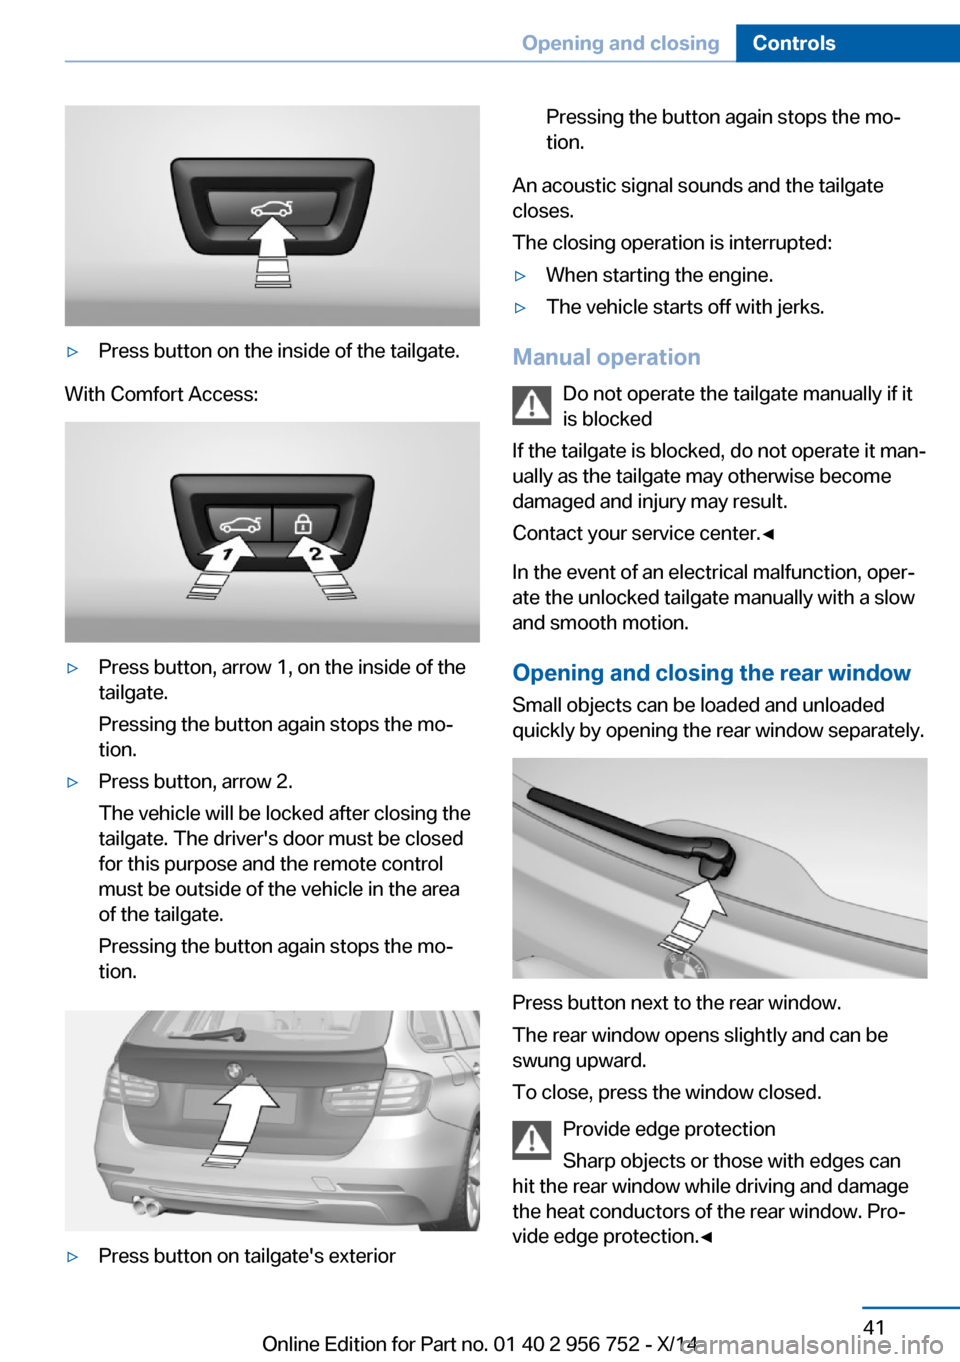
▷Press button on the inside of the tailgate.
With Comfort Access:
▷Press button, arrow 1, on the inside of the
tailgate.
Pressing the button again stops the mo‐
tion.▷Press button, arrow 2.
The vehicle will be locked after closing the
tailgate. The driver's door must be closed
for this purpose and the remote control
must be outside of the vehicle in the area
of the tailgate.
Pressing the button again stops the mo‐
tion.▷Press button on tailgate's exteriorPressing the button again stops the mo‐
tion.
An acoustic signal sounds and the tailgate
closes.
The closing operation is interrupted:
▷When starting the engine.▷The vehicle starts off with jerks.
Manual operation
Do not operate the tailgate manually if it
is blocked
If the tailgate is blocked, do not operate it man‐
ually as the tailgate may otherwise become
damaged and injury may result.
Contact your service center.◀
In the event of an electrical malfunction, oper‐
ate the unlocked tailgate manually with a slow
and smooth motion.
Opening and closing the rear window
Small objects can be loaded and unloaded
quickly by opening the rear window separately.
Press button next to the rear window.
The rear window opens slightly and can be
swung upward.
To close, press the window closed.
Provide edge protection
Sharp objects or those with edges can
hit the rear window while driving and damage
the heat conductors of the rear window. Pro‐
vide edge protection.◀
Seite 41Opening and closingControls41
Online Edition for Part no. 01 40 2 956 752 - X/14
Page 58 of 253
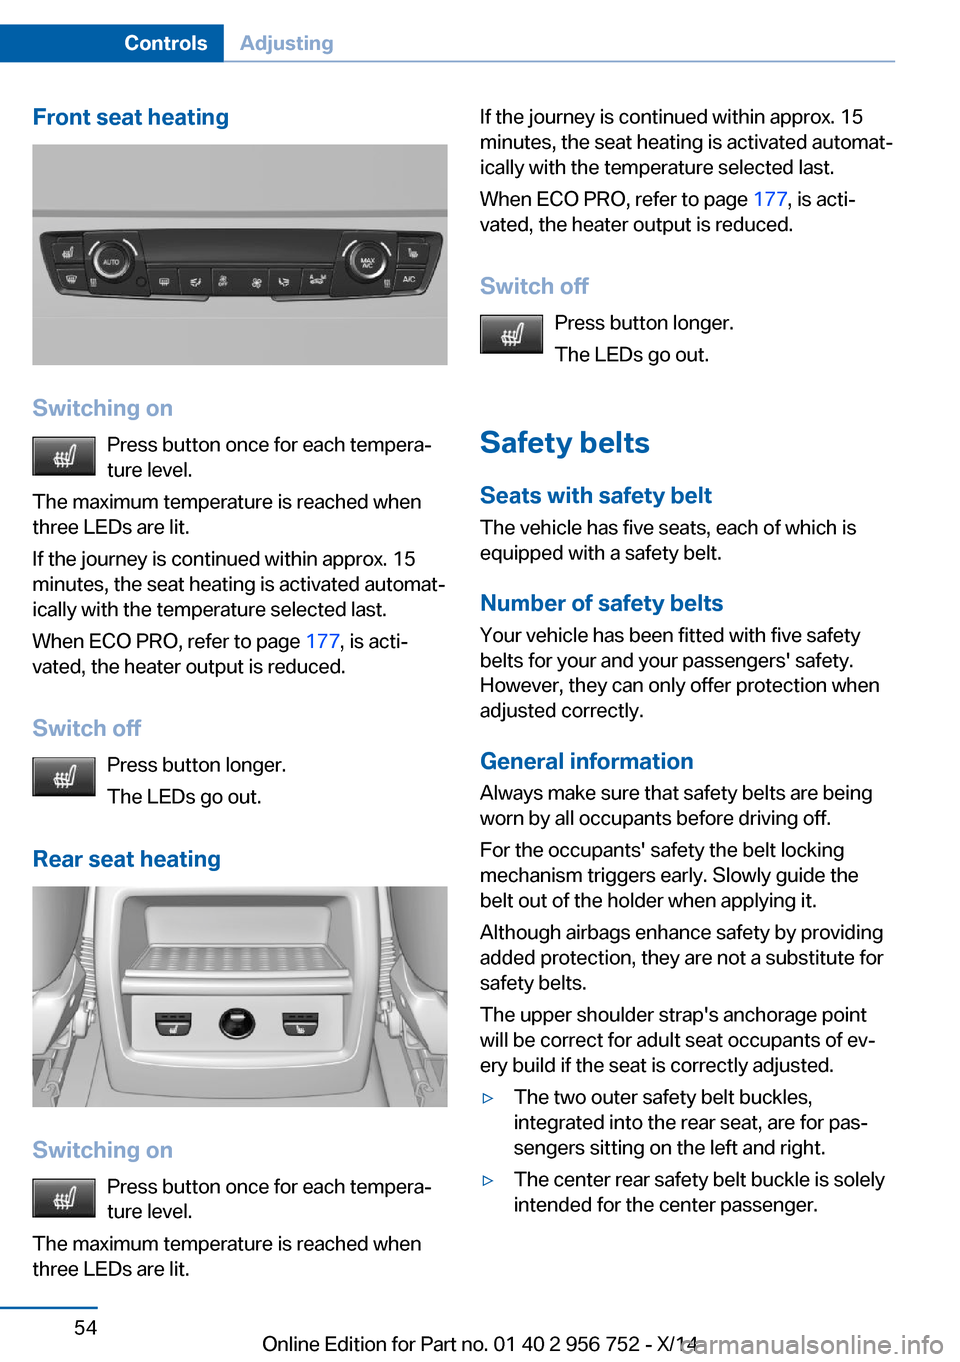
Front seat heating
Switching onPress button once for each tempera‐
ture level.
The maximum temperature is reached when
three LEDs are lit.
If the journey is continued within approx. 15
minutes, the seat heating is activated automat‐
ically with the temperature selected last.
When ECO PRO, refer to page 177, is acti‐
vated, the heater output is reduced.
Switch off Press button longer.
The LEDs go out.
Rear seat heating
Switching on Press button once for each tempera‐
ture level.
The maximum temperature is reached when
three LEDs are lit.
If the journey is continued within approx. 15
minutes, the seat heating is activated automat‐
ically with the temperature selected last.
When ECO PRO, refer to page 177, is acti‐
vated, the heater output is reduced.
Switch off Press button longer.
The LEDs go out.
Safety belts
Seats with safety belt The vehicle has five seats, each of which is
equipped with a safety belt.
Number of safety belts
Your vehicle has been fitted with five safety
belts for your and your passengers' safety.
However, they can only offer protection when
adjusted correctly.
General information Always make sure that safety belts are being
worn by all occupants before driving off.
For the occupants' safety the belt locking
mechanism triggers early. Slowly guide the
belt out of the holder when applying it.
Although airbags enhance safety by providing
added protection, they are not a substitute for
safety belts.
The upper shoulder strap's anchorage point
will be correct for adult seat occupants of ev‐
ery build if the seat is correctly adjusted.▷The two outer safety belt buckles,
integrated into the rear seat, are for pas‐
sengers sitting on the left and right.▷The center rear safety belt buckle is solely
intended for the center passenger.Seite 54ControlsAdjusting54
Online Edition for Part no. 01 40 2 956 752 - X/14
Page 63 of 253
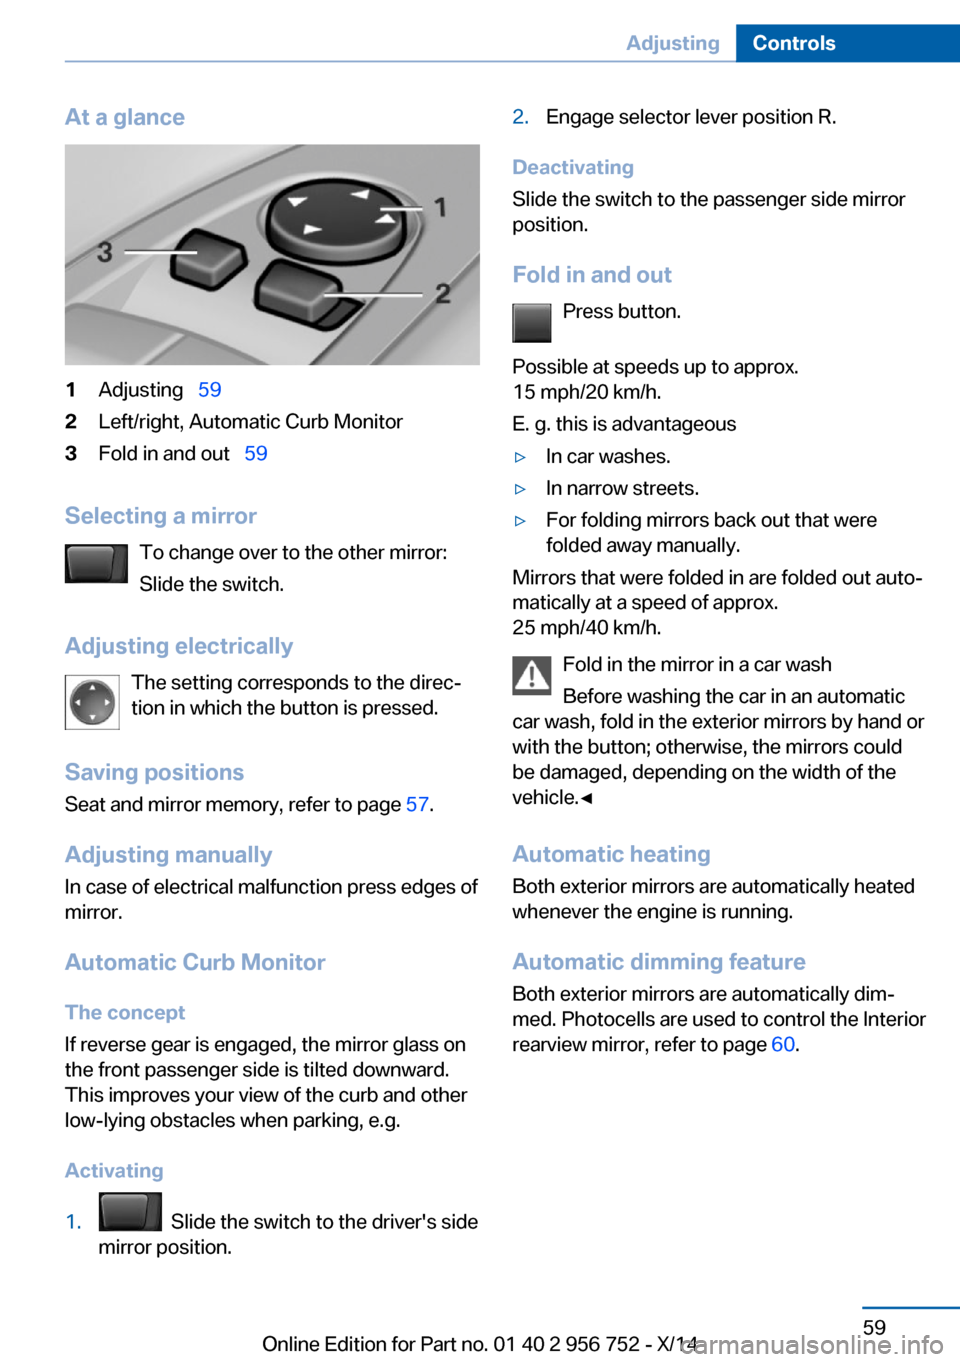
At a glance1Adjusting 592Left/right, Automatic Curb Monitor3Fold in and out 59
Selecting a mirror
To change over to the other mirror:
Slide the switch.
Adjusting electrically The setting corresponds to the direc‐
tion in which the button is pressed.
Saving positions
Seat and mirror memory, refer to page 57.
Adjusting manually
In case of electrical malfunction press edges of
mirror.
Automatic Curb MonitorThe concept
If reverse gear is engaged, the mirror glass on
the front passenger side is tilted downward.
This improves your view of the curb and other
low-lying obstacles when parking, e.g.
Activating
1. Slide the switch to the driver's side
mirror position.2.Engage selector lever position R.
Deactivating
Slide the switch to the passenger side mirror
position.
Fold in and out Press button.
Possible at speeds up to approx.
15 mph/20 km/h.
E. g. this is advantageous
▷In car washes.▷In narrow streets.▷For folding mirrors back out that were
folded away manually.
Mirrors that were folded in are folded out auto‐
matically at a speed of approx.
25 mph/40 km/h.
Fold in the mirror in a car wash
Before washing the car in an automatic
car wash, fold in the exterior mirrors by hand or
with the button; otherwise, the mirrors could
be damaged, depending on the width of the
vehicle.◀
Automatic heating
Both exterior mirrors are automatically heated
whenever the engine is running.
Automatic dimming feature Both exterior mirrors are automatically dim‐
med. Photocells are used to control the Interior
rearview mirror, refer to page 60.
Seite 59AdjustingControls59
Online Edition for Part no. 01 40 2 956 752 - X/14
Page 64 of 253
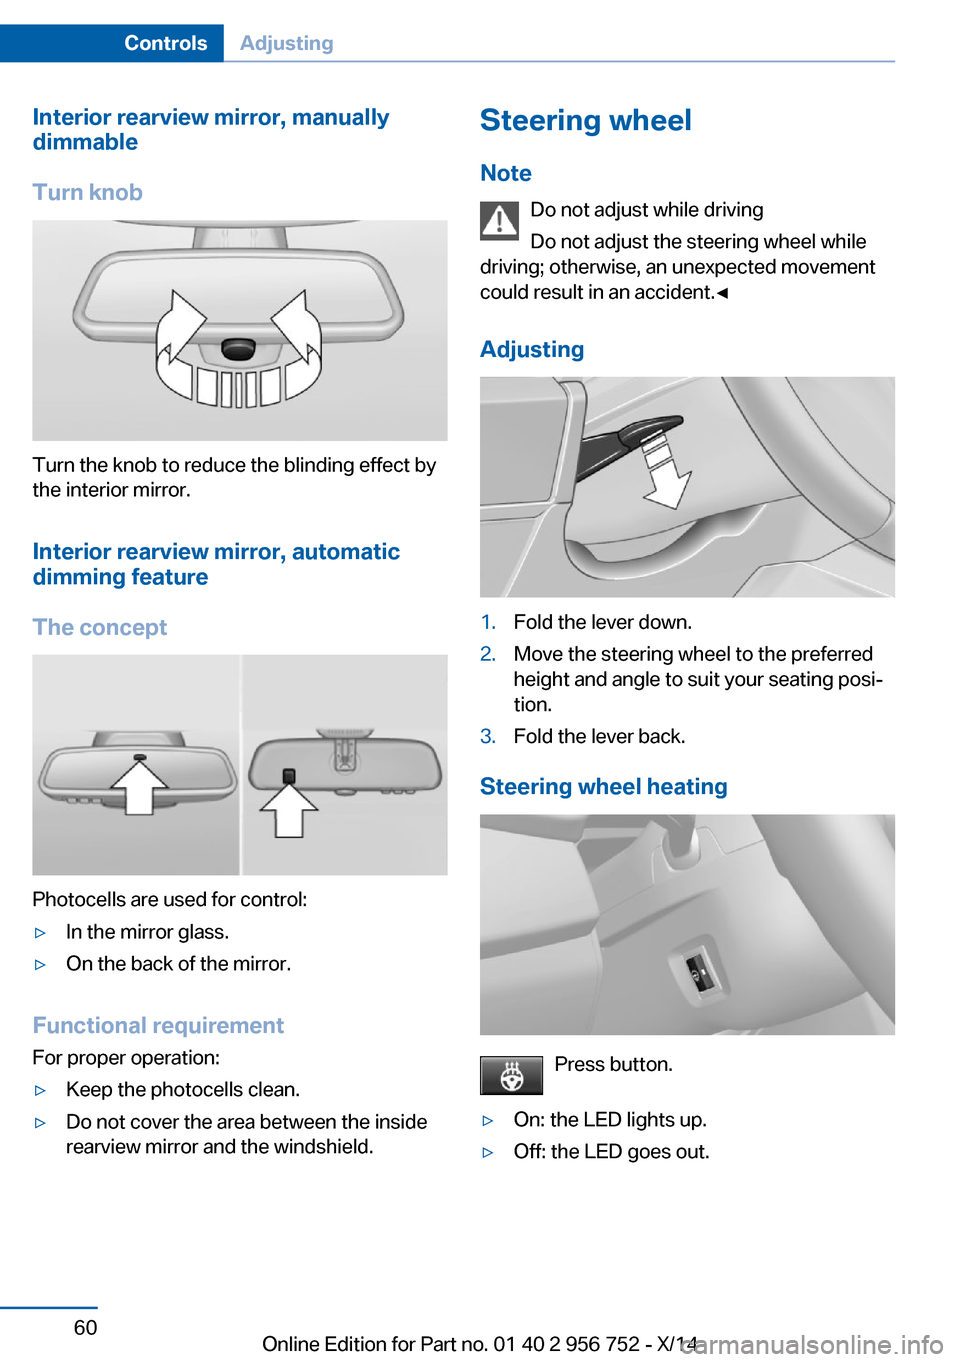
Interior rearview mirror, manually
dimmable
Turn knob
Turn the knob to reduce the blinding effect by
the interior mirror.
Interior rearview mirror, automaticdimming feature
The concept
Photocells are used for control:
▷In the mirror glass.▷On the back of the mirror.
Functional requirement For proper operation:
▷Keep the photocells clean.▷Do not cover the area between the inside
rearview mirror and the windshield.Steering wheel
Note Do not adjust while driving
Do not adjust the steering wheel while
driving; otherwise, an unexpected movement
could result in an accident.◀
Adjusting1.Fold the lever down.2.Move the steering wheel to the preferred
height and angle to suit your seating posi‐
tion.3.Fold the lever back.
Steering wheel heating
Press button.
▷On: the LED lights up.▷Off: the LED goes out.Seite 60ControlsAdjusting60
Online Edition for Part no. 01 40 2 956 752 - X/14
Page 70 of 253
Radio ready stateActivate radio-ready state:▷When the engine is running: press the
Start/Stop button.
Some electronic systems/power consumers
remain ready for operation.
The radio-ready state switches off automati‐
cally:
▷After approx. 8 minutes.▷When the vehicle is locked using the cen‐
tral locking system.▷Shortly before the battery is discharged
completely, so that the engine can still be
started.
The radio-ready state remains active if, e.g.,
the ignition is automatically switched off for the
following reasons:
▷Opening or closing the driver's door.▷Unfastening of the driver's safety belt.▷When automatically switching from low
beams to parking lights.
Starting the engine
Hints Enclosed areas
Do not let the engine run in enclosed
areas, since breathing in exhaust fumes may
lead to loss of consciousness and death. The
exhaust gases contain carbon monoxide, an
odorless and colorless but highly toxic gas.◀
Unattended vehicle
Do not leave the vehicle unattended with
the engine running; doing so poses a risk of
danger.
Before leaving the vehicle with the engine run‐
ning, set the parking brake and place the trans‐
mission in selector lever position P or N to pre‐
vent the vehicle from moving.◀
Repeated starting in quick succession
Avoid trying to start the vehicle repeat‐
edly and in quick succession. Otherwise, the
fuel is not burned or is inadequately burned,
posing a risk of overheating and damage to the
catalytic converter.◀
Do not wait for the engine to warm-up while
the vehicle remains stationary. Start driving at
moderate engine speeds.
Diesel engine
If the engine is cold and temperatures are be‐
low approx. 32 ℉/0 ℃, the start process may
be delayed somewhat due to automatic pre‐
heating.
A Check Control message is displayed.
Steptronic transmission
Starting the engine1.Depress the brake pedal.2.Press the Start/Stop button.
The ignition is activated automatically for a
certain time and is stopped as soon as the en‐
gine starts.
Manual transmission
Starting the engine
1.Depress the brake pedal.2.Press on the clutch pedal and shift to neu‐
tral.3.Press the Start/Stop button.
The ignition is activated automatically for a
certain time and is stopped as soon as the en‐
gine starts.
Seite 66ControlsDriving66
Online Edition for Part no. 01 40 2 956 752 - X/14
Page 72 of 253
The display indicates that the
conditions for an automatic en‐
gine stop have not been met.
Note The engine is not switched off automatically in
the following situations:▷External temperature too low.▷The external temperature is high and auto‐
matic climate control is running.▷The car's interior has not yet been heated
or cooled to the required level.▷The engine is not yet at operating temper‐
ature.▷The wheels are at a sharp angle or the
steering wheel is being turned.▷After driving in reverse.▷Fogging of the windows when the auto‐
matic climate control is switched on.▷Vehicle battery is heavily discharged.▷At higher elevations.▷The engine compartment lid is unlocked.▷The parking assistant is activated.▷Stop-and-go traffic.▷The selector lever is in position N, M/S or
R.▷Use of fuel with high ethanol content.
Starting the engine
The engine starts automatically under the fol‐
lowing conditions:
▷Steptronic transmission:
By releasing the brake pedal.▷Manual transmission:
The clutch pedal is pressed.
After the engine starts, accelerate as usual.
Safety mode
After the engine switches off automatically, it
will not start again automatically if any one of
the following conditions are met.▷The driver's safety belt is unbuckled and
the driver's door is open.▷The hood was unlocked.
Some indicator lights light up for a varied
length of time.
The engine can only be started via the Start/
Stop button.
Note Even if driving off was not intended, the deacti‐
vated engine starts up automatically in the fol‐
lowing situations:
▷Excessive warming of the car's interior
when the cooling function is switched on.▷The steering wheel is turned.▷Steptronic transmission: change from se‐
lector lever position D to R, N or M/S.▷Steptronic transmission: change from se‐
lector lever position P to N, D, R or M/S.▷The vehicle begins rolling.▷Fogging of the windows when the auto‐
matic climate control is switched on.▷Vehicle battery is heavily discharged.▷Excessive cooling of the car's interior when
the heating is switched on.▷Low brake vacuum pressure; this can oc‐
cur, e.g., if the brake pedal is depressed a
number of times in succession.Seite 68ControlsDriving68
Online Edition for Part no. 01 40 2 956 752 - X/14