2014 BMW 3 SERIES SPORTS WAGON cargo floor
[x] Cancel search: cargo floorPage 164 of 253
Before closing the rear window or tailgate,
push the cargo cover down until it locks into
place.
Removing
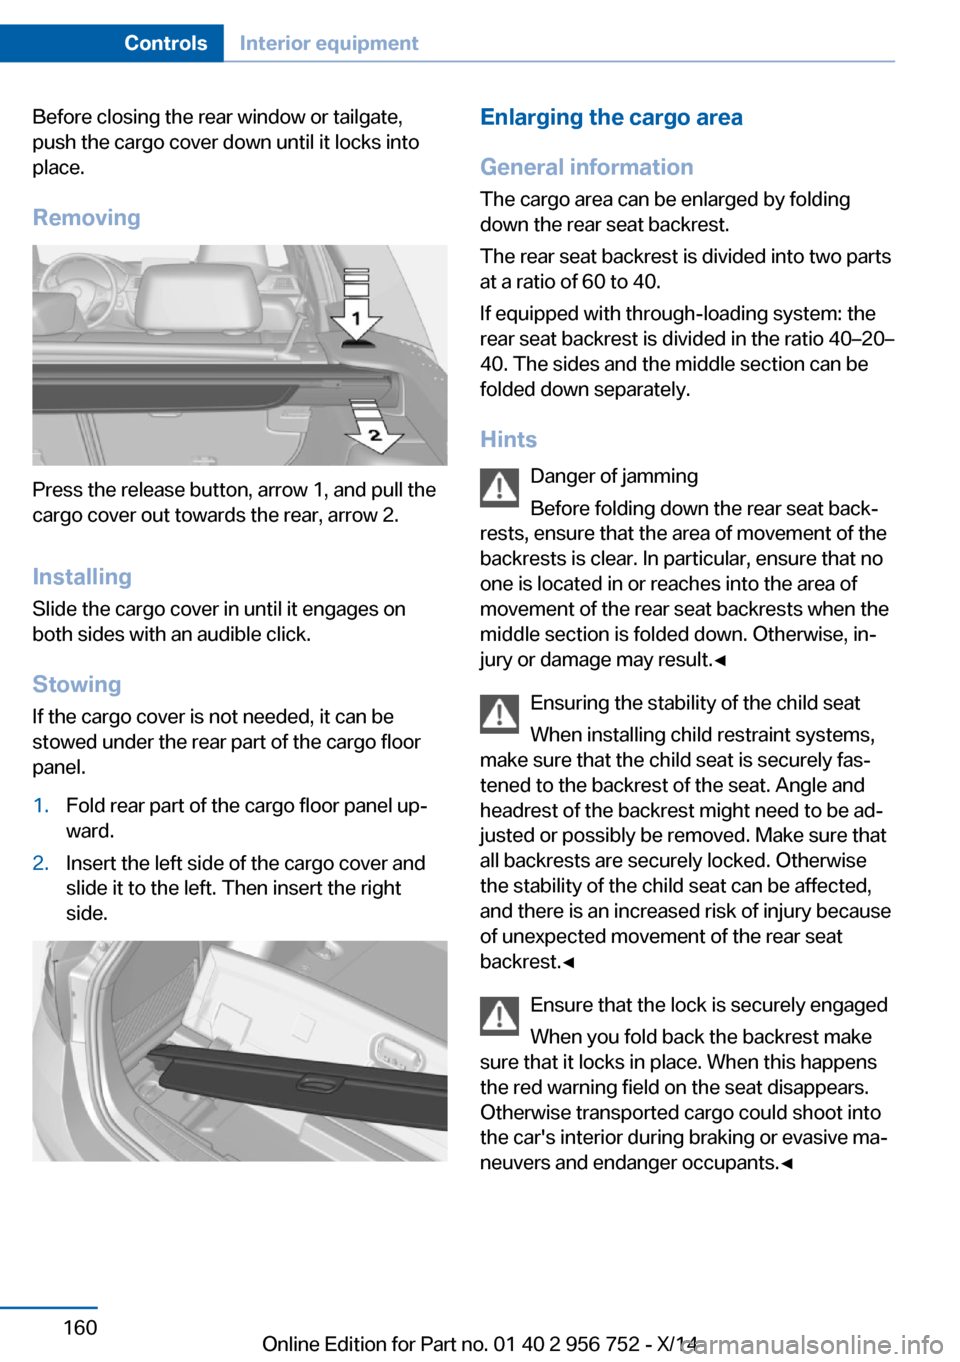
Press the release button, arrow 1, and pull the
cargo cover out towards the rear, arrow 2.
Installing Slide the cargo cover in until it engages on
both sides with an audible click.
Stowing
If the cargo cover is not needed, it can be
stowed under the rear part of the cargo floor
panel.
1.Fold rear part of the cargo floor panel up‐
ward.2.Insert the left side of the cargo cover and
slide it to the left. Then insert the right
side.Enlarging the cargo area
General information
The cargo area can be enlarged by folding
down the rear seat backrest.
The rear seat backrest is divided into two parts
at a ratio of 60 to 40.
If equipped with through-loading system: the
rear seat backrest is divided in the ratio 40–20–
40. The sides and the middle section can be
folded down separately.
Hints Danger of jamming
Before folding down the rear seat back‐
rests, ensure that the area of movement of the
backrests is clear. In particular, ensure that no
one is located in or reaches into the area of
movement of the rear seat backrests when the
middle section is folded down. Otherwise, in‐
jury or damage may result.◀
Ensuring the stability of the child seat
When installing child restraint systems,
make sure that the child seat is securely fas‐
tened to the backrest of the seat. Angle and
headrest of the backrest might need to be ad‐
justed or possibly be removed. Make sure that
all backrests are securely locked. Otherwise
the stability of the child seat can be affected,
and there is an increased risk of injury because
of unexpected movement of the rear seat
backrest.◀
Ensure that the lock is securely engaged
When you fold back the backrest make
sure that it locks in place. When this happens
the red warning field on the seat disappears.
Otherwise transported cargo could shoot into
the car's interior during braking or evasive ma‐
neuvers and endanger occupants.◀Seite 160ControlsInterior equipment160
Online Edition for Part no. 01 40 2 956 752 - X/14
Page 171 of 253
3.Hook the retaining strap into the fixing
point.4.Press button 1 to tighten the retaining
strap.
To secure larger loads, the retaining straps can
also be interlocked with one another.
Removing the brackets
Pull the bracket vertically out of the fixing
point.
Stowing the adaptive retaining system If the adaptive retaining system is not needed,
it can be stowed under the rear part of the
cargo floor panel. Use the tension straps to se‐
cure it more firmly.
Floor net
The floor net can also be used to Secure the
load, refer to page 174, and to store small
parts.
Storage compartment under the cargofloor panel
Maximum load
To avoid damage to the vehicle, do not
exceed a maximum permitted load of 44 lbs/
20 kg in the storage compartment under the
cargo floor panel.◀
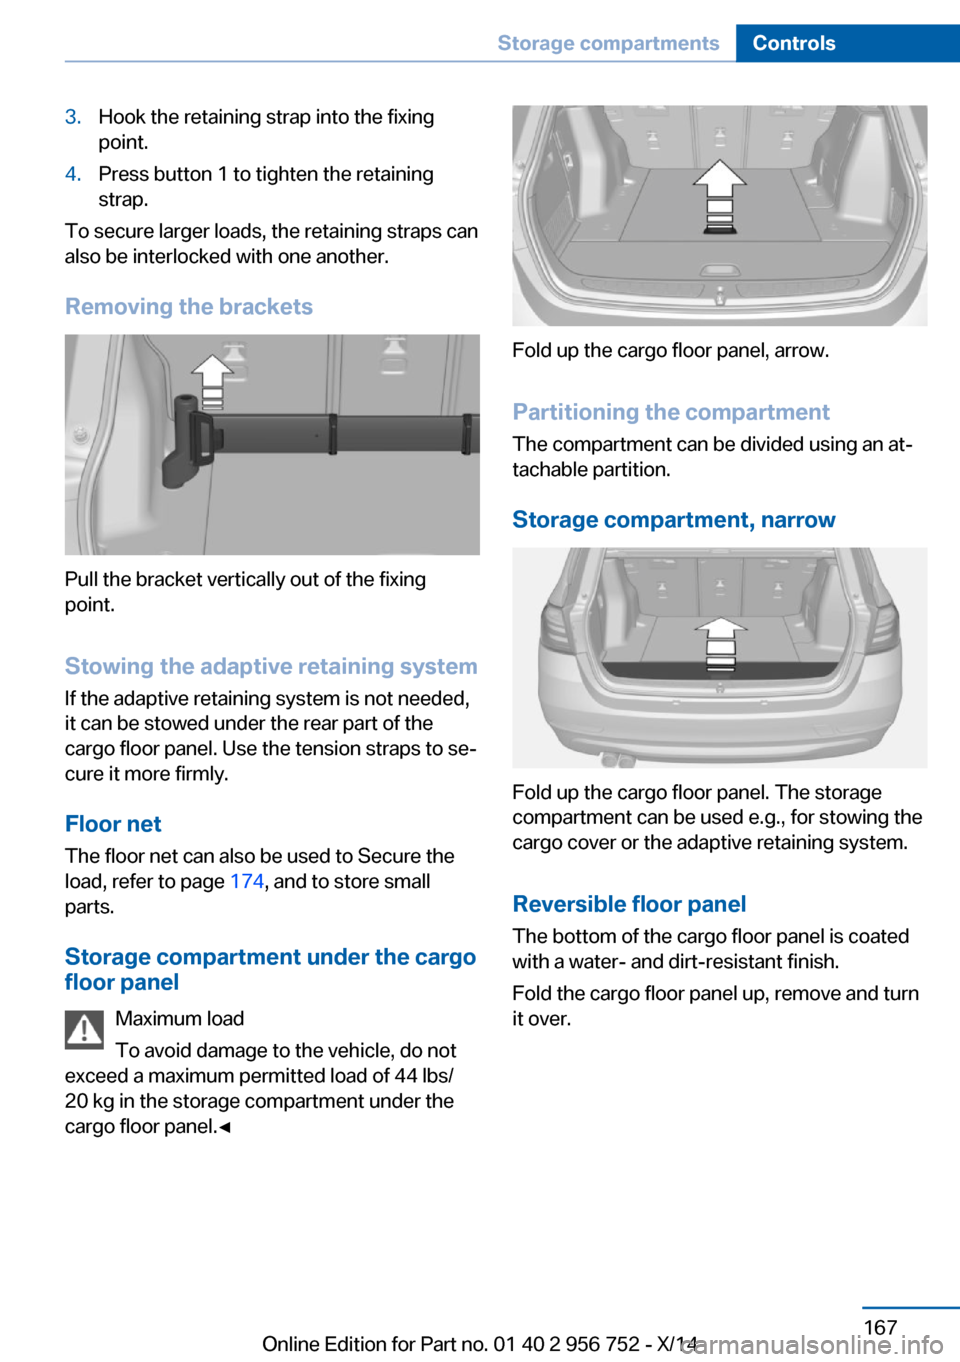
Fold up the cargo floor panel, arrow.
Partitioning the compartment The compartment can be divided using an at‐
tachable partition.
Storage compartment, narrow
Fold up the cargo floor panel. The storage
compartment can be used e.g., for stowing the
cargo cover or the adaptive retaining system.
Reversible floor panel
The bottom of the cargo floor panel is coated
with a water- and dirt-resistant finish.
Fold the cargo floor panel up, remove and turn
it over.
Seite 167Storage compartmentsControls167
Online Edition for Part no. 01 40 2 956 752 - X/14
Page 191 of 253
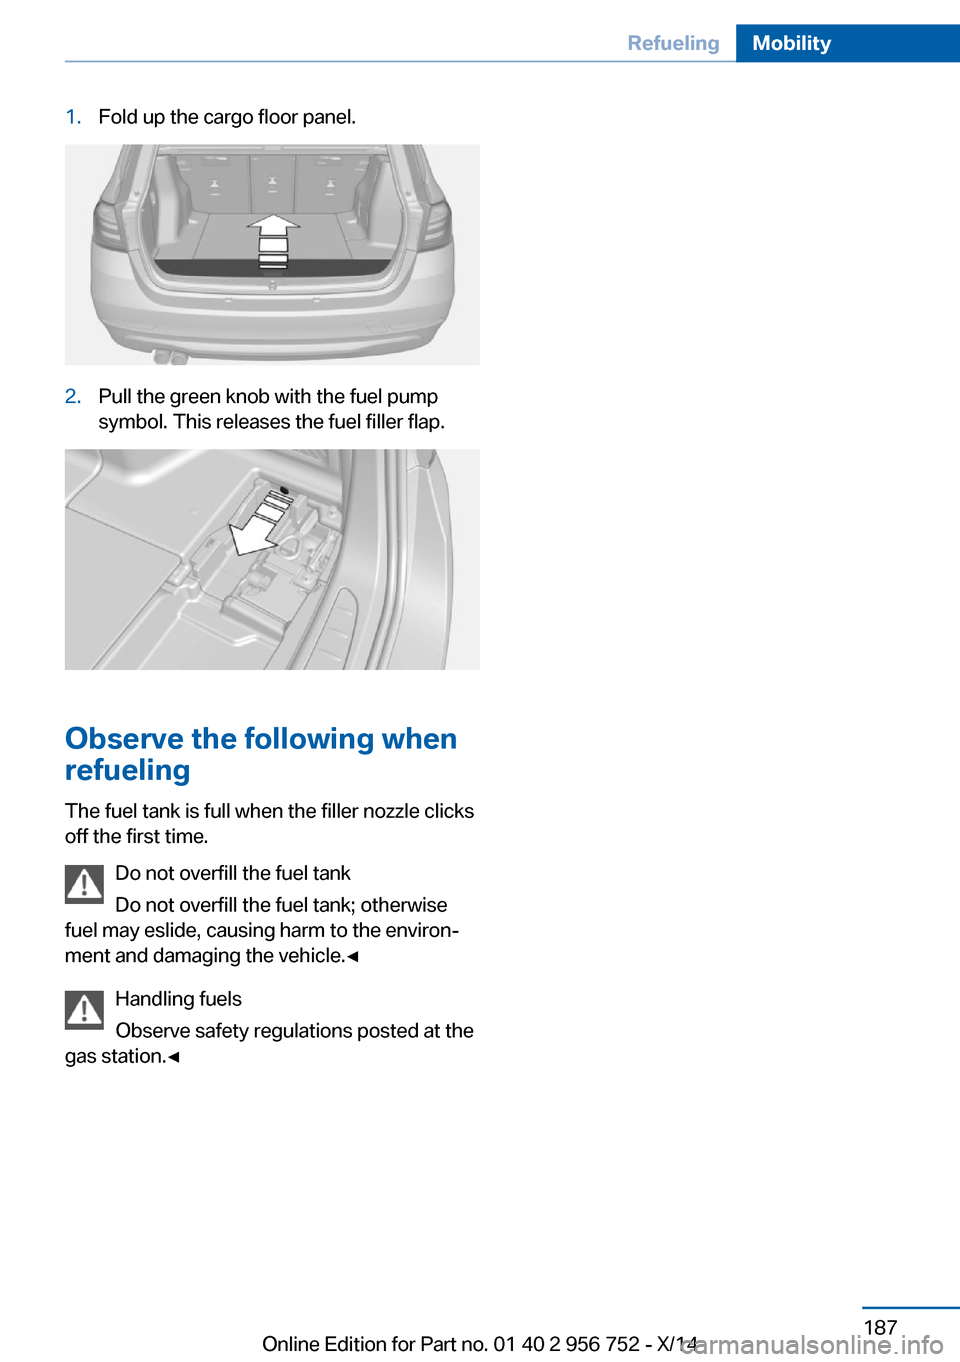
1.Fold up the cargo floor panel.2.Pull the green knob with the fuel pump
symbol. This releases the fuel filler flap.
Observe the following when
refueling
The fuel tank is full when the filler nozzle clicks
off the first time.
Do not overfill the fuel tank
Do not overfill the fuel tank; otherwise
fuel may eslide, causing harm to the environ‐
ment and damaging the vehicle.◀
Handling fuels
Observe safety regulations posted at the
gas station.◀
Seite 187RefuelingMobility187
Online Edition for Part no. 01 40 2 956 752 - X/14
Page 213 of 253
Replacing componentsVehicle features and optionsThis chapter describes all standard, country-
specific and optional features offered with the
series. It also describes features that are not
necessarily available in your car, e. g., due to
the selected options or country versions. This
also applies to safety-related functions and
systems.
Onboard vehicle tool kit
The onboard vehicle tool kit is located under
the cargo floor panel. Lift to open the slim
cover.
Wiper blade replacement
Note Do not fold down the wipers without
wiper blades
Do not fold down the wipers if wiper blades
have not been installed; this may damage the
windshield.◀
Replacing the front wiper blades
1.To change the wiper blades, fold up, refer
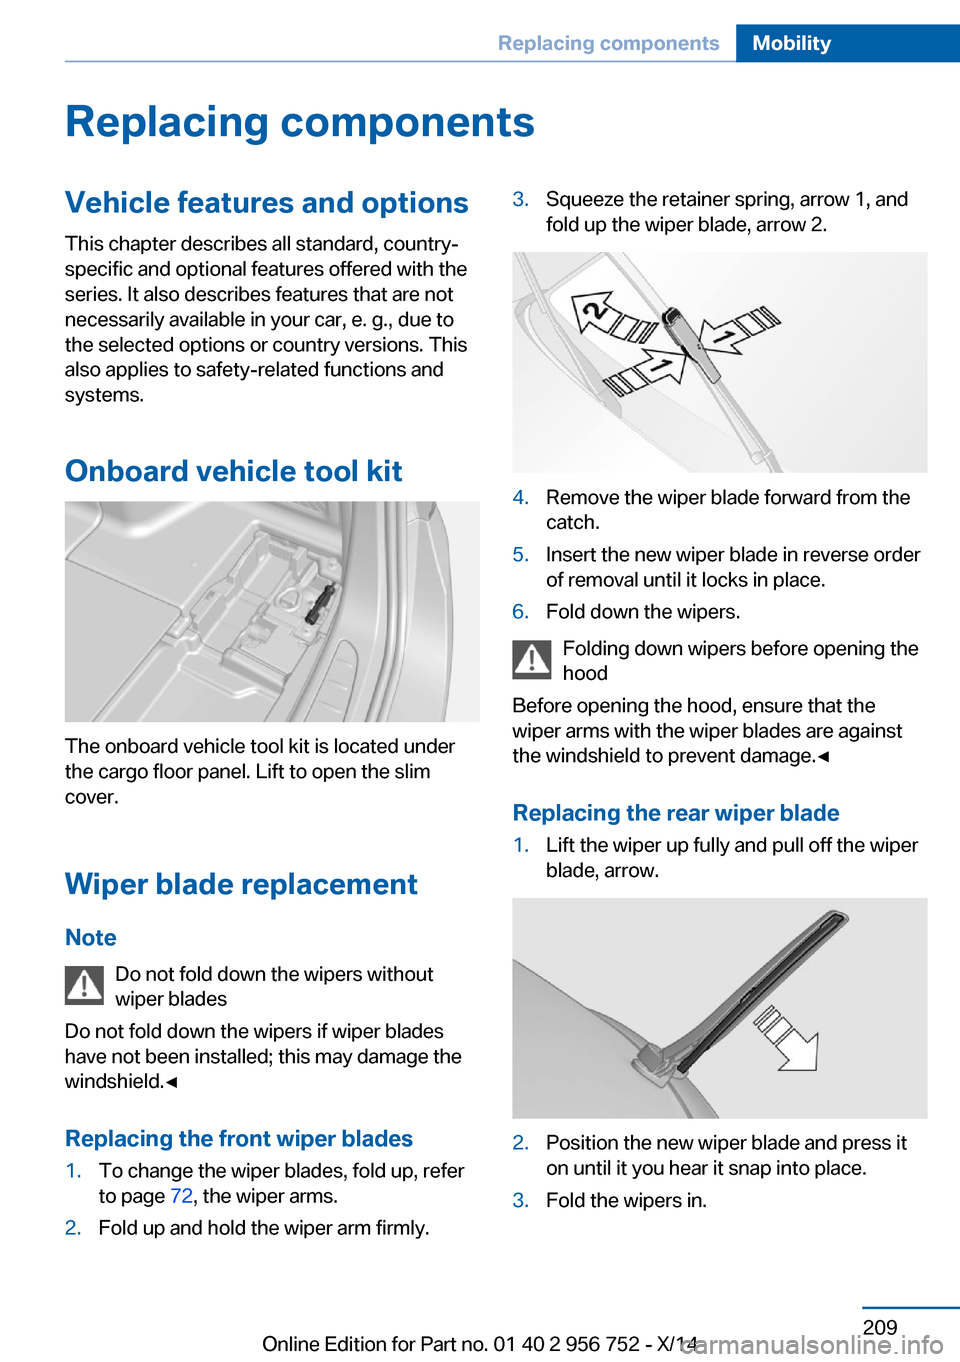
to page 72, the wiper arms.2.Fold up and hold the wiper arm firmly.3.Squeeze the retainer spring, arrow 1, and
fold up the wiper blade, arrow 2.4.Remove the wiper blade forward from the
catch.5.Insert the new wiper blade in reverse order
of removal until it locks in place.6.Fold down the wipers.
Folding down wipers before opening the hood
Before opening the hood, ensure that the
wiper arms with the wiper blades are against
the windshield to prevent damage.◀
Replacing the rear wiper blade
1.Lift the wiper up fully and pull off the wiper
blade, arrow.2.Position the new wiper blade and press it
on until it you hear it snap into place.3.Fold the wipers in.Seite 209Replacing componentsMobility209
Online Edition for Part no. 01 40 2 956 752 - X/14
Page 223 of 253
Disposing of old batteriesHave old batteries disposed of by your
service center or bring them to a recy‐
cling center.
Maintain the battery in an upright position for
transport and storage. Secure the battery so
that it does not tip over during transport.
Fuses Hints Replacing fuses
Never attempt to repair a blown fuse and
do not replace a defective fuse with a substi‐
tute of another color or amperage rating; this
could lead to a circuit overload, ultimately re‐
sulting in a fire in the vehicle.◀
Plastic tweezers and information on the fuse
types and locations are stored in the fuse box
in the cargo area.
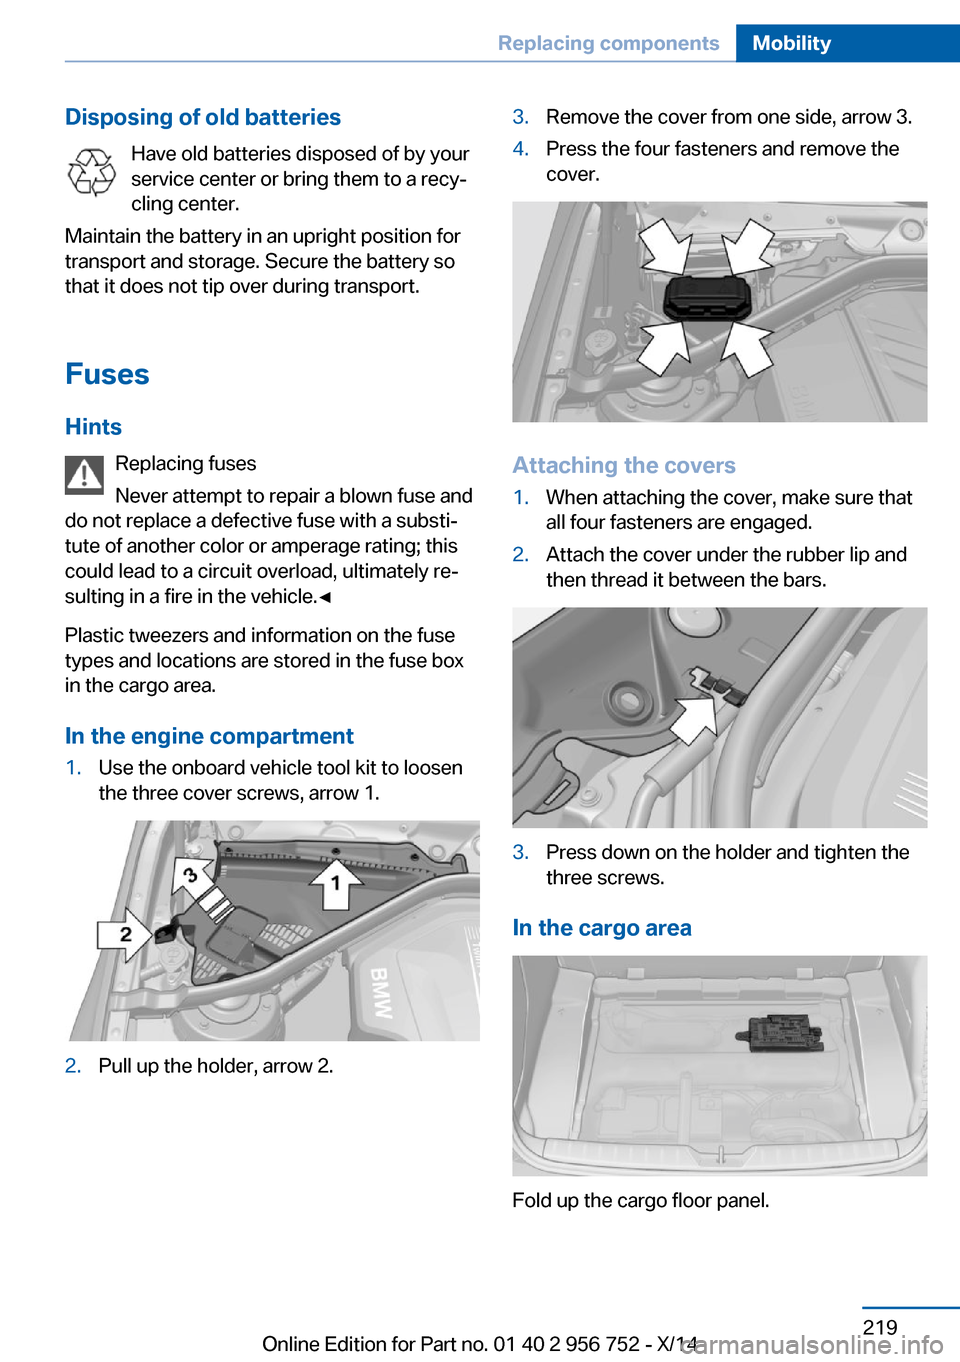
In the engine compartment1.Use the onboard vehicle tool kit to loosen
the three cover screws, arrow 1.2.Pull up the holder, arrow 2.3.Remove the cover from one side, arrow 3.4.Press the four fasteners and remove the
cover.
Attaching the covers
1.When attaching the cover, make sure that
all four fasteners are engaged.2.Attach the cover under the rubber lip and
then thread it between the bars.3.Press down on the holder and tighten the
three screws.
In the cargo area
Fold up the cargo floor panel.
Seite 219Replacing componentsMobility219
Online Edition for Part no. 01 40 2 956 752 - X/14
Page 229 of 253
Tow truck
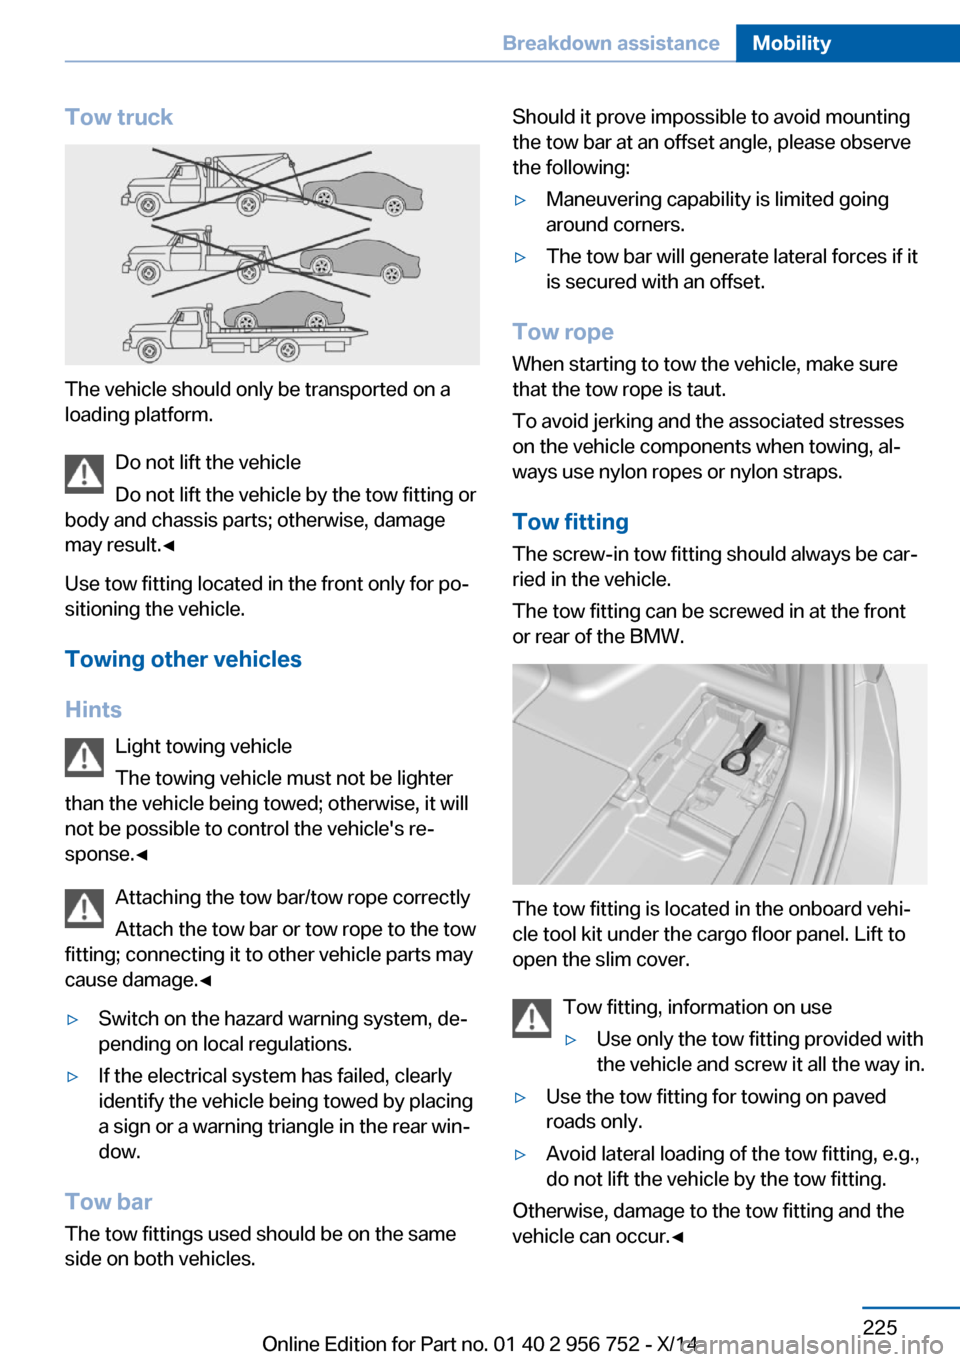
The vehicle should only be transported on a
loading platform.
Do not lift the vehicle
Do not lift the vehicle by the tow fitting or
body and chassis parts; otherwise, damage
may result.◀
Use tow fitting located in the front only for po‐
sitioning the vehicle.
Towing other vehicles
Hints Light towing vehicle
The towing vehicle must not be lighter
than the vehicle being towed; otherwise, it will
not be possible to control the vehicle's re‐
sponse.◀
Attaching the tow bar/tow rope correctly
Attach the tow bar or tow rope to the tow
fitting; connecting it to other vehicle parts may
cause damage.◀
▷Switch on the hazard warning system, de‐
pending on local regulations.▷If the electrical system has failed, clearly
identify the vehicle being towed by placing
a sign or a warning triangle in the rear win‐
dow.
Tow bar
The tow fittings used should be on the same
side on both vehicles.
Should it prove impossible to avoid mounting
the tow bar at an offset angle, please observe
the following:▷Maneuvering capability is limited going
around corners.▷The tow bar will generate lateral forces if it
is secured with an offset.
Tow rope
When starting to tow the vehicle, make sure
that the tow rope is taut.
To avoid jerking and the associated stresses
on the vehicle components when towing, al‐
ways use nylon ropes or nylon straps.
Tow fitting
The screw-in tow fitting should always be car‐
ried in the vehicle.
The tow fitting can be screwed in at the front
or rear of the BMW.
The tow fitting is located in the onboard vehi‐
cle tool kit under the cargo floor panel. Lift to
open the slim cover.
Tow fitting, information on use
▷Use only the tow fitting provided with
the vehicle and screw it all the way in.▷Use the tow fitting for towing on paved
roads only.▷Avoid lateral loading of the tow fitting, e.g.,
do not lift the vehicle by the tow fitting.
Otherwise, damage to the tow fitting and the
vehicle can occur.◀
Seite 225Breakdown assistanceMobility225
Online Edition for Part no. 01 40 2 956 752 - X/14
Page 245 of 253
Engine compartment, work‐ing in 202
Engine coolant 206
Engine idling when driving, coasting 180
Engine oil 203
Engine oil, adding 204
Engine oil additives 204
Engine oil change 205
Engine oil filler neck 204
Engine oil temperature 82
Engine oil types, alterna‐ tive 205
Engine oil types, ap‐ proved 205
Engine start during malfunc‐ tion 35
Engine start, jump-start‐ ing 222
Engine start, refer to Starting the engine 66
Engine stop 67
Engine temperature 82
Entering a car wash 227
Equipment, interior 153
Error displays, see Check Control 79
ESP Electronic Stability Pro‐ gram, refer to DSC 120
Exchanging wheels/tires 198
Exhaust system 171
Exterior mirror, automatic dimming feature 59
Exterior mirrors 58
External start 222
External temperature dis‐ play 83
External temperature warn‐ ing 83
Eyes for securing cargo 174
F
Failure message, see Check Control 79 False alarm, refer to Uninten‐
tional alarm 46
Fan, refer to Air flow 147, 150
Filler neck for engine oil 204
Fine wood, care 229
First aid kit 222
Fitting for towing, see tow fit‐ ting 225
Flat tire, changing wheels 218
Flat Tire Monitor FTM 105
Flat tire, Tire Pressure Moni‐ tor TPM 101
Flat tire, warning lamp 102, 105
Flooding 171
Floor carpet, care 230
Floor mats, care 230
Fogged up windows 147
Fold-out position, wiper 72
Foot brake 171
Front airbags 98
Front-end collision warning with braking function 110
Front-end collision warning with City Braking func‐
tion 107
Front fog lights 96
Front fog lights, front, bulb re‐ placement 214
Front lights 211
front-seat passenger airbags, automatic deactivation 100
Front-seat passenger airbags, indicator lamp 100
FTM Flat Tire Monitor 105
Fuel 188
Fuel consumption, current 84
Fuel consumption, refer to Average fuel consump‐
tion 88
Fuel filler flap 186
Fuel gauge 82
Fuel lid 186
Fuel quality 188 Fuel recommendation 188
Fuel, tank capacity 236
Fuse 219
G
Garage door opener, refer to Universal Integrated Remote
Control 153
Gasoline 188
Gear change, Steptronic transmission 74
Gear shift indicator 85
General driving notes 170
Glare shield 157
Glass sunroof, refer to Panor‐ amic glass sunroof 48
Glove compartment 163
Gross vehicle weight, ap‐ proved 235
H
Handbrake, refer to parking brake 69
Hand-held transmitter, alter‐ nating code 154
Hazard warning flashers 221
Head airbags 98
Headlight control, auto‐ matic 94
Headlight courtesy delay fea‐ ture 93
Headlight flasher 70
Headlight glass 210
Headlights 211
Headlights, care 228
Headlight washer system 70
Head restraints 51
Head restraints, front 55
Head restraints, rear 56
Head-up Display 91
Head-up Display, care 230
Heavy cargo, stowing 174
Height, vehicle 234
High-beam Assistant 95 Seite 241Everything from A to ZReference241
Online Edition for Part no. 01 40 2 956 752 - X/14