2014 BMW 228I seat adjustment
[x] Cancel search: seat adjustmentPage 43 of 218

Automatic lockingThe setting is stored for the remote control
currently in use.1."Settings"2."Doors/key"3.Select the desired function:▷"Lock if no door is opened"
The vehicle locks automatically after a
short period of time if a door is not
opened.▷"Lock after start driving"
The vehicle locks automatically after
you drive away.
Retrieving the seat and mirror settings
The driver's seat and exterior mirror positions
used last are stored for the remote control cur‐
rently in use.
When the vehicle is unlocked, these positions
are automatically retrieved if this function was
activated.
Pinch hazard when moving back the seat
If this function is used, first make sure
that the footwell behind the driver's seat is
empty. Otherwise, people can be injured or ob‐
jects damaged when the seat is moved back.◀
The adjustment procedure is interrupted:
▷When a seat position switch is pressed.▷When a button of the seat and mirror mem‐
ory is pressed.
Activating the setting
1."Settings"2."Doors/key"3."Last seat position autom."Alarm system
The conceptThe vehicle alarm system responds to:▷Opening of a door, the hood or the trunk
lid.▷Movements in the vehicle.▷Changes in the vehicle tilt, e.g., during at‐
tempts to steal a wheel or when towing the
car.▷Interruptions in battery voltage.
The alarm system briefly indicates tampering:
▷By sounding an acoustic alarm.▷By switching on the hazard warning sys‐
tem.▷By flashing the daytime running lights.
Arming and disarming the alarm
system
General information
When you lock or unlock the vehicle, either
with the remote control or via the Comfort Ac‐
cess at the door lock, the alarm system is
armed or disarmed at the same time.
Door lock and armed alarm systemThe alarm system is triggered when the door is
opened, if the vehicle is unlocked via the door
lock.
In order to terminate this alarm, unlock vehicle
with the remote control or switch on the igni‐
tion, if necessary, by emergency detection of
the remote control.
Trunk lid and armed alarm systemThe trunk lid can be opened even when the
alarm system is armed.
Press the button on the remote con‐
trol for approx. 1 second.
Seite 43Opening and closingControls43
Online Edition for Part no. 01 40 2 924 974 - X/13
Page 49 of 218

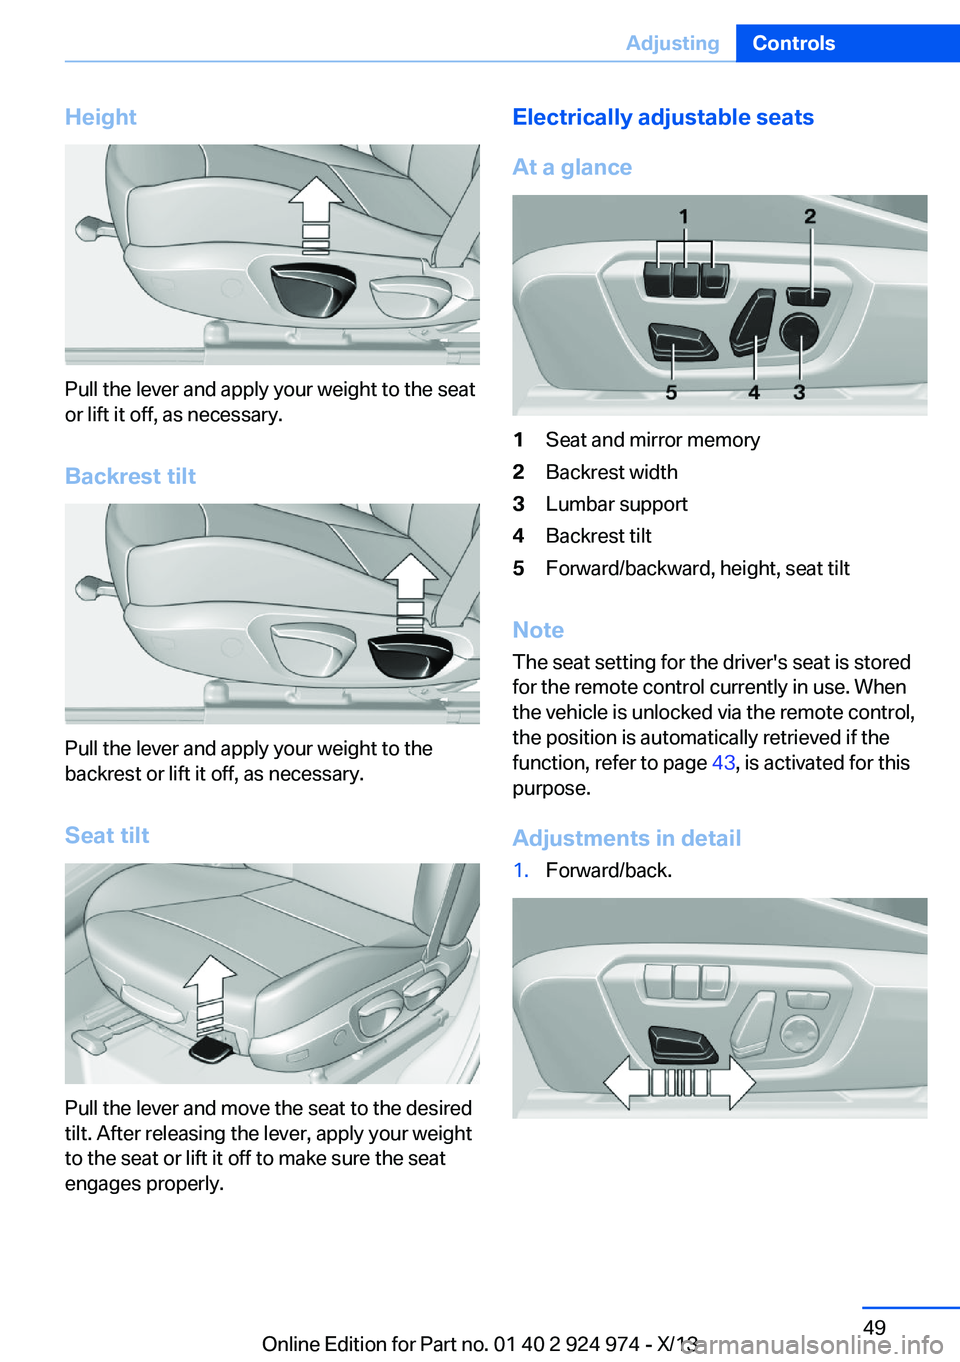
Height
Pull the lever and apply your weight to the seat
or lift it off, as necessary.
Backrest tilt
Pull the lever and apply your weight to the
backrest or lift it off, as necessary.
Seat tilt
Pull the lever and move the seat to the desired
tilt. After releasing the lever, apply your weight
to the seat or lift it off to make sure the seat
engages properly.
Electrically adjustable seats
At a glance1Seat and mirror memory2Backrest width3Lumbar support4Backrest tilt5Forward/backward, height, seat tilt
Note The seat setting for the driver's seat is stored
for the remote control currently in use. When
the vehicle is unlocked via the remote control,
the position is automatically retrieved if the
function, refer to page 43, is activated for this
purpose.
Adjustments in detail
1.Forward/back.Seite 49AdjustingControls49
Online Edition for Part no. 01 40 2 924 974 - X/13
Page 51 of 218

Keep the movement area unobstructed
When changing the seat position, keep
the seat's area of movement unobstructed;
otherwise, people can be injured or objects
damaged.◀
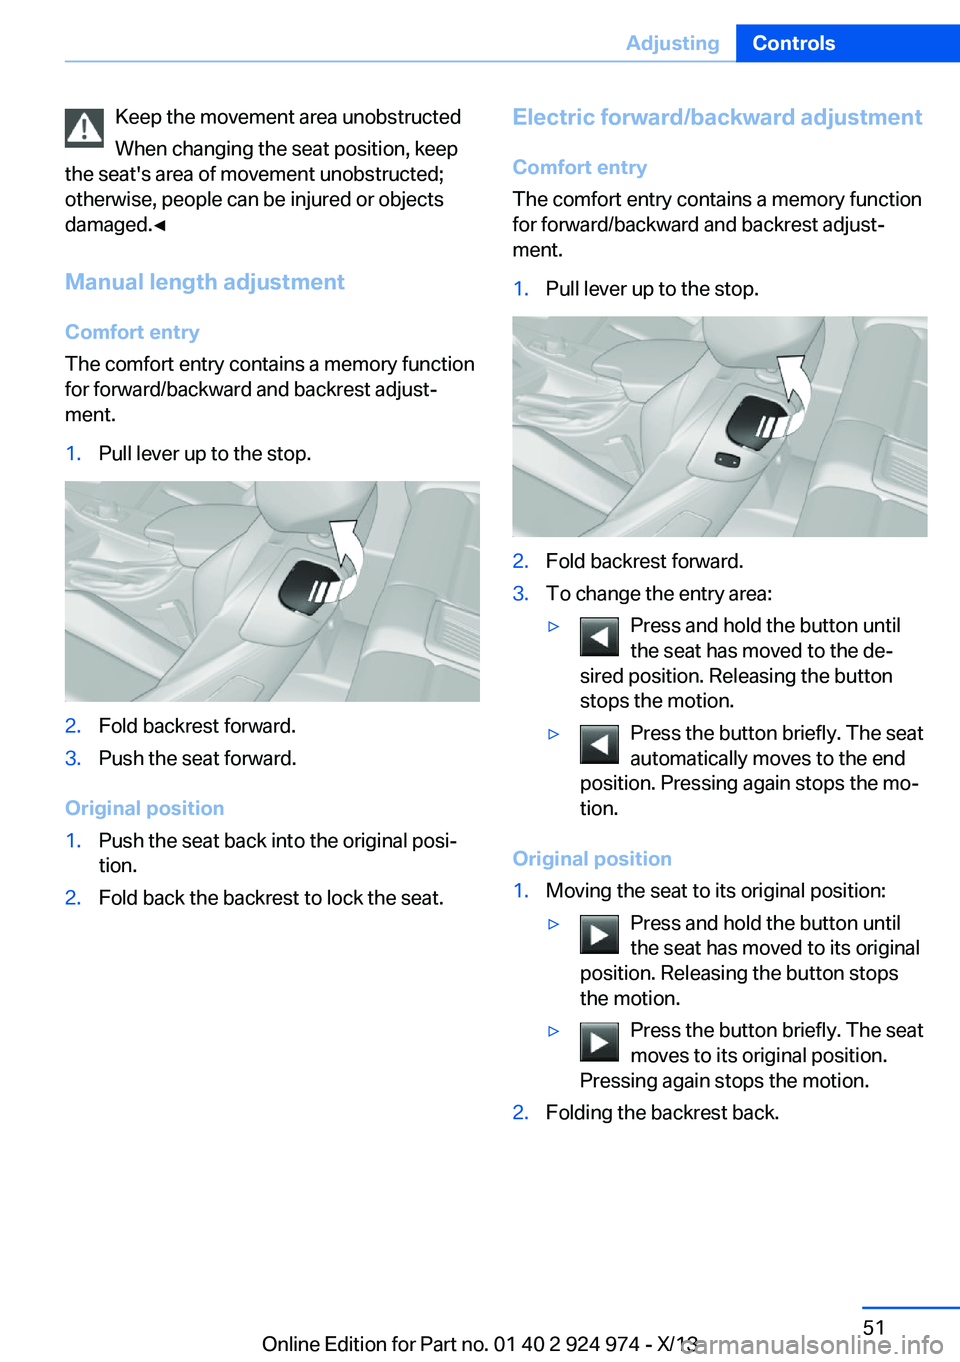
Manual length adjustment
Comfort entry
The comfort entry contains a memory function
for forward/backward and backrest adjust‐
ment.1.Pull lever up to the stop.2.Fold backrest forward.3.Push the seat forward.
Original position
1.Push the seat back into the original posi‐
tion.2.Fold back the backrest to lock the seat.Electric forward/backward adjustment
Comfort entry
The comfort entry contains a memory function
for forward/backward and backrest adjust‐
ment.1.Pull lever up to the stop.2.Fold backrest forward.3.To change the entry area:▷Press and hold the button until
the seat has moved to the de‐
sired position. Releasing the button
stops the motion.▷Press the button briefly. The seat
automatically moves to the end
position. Pressing again stops the mo‐
tion.
Original position
1.Moving the seat to its original position:▷Press and hold the button until
the seat has moved to its original
position. Releasing the button stops
the motion.▷Press the button briefly. The seat
moves to its original position.
Pressing again stops the motion.2.Folding the backrest back.Seite 51AdjustingControls51
Online Edition for Part no. 01 40 2 924 974 - X/13
Page 55 of 218

Seat and mirror memory
Hints Do not retrieve the memory while driving
Do not retrieve the memory setting while
driving, as an unexpected movement of the
seat could result in an accident.◀
Keep the movement area unobstructed
When changing the seat position, keep
the seat's area of movement unobstructed;
otherwise, people can be injured or objects
damaged.◀
General information
Two different driver's seat and exterior mirror
positions can be stored and retrieved for each
remote control. Settings for the backrest width
and lumbar support are not stored in memory.
Storing
1.Switch on the ignition.2.Set the desired position.3. Press the button. The LED in the
button lights up.4.Press the desired button 1 or 2. The LED
goes out.
If the M button is pressed accidentally:
Press the button again.
The LED goes out.
Calling up settings
Comfort function1.Open the driver's door.2.Switch off the ignition.3.Briefly press the desired button 1 or 2.
The corresponding seat position is performed
automatically.
The procedure stops when a switch for adjust‐
ing the seat or one of the buttons is pressed.
Safety mode
1.Close the driver's door or switch on the ig‐
nition.2.Press and hold the desired button 1 or 2
until the adjustment procedure is com‐
pleted.
Calling up of a seat position
deactivated
After a brief period, the calling up of stored
seat positions is deactivated to save battery
power.
To reactivate calling up of a seat position:
▷Open and close the door or trunk lid.▷Press a button on the remote control.▷Press the Start/Stop button.Seite 55AdjustingControls55
Online Edition for Part no. 01 40 2 924 974 - X/13
Page 60 of 218

On the front passenger seat
Deactivating airbags
After installing a child restraint fixing system in
the front passenger seat, make sure that the
front, knee and side airbags on the front pas‐
senger side are deactivated.
Deactivate the front passenger airbags auto‐
matically, refer to page 97.
Deactivating the front passenger airbags
If a child restraint fixing system is used in
the front passenger seat, the front passenger
airbags must be deactivated; otherwise, there
is an increased risk of injury to the child when
the airbags are triggered, even with a child re‐
straint fixing system.◀
Seat position and height
Before installing a child restraint fixing system,
move the front passenger seat as far back as
possible and adjust its height to the highest
position to obtain the best possible position for
the belt and to offer optimal protection in the
event of an accident.
Do not change the seat position and height af‐
ter this.
Backrest width Adjustable backrest width: before installing a
child restraint fixing system in the front pas‐
senger seat, open the backrest width com‐
pletely. Do not change the backrest width
again and do not call up a memory position.
Backrest width for the child seat
Before installing a child restraint fixing
system in the front passenger seat, the back‐
rest width must be opened completely. Do not
change the adjustment after this; otherwise,
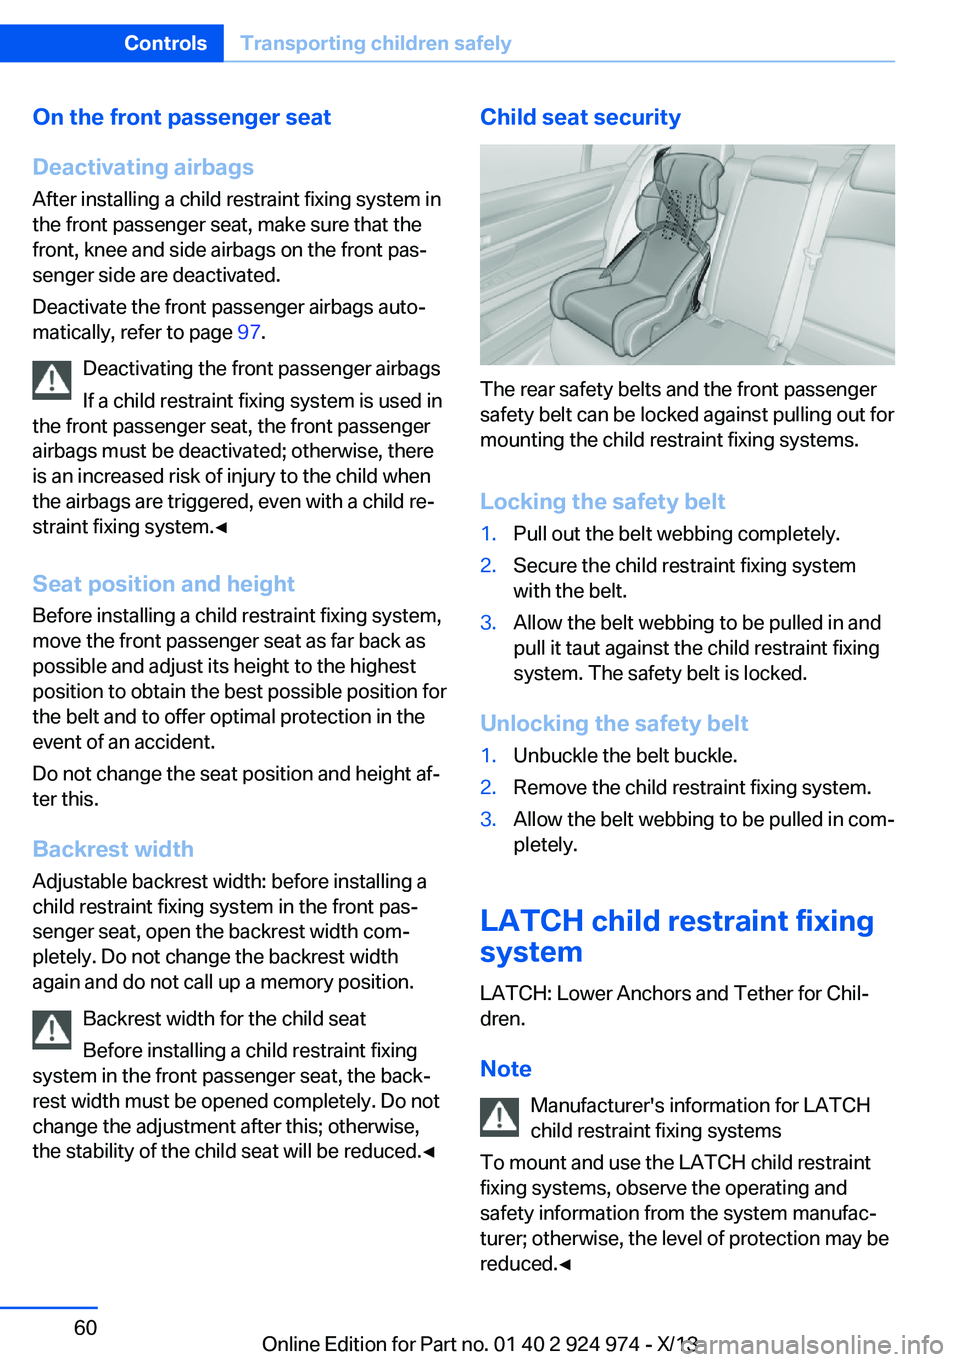
the stability of the child seat will be reduced.◀Child seat security
The rear safety belts and the front passenger
safety belt can be locked against pulling out for
mounting the child restraint fixing systems.
Locking the safety belt
1.Pull out the belt webbing completely.2.Secure the child restraint fixing system
with the belt.3.Allow the belt webbing to be pulled in and
pull it taut against the child restraint fixing
system. The safety belt is locked.
Unlocking the safety belt
1.Unbuckle the belt buckle.2.Remove the child restraint fixing system.3.Allow the belt webbing to be pulled in com‐
pletely.
LATCH child restraint fixing
system
LATCH: Lower Anchors and Tether for Chil‐
dren.
Note Manufacturer's information for LATCH
child restraint fixing systems
To mount and use the LATCH child restraint
fixing systems, observe the operating and
safety information from the system manufac‐
turer; otherwise, the level of protection may be
reduced.◀
Seite 60ControlsTransporting children safely60
Online Edition for Part no. 01 40 2 924 974 - X/13
Page 208 of 218

Everything from A to Z
IndexA ABS, Antilock Brake Sys‐ tem 111
Acceleration Assistant, refer to Launch Control 73
Activated-charcoal filter 132
Adaptive brake lights, refer to Brake force display 110
Adaptive Light Control 91
Additives, oil 178
Adjustments, seats/head re‐ straints 48
After washing vehicle 200
Airbags 95
Airbags, indicator/warning light 96
Air circulation, refer to Recir‐ culated-air mode 128, 131
Air, dehumidifying, refer to Cooling function 128, 130
Air distribution, manual 128, 131
Air flow, air conditioner 128
Air flow, automatic climate control 131
Air pressure, tires 166
Air vents, refer to Ventila‐ tion 132
Alarm system 43
Alarm, unintentional 44
All around the center con‐ sole 16
All around the headliner 17
All around the steering wheel 14
All-season tires, refer to Win‐ ter tires 173
Alternating-code hand-held transmitter 135
Alternative oil types 179 Antifreeze, washer fluid 70
Antilock Brake System, ABS 111
Anti-slip control, refer to DSC 111
Approved axle load 206
Approved engine oils 178
Arrival time 86
Ash tray 138
Assistance, Roadside Assis‐ tance 194
Assistance when driving off 114
AUTO intensity 130
Automatic car wash 199
Automatic climate con‐ trol 127
Automatic climate control with enhanced features 129
Automatic Curb Monitor 56
Automatic deactivation, front passenger airbags 97
Automatic headlamp con‐ trol 91
Automatic locking 43
Automatic recirculated-air control 131
Automatic transmission with Steptronic 71
AUTO program, automatic cli‐ mate control 130
AUTO program, climate con‐ trol 128
AUTO program, intensity 130
Auto Start/Stop function 65
Average fuel consumption 86
Average speed 86
Axle loads, weights 206 B
Backrest curvature, refer to Lumbar support 50
Backrest, width 50
Band-aids, refer to First aid kit 194
Bar for tow-starting/ towing 197
Battery replacement, vehicle battery 190
Battery replacement, vehicle remote control 34
Battery, vehicle 190
Belts, safety belts 52
Beverage holder, cu‐ pholder 144
BMW Assist, see user's manual for Navigation, En‐
tertainment and Communi‐
cation
BMW Homepage 6
BMW Internet page 6
BMW maintenance sys‐ tem 181
Bonus range, ECO PRO 156
Bottle holder, refer to Cu‐ pholder 144
Brake assistant 111
Brake discs, breaking in 148
Brake force display 110
Brake lamps, brake force dis‐ play 110
Brake lights, adaptive 110
Brake pads, breaking in 148
Braking, hints 149
Breakdown assis‐ tance 193, 194
Breaking in 148
Brightness of Control Dis‐ play 88 Seite 208ReferenceEverything from A to Z208
Online Edition for Part no. 01 40 2 924 974 - X/13