2014 AUDI TT ROADSTER center console
[x] Cancel search: center consolePage 46 of 244

44 Convertible top
Convenience opening
.,. Press the unlock but ton m on the remote
control key to unlock the vehicle.
.,. Turn the key in the driver door
once to posi
tion @~
fig. 43.
.,. Within two seconds turn the key a second
t ime and hold it in t his position until the
power top has completely retracted.
Convenience clos ing
.,. Turn the key in the dr iver door once to posi
tion @
~fig. 43.
.,. Within two seconds turn the key a second
time and hold it in this position until the
power top has completely closed .
Opening or clos ing motion stops
immediately
as soon as you re lease the key. For safety rea
sons, it is not possible to activate the
conven
ience feature with the remote control.
A WARNING
When opening and closing the powe r top
make sure to keep yourself a nd others
clear of all moving parts. Risk of injury!
Wind Deflector
The wind deflector reduces turbulence in the
passenger compartment and makes driving
more comfortable.
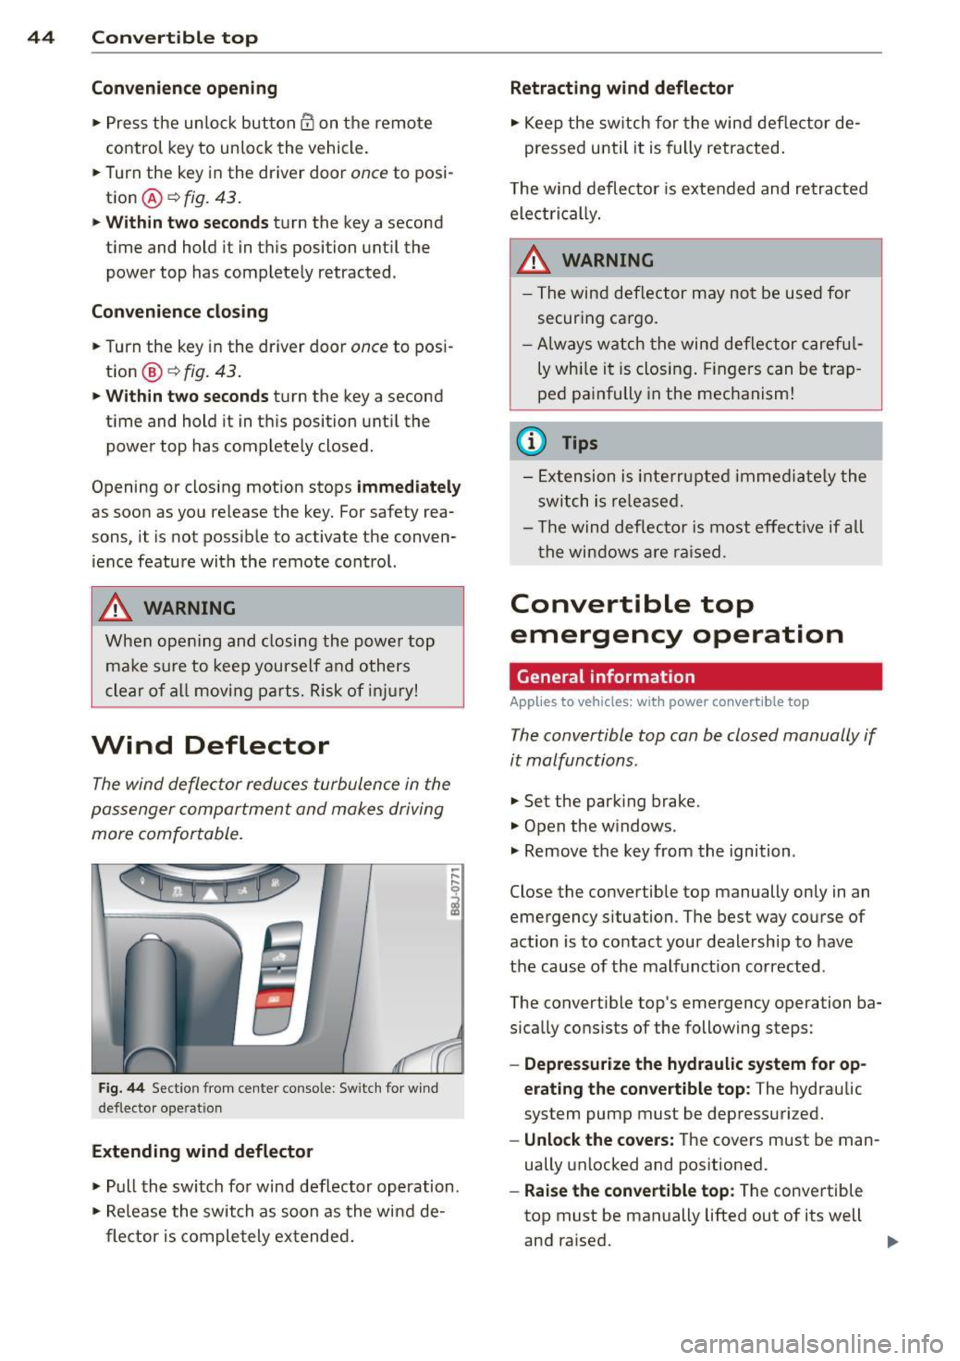
F ig. 44 Section from center console: Sw itch for w ind
deflecto r operation
Extending wind deflector
.. ,... ,... 0
i
.,. Pull the switch for wind deflector operation.
.,. Re lease the switch as soon as the wind de-
flector is completely extended.
Retracting wind deflector
.,. Keep the switch for the wind deflector de
pressed unti l it is fully retracted .
T he w ind deflector is extended and retracted
electrical ly .
A WARNING
- The wind deflector may not be used for
secur ing ca rgo.
-Al ways watch the wind deflector careful
ly while it is closing. Fingers can be trap
ped painfully in the mechanism!
(D Tips
-Extension is interrupted immediately the
switch is released.
- Th e wind deflector is most effective if all
th e windows are raised.
Convertible top
emergency operation
General information
Applies to vehicles: with power convertible top
-
The convertible top con be closed manually if
it malfunctions.
.,. Set the park ing brake.
.,. Open the w indows.
.,. Remove the key from the ignition .
Close the convertible top manually only in an
emergency situation. The best way course of
action is to contact your dealership to have
the cause of the malfunct ion corrected.
The convert ible top's emergency operation ba
s ically consists of the following steps:
- Oepressurize the hydraulic system for op
erating the convertible top :
The hydraulic
system pump must be depressurized.
- Unlock the covers: The covers must be man
ually unlocked and positioned .
-Raise the convertible top: The convertible
top must be manually lifted out of its well
and ra ised. ..,.
Page 54 of 244

52 Clear vis ion
Instrument panel illumination
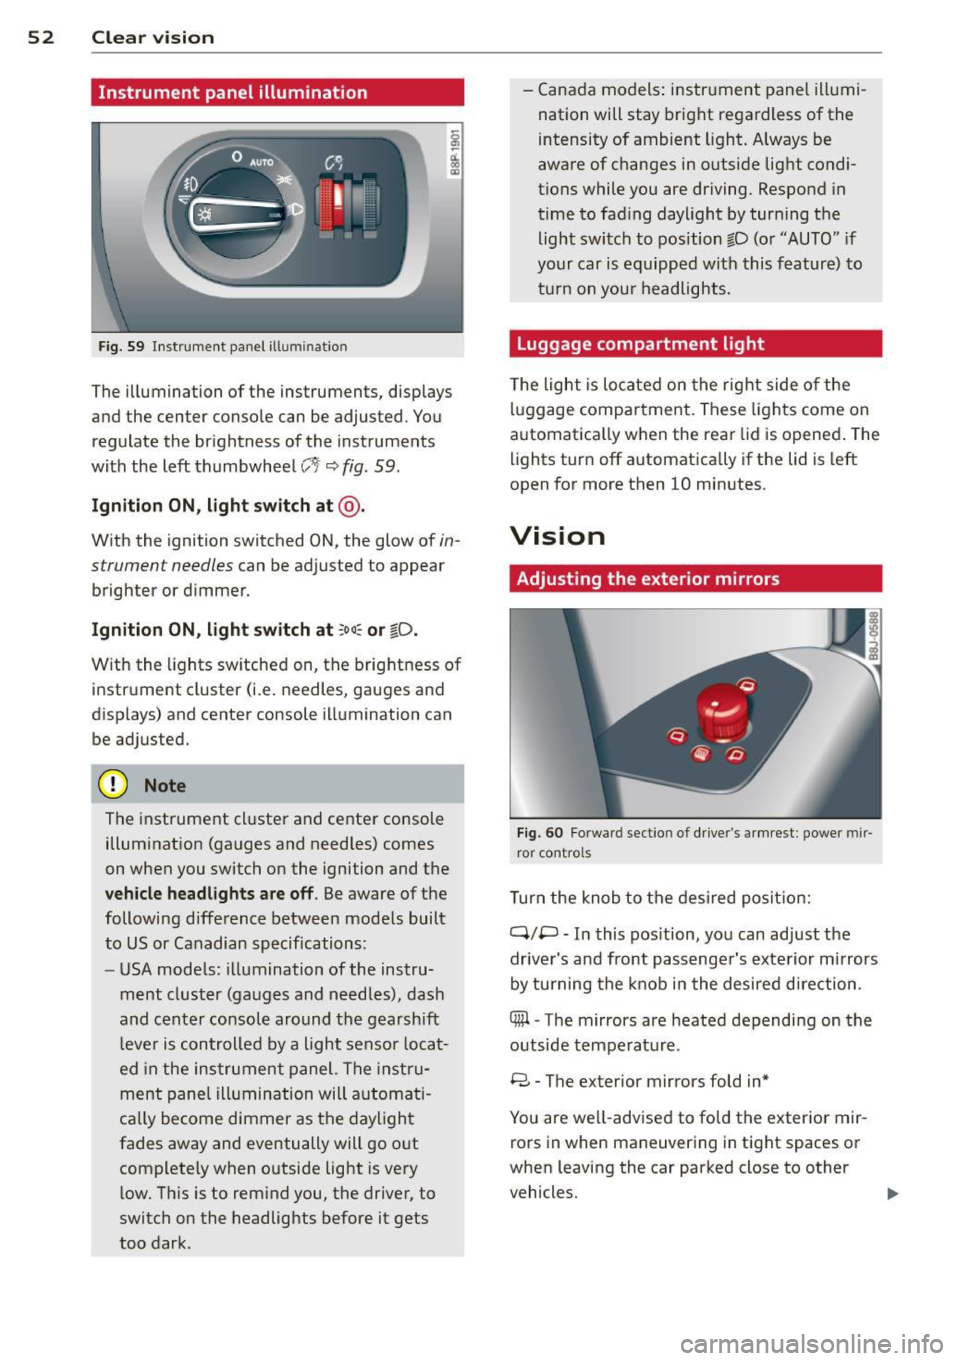
F ig. 59 In strum ent panel ill uminatio n
The illumina tion of the instruments, displays
and the center conso le can be adjusted . You
regulate the br ightness of the inst ruments
with the left thumbwhee l
CJ:J ~ fig. 59 .
Ignition ON, light switch at @.
With the ignition switched ON, the glow of in
strument needles can be adjusted to appear
brighte r or d immer.
Ignition ON, light switch at ;oo~ or io .
With the l ights sw itched on, the brightness of
instrument cluster (i.e. needles, gauges and
displays) and center console illuminat ion can
be adjusted.
@ Note
The instrument cl uster and cente r console
illumination (gauges and needles) comes
on when you switch on the ignition and the
veh icle headlights are off. Be aware of the
following difference between mode ls built
to US or Canadian specifications:
- USA mode ls : illumination of the instru
ment cluster (gauges and needles), dash
and cente r consol e around the gearsh ift
l ever is controlled by a light senso r locat
ed in the instrument panel. The instru
ment pane l ill umination will a utomat i
ca lly become dimmer as the daylight
fades away and eventually will go o ut
complete ly when outside light is very
l ow . Th is is to rem ind you, the driver, to
switch on the headlights before it gets
too dark . -
Canada models: instr ument panel illumi
nation will stay bright regardless of the
intensity of ambient light . A lways be
aware of changes in outside light condi
tions while you are driving. Respond in
time to fading daylight by tur ning the
light switch to position fD (o r "AUTO" if
your car is equipped with this feature) to
t ur n on you r headlights.
Luggage compartment light
The light is located on the right side of the
lu ggage compartme nt. These lights come on
automat ica lly when the rea r lid is opened . The
lights turn off automatica lly if the lid is left
open for more then 10 minutes.
Vision
Adjusting the exterior mirrors
F ig. 60 Fo rwa rd sect io n of drive r's armr est: power mir
ror cont rol s
Turn the knob to the desired posit ion:
Q/ P -In this pos ition, you can adjust the
drive r's and front passenger's exte rior m irrors
by turning the knob in the desired d irection.
4iil -The mirrors are heated depending on the
outside temperature .
8 -The exterior mirror s fold in*
You are we ll-advised to fold the exterior mir
rors in when maneuvering in tight spaces or
when leaving the car parked close to other
vehicles. ..,,.
Page 66 of 244

64 Seats and storage
• Push the ski bag from the trunk through the
opening in the rear wall
c::> &_.
• Load up the ski bag.
Securing
• Hook the ski bag 's safety strap @ c::> fig. 72.
• Adjust the retain ing strap @ to the des ired
length .
• Clip the retaining strap.
Storag e
• Unhoo k the ski bag's safety strap @
¢fig. 72.
• Fold the cover¢
fig. 71 downward in the op
posite direction of the arrow .
• Loosen the retaining strap@.
• Pull the ski bag backward through the rear
wall.
• Close the cover of the pass-through to the
trunk .
• Close the flip cove r to the storage compart
ment between the seatbacks ¢
page 67.
• If necessary, collapse the s ki bag.
_& WARNING
After loading, the sk i bag must be secured
w ith the safety strap.
(D Tips
Ma ke sure that the s ki bag is not folded up
while still damp.
Cup holder
F ig. 73 Cup holder
_& WARNING ,. -
Spilled hot liquid can cause an accident
and pe rsonal injury. -
Never carry any beverage conta iners with
hot liqu ids, such as hot coffee or hot tea,
in the vehicle while it is moving. In case
of an acc ident, sudden braking or other
veh icle movement, hot liquid could spill,
causing scalding burns . Spilled hot liquid
can also cause an accident and pe rsonal
inju ry.
- Us e only soft cups in the c upholder. Hard
cups and glasses can cause injury in an
accident.
- Neve r use the cupholder or adapter as an
ashtray -ris k of fire.
(1) Note
Only drink containers with Lids should be
carried in the cuphold er. L iquid could spill
out and damage your vehicles electronic
equipmen t or s tain t he upho lstery, etc.
Ashtray
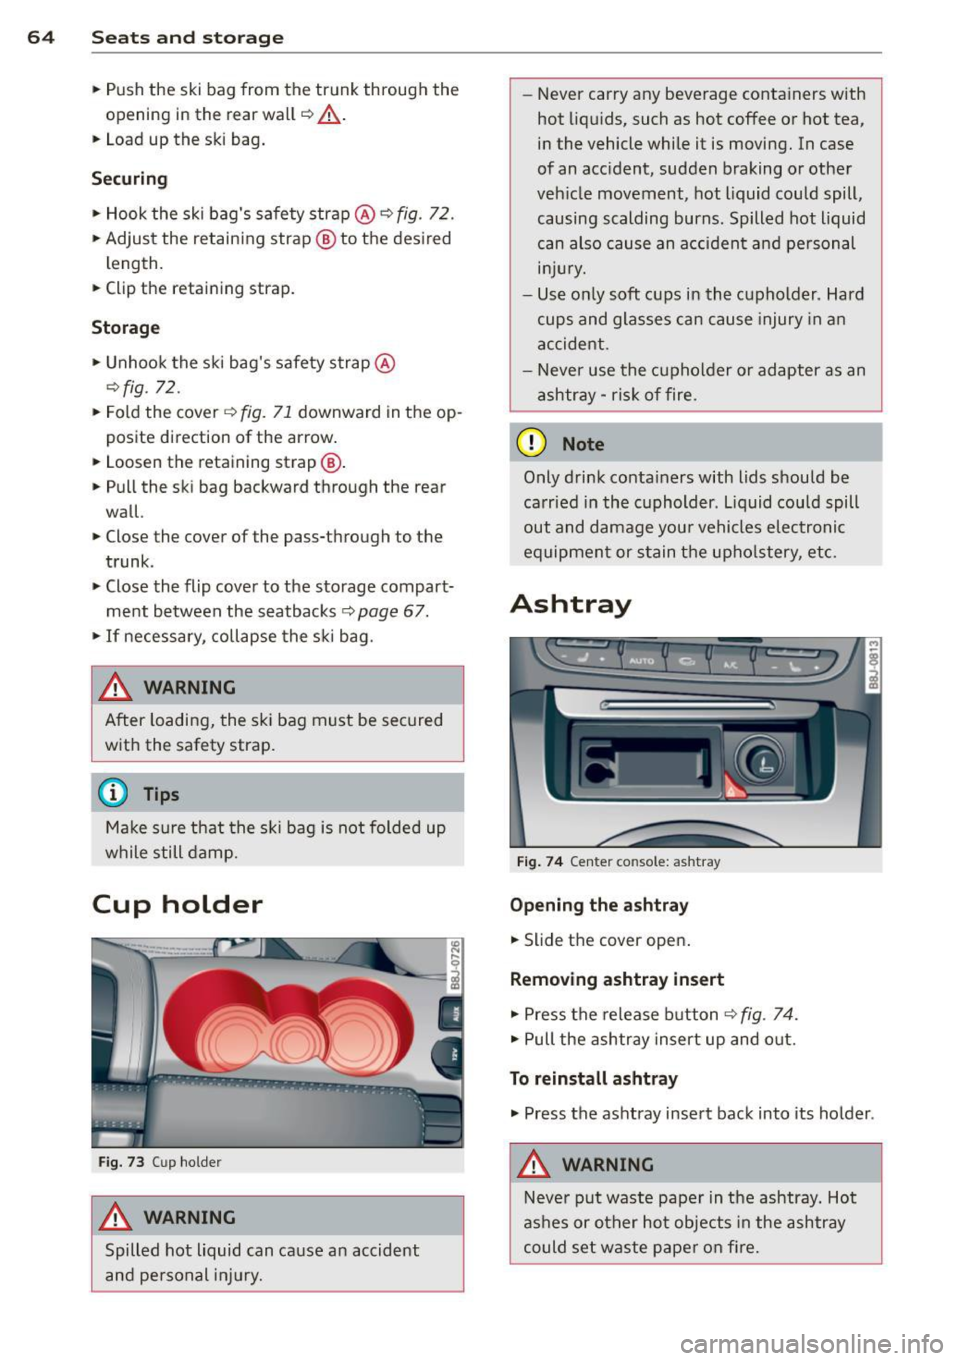
Fig . 7 4 Center console: ashtray
Opening the ashtray
• Slide the cover open.
Removing ashtray insert
• Press the release button ¢fig . 74.
• Pull the ashtray insert up and out.
To r einstall a shtray
• Press the ashtray insert back into its holder.
_& WARNING
-Never put waste paper in the ashtray. Hot
as hes or other hot objects in the ashtray
could set waste paper on fire.
Page 67 of 244

Cigarette lighter/
socket
Cigarette lighter
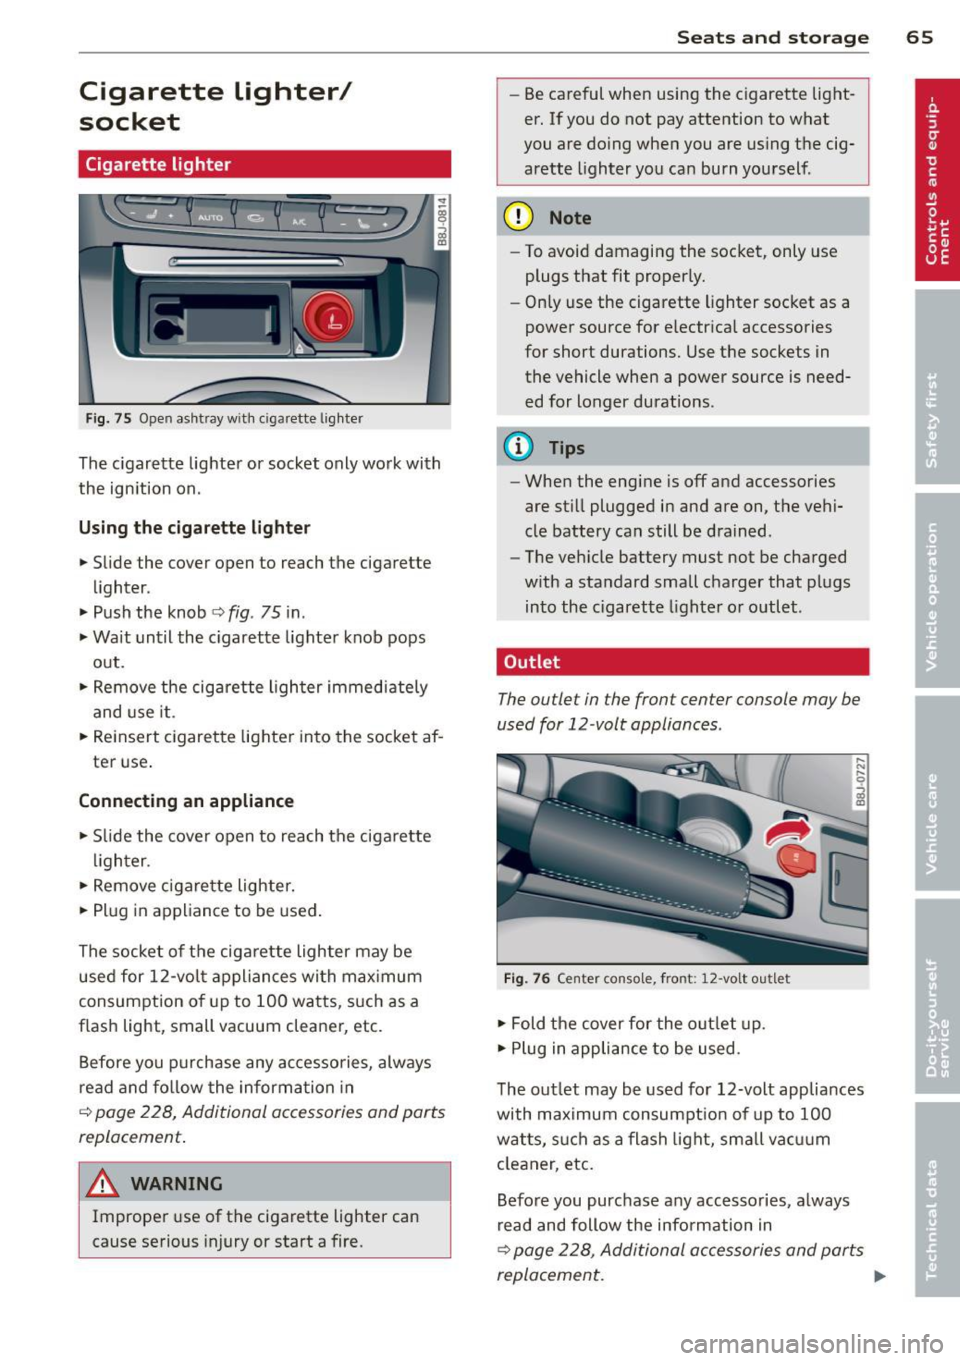
Fig. 75 Open ashtray with cigar ette ligh ter
The cigarette lighter or socket only work with
the ignition on.
Using the cigarette lighter
.,. Slide the cover open to reach the cigarette
lighter.
.,. Push the knob¢
fig. 75 in .
.,. Wait until the cigarette lighter knob pops
out .
.,. Remove the cigarette lighter immediately
and use it.
.,. Reinsert cigarette lighter into the socket af
ter use.
Connecting an appliance
.,. Slide the cover open to reach the cigarette
lighter.
.,. Remove cigarette lighter .
.,. Plug in appliance to be used.
The socket of the cigarette lighter may be used for 12-volt appliances with maximum
consumption of up to 100 watts, such as a
f lash Light, small vacuum cleaner, etc.
Before you purchase any accessories, always
read and follow the information in
¢ page 228, Additional accessories and parts
replacement .
A WARNING
-
Improper use of the cigarette lighter can
cause serious injury or start a fire.
Seats and storage 65
-Be careful when using the cigarette light
er. If you do not pay attention to what
you are doing when you are using the cig
arette lighter you can burn yourself .
(D Note
-To avoid damaging the socket, only use
plugs that fit properly.
- Only use the cigarette lighter socket as a
power source for e lectrical accessories
for short durations. Use the sockets in the vehicle when a power source is need
ed for longer durations.
@ Tips
- When the engine is off and accessories
are still plugged in and are on, the vehi
cle battery can still be drained.
- The vehicle battery must not be charged
with a standard small charger that plugs
into the cigarette lighter or outlet .
, Outlet
The outlet in the front center console may be
used for 12 -volt appliances .
Fig. 76 Center console, front: 12 -volt outlet
.,. Fold the cover for the outlet up.
.,. Plug in appliance to be used .
"'
" 0
i
The outlet may be used for 12-volt appliances
with maximum consumpt ion of up to 100
watts, such as a flash light, small vacuum
cleaner, etc.
Before you purchase any accessories, always
read and follow the info rmation in
¢ page 228, Additional accessories and parts
replacement.
Page 77 of 244

@ For the sake of the environment
To avoid unnecessary engine wear and to reduce exhaust emissions, do not let your
vehicle stand and warm up. Be ready to
drive off immediately after start ing your
veh icle. Mainta in moderate speed until the
engine is completely warm . Remember,
the engine performs best at operating
temperature .
Stopping the engine
.,. Turn the ignition key to position @
¢page 73, fig. 82.
_& WARNING
-Never turn off the engine before the ve
hicle has come to a complete stop. The
full function of the brake booster and the
power steering is not guaranteed. You
must use more force to turn or brake if
necessary . Because you cannot steer and
brake as you usually would, this could
lead to crashes and serious injur ies.
- The radiator fan can continue to run for
up to 10 minutes even after you have
turned off the eng ine and removed the
ignition key. The radiator fan can also
turn on again if the engine coolant heats
up because of intense sunlight or heat
build-up in the engine compartment .
(D Note
Do not stop the engine immediately after
hard or extended driving. Keep the engine
r un ning for approximately two minutes to
prevent excessive heat build-up.
On the road 75
Parking brake
Parking brake
When the parking brake is set, it prevents the
vehicle from rolling away unintentionally .
Fig. 83 Center console: Parki ng b rake set
Setting the parking brake
.. Pull the parking brake lever all the way up.
Releasing the parking brake
.. Pull the parking brake lever up slightly and
press the release button at the same time
¢ fig. 83 -arrow-.
.,. Keep the re lease button pressed and lower
the parking brake¢&_ .
If you should drive off with the parking brake
still set, a warning tone will sound and the
follow ing will appear in the instrument clus
ter to rem ind you to release the parking
brake:
Parking brake set
The parking brake warning comes on only af
ter you have driven for longer than 3 seconds
and faster than 5 mph (5 km/h) .
The parking brake warning light_
(USA)/ . (CON) illuminates when the park
ing brake is set and you switch on the ignition .
A WARNING
Always re lease the park ing brake com -
pletely. A partially engaged brake will
overheat the rear brakes, reduce their ef
fectiveness and cause excessive wear. This
could lead to brake failure and an accident. .,.
Page 82 of 244

80 On the road
Audi magnetic ride
Applies to vehicles: with magnetic ride
Damping can be adjusted to the driver's pref
erence and it adapts automatically to the cur
rent driving situation.
Fig. 88 Center console: Switch for Audi magnetic r ide
.,. Press the sw itch ~ fig. 88 to turn sport set-
ting on or off.
Aud i magnetic ride is an electronically con
trolled damping system. This chassis system
assists the driver by adapting to the particular
situation through imperceptible control proc
esses. The
damping provides individual modu
lation of damping forces. For example, with
damping characteristics set to provide greater
comfort, damping is set somewhat harder for
a brief period only as required, when rounding
a curve and when braking.
Standard setting
Select the standard setting if you prefer a sus
pension setting emphasizing comfort.
Sport setting
Select the sport setting if you prefer a sporty
suspe nsion setting . The LED in the switch
8
comes on to indicate sport setting.
@ Tips
The warning/indicator light 8 in the instru
ment cluster comes on in the event of a
malfunction .
Drive to the closest author
ized Audi dealer as soon as possible and
have the malfunction repaired.
Sport mode
Applies to vehicles: with Sport button
Fig. 89 Button in the center console
.,. To switch sport mode on, press the button
in the center console. The indicator light
turns on .
.,. To switch sport mode off, press the button
in the center console again. The indicator
light turns on .
A more agile and sporty driving style is possi
ble when driving the vehicle in "sport mode".
T his mode affects throttle response and the
sound of the engine and the damping charac
teristics of the Audi magnetic ride for dynamic
suspension tuning .
@ Tips
If there is a malfunction in the retractable
rear spoiler* or the Audi magnetic ride*, it
may not be poss ible to activate sport
mode.
Acoustic parking system
Rear acoustic park assist
Applies to vehicles: with 4-channel acoustic park assist
Acoustic park assist gives a warning about
obstacles behind the vehicle.
Description
T he rear acoustic park ass ist (4-channel
acoustic park assist) determines the distance
of the vehicle from an obstacle using ultra
son ic sensors. The sensors are in the rear
bumper. The volume and the pitch of the
Page 87 of 244

because if the vehicle starts to roll
backward, you could cause an accident. If
the clutch should start to slip, you will
feel the vehicle "jerk" and the selector lever display will start blink ing.
- Before driving down a steep slope, re
duce your speed and shift into a lower gear with "tiptronic".
- Do not ride the brakes or apply the brake
pedal too often or too long . Constant
braking causes the brakes to overheat
and substantially reduces braking per
formance, increases braking distance or
causes complete failure of the brake sys
tem.
Hill Descent Assist
Applies to vehicles: with S tro nic
Hill Descent Assist helps the driver when driv
ing down inclines .
Hill Descent Ass ist is activated by pressing the
b rake wh ile descending when the selector lev
er is in D/S. The S tronic transmission auto
mat ically shifts down to a gear suitab le for
the incline. Hill Descent Assist attempts to
maintain the current vehicle speed when the
brak ing occurs, as far as phys ical and techni
cal limits allow. It may be necessary to adjust
the speed using the brakes.
Hill Descent Assist switches off when the in
cline levels out or when the gas pedal is press
ed.
On vehicles w ith cruise control*~
page 78,
Hill Descent Assist is also activated when the
speed is set.
_&. WARNING
Hill Descent Assist cannot overcome phys i
cal limitations, so it may not be possible to
ma intain a constant vehicle speed under
all circumstances . Always be ready to ap
ply the brakes .
Transmission 85
tiptronic operation
Applies to vehicles: with S tronic
Tiptronic allows the driver to shift gears man
ually.
Fig. 93 Center console: Ma nua l sh ift in g (t iptronic)
Fig . 94 D isplay : Manual sh ift ing (t iptron ic)
Switching to manual
"' Move the selector lever to the right out of
the D position . Th e display changes once the
transmission has switched to manual mode.
For examp le,
M4 indicates that 4th gear is
engaged.
Upshifting
"' Tap the selector lever forward (in the tip
tronic setting)
~ fig. 93 0 -
Downshifting
"'Tap the selector lever backward (in the tip-
tronic setting)
0 -
Switching to manual can be carried out with
the vehicle stationary as well as moving .
When accelerating, the transmission shifts in
to the next gear in gears 1, 2, 3, 4 and S
shortly before the maximum permissible en- gine speed is reached . ..,.
Page 88 of 244

86 Transmis sion
If you have selected a lower gear than the cur
rent one, the transmission w ill only shift down
when the engine cannot be overspeeded.
I f kick-down is actuated, the transmiss ion
shifts into a lower gear independently of
speed and engine rpm .
Steering wheel with Tiptronic controls
Applies to vehicles: with S tro nic
The selector paddles allow the driver to keep
both hands on the steering wheel when shift
ing gears.
Fig. 95 Spo rt stee ring wheel w ith selecto r paddle s
Shifting up
.,. Pull the right paddle, marked 0 ¢ fig. 95
briefly towards you .
Shifting down
.,. Pull the left paddle, marked O ¢ fig. 95
briefly towards you .
The selector paddles on the steering wheel
are activated when the selector lever on the
center console is in D, 5 or in the manual posi
tion ( Tiptronic mode).
You can also shift gears in the Tiptronic mode
using the selector lever on the center console.
(D Tips
With the gear selector lever in either Dor
5 the transmission will switch back to the
automatic mode if you do not use the pad
dles within approx . 30 seconds.
Kick-down feature
Applies to vehicles: w it h S tronic
The kick-down feature allows maximum ac
celeration.
If you depress the accelerator pedal fully be
yond the full-throttle position, the transmis·
sion automatically downshifts one gear, de·
pending on vehicle speed and eng ine rpm. The
upshift into the next higher gear takes place
as soon as the maximum specified engine
speed is reached.
.&_ WARNING i-==
Please note that the drive wheels can spin
if the kick-down is used on a smooth slip·
pery road -risk of skidding!
Launch Control Program
Applies to veh icles: w it h S t ronic
The Launch Control Program permits maxi
mum acceleration.
In order to use Launch Control, the ASR (Anti
S lip Regulation) must be disabled . When ASR
is disabled , the ESC warning/indicator light
fl
in the instrument cluster illuminates. So that
Launch Control can be used, the engine must
be at operating temperature and the steering
wheel must not be turned.
.,. With the engine running, briefly press the
ESC button . The message "Stabilization pro
gram off" or "Sport control Warning! Re
stricted stability" in the driver information
system display .
.,. Shift the gear lever to "5" or the tiptronic
position .
.,. Step on the brake pedal with your left foot
and keep the brake pedal fully depressed for
at least one second.
.,. With yo ur right foot, step on the accelerator
to the wide-open throttle position or Kick·
down. The eng ine speed settles at about
3,200 rpm .
.,. Take your left foot off the brake. ..,.