Page 279 of 343
278Rear Entertainment System
Front Control Panel OperationOperate the Rear Entertainment System (RES) from the front control panel.Selecting the Audio Source using front control panel
1.Press the Rear 9 (Power) button
on the front control panel.
2. Press the REAR AUDIO button.
The rear source is displayed on
the front audio screen and the
On Demand Multi-Use
Display™.
The rear source is heard from
the front speakers.
3. Select Rear Audio Source on the
On Demand Multi-Use Display™.
4. Select the audio source icon on the
On Demand Multi-Use Display™.
5. Select a station, channel, track, or
chapter in the same way as the
front audio system.
2 Audio
P. 141
Page 281 of 343
280
Front Control Panel Operation
Setting the DVD Menu
Rear Entertainment System
Setting the DVD MenuHMENU button (in DVD mode)
1.Rotate i to select an item. Press
u .
Select Other Function to
display additional menu entries.
2. Rotate i to select an option.
Press u.
The following item s are available:
• Top Menu : Displays the top menu of the DVD.
• Menu : Displays the menu of the DVD.
• Repeat :
Repeat Title : Repeats the current title.
Repeat Chapter : Repeats the current chapter.
• Change Source : Changes the audio source mode.
Interface Dial
Page 282 of 343
281
Front Control Panel Operation
Setting the DVD Menu
Rear Entertainment System
•Play/Pause: Pauses or resume the playback.
• Stop : Stops the playback.
• Audio/Subtitle : Selects the language of the DVD audio and the DVD subtitle.
• Angle : Selects the angle of a scene shot with multiple cameras.
• Back : Hides the DVD menu.
• Number Input : Enters a number of a title or chapter to skip.
• Search : Skips to a title or chapter by Interface Dial.
1.Select More.
2. Select a setting item.
The following items are available:
• Sound Settings : Displays the sound preferences screen.2Adjusting the Sound
P. 151
• Stop : Stops the playback.
• Repeat :
Repeat Title : Repeats the current title.
Repeat Chapter : Repeats the current chapter.
• Screen Settings : Displays the screen preferences screen.
2Changing the Screen Settings
P. 86
On Demand Multi-Use Display™
Page 287 of 343
286Other Features
Trip ComputerHINFO button
Trip Computer
View the distance traveled and average fuel consumption. Move w or y to select the trip
information.
The following item s are available:
• Current Drive : Displays the current trip information.
• History of Trip A : Displays information for three previous histories. The
information is stored ever y time you reset Trip A.
• Delete History : Deletes the trip information. Move r on the Trip A screen to
select Delete History , then press u. You will receive a confirmation message on
the screen. Rotate i to select Yes, then press u.
1Trip Computer
Displays the following trip information:•Instant Fuel : The current estimated instant
fuel economy.•Average Fuel : The average fuel economy
since the last key cycle.•1st, 2nd, 3rd Prev. : The previous average fuel
consumption.•RANGE : The estimated distance you can travel
on the fuel remaining in the tank.
These values are estimates only.
Page 291 of 343

290Other Features
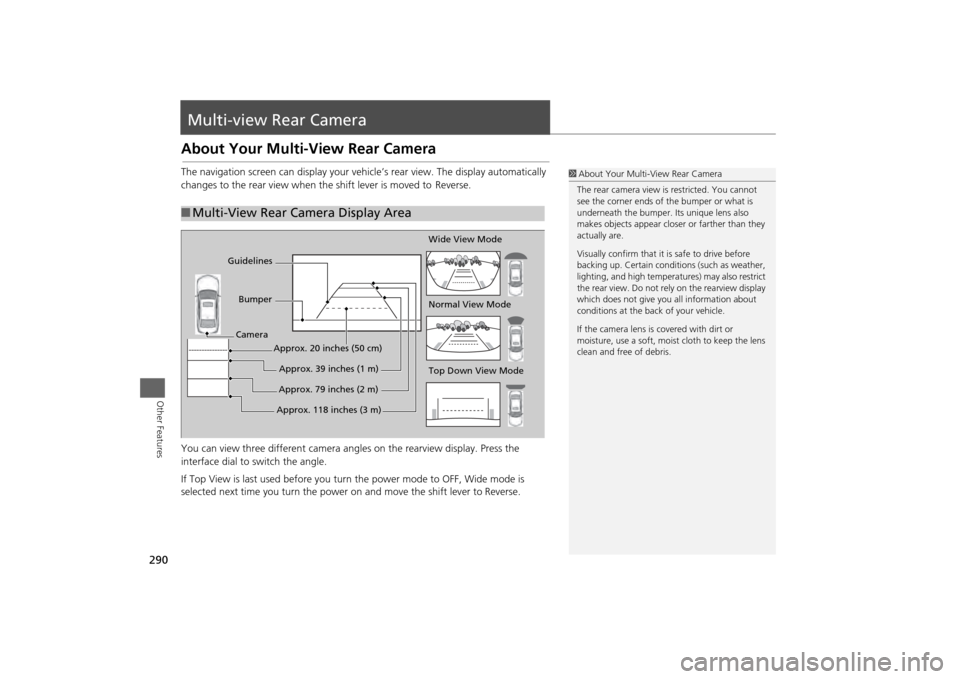
Multi-view Rear CameraAbout Your Multi-View Rear CameraThe navigation screen can display your vehi cle’s rear view. The display automatically
changes to the rear vi ew when the shift leve r is moved to Reverse.
You can view three different camera angl es on the rearview display. Press the
interface dial to switch the angle.
If Top View is last used before you turn the power mode to OFF, Wide mode is
selected next time you turn the power on and move the shift lever to
Reverse.
■Multi-View Rear Camera Display Area
1 About Your Multi- View Rear Camera
The rear camera view is restricted. You cannot
see the corner ends of the bumper or what is
underneath the bumper. Its unique lens also
makes objects appear closer or farther than they
actually are.
Visually confirm that it is safe to drive before
backing up. Certain conditi ons (such as weather,
lighting, and high temperat ures) may also restrict
the rear view. Do not rely on the rearview display
which does not give you all information about
conditions at the back of your vehicle.
If the camera lens is covered with dirt or
moisture, use a soft, moist cloth to keep the lens
clean and free of debris.
Top Down View Mode Normal View Mode Wide View Mode
Guidelines
Bumper
Camera
Approx. 118 inches (3 m)Approx. 79 inches (2 m)Approx. 39 inches (1 m)
Approx. 20 inches (50 cm)
Page 294 of 343
293
Troubleshooting
Troubleshooting................................... 294
Map, Voice, Entering Destinations ........ 294
Traffic .................................................. 296
Guidance, Routing ............................... 297
Update, Coverage, Map Errors ............. 299
Display, Accessories.............................. 299
Miscellaneous Questions ...................... 299
Error Messages ...................................... 300
Navigation System ................................ 300
CD Player ............................................. 301
Hard Disc Drive (HDD) Audio ................ 302
iPod®/USB Flash Drive .......................... 303
Pandora® ............................................ 304
Aha
TM Radio ......................................... 305
Page 295 of 343

294Troubleshooting
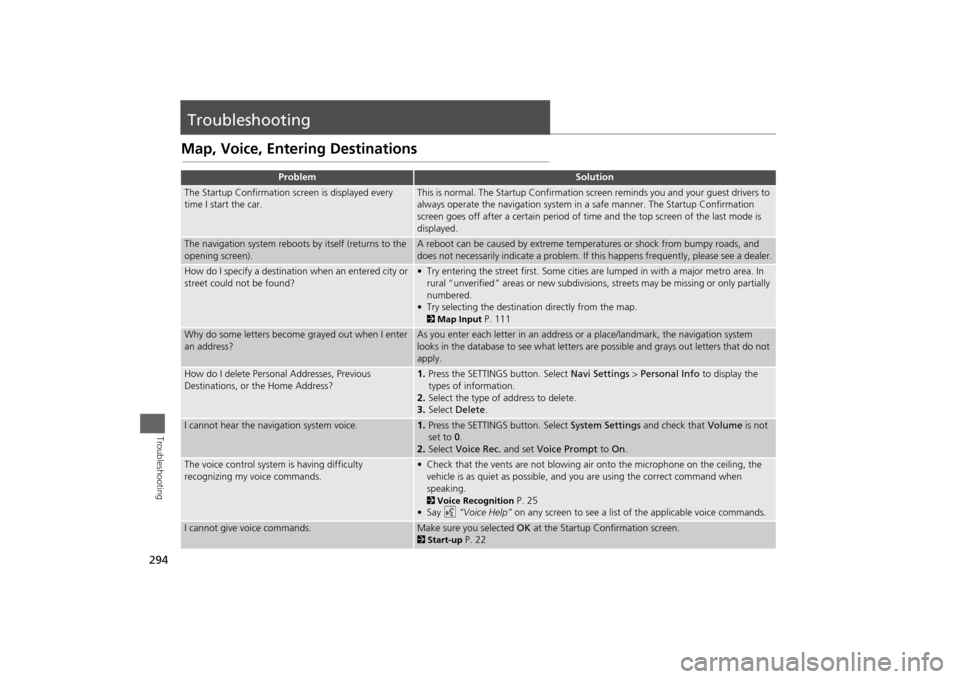
TroubleshootingMap, Voice, Entering Destinations
Problem
Solution
The Startup Confirmation screen is displayed every
time I start the car.
This is normal. The Startup Confirmation screen reminds you and your guest drivers to
always operate the navigation system in a safe manner. The Startup Confirmation
screen goes off after a certain period of time and the top screen of the last mode is
displayed.
The navigation system reboots by itself (returns to the
opening screen).
A reboot can be caused by extreme temper atures or shock from bumpy roads, and
does not necessarily indicate a problem. If this happens frequently, please see a dealer.
How do I specify a destination when an entered city or
street could not be found?
• Try entering the street first. Some cities are lumped in with a major metro area. In
rural “unverified” areas or new subdivisions, streets may be missing or only partially
numbered.
• Try selecting the destinati on directly from the map. 2Map Input
P. 111
Why do some letters become grayed out when I enter
an address?
As you enter each letter in an address or a place/landmark, the navigation system
looks in the database to see what letters are possible and grays out letters that do not
apply.
How do I delete Personal Addresses, Previous
Destinations, or the Home Address?
1. Press the SETTINGS button. Select Navi Settings > Personal Info to display the
types of information.
2. Select the type of address to delete.
3. Select Delete .
I cannot hear the navigation system voice.
1.Press the SETTINGS button. Select System Settings and check that Volume is not
set to 0 .
2. Select Voice Rec. and set Voice Prompt to On.
The voice control system is having difficulty
recognizing my voice commands.
• Check that the vents are not blowing air onto the microphone on the ceiling, the
vehicle is as quiet as possible, and you are using the correct command when
speaking. 2 Voice Recognition
P. 25
•Say d “Voice Help” on any screen to see a list of the applicable voice commands.
I cannot give voice commands.
Make sure you selected OK at the Startup Confirmation screen.2Start-up
P. 22
Page 296 of 343

295
Troubleshooting
Map, Voice, Entering Destinations
Troubleshooting
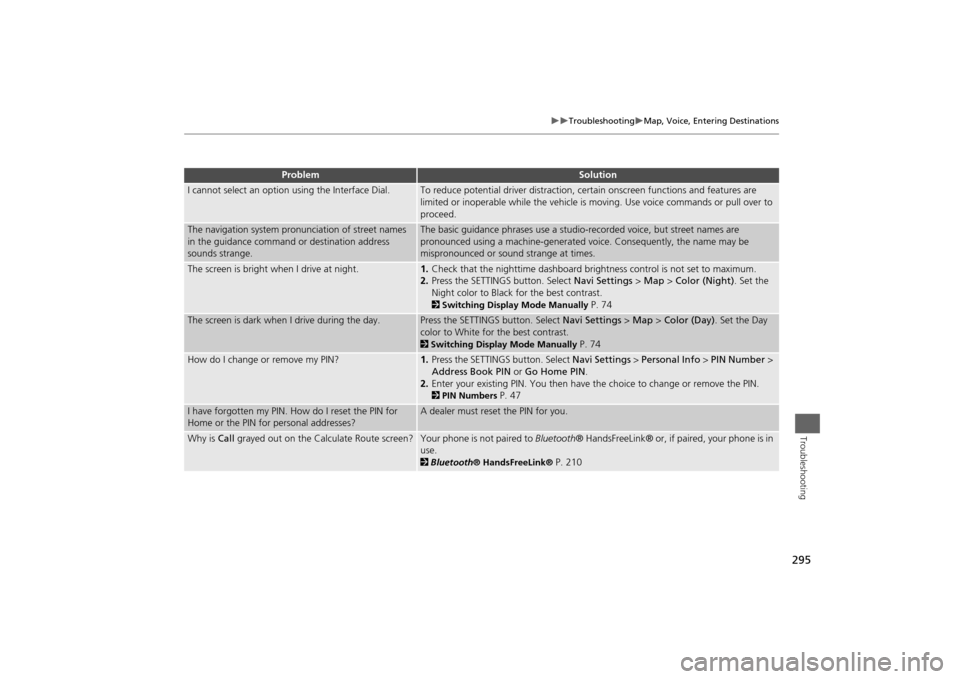
I cannot select an option using the Interface Dial.
To reduce potential driver distraction, ce rtain onscreen functions and features are
limited or inoperable while the vehicle is moving. Use voice commands or pull over to
proceed.
The navigation system pronunciation of street names
in the guidance command or destination address
sounds strange.
The basic guidance phrases use a studio- recorded voice, but street names are
pronounced using a machine-generated voice. Consequently, the name may be
mispronounced or sound strange at times.
The screen is bright when I drive at night.
1. Check that the nighttime dashboard brig htness control is not set to maximum.
2. Press the SETTINGS button. Select Navi Settings > Map > Color (Night) . Set the
Night color to Black for the best contrast. 2 Switching Display Mode Manually
P. 74
The screen is dark when I drive during the day.
Press the SETTINGS button. Select Navi Settings > Map > Color (Day) . Set the Day
color to White for the best contrast. 2 Switching Display Mode Manually
P. 74
How do I change or remove my PIN?
1. Press the SETTINGS button. Select Navi Settings > Personal Info > PIN Number >
Address Book PIN or Go Home PIN.
2. Enter your existing PIN. Yo u then have the choice to change or remove the PIN. 2PIN Numbers
P. 47
I have forgotten my PIN. How do I reset the PIN for
Home or the PIN for personal addresses?
A dealer must reset the PIN for you.
Why is Call grayed out on the Calculate Route screen?
Your phone is not paired to Bluetooth® HandsFreeLink® or, if paired, your phone is in
use. 2 Bluetooth ® HandsFreeLink®
P. 210
Problem
Solution