Page 56 of 234
55
System Setup
Clock Adjustment
HINFO button Set up Other Clock Adjustment
Set the automatic adjustment of the sy stem clock for daylight saving and
international time zones.
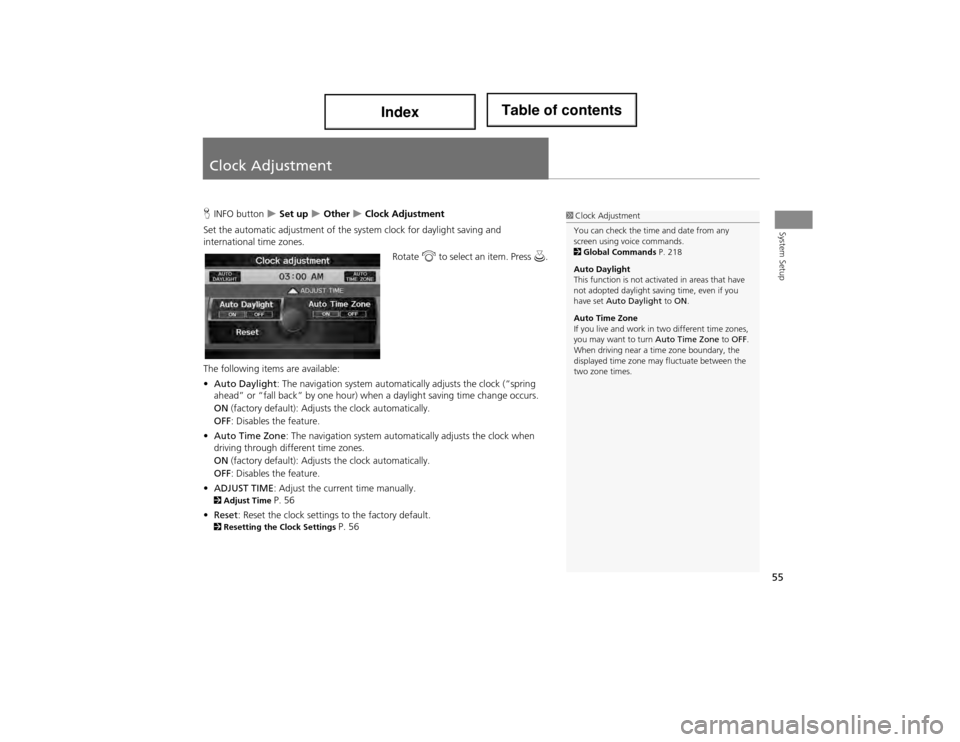
Rotate i to select an item. Press u.
The following items are available:
• Auto Daylight: The navigation system automati cally adjusts the clock (“spring
ahead” or “fall back” by one hour) when a daylight saving time change occurs.
ON (factory default): Adjusts the clock automatically.
OFF : Disables the feature.
• Auto Time Zone : The navigation system automa tically adjusts the clock when
driving through different time zones.
ON (factory default): Adjusts the clock automatically.
OFF : Disables the feature.
• ADJUST TIME : Adjust the current time manually.
2Adjust Time P. 56
• Reset : Reset the clock settings to the factory default.
2Resetting the Clock Settings P. 56
1Clock Adjustment
You can check the time and date from any
screen using voice commands.
2 Global Commands P. 218
Auto Daylight
This function is not activated in areas that have
not adopted daylight saving time, even if you
have set Auto Daylight to ON .
Auto Time Zone
If you live and work in two different time zones,
you may want to turn Auto Time Zone to OFF .
When driving near a time zone boundary, the
displayed time zone may fluctuate between the
two zone times.
Page 57 of 234
56
Clock AdjustmentAdjust Time
System Setup
Adjust Time
HINFO button Set up Other Clock Adjustment Adjust Time
Adjust the current time (hours and minutes). 1.Move w or y to select HOUR or
MINUTE.
2. Rotate i to adjust the value.
3. Move r to select OK.
Resetting the Clock Settings
HINFO button Set up Other Clock Adjustment Reset
Reset the Auto Daylight and Auto Time Zone settings to the factory defaults.
Page 61 of 234
60
System Setup
Data Reset
Reset Factory Default Settings
HINFO button Set up Other Reset Factory Default
Reset all the settings on the Setup screens and multi-view rear camera brightness
settings to their factory default.
Rotate i to select Yes. Press u to
reset the settings.1 Reset Factory Default Settings
When you transfer the vehicle to a third party,
reset all settings to de fault and delete all
personal data.
The following settings are reset:
•Brightness, Contrast, Black Level, Volume,
Interface Dial Feedback , Brightness (multi-view
rear camera)
•Basic Settings: Units, Voice Recognition Tutor,
Display Voice Command Tips, Verbal Reminder
•Routing & Guidance: Rerouting, Unverified
Area Routing, Edit Waypoint Search Area,
Guidance Mode
•Clock Adjustment: Auto Daylight, Auto Time
Zone, Time
•Vehicle: Off-road Tracking
•Colour: Map Colour, Menu Colour
•Route Preference
Page 79 of 234
78
Entering a DestinationPlace Category
Navigation
4.Rotate i to select a place name
from the list. Press u .
5. Set the route to your destination.
2 Calculating the Route P. 87
H DEST/ROUTE button
Place Category My Favorites
Store up to 30 favourite subcategories.
1 Place Category
The straight line distance (as the crow flies, not
driving distance) and direction to the destination
are shown for the highlighted place.
Restaurants with a z icon have a ZAGAT®
review. To display only restaurants with a
ZAGAT® review, select Restaurant > ALL
TYPES (ZAGAT ONLY) or say d “Zagat”.
2 Key to ZAGAT Ratings P. 190
■My Favorites
Page 92 of 234
91
Driving to Your DestinationViewing the Route
Navigation
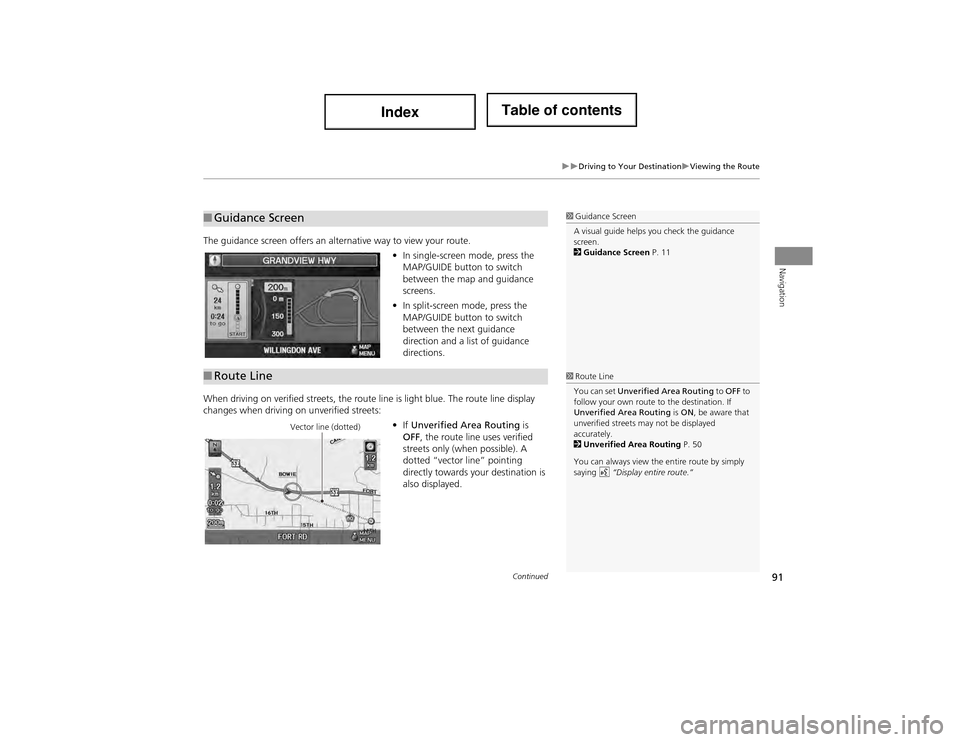
The guidance screen offers an alternative way to view your route.•In single-screen mode, press the
MAP/GUIDE button to switch
between the map and guidance
screens.
• In split-screen mode, press the
MAP/GUIDE button to switch
between the next guidance
direction and a list of guidance
directions.
When driving on verified streets, the route line is light blue. The route line display
changes when driving on unverified streets: •If Unverified Area Routing is
OFF , the route line uses verified
streets only (when possible). A
dotted “vector line” pointing
directly towards your destination is
also displayed.
■ Guidance Screen1 Guidance Screen
A visual guide helps you check the guidance
screen.
2 Guidance Screen P. 11
■Route Line1 Route Line
You can set Unverified Area Routing to OFF to
follow your own route to the destination. If
Unverified Area Routing is ON , be aware that
unverified streets ma y not be displayed
accurately.
2 Unverified Area Routing P. 50
You can always view the entire route by simply
saying d “Display entire route.”
Vector line (dotted)
Continued
Page 138 of 234
137
Audio
Playing Hard Disc Drive (HDD) Audio
The Hard Disc Drive (HDD) Audio function plays tracks from music CDs that have
been recorded onto the built-in HDD. You can arrange the tracks in playlists or play
the tracks using various search methods.
Selecting HDD Mode
1. Press the HDD/AUX button to pl ay tracks stored on the HDD.
2. Select a track by genre, artist, album, recording date, playlist, or track list.
The track number and elapsed time are displayed on the display. Title
information is displayed if found in the Gracenote® Album Info (Gracenote®
Media Database) stored on the HDD.
The HDD has two types of playlists: orig inal playlists and user playlists. An
original playlist is automatically cr eated for each album when a music CD is
recorded. You can customise up to six user playlists provided on the HDD by
adding tracks from your original playlists.
1 Playing Hard Disc Drive (HDD) Audio
d “Display audio screen”
You can control the HDD audio using voice
commands.
2 HDD Commands P. 222
A visual guide helps you operate the audio
system.
2 System Controls P. 4
2 Basic Operation P. 6
Music tracks recorded on HDD cannot be
recorded onto CDs or other devices.
Tracks are recorded at four times the playback
speed using ultra-efficient compression
technology; therefore, sound quality may vary
slightly from the original.
If the HDD is ever replaced, all music data is lost
and cannot be recovered.
If there is a problem, you may see an error
message on the display.
2 Error Messages P. 200
Page 197 of 234
196
TroubleshootingGuidance, Routing
Troubleshooting
Guidance, Routing
ProblemSolution
The navigation system does not route me the same
way I would go or the same way as other mapping
systems.The navigation system attempts to generate the optimal route. You can change the
route preferences used when calculating a route.
2Changing the Route Preference P. 88
The street I’m on is not shown on the map screen.The mapping database is constantly undergoing revision. You can access the most
recent information on the internet.
2Map Coverage P. 211
The vehicle position icon is not following the road and
the “GPS icon” text in the upper left hand corner of
the screen is white or missing.• Check that the GPS antenna (located in the dashboard) is not blocked. For best
reception, remove items from the dashboard, such as radar detectors, cell phones,
or loose articles.
• Metallic tinting or other aftermarket devi ces can interfere with the GPS reception.
Please consult a dealer.
2 GPS System P. 208
The blue highlighted route and voice guidance
stopped or turned into a blue/pink dashed line before I
got to my destination.Your route has entered an unverified area. 2Unverified Area Routing P. 50
How do I stop the map from rotating as I drive along?Press the ENTER button to display the Map Menu. Select Map Information > North-
up, or say d “Display north-up” to change the map orientation.
Sometimes, I cannot select between the North-up and
Heading-up map orientations.The Heading-up map orientation can only be shown in the lower scales (80 m - 1.6 km
scales).
2Map Scale and Functions P. 108
The “time to destination” display sometimes increases
even though I am getting closer to my destination.If your speed reduces due to slower traffic, the navigation system updates the “time to
destination” based on your actual road speed to give you a better estimate of arrival
time.
The vehicle position icon on the map “lags” a short
distance behind, especially when I arrive at an
intersection.This is normal. The navigation system is unaware of the width of intersections. Large
differences in vehicle position can indica te a temporary loss of the GPS signal.
2GPS System P. 208
Page 200 of 234
199
TroubleshootingMiscellaneous Questions
Troubleshooting
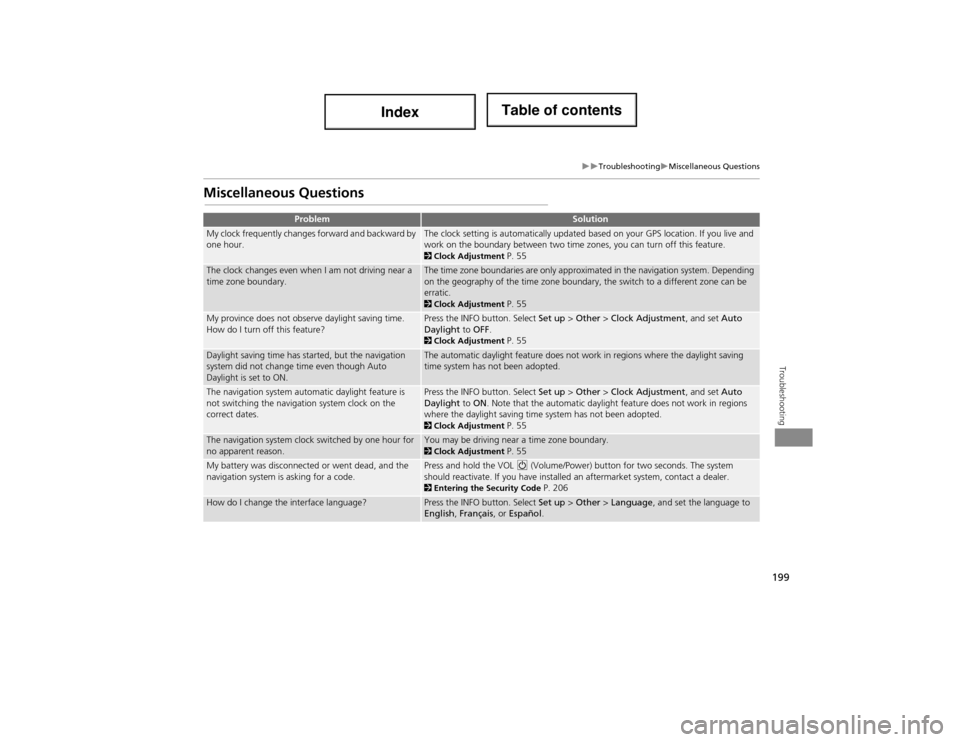
Miscellaneous Questions
ProblemSolution
My clock frequently changes forward and backward by
one hour.The clock setting is automatically updated based on your GPS location. If you live and
work on the boundary between two time zones, you can turn off this feature.
2Clock Adjustment P. 55
The clock changes even when I am not driving near a
time zone boundary.The time zone boundaries are only approximated in the navigation system. Depending
on the geography of the time zone boundary, the switch to a different zone can be
erratic.
2Clock Adjustment P. 55
My province does not observe daylight saving time.
How do I turn off this feature?Press the INFO button. Select Set up > Other > Clock Adjustment , and set Auto
Daylight to OFF .
2Clock Adjustment P. 55
Daylight saving time has started, but the navigation
system did not change time even though Auto
Daylight is set to ON.The automatic daylight feature does not work in regions where the daylight saving
time system has not been adopted.
The navigation system automatic daylight feature is
not switching the navigation system clock on the
correct dates.Press the INFO button. Select Set up > Other > Clock Adjustment , and set Auto
Daylight to ON . Note that the automatic daylight feature does not work in regions
where the daylight saving time system has not been adopted.
2 Clock Adjustment P. 55
The navigation system clock switched by one hour for
no apparent reason.You may be driving near a time zone boundary. 2Clock Adjustment P. 55
My battery was disconnected or went dead, and the
navigation system is asking for a code.Press and hold the VOL 9 (Volume/Power) button for two seconds. The system
should reactivate. If you have installed an aftermarket system, contact a dealer.
2 Entering the Security Code P. 206
How do I change the interface language?Press the INFO button. Select Set up > Other > Language , and set the language to
English , Français , or Español .