Page 147 of 234
146
Playing Hard Disc Drive (HDD) AudioUpdating Gracenote® Album Info
Audio
Updating Gracenote® Album Info
HAUDIO button (in HDD or DISC mode) AUDIO MENU HDD Setup
Update the Gracenote® Album Info (Grace note® Media Database) that is included
with the navigation system.
1.Insert the update disc into the disc
slot or connect the USB flash drive
that includes the update.
2. Rotate i to select Update
Gracenote Info . Press u.
3. Rotate i to select USB or Disc
update source media. Press u.
4. Rotate i to select Yes on the
confirmation screen. Press u.
The system updates the
Gracenote information.
5. Rotate i to select OK on the
confirmation screen. Press u.
1
Updating Gracenote® Album Info
To acquire updated files:
•Consult a dealer.
•Canada: Visit www.acura.ca.
Once you perform an update, any information
you edited before will be overwritten or erased.Remaining capacity Maximum capacity
Gracenote version
number
Page 148 of 234
147
Audio
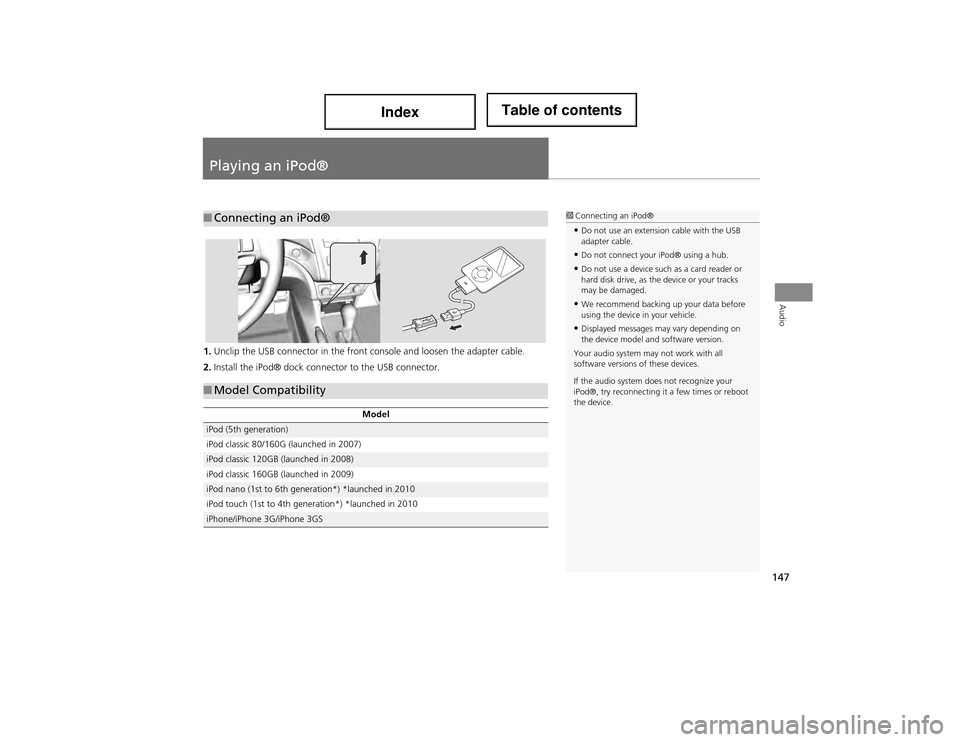
Playing an iPod®
1.Unclip the USB connector in the front console and loosen the adapter cable.
2. Install the iPod® dock connector to the USB connector.
■Connecting an iPod®1 Connecting an iPod®
•Do not use an extension cable with the USB
adapter cable.
•Do not connect your iPod® using a hub.
•Do not use a device such as a card reader or
hard disk drive, as the device or your tracks
may be damaged.
•We recommend backing up your data before
using the device in your vehicle.
•Displayed messages may vary depending on
the device model and software version.
Your audio system may not work with all
software versions of these devices.
If the audio system does not recognize your
iPod®, try reconnecting it a few times or reboot
the device.
■ Model Compatibility
Model
iPod (5th generation)
iPod classic 80/160G (launched in 2007)
iPod classic 120GB (launched in 2008)
iPod classic 160GB (launched in 2009)
iPod nano (1st to 6th generation*) *launched in 2010
iPod touch (1st to 4th generation*) *launched in 2010
iPhone/iPhone 3G/iPhone 3GS
Page 149 of 234
148
Playing an iPod®Selecting iPod® Mode
Audio
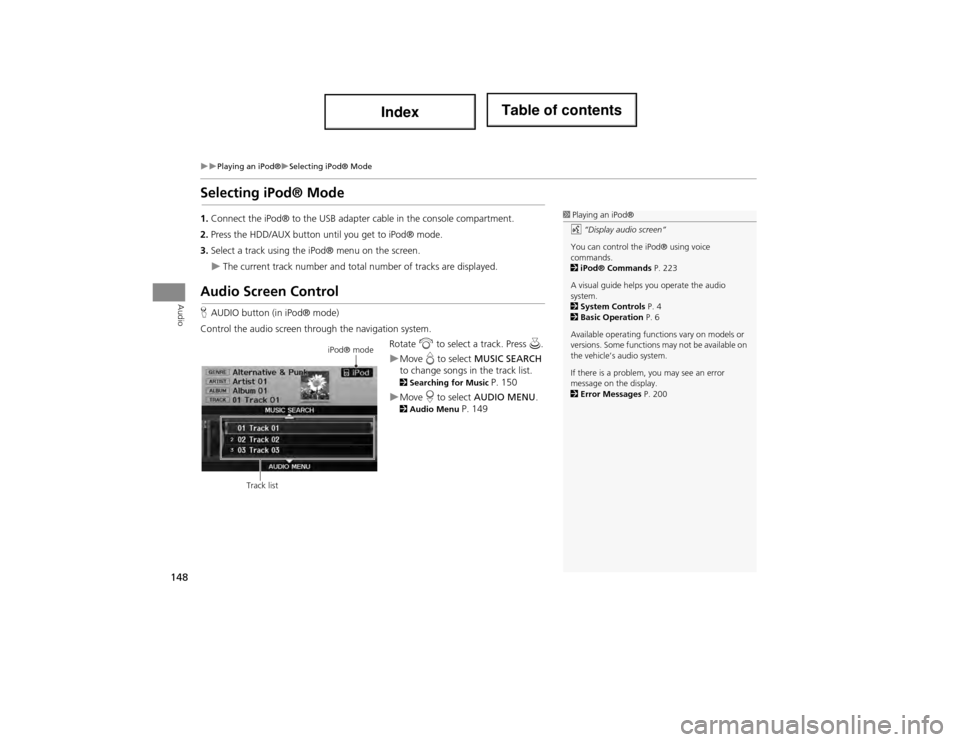
Selecting iPod® Mode
1.Connect the iPod® to the USB adapter cable in the c onsole compartment.
2. Press the HDD/AUX button until you get to iPod® mode.
3. Select a track using the iP od® menu on the screen.
The current track number and total number of tracks are displayed.
Audio Screen Control
HAUDIO button (in iPod® mode)
Control the audio screen through the navigation system. Rotate i to select a track. Press u.
Move e to select MUSIC SEARCH
to change songs in the track list.
2 Searching for Music P. 150
Move r to select AUDIO MENU . 2Audio Menu P. 149
1Playing an iPod®
d “Display audio screen”
You can control the iPod® using voice
commands.
2 iPod® Commands P. 223
A visual guide helps you operate the audio
system.
2 System Controls P. 4
2 Basic Operation P. 6
Available operating functions vary on models or
versions. Some functions may not be available on
the vehicle’s audio system.
If there is a problem, you may see an error
message on the display.
2 Error Messages P. 200
iPod® mode
Track list
Page 153 of 234
152
Audio
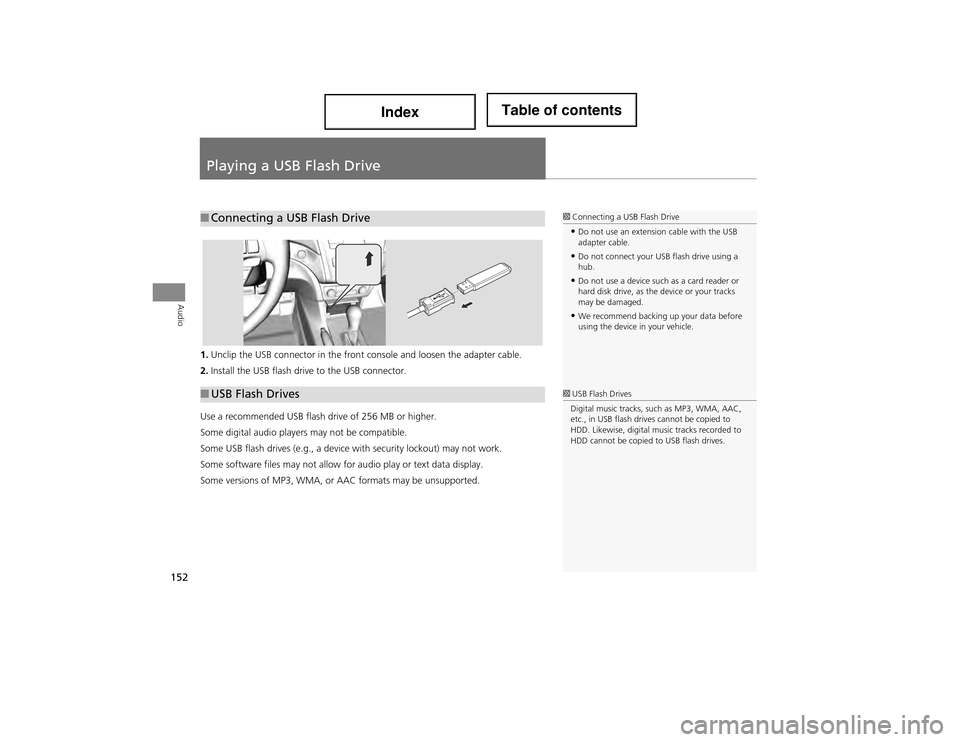
Playing a USB Flash Drive
1.Unclip the USB connector in the front console and loosen the adapter cable.
2. Install the USB flash driv e to the USB connector.
Use a recommended USB flash drive of 256 MB or higher.
Some digital audio players may not be compatible.
Some USB flash drives (e.g., a device with security lockout) may not work.
Some software files may not allow for audio play or text data display.
Some versions of MP3, WMA, or AAC formats may be unsupported.
■ Connecting a USB Flash Drive1 Connecting a USB Flash Drive
•Do not use an extension cable with the USB
adapter cable.
•Do not connect your USB flash drive using a
hub.
•Do not use a device such as a card reader or
hard disk drive, as the device or your tracks
may be damaged.
•We recommend backing up your data before
using the device in your vehicle.
■USB Flash Drives1 USB Flash Drives
Digital music tracks, such as MP3, WMA, AAC,
etc., in USB flash drives cannot be copied to
HDD. Likewise, digital mu sic tracks recorded to
HDD cannot be copied to USB flash drives.
Page 154 of 234
153
Playing a USB Flash DriveSelecting USB Mode
Audio
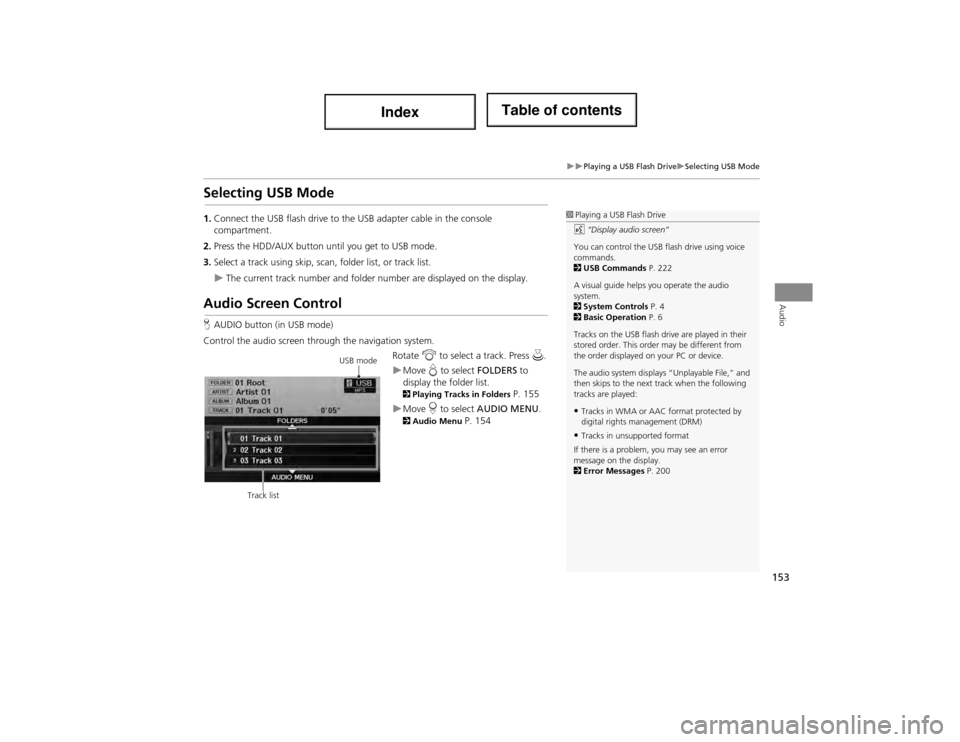
Selecting USB Mode
1.Connect the USB flash drive to the USB adapter cable in the console
compartment.
2. Press the HDD/AUX button until you get to USB mode.
3. Select a track using skip, scan , folder list, or track list.
The current track number and folder number are displayed on the display.
Audio Screen Control
HAUDIO button (in USB mode)
Control the audio screen through the navigation system. Rotate i to select a track. Press u.
Move e to select FOLDERS to
display the folder list.
2 Playing Tracks in Folders P. 155
Move r to select AUDIO MENU . 2Audio Menu P. 154
1Playing a USB Flash Drive
d “Display audio screen”
You can control the USB flash drive using voice
commands.
2 USB Commands P. 222
A visual guide helps you operate the audio
system.
2 System Controls P. 4
2 Basic Operation P. 6
Tracks on the USB flash dr ive are played in their
stored order. This order may be different from
the order displayed on your PC or device.
The audio system displays “Unplayable File,” and
then skips to the next track when the following
tracks are played:
•Tracks in WMA or AAC format protected by
digital rights management (DRM)
•Tracks in unsupported format
If there is a problem, you may see an error
message on the display.
2 Error Messages P. 200
USB mode
Track list
Page 155 of 234
154
Playing a USB Flash DriveAudio Menu
Audio
Audio Menu
HAUDIO button (in USB mode) AUDIO MENU
Rotate i to select an item. Press u.
The following items are available:
• Sound Setup : Displays the sound preferences screen.
2Adjusting the Sound P. 158
• Repeat :
6 : Repeats the current track.
7 : Repeats all tracks in the current folder.
• Random :
F : Plays all tracks on the USB flash drive in random order.
I : Plays all tracks in the current folder in random order.
• Scan :
1 : Scans all tracks in the current folder in the order they were stored and plays
a 10-second sample. Select OFF to stop scanning and pl ay the current selection.
2 : Scans the first track in each folder on the USB flash drive and plays a 10-
second sample. Select OFF to stop scanning and pl ay the current selection.
Page 156 of 234
155
Playing a USB Flash DrivePlaying Tracks in Folders
Audio
Playing Tracks in Folders
HAUDIO button (in USB mode) FOLDERS
Change the folder if the tracks ar e stored in a folder structure.
1.Rotate i to select a folder. Press
u .
The system displays the track
list.
2. Rotate i to select a track. Press
u .
The system begins playing the
selected track.
1Playing Tracks in Folders
Folder List
•Any music tracks not in a folder are
automatically added to a “ROOT” folder,
which is displayed at the top of the Folder List.
•If the root folder has additional folders in a
lower layer, they are listed on the screen.
Page 159 of 234
158
Audio
Adjusting the Sound
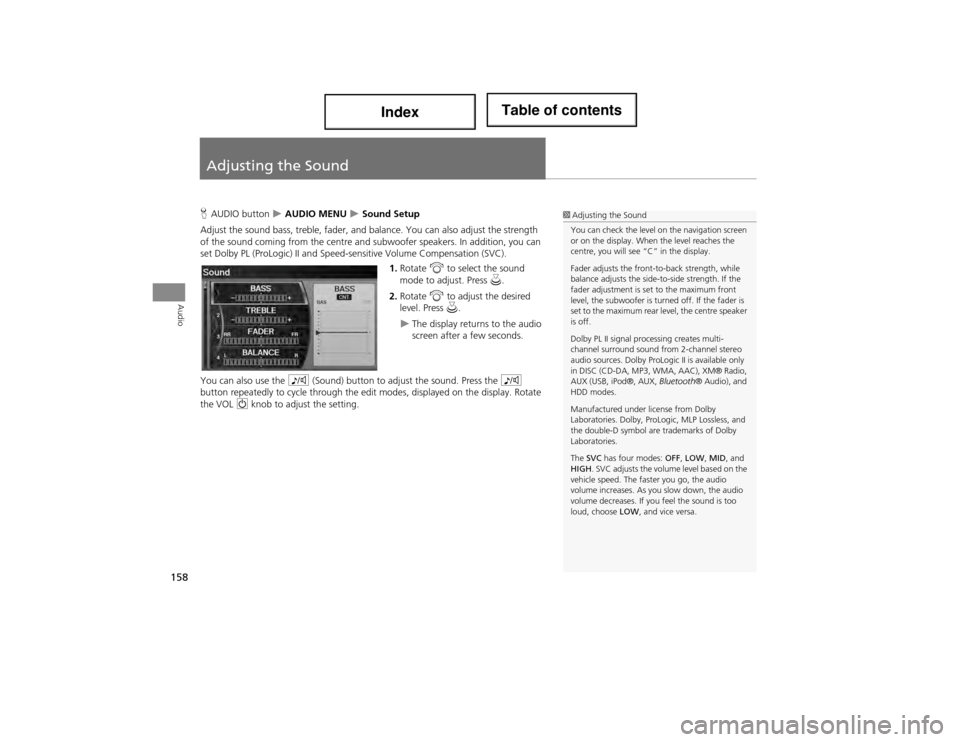
HAUDIO button AUDIO MENU Sound Setup
Adjust the sound bass, treble, fader, and balance. You can also adjust the strength
of the sound coming from th e centre and subwoofer speakers. In addition, you can
set Dolby PL (ProLogic) II and Speed -sensitive Volume Compensation (SVC).
1. Rotate i to select the sound
mode to adjust. Press u.
2. Rotate i to adjust the desired
level. Press u.
The display returns to the audio
screen after a few seconds.
You can also use the 8 (Sound) button to adjust the sound. Press the 8
button repeatedly to cycle th rough the edit modes, displayed on the display. Rotate
the VOL 9 knob to adjust the setting.
1Adjusting the Sound
You can check the level on the navigation screen
or on the display. When the level reaches the
centre, you will see “C” in the display.
Fader adjusts the front-to-back strength, while
balance adjusts the side-to-side strength. If the
fader adjustment is set to the maximum front
level, the subwoofer is turn ed off. If the fader is
set to the maximum rear le vel, the centre speaker
is off.
Dolby PL II signal processing creates multi-
channel surround sound from 2-channel stereo
audio sources. Dolby ProLogic II is available only
in DISC (CD-DA, MP3, WMA, AAC), XM® Radio,
AUX (USB, iPod®, AUX, Bluetooth® Audio), and
HDD modes.
Manufactured under license from Dolby
Laboratories. Dolby, ProL ogic, MLP Lossless, and
the double-D symbol are trademarks of Dolby
Laboratories.
The SVC has four modes: OFF, LOW , MID , and
HIGH . SVC adjusts the volume level based on the
vehicle speed. The faster you go, the audio
volume increases. As you slow down, the audio
volume decreases. If yo u feel the sound is too
loud, choose LOW, and vice versa.