2014.5 VAUXHALL MERIVA charging
[x] Cancel search: chargingPage 89 of 237

Instruments and controls87
Adjust all settings.
Set date
To adjust the time settings, select the
Set Date menu item. Turn the
multifunction knob to adjust the first
setting.
Press the multifunction knob to
confirm the input. The coloured
background moves to the next
setting.
Adjust all settings.
Time format
To choose the desired time format,
select 12 hr / 24 hr Format . Activate
12 Hour or 24 Hour .
Vehicle personalisation 3 109.Power outlets
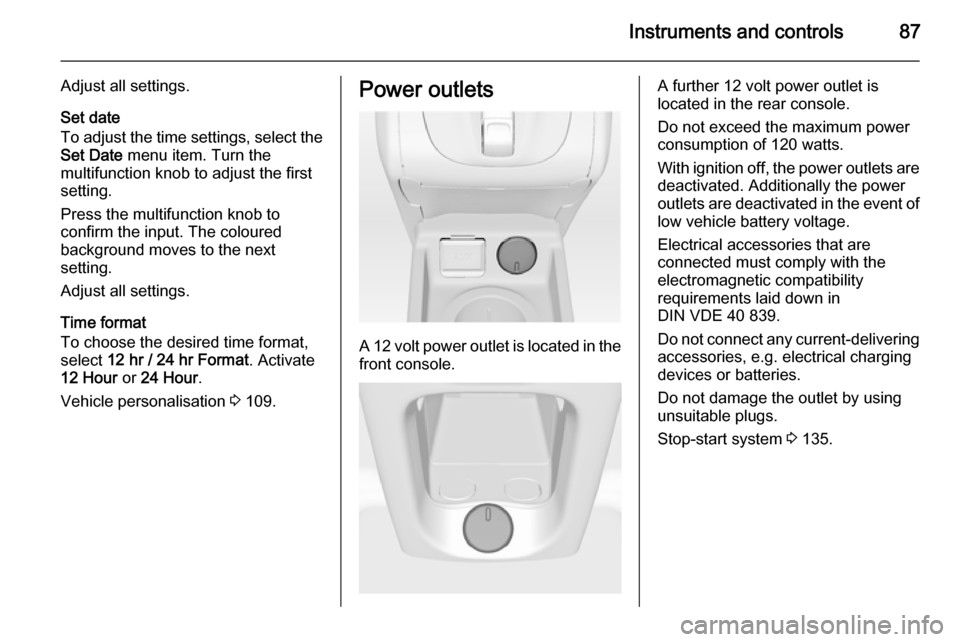
A 12 volt power outlet is located in the
front console.
A further 12 volt power outlet is
located in the rear console.
Do not exceed the maximum power
consumption of 120 watts.
With ignition off, the power outlets are
deactivated. Additionally the power
outlets are deactivated in the event of
low vehicle battery voltage.
Electrical accessories that are
connected must comply with the
electromagnetic compatibility
requirements laid down in
DIN VDE 40 839.
Do not connect any current-delivering
accessories, e.g. electrical charging
devices or batteries.
Do not damage the outlet by using
unsuitable plugs.
Stop-start system 3 135.
Page 96 of 237

94Instruments and controls9Warning
Have the cause of the fault
remedied immediately by a
workshop.
Belt pretensioners, airbag system
3 44, 3 48.
Airbag deactivation
V illuminates yellow.
Illuminates for approx. 60 seconds
after the ignition is switched on. The
front passenger airbag is activated.
* illuminates yellow.
The front passenger airbag is
deactivated 3 53.
9 Danger
Risk of fatal injury for a child using
a child restraint system together
with activated front passenger
airbag.
Risk of fatal injury for an adult
person with deactivated front
passenger airbag.
Charging system
p illuminates red.
Illuminates when the ignition is
switched on and extinguishes shortly
after the engine starts.
Illuminates when the engine is
running
Stop, switch off engine. Vehicle
battery is not charging. Engine
cooling may be interrupted. The
brake servo unit may cease to be
effective. Seek the assistance of a
workshop.
Malfunction indicator light
Z illuminates or flashes yellow.
Illuminates when the ignition is
switched on and extinguishes shortly
after the engine starts.
Illuminates when the engine is
running
Fault in the emission control system. The permitted emission limits may be
exceeded. Seek the assistance of a
workshop immediately.
Flashes when the engine isrunning
Fault that could lead to catalytic
converter damage. Ease up on the
accelerator until the flashing stops.
Seek the assistance of a workshop
immediately.
Service vehicle soon g illuminates yellow.
Additionally a warning message or a
warning code is displayed.
The vehicle needs a service.
Seek the assistance of a workshop.
Vehicle messages 3 103.
Page 109 of 237

Instruments and controls107
1. Switch off immediately anyelectrical consumers which are
not required for a safe ride, e.g.
seat heating, heated rear window
or other main consumers.
2. Charge the vehicle battery by driving continuously for a while or
by using a charging device.
The warning message or warning
code will disappear after the engine
has been started two times running
without voltage drop.
If the vehicle battery cannot be
recharged, have the cause of the fault
remedied by a workshop.Trip computer
The menus and functions can be
selected via the buttons on the turn
signal lever.
Press the MENU button to select the
Trip/Fuel Information Menu .
Turn the adjuster wheel to select one
of the submenus:
■ Trip odometer 1
■ Trip odometer 2
■ Range
■ Average consumption
■ Instantaneous consumption
■ Average speed
■ Digital speed
Trip odometer 2 and digital speed are
only available on vehicles with
Uplevel-Display.
Page 134 of 237

132Driving and operatingDriving and operatingDriving hints............................... 132
Starting and operating ...............133
Engine exhaust .......................... 137
Automatic transmission .............. 139
Manual transmission ..................142
Brakes ........................................ 143
Ride control systems .................145
Driver assistance systems .........147
Fuel ............................................ 152
Trailer hitch ................................ 159Driving hints
Control of the vehicleNever coast with engine not
running (except during Autostop)
Many systems will not function in this
situation (e.g. brake servo unit, power steering). Driving in this manner is a
danger to yourself and others. All
systems function during an Autostop,
but there will be a controlled reduction
in power steering assist and vehicle
speed is reduced.
Stop-start system 3 135.
Idle boost
If charging of the vehicle battery is
required due to vehicle battery
condition, the power output of the
generator has to be increased. This
will be achieved by an idle boost
which may be audible.
On vehicles with Uplevel-Display, a
message appears in the Driver
Information Centre.Pedals
To ensure the pedal travel is
uninhibited, there must be no mats in the area of the pedals.
Steering If power steering assist is lost
because the engine stops or due to a
system malfunction, the vehicle can
be steered but may require a higher
or lower steering effort.
Control indicator c 3 96.Caution
Vehicles equipped with hydraulic
power steering:
If the steering wheel is turned until it reaches the end of its travel, and
is held in that position for more
than 15 seconds, damage may
occur to the power steering
system and there may be loss of
power steering assist.
Page 135 of 237

Driving and operating133Starting and operating
New vehicle running-in Do not brake unnecessarily hard for
the first few journeys.
During the first drive, smoke may
occur because of wax and oil
evaporating off the exhaust system.
Park the vehicle in the open for a
while after the first drive and avoid
inhaling the fumes.
During the running-in period fuel and
engine oil consumption may be
higher and the cleaning process of the diesel particle filter may take
place more often. Autostop may be inhibited to allow for charging the
vehicle battery.
Diesel particle filter 3 137.Ignition switch positions0=Ignition off1=Steering wheel lock released,
ignition off2=Ignition on, for diesel engine:
preheating3=Starting
Retained power off
The following electronic systems can
work until the driver's door is opened
or at the latest for 10 minutes after the
ignition is switched off:
■ Power windows
■ Power outlets
Power to the Infotainment system will continue to operate for 30 minutes oruntil the key is removed from the
ignition, regardless of whether any
door will be opened.
Starting the engine
Manual transmission: operate clutch.
Automatic transmission: operate
brake and move the selector lever to
P or N.
Do not operate accelerator pedal.
Page 171 of 237

Vehicle care169
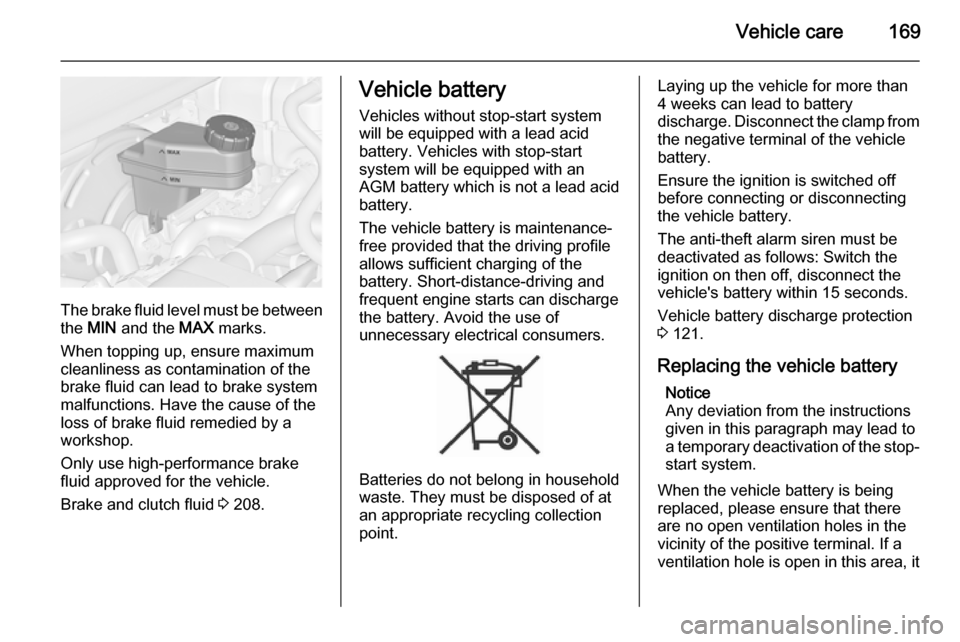
The brake fluid level must be betweenthe MIN and the MAX marks.
When topping up, ensure maximum cleanliness as contamination of the
brake fluid can lead to brake system
malfunctions. Have the cause of the
loss of brake fluid remedied by a
workshop.
Only use high-performance brake
fluid approved for the vehicle.
Brake and clutch fluid 3 208.
Vehicle battery
Vehicles without stop-start system
will be equipped with a lead acid
battery. Vehicles with stop-start
system will be equipped with an
AGM battery which is not a lead acid
battery.
The vehicle battery is maintenance-
free provided that the driving profile
allows sufficient charging of the
battery. Short-distance-driving and
frequent engine starts can discharge
the battery. Avoid the use of
unnecessary electrical consumers.
Batteries do not belong in household
waste. They must be disposed of at
an appropriate recycling collection
point.
Laying up the vehicle for more than
4 weeks can lead to battery
discharge. Disconnect the clamp from the negative terminal of the vehicle
battery.
Ensure the ignition is switched off
before connecting or disconnecting
the vehicle battery.
The anti-theft alarm siren must be
deactivated as follows: Switch the ignition on then off, disconnect the
vehicle's battery within 15 seconds.
Vehicle battery discharge protection
3 121.
Replacing the vehicle battery Notice
Any deviation from the instructions
given in this paragraph may lead to
a temporary deactivation of the stop-
start system.
When the vehicle battery is being
replaced, please ensure that there
are no open ventilation holes in the
vicinity of the positive terminal. If a
ventilation hole is open in this area, it
Page 172 of 237

170Vehicle care
must be closed off with a dummy cap,and the ventilation in the vicinity of the
negative terminal must be opened.
Only use vehicle batteries that allow
the fuse box to be mounted above the vehicle battery.
In vehicles with stop-start system,
ensure to have the AGM (Absorptive
Glass Mat) battery replaced with an
AGM battery again.
An AGM battery can be identified by
the label on the battery. We
recommend the use of an original
Vauxhall vehicle battery.
Notice
Using an AGM vehicle battery
different from the original Vauxhall
vehicle battery may result in a lower performance of the stop-start
system.9 Warning
When fitting a battery with a length
deviating from the original one, itis essential to ensure a proper
fitting of the buffer element.
We recommend that you have the
vehicle battery replaced by a
workshop.
Stop-start system 3 135.
Charging the vehicle battery9 Warning
On vehicles with stop-start
system, ensure that the charging potential does not exceed
14.6 volts when using a battery
charger. Otherwise the vehicle
battery might be damaged.
Jump starting 3 200.
Warning label
Page 195 of 237

Vehicle care193
1. Take the sealant bottle andbracket with air hose from the
insert.
2. Detach air hose from bracket and screw onto sealant bottle
connection.
3. Position the sealant bottle on the bracket. Make sure that the bottle
does not fall.
4. Unscrew valve cap from defective
tyre.
5. Screw tyre inflation hose to valve.
6. Screw air hose onto compressor connection.
7. Switch on ignition. To avoid discharging the vehicle
battery, we recommend running
the engine.