2014.5 VAUXHALL INSIGNIA phone
[x] Cancel search: phonePage 57 of 143

External devices57
Notice
If a non-readable SD card is connected, a corresponding error
message will appear and the
Infotainment system will
automatically switch to the previous
function.
To remove the SD card, first activate
another function. Then, gently push
the SD card deeper into the slot. The
SD card is pushed out of the slot and
may be removed.Caution
Avoid disconnecting the device
during playback. This may
damage the device or the
Infotainment system.
SD audio function
The Infotainment system can play music files stored on the SD card.
SD movie function
The Infotainment system can play movies stored on the SD card.
Bluetooth
Bluetooth enabled audio sources
(e.g. music mobile phones, MP3
players featuring Bluetooth, etc.),
which support the Bluetooth music profiles A2DP and AVRCP can be
connected wirelessly to the
Infotainment system.
Connecting a device
Find a detailed description on the
Bluetooth connection 3 87.
Bluetooth audio function
The Infotainment system can play
music files contained in Bluetooth
devices like iPod or Smartphone.
File formats Only devices formatted in the FAT32,
NTFS and HFS+ file systems are
supported.
Notice
Some files may not be played
properly. This might be due to a
different recording format or the
condition of the file.Files from online shops to which
Digital Rights Management (DRM)
has been applied cannot be played.
The Infotainment system can play the following audio and movie files stored on external devices.
Audio files
The playable audio file formats
are .mp3, .wma, .aac, .m4a and .aif.
When playing a file with ID3 tag
information, the Infotainment system
can display information, e.g. on the
track title and artist.
Movie files
The playable movie file formats
are .avi, .mpg, .mp4, .xvid and .wmv.
Common audio and video
combinations for mobile devices are
generally supported.
Playing audio
Starting playback If not connected, connect the device
3 55.
Page 60 of 143

60External devices
Fast forwarding or rewinding
Tap and hold the t or v buttons to
rewind or fast forward.
Video menu To display the video menu, select the
MENU screen button in the
interaction selector bar.
Find a detailed description of the
menu 3 57.
Using apps The Infotainment system supports the
operation of apps via the controls on the Infotainment system.
Before an application can be
operated using the controls and
menus of the Infotainment system,
the respective application has to be
installed via a smartphone.
Activating the Tethering function on the smartphone
Activate the Tethering and the
Bluetooth functions on the
smartphone (see user guide of the
smartphone).Notice
Tethering has to be set up correctly
depending on the network provider.
Connect the smartphone to the
Infotainment system via Bluetooth
3 87.
Creating a new account Press the ; button and then select
the Apps icon to display a welcome
screen.
To setup a new account, select the
respective screen button at the
bottom of the screen. You are led through various setup screens.
First, a list of all phones paired to the
system is displayed. Select the phone
with which you want to establish an
Internet connection to the app store.
Then a keyboard for the entry of an
email address is displayed. Enter
your email address.
In the menu displayed afterwards, a
PIN code needs to be set. Select the
New PIN entry field. A keyboard is
displayed. Select the desired digits.
To confirm the PIN code, select theConfirm New PIN entry field. The
keyboard is redisplayed. Enter the
PIN code again. Confirm your input.
A menu for country selection is
displayed. Scroll through the list and
select the desired country.
Last, the privacy policy of the app
store is displayed. Select the Agree
screen button to create the account.
The apps main menu is displayed.
Installing new apps
Press the ; button and then select
the Apps icon to display the apps
main menu.
Select the Apps screen button at the
bottom of the screen to display the apps menu.
All
To display a list of all apps available,
select the All screen button at the
bottom of the screen.
Scroll through the list and select the
desired app. A submenu with detailed information on the respective app is
displayed.
Page 69 of 143

Navigation69
The contacts list and POI data is
stored on the connected USB device
in the folders "F:\myContacts"
respective "F:\myPOIs", where "F:\" is
the root folder of the USB device.
Notice
This function may only be carried out if a USB device with sufficient
storage space is connected.
Downloading contacts data
You can exchange your vehicle
contacts list data with Infotainment
systems in other cars:
To upload the data to a USB device,
see "Uploading navigation data to a
USB device" above.
Connect the USB device to the
Infotainment system of another car
3 55.
A message is displayed that prompts
you to confirm the download.
After confirmation, the contacts data
is downloaded to the Infotainment
system.
The downloaded contacts are then
selectable via the CONTACTS menu
3 32.Creating and downloading user
defined POIs (My POIs)
In addition to the predefined POIs
already stored in the Infotainment
system, you can create user defined
POIs that meet your personal
requirements. After creation, such
user defined POIs can be
downloaded to the Infotainment
system.
For each POI, you need to define the
GPS coordinates (longitude and
latitude values) of the respective
location and a descriptive name.
After downloading the POI data to the Infotainment system, you will find the
respective POIs as selectable
destinations in the My POIs menu,
see "Selecting a point of interest" in
chapter "Destination input" 3 70.
Creating a text file with POI data
Create a text file (e.g. by using a
simple text editor software) with an
arbitrary name and the file
extension .poi, e.g. "TomsPOIs.poi".
Enter the POI data into the text file in
the following format:
Longitude coordinate, Latitude
coordinate, "Name of POI",
"Additional information", "Phone
number"
Example:
7.0350000, 50.6318040, "Michaels
Home", "Bonn, Hellweg 6",
"02379234567" , see image above.
The GPS coordinates must be
expressed in decimal degrees and
can be taken, e.g., from a
topographical map.
Page 70 of 143

70Navigation
The additional information and phonenumber strings are optional.
The POI name and the additional
information string may not exceed 60 characters each. The phone number
string may not exceed 30 characters.
The POI data of each destination
address must be entered in a single
separate line, see image above.
Storing the POI data on a USB drive
In the root directory of a USB drive,
create a folder named " myPOIs",
e.g. "F:\myPOIs", where "F:\" is the
root directory of the USB drive.
In the "myPOIs" folder, store the text
file with your POIs, e.g. "F:\myPOIs
\TomsPOIs.poi".
Notice
Optionally, subfolders may be
created in the "myPOIs" folder and
several POI files stored.
Downloading the POI data to the
Infotainment system
Connect the USB device with your
user defined POI data to the USB port
3 55 of the Infotainment system.A message is displayed that prompts
you to confirm the download.
After confirmation, the POI data will
be downloaded to the Infotainment
system.
The downloaded POIs are then
selectable as destinations via the My
POIs menu, see "Selecting a point of
interest" in chapter "Destination input" 3 70.
Destination input The navigation application provides
different options to set a destination
for route guidance.
Press the ; button and then select
the NAV icon to display the navigation
map.
Entering an address via
keyboard Select the DESTINATION screen
button in the interaction selector bar
and then select the ADDRESS tab.
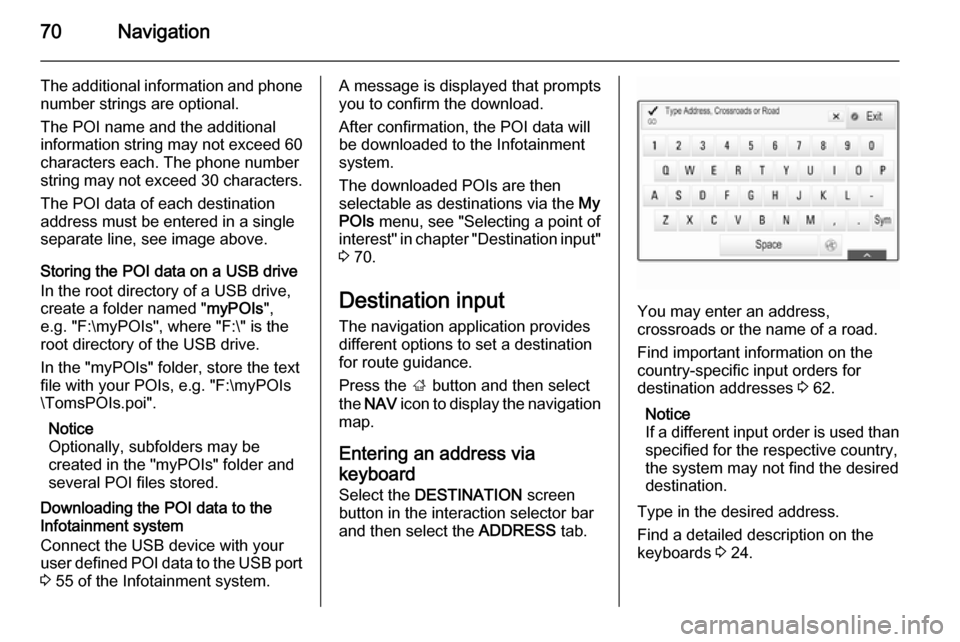
You may enter an address,
crossroads or the name of a road.
Find important information on the country-specific input orders for
destination addresses 3 62.
Notice
If a different input order is used than specified for the respective country,
the system may not find the desired
destination.
Type in the desired address.
Find a detailed description on the
keyboards 3 24.
Page 74 of 143

74Navigation
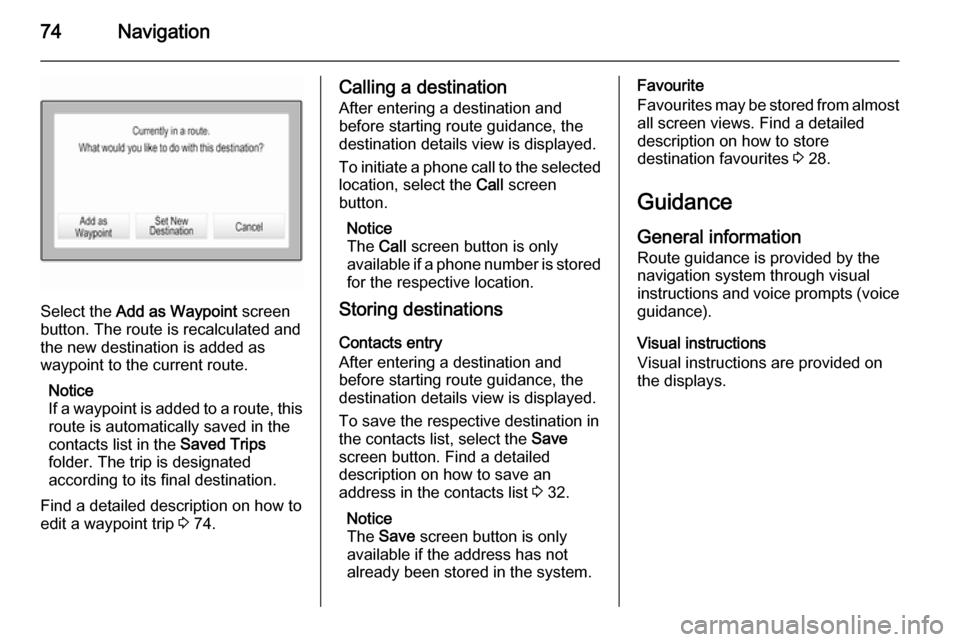
Select the Add as Waypoint screen
button. The route is recalculated and
the new destination is added as
waypoint to the current route.
Notice
If a waypoint is added to a route, this route is automatically saved in the
contacts list in the Saved Trips
folder. The trip is designated
according to its final destination.
Find a detailed description on how to edit a waypoint trip 3 74.
Calling a destination
After entering a destination and
before starting route guidance, the
destination details view is displayed.
To initiate a phone call to the selected
location, select the Call screen
button.
Notice
The Call screen button is only
available if a phone number is stored for the respective location.
Storing destinations
Contacts entry
After entering a destination and
before starting route guidance, the
destination details view is displayed.
To save the respective destination in
the contacts list, select the Save
screen button. Find a detailed
description on how to save an
address in the contacts list 3 32.
Notice
The Save screen button is only
available if the address has not
already been stored in the system.Favourite
Favourites may be stored from almost all screen views. Find a detailed
description on how to store
destination favourites 3 28.
Guidance General information
Route guidance is provided by the
navigation system through visual
instructions and voice prompts (voice guidance).
Visual instructions
Visual instructions are provided on
the displays.
Page 75 of 143

Navigation75
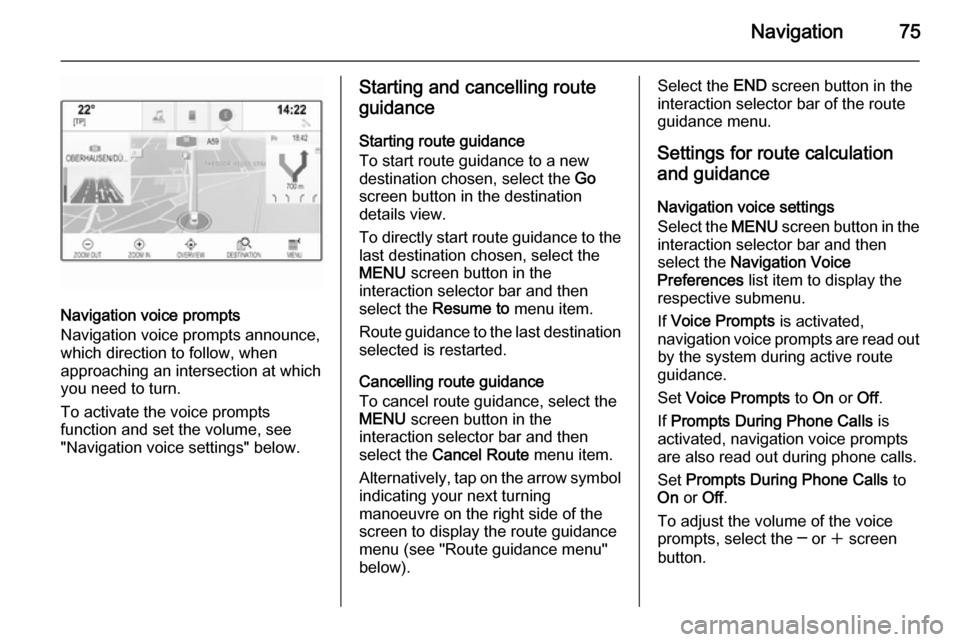
Navigation voice prompts
Navigation voice prompts announce,
which direction to follow, when
approaching an intersection at which
you need to turn.
To activate the voice prompts
function and set the volume, see
"Navigation voice settings" below.
Starting and cancelling route
guidance
Starting route guidance
To start route guidance to a new
destination chosen, select the Go
screen button in the destination
details view.
To directly start route guidance to the last destination chosen, select the
MENU screen button in the
interaction selector bar and then
select the Resume to menu item.
Route guidance to the last destination selected is restarted.
Cancelling route guidance
To cancel route guidance, select the
MENU screen button in the
interaction selector bar and then
select the Cancel Route menu item.
Alternatively, tap on the arrow symbol
indicating your next turning
manoeuvre on the right side of the
screen to display the route guidance
menu (see "Route guidance menu"
below).Select the END screen button in the
interaction selector bar of the route
guidance menu.
Settings for route calculation and guidance
Navigation voice settings
Select the MENU screen button in the
interaction selector bar and then select the Navigation Voice
Preferences list item to display the
respective submenu.
If Voice Prompts is activated,
navigation voice prompts are read out
by the system during active route
guidance.
Set Voice Prompts to On or Off.
If Prompts During Phone Calls is
activated, navigation voice prompts
are also read out during phone calls.
Set Prompts During Phone Calls to
On or Off.
To adjust the volume of the voice
prompts, select the ─ or w screen
button.
Page 82 of 143

82Speech recognition
Confirm Less: If selected, the system
asks you less often to confirm your
voice inputs. Consequently, the
system might sometimes misinterpret your commands and not perform the
correct action.
Notice
When starting to use the speech recognition, it may be advantageous
to use the Confirm More setting. As
you get more experienced, i.e., you
get to know how to pronounce your
commands in a way the speech
recognition understands you
correctly, it may be advantageous to
use the Confirm Less setting.Prompt Length
The length and the detailedness of
the questions and statements the
speech recognition gives out can be
adjusted in the corresponding
submenu.Audio Feedback Speed
The speed with which the speech
recognition asks questions or makes
statements can be adjusted in the
corresponding submenu.If Medium is selected, the system's
speech rate corresponds to natural
speech.
Notice
When starting to use the speech
recognition, it may be advantageous
to use the Long setting. As you get
more experienced, it may be
advantageous to use the Short
setting.
Voice pass-thru application
The voice pass-thru application of the Infotainment system allows access tothe speech recognition commands on
your smartphone. See your
smartphone manufacturer's user
guide to find out whether your
smartphone supports this feature.
Usage
Embedded speech recognition Activating speech recognition Notice
Speech recognition is not available
during an active phone call.Activation via the w button on the
steering wheel
Press the w button on the left-hand
side of the steering wheel.
The audio system mutes, a voice
output message prompts you to say a command, and a help menu with the
most important commands currently
available is shown in the Driver
Information Centre.
As soon as the speech recognition is
ready for voice input, a beep is heard. The speech recognition symbol in the
upper left corner of the help menu changes from white to red.
Page 84 of 143

84Speech recognition
In the following situations, a dialogue
sequence is automatically cancelled:
■ If you do not say any command for a certain period of time (by default
you are prompted three times to
say a command).
■ If you say commands that are not recognised by the system (by
default you are prompted three
times to say a correct command).
Operation via speech commands
The speech recognition can
understand commands that are either
naturally stated in sentence form, or
direct commands stating the
application and the action.
For best results: ■ Listen for the voice prompt and wait
for the beep before saying a
command or replying.
■ Say " Help" or read the example
commands on the screen.■ The voice prompt can be interrupted by pressing the w button
again
■ Wait for the beep and then speak the command naturally, not too
fast, not too slow. Use short and direct commands.
Usually phone and audio commands
can be spoken in a single command. For example, "Call David Smith at
work", "Play" followed by the artist or
song name, or "Tune to" followed by
the radio frequency and the
waveband.
Navigation destinations, however,
are too complex for a single
command. First, state a command that explains the type of destination
needed, such as "Directions to an
Address", "Navigate to an
intersection", "Find a Place of
Interest", or "Directions to a contact".
The system responds with requesting
more details.
When searching for a "Place of
Interest," only major chains may be
selected by name. Chains are
businesses with at least 20 locations.For other POIs, say the name of a
category like "Restaurants,"
"Shopping centres," or "Hospitals".
Direct commands are easier
understood by the system, e.g. "Call
01234567". Examples of these direct
commands are displayed on most of
the screens while a speech
recognition session is active.
If you say "Phone" or "Phone
commands", the system understands
that a phone call is requested and
responds with respective questions
until enough details are gathered. If
the phone number has been saved
with a name and a place, the direct
command should include both, for
example "Call David Smith at work".Selecting list items
When a list is displayed, a voice
prompt asks to confirm or select an
item from that list. A list item may be
manually selected, or by speaking the
line number of the item.