2014.5 Citroen C4 ESP
[x] Cancel search: ESPPage 20 of 494

18
Warning/indicator lampis on Cause Action/Observations
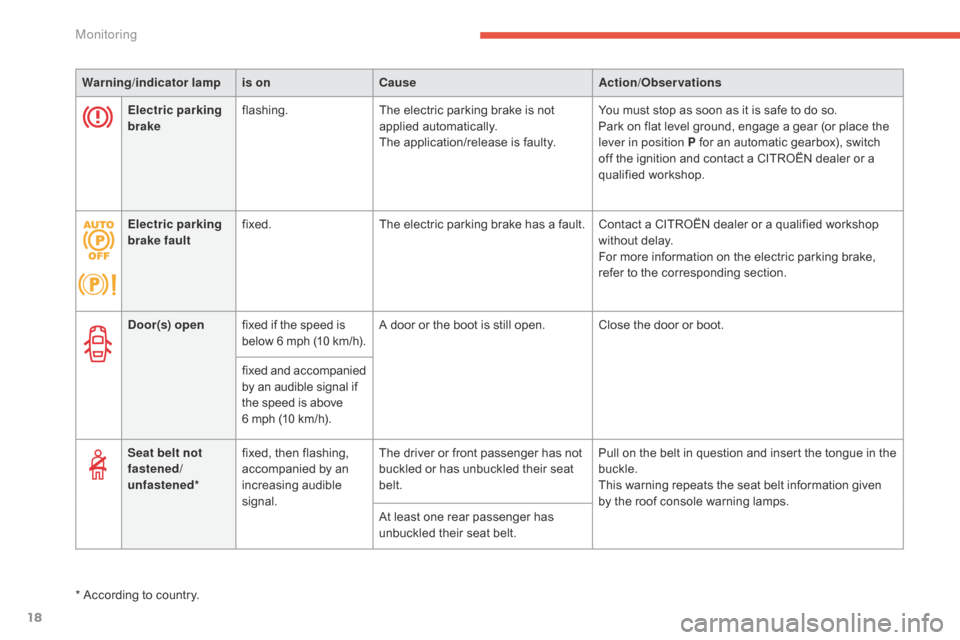
Door(s) open fixed
if the speed is
b
elow
6 m
ph
(
10
k
m/h).A
door or the boot is still open. Close the door or boot.
fixed
a
nd
a
ccompanied
b
y an audible signal if
t
he speed is above
6
mph (10 km/h).
Seat belt not
fastened/
unfastened* fixed,
then flashing,
a
ccompanied by an
inc
reasing
a
udible
s
ignal.The
driver or front passenger has not
b
uckled or has unbuckled their seat
bel
t.Pull
on the belt in question and insert the tongue in the
buc
kle.
This
warning repeats the seat belt information given
b
y the roof console warning lamps.
At
least one rear passenger has
u
nbuckled their seat belt.
*
According to country.
Electric parking
brake
flashing.
The
electric parking brake is not
a
pplied
a
utomatically.
The
application/release is faulty.You
must stop as soon as it is safe to do so.
Park
on flat level ground, engage a gear (or place the
l
ever in position P for an automatic gearbox), switch
o
ff the ignition and contact a CITROËN dealer or a
q
ualified
w
orkshop.
Electric parking
brake fault fixed.
The
electric parking brake has a fault. Contact a CITROËN dealer or a qualified workshop
w
ithout delay.
For
more information on the electric parking brake,
r
efer to the corresponding section.
Monitoring
Page 25 of 494

23
Warning/indicator lampis on Cause Action/Observations
AdBlue
® additive
(BlueHDi Diesel) fixed,
on switching o
n the ignition, a
ccompanied by an
a
udible signal and a
m
essage indicating the
r
emaining
d
riving
r
ange.The
remaining driving range is b
etween 350 miles (600 km) and
1
500 miles (2400 km).Have
the AdBlue® additive tank topped up as soon a
s
possible:
go
to
a CITROËN dealer or a qualified
w
orkshop,
or
carry out this operation yourself by
r
eferring
to
the
corresponding section.
+ flashing
associated
with
t
he
SERVICE
warning
l
amp,
accompanied
by
a
n
audible
signal
and
a
m
essage
indicating
the
r
emaining
d
riving
r
ange. The
remaining
driving
range
is
b
etween
0
and
375
miles
(600
km). You
must
top-up the
Ad
Blue
® additive tank to avoid
a
breakdown :
go
to
a
CITROËN delaer or a qualified
w
orkshop,
or
carry
out
this
operation yourself by
r
eferring
to
the
corresponding
section.
flashing,
as
sociated
w
ith the SERVICE
warning
lam
p,
a
ccompanied
by
an
a
udible
signal
and
a
m
essage
indicating
that
s
tarting
is
prevented. The
AdBlue
® tank is empty: the s
tarting
inhibition system required
b
y
legislation prevents starting of the
e
ngine. To
be able to start the engine, you must top-up the
AdBlue® additive tank: go to a CITROËN dealer or a q
ualified workshop, or carry out this operation yourself
b
y
referring to the corresponding section.
It is essential
to add at least 3.8 litres of AdBlue
® to
the
additive
tank.
1
Monitoring
Page 27 of 494

25
Operation indicator lamps
If one of the following indicator lamps comes on, this confirms that the corresponding system has come into operation.
I t may be accompanied by an audible signal and a message in the screen.
Warning /indicator lampis on Cause Action/Observations
Left-hand
direction indicatorflashing with buzzer.The lighting stalk is pushed down.
Right-hand
direction indicatorflashing with buzzer.The lighting stalk is pushed up.
Hazard warning
lamps flashing
with audible
s
ignal. The
hazard warning lamps switch,
l
ocated on the dashboard, has been
ope
rated. The
left-hand and right-hand direction indicators and
t
heir associated indicator lamps flash simultaneously.
Sidelamps fixed. The
lighting stalk is in the
"
Sidelamps"
p
osition.
Dipped beam
headlamps fixed.
The
lighting stalk is in the "Dipped
b
eam headlamps" position or in the
"
AUTO" position in conditions of low
l
ight.
Main beam
headlamps fixed.
The
lighting stalk is pulled towards
yo
u. Pull
the stalk again to return to dipped beam
h
eadlamps.
Front foglamps fixed. The
front foglamps are switched on
u
sing the ring on the lighting control
st
alk. Turn
the ring on the lighting control stalk rear ward
t
wice to switch off the front foglamps.
Rear foglamps fixed. The
rear foglamps are on.Turn
the ring on the stalk rear ward to switch off the
r
ear
fo
glamps.
1
Monitoring
Page 28 of 494

26
Warning/indicator lampis on Cause Action/Observations
Parking brake fixed. The
parking brake is applied or not
p
roperly
r
eleased.Release
the parking brake to switch off the warning
l
amp, keeping your foot on the brake pedal.
Observe
the safety recommendations.
For
more information on the parking brake, refer to the
"
Parking brake" and "Electric parking brake" sections.
Electric parking
brake fixed.
The
electric parking brake is applied. Release the electric parking brake to switch off the
w
arning lamp: with your foot on the brake pedal, pull
t
he electric brake control.
Observe
the safety recommendations.
For
more information on the electric parking brake,
r
efer to the corresponding section.
Deactivation of
the automatic
functions of the
electric parking
brake fixed.
The
"automatic application" (on
s
witching off the engine) and
"
automatic release" functions are
d
eactivated or faulty.Activate
the function (according to country) via the
v
ehicle configuration menu or contact a CITROËN
d
ealer or a qualified workshop.
Diesel engine
pre-heating fixed.
The
ignition switch is at the
2nd position (Ignition on) or the "ST
ART/STOP "
starting button has
b
een pressed. Wait
until the warning lamp goes off before starting.
Once it goes off, starting is immediate, on condition t
hat the brake pedal remains pressed with an
a
utomatic or electronic gearbox, or the clutch pedal is
p
ressed fully down with a manual gearbox.
The
period of illumination of the warning lamp is
d
etermined by the ambient conditions (up to about
t
hirty seconds in severe winter conditions).
If
the engine does not start, switch the ignition off and
t
hen on, wait until the warning lamp goes off again,
t
hen start the engine.
Monitoring
Page 30 of 494

28
Deactivation indicator lamps
If one of the following indicator lamps comes on, this confirms that the corresponding system has been switched off intentionally.
T his is may be accompanied by an audible signal and a message on the multifunction screen.
Warning /indicator lampis on Cause Action/Observations
Passenger's
airbag system fixed
in the instrument
p
anel and/or seat belt
a
nd front passenger's
a
irbag
w
arning
lam
ps
d
isplay.The
control switch, located in
t
he glove box, is set to the "OFF "
position.
The
passenger's front airbag is
d
eactivated.Set the control to the "ON"
position to activate the
passenger's
front airbag.
In
this case, do not fit a child seat in the rear ward
f
acing position.
Monitoring
Page 36 of 494

34
Setting the time and the time
format in the instrument
panel with the clock
On the type 1 instrument panel (without audio system), to adjust the time, use buttons A
and B then carry out the operations in the
following
or
der:
F
p
ress buttons A and B
s
imultaneously:
t
he
m
inutes
f
lash,
F
press A
to increase the minutes or B to
reduce
the minutes,
F
p
ress buttons A and B
s
imultaneously:
t
he
h
ours flash,
F
press A to increase the hours or B to
reduce
the hours,
F
p
ress buttons A and B
s
imultaneously:
2
4 H or 12 H is displayed and flashes,After
approximately 30 seconds without any
a
ction, the screen returns to the normal display.On
the type 1 instrument panel (without audio
s
ystem), to change the display units, use
b
uttons A and B then carry out the operations
in the following order:
F
p
ress buttons A and B
s
imultaneously
fo
r
t
hree seconds: km/h or mph flashes,
F
p
ress button A or B to change the units,
F
p
ress buttons A and B simultaneously to
e
xit from setting units.
After approximately 30 seconds without any
a
ction, the screen returns to the normal display.
Setting units in the instrument
panel with the clock
Setting the time and units
in the multifunction screen
The other instrument panels are associated w
ith an audio system and a multifunction
s
creen. Refer to the corresponding screens.
F
p
ress button A or B
to
change
the
format,
F
p
ress buttons A
and
B
simultaneously
to
e
xit
from
time
setting.
Monitoring
Page 39 of 494

37
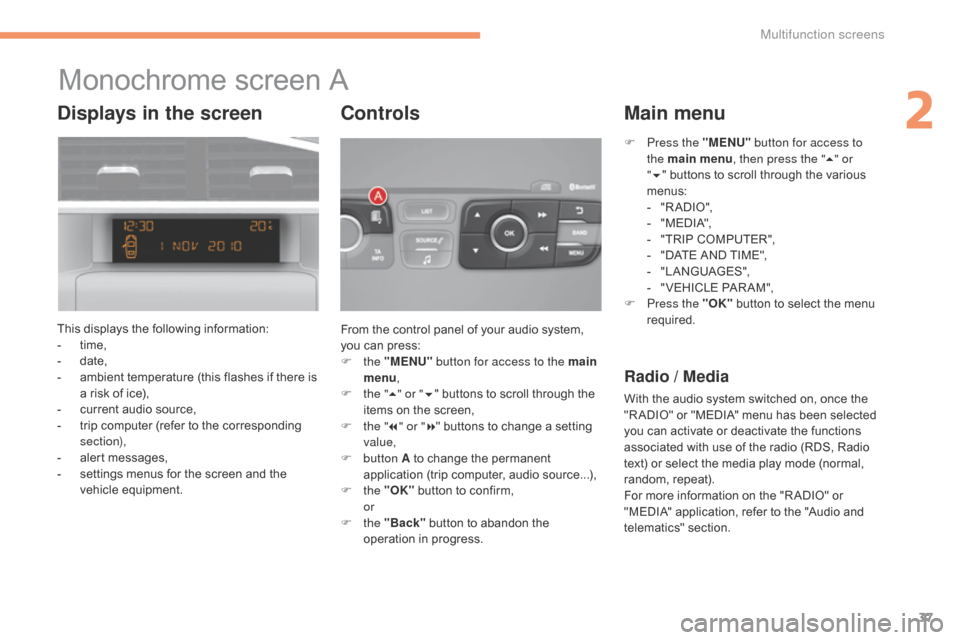
Monochrome screen A
This displays the following information:
- t ime,
-
d
ate,
-
a
mbient temperature (this flashes if there is
a
risk of ice),
-
c
urrent audio source,
-
t
rip computer (refer to the corresponding
s
ection),
-
a
lert messages,
-
s
ettings menus for the screen and the
v
ehicle
e
quipment. From
the control panel of your audio system,
y
ou can press:
F
the "MENU" button for access to the main
menu ,
F
t
he "5" or " 6"
buttons to scroll through the
i
tems on the screen,
F
t
he "7" or " 8"
buttons to change a setting
va
lue,
F
button A
to change the permanent
a
pplication (trip computer, audio source...),
F
the "OK"
button to confirm,
or
F
the "Back"
button to abandon the
o
peration in progress.
Controls
F Press the "MENU" button for access to
the main menu , then press the " 5" or
" 6 "
buttons to scroll through the various
m
enus:
-
"
R A DIO ",
-
"
M EDI A",
-
"
TRIP COMPUTER",
-
"
DATE AND TIME",
-
"
LANGUAGES",
-
"
VEHICLE PAR AM",
F
P
ress the "OK"
button to select the menu
r
equired.
Main menu
Radio / Media
With the audio system switched on, once the "R ADIO" or "MEDIA" menu has been selected
y
ou can activate or deactivate the functions
a
ssociated with use of the radio (RDS, Radio
t
ext) or select the media play mode (normal,
r
andom,
r
epeat).
For
more information on the "R ADIO" or
"
MEDIA" application, refer to the "Audio and
t
elematics"
se
ction.
Displays in the screen
2
Multifunction screens
Page 40 of 494

38
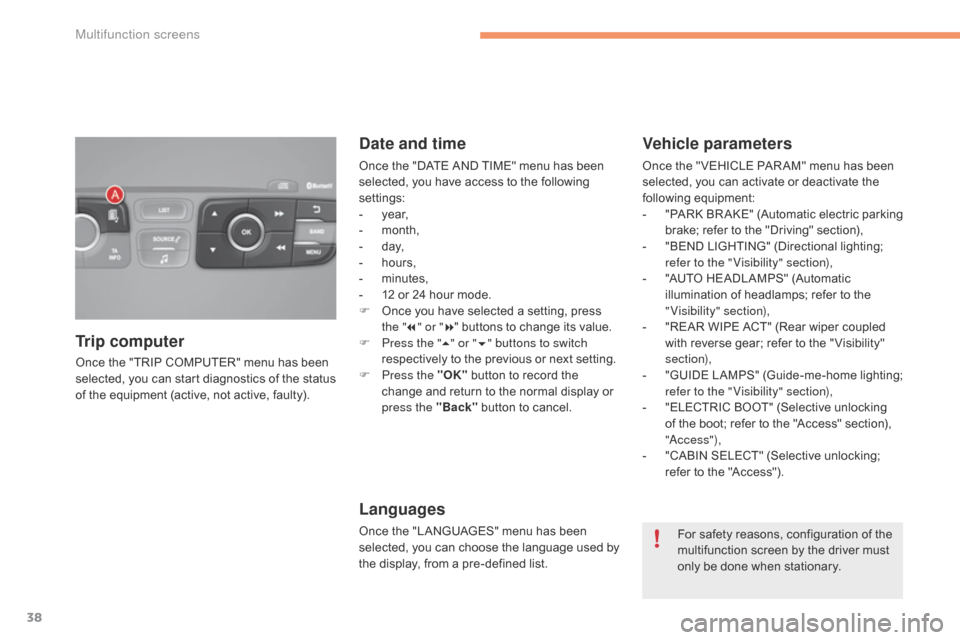
Once the "TRIP COMPUTER" menu has been selected, you can start diagnostics of the status
o
f the equipment (active, not active, faulty).
Trip computer Date and time
Once the "DATE AND TIME" menu has been s
elected, you have access to the following
se
ttings:
-
ye
ar,
-
m
onth,
-
d
ay,
-
h
ours,
-
m
inutes,
-
1
2 or 24 hour mode.
F
O
nce you have selected a setting, press
t
he "7" or " 8"
buttons to change its value.
F
P
ress the " 5" or " 6" buttons to switch
respectively
to the previous or next setting.
F
P
ress the "OK"
button to record the
c
hange and return to the normal display or
p
ress the "Back"
button to cancel.
Languages
Once the "LANGUAGES" menu has been selected, you can choose the language used by
t
he display, from a pre-defined list.
Vehicle parameters
Once the " VEHICLE PAR AM" menu has been selected, you can activate or deactivate the
fo
llowing
e
quipment:
-
"
PARK
B
R AKE"
(
Automatic
e
lectric
p
arking
b
rake; refer to the "Driving" section),
-
"
BEND LIGHTING" (Directional lighting;
r
efer to the " Visibility" section),
-
"
AUTO HEADLAMPS" (Automatic
i
llumination of headlamps; refer to the
"
Visibility" section),
-
"
REAR WIPE ACT" (Rear wiper coupled
w
ith reverse gear; refer to the " Visibility"
s
ection),
-
"
GUIDE
L
AMPS"
(
Guide-me-home
l
ighting;
r
efer to the " Visibility" section),
-
"
ELECTRIC BOOT" (Selective unlocking
o
f the boot; refer to the "Access" section),
"
a
c
c ess"),
-
"
CABIN SELECT" (Selective unlocking;
r
efer to the "Access").
For
safety reasons, configuration of the
m
ultifunction screen by the driver must
o
nly be done when stationary.
Multifunction screens