2014.5 Citroen C4 display
[x] Cancel search: displayPage 39 of 494

37
Monochrome screen A
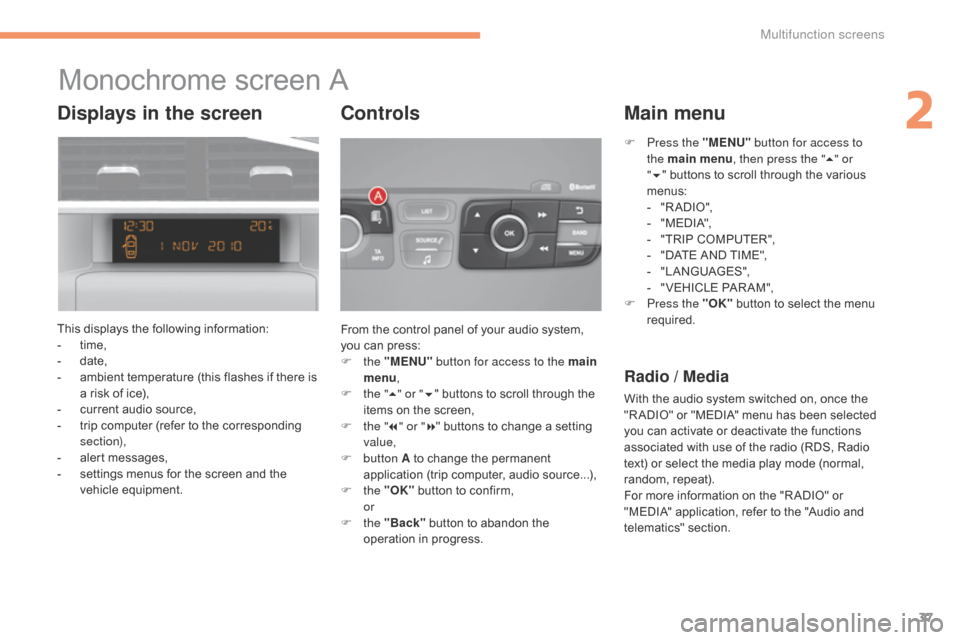
This displays the following information:
- t ime,
-
d
ate,
-
a
mbient temperature (this flashes if there is
a
risk of ice),
-
c
urrent audio source,
-
t
rip computer (refer to the corresponding
s
ection),
-
a
lert messages,
-
s
ettings menus for the screen and the
v
ehicle
e
quipment. From
the control panel of your audio system,
y
ou can press:
F
the "MENU" button for access to the main
menu ,
F
t
he "5" or " 6"
buttons to scroll through the
i
tems on the screen,
F
t
he "7" or " 8"
buttons to change a setting
va
lue,
F
button A
to change the permanent
a
pplication (trip computer, audio source...),
F
the "OK"
button to confirm,
or
F
the "Back"
button to abandon the
o
peration in progress.
Controls
F Press the "MENU" button for access to
the main menu , then press the " 5" or
" 6 "
buttons to scroll through the various
m
enus:
-
"
R A DIO ",
-
"
M EDI A",
-
"
TRIP COMPUTER",
-
"
DATE AND TIME",
-
"
LANGUAGES",
-
"
VEHICLE PAR AM",
F
P
ress the "OK"
button to select the menu
r
equired.
Main menu
Radio / Media
With the audio system switched on, once the "R ADIO" or "MEDIA" menu has been selected
y
ou can activate or deactivate the functions
a
ssociated with use of the radio (RDS, Radio
t
ext) or select the media play mode (normal,
r
andom,
r
epeat).
For
more information on the "R ADIO" or
"
MEDIA" application, refer to the "Audio and
t
elematics"
se
ction.
Displays in the screen
2
Multifunction screens
Page 40 of 494

38
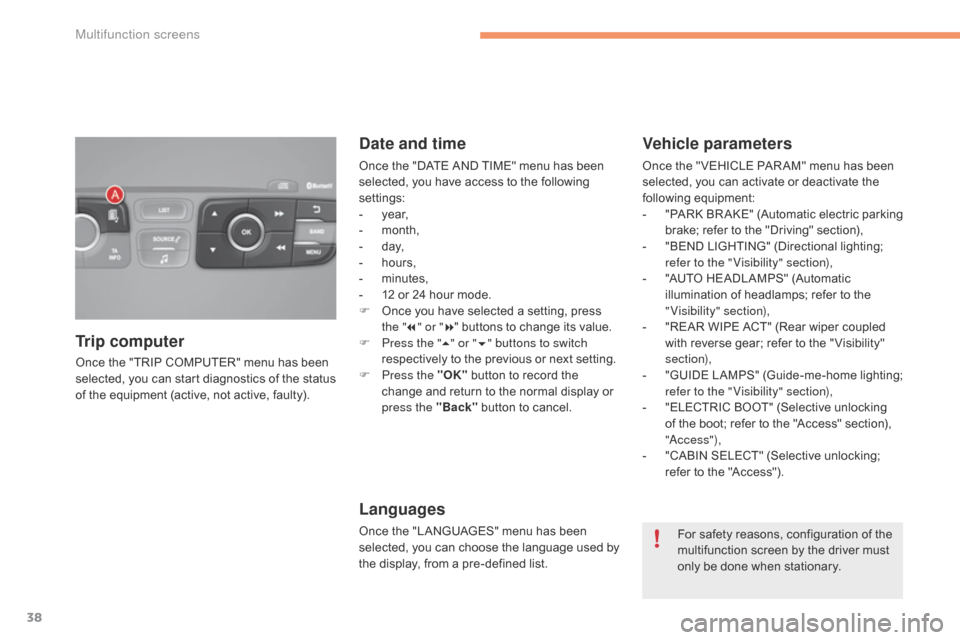
Once the "TRIP COMPUTER" menu has been selected, you can start diagnostics of the status
o
f the equipment (active, not active, faulty).
Trip computer Date and time
Once the "DATE AND TIME" menu has been s
elected, you have access to the following
se
ttings:
-
ye
ar,
-
m
onth,
-
d
ay,
-
h
ours,
-
m
inutes,
-
1
2 or 24 hour mode.
F
O
nce you have selected a setting, press
t
he "7" or " 8"
buttons to change its value.
F
P
ress the " 5" or " 6" buttons to switch
respectively
to the previous or next setting.
F
P
ress the "OK"
button to record the
c
hange and return to the normal display or
p
ress the "Back"
button to cancel.
Languages
Once the "LANGUAGES" menu has been selected, you can choose the language used by
t
he display, from a pre-defined list.
Vehicle parameters
Once the " VEHICLE PAR AM" menu has been selected, you can activate or deactivate the
fo
llowing
e
quipment:
-
"
PARK
B
R AKE"
(
Automatic
e
lectric
p
arking
b
rake; refer to the "Driving" section),
-
"
BEND LIGHTING" (Directional lighting;
r
efer to the " Visibility" section),
-
"
AUTO HEADLAMPS" (Automatic
i
llumination of headlamps; refer to the
"
Visibility" section),
-
"
REAR WIPE ACT" (Rear wiper coupled
w
ith reverse gear; refer to the " Visibility"
s
ection),
-
"
GUIDE
L
AMPS"
(
Guide-me-home
l
ighting;
r
efer to the " Visibility" section),
-
"
ELECTRIC BOOT" (Selective unlocking
o
f the boot; refer to the "Access" section),
"
a
c
c ess"),
-
"
CABIN SELECT" (Selective unlocking;
r
efer to the "Access").
For
safety reasons, configuration of the
m
ultifunction screen by the driver must
o
nly be done when stationary.
Multifunction screens
Page 41 of 494

39
Monochrome screen C
This displays the following information:
- t ime,
-
d
ate,
-
a
mbient temperature (this flashes if there is
a
risk of ice),
-
p
arking sensor information,
-
c
urrent audio source,
-
t
elephone or Bluetooth system information,
-
t
rip computer (refer to the corresponding
s
ection),
-
a
lert messages,
-
s
ettings menus for the screen and the
v
ehicle
e
quipment. From
the control panel of your audio system, y
ou can press:
F
button A
to chooses between the display
o
f audio information in full screen or the
s
hared display of audio and trip computer
i
nformation,
F
the "MENU" button for access to the main
menu ,
F
t
he "5" or " 6"
buttons to scroll through the
i
tems on the screen,
F
t
he "7" or " 8"
buttons to change a setting
va
lue,
F
the "OK"
button to confirm,
or
F
the "Back"
button to abandon the
o
peration in progress.
Controls
F Press the "MENU" button for access to the
main menu :
-
"
Multimedia",
-
"
Telephone",
-
"
Trip computer",
-
"
Bluetooth connection",
-
"
Personalisation-configuration",
F
P
ress the " 7" or " 8" button to select the
menu
required, then confirm by pressing
t
he "OK"
button.
Main menuDisplays in the screen
2
Multifunction screens
Page 42 of 494

40
"Telephone" menu
With the audio system switched on, this menu allows you to make a call or view the various
t
elephone
d
irectories.
For
more information on the "Telephone"
a
pplication, refer to the "Audio and telematics"
s
ection. This
menu allows you to view information on
t
he status of the vehicle.
Warning log
This summarises the status and warning m
essages for systems (active, not active or
f
aulty), displaying them in succession in the
m
ultifunction
s
creen.
F
P
ress the "MENU" button for access to the
main
menu.
F
P
ress the arrows, then the "OK" button to
select the "Trip computer"
menu.
F
I
n the "Trip computer"
menu, select the
"
Warning log" line and confirm.
"Trip computer" menu
"Multimedia" menu
With the audio system switched on, this m
enu allows you to activate or deactivate the
f
unctions associated with use of the radio
(
RDS, DAB / FM auto tracking, RadioText
(
TXT) display) or to choose the media play
m
ode (Normal, Random, Random all, Repeat).
For
more information on the "Multimedia"
a
pplication, refer to the "Audio and telematics"
s
ection.
"Bluetooth
connection" menu
Wit the audio system on, this menu allows a B luetooth device (telephone, media player)
t
o be connected or disconnected and the
c
onnection mode to be defined (hands-free,
p
laying audio files).
For
more information on the "Bluetooth
c
onnection" application, refer to the "Audio and
t
elematics"
se
ction.
Multifunction screens
Page 43 of 494

41
"Personalisation-
configuration" menu
This menu gives access to the following functions:
-
"
Define the vehicle parameters",
-
"
Choice of language",
-
"
Display configuration".
Define the vehicle parameters
- "Vehicle lighting" (see the " Visibility" s
ection):
●
"
Directional headlamps" (Main /
a
dditional
d
irectional
l
ighting),
-
"
Interior lighting" (see the " Visibility"
s
ection):
●
"
Follow-me-home headlamps"
(
Automatic operation of headlamps after
s
witching off the ignition),
●
"
Welcome lighting" (Exterior and interior
w
elcome lighting).
This
menu
allows
you
to
activate
or
deactivate
t
he
following
equipment,
classified
in
different
c
ategories:
-
"
Access
to
the
vehicle"
(see
the
"Access"
s
ection):
●
"
Plip
action"
(Selective
unlocking
of
the
d
river's
do
or),
●
"
Unlocking
boot
only"
(Selective
u
nlocking
of
the
boot).
-
"
Driving
assistance":
●
"
Parking
brake
automatic"
(Automatic
e
lectric
parking
brake;
see
the
"Driving"
s
ection),
●
"
Rear
wipe
in
reverse
gear"
(Rear
w
iper
coupled
to
reverse
gear;
see
the
"
Visibility" section),
●
"
Speeds
memorised"
(Memorising
s
peeds;
see
the
"Driving"
section).
2
Multifunction screens
Page 44 of 494

42
Choice of language
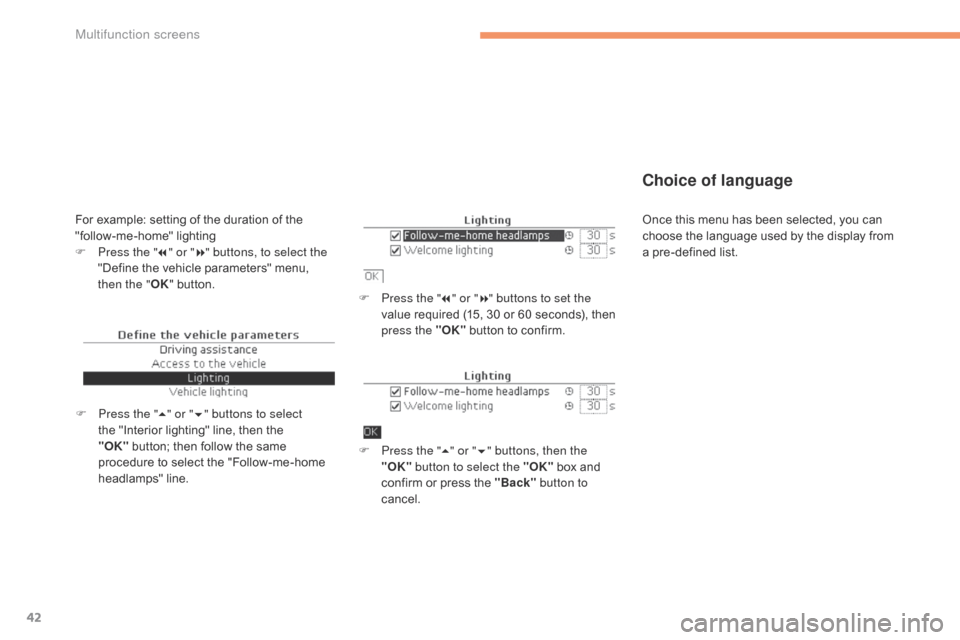
F Press the "7" or " 8" buttons to set the
value required (15, 30 or 60 seconds), then
p
ress the "OK"
button to confirm.
F
P
ress the " 5" or " 6" buttons, then the
"OK" button to select the "OK"
box and
c
onfirm or press the "Back" button to
cancel.
F
P
ress the " 5" or " 6" buttons to select
the
"Interior
lighting"
line,
then
the
"O
K" button;
then
follow
the
same
p
rocedure
to
select
the
"Follow-me-home
h
eadlamps"
l
ine.
For example: setting of the duration of the " follow-me-home" l ighting
F
P
ress the " 7" or " 8" buttons, to select the
"Define
the vehicle parameters" menu,
t
hen the " OK"
button. Once
this menu has been selected, you can c
hoose the language used by the display from
a
pre-defined list.
Multifunction screens
Page 45 of 494

43
Display configuration
This menu gives access to the following settings:
-
"
Choice of units",
-
"
Date and time adjustment",
-
"
Display
par
ameters",
-
"
Brightness". For
safety reasons, configuration of the m
ultifunction screen by the driver must o
nly be done when stationary.
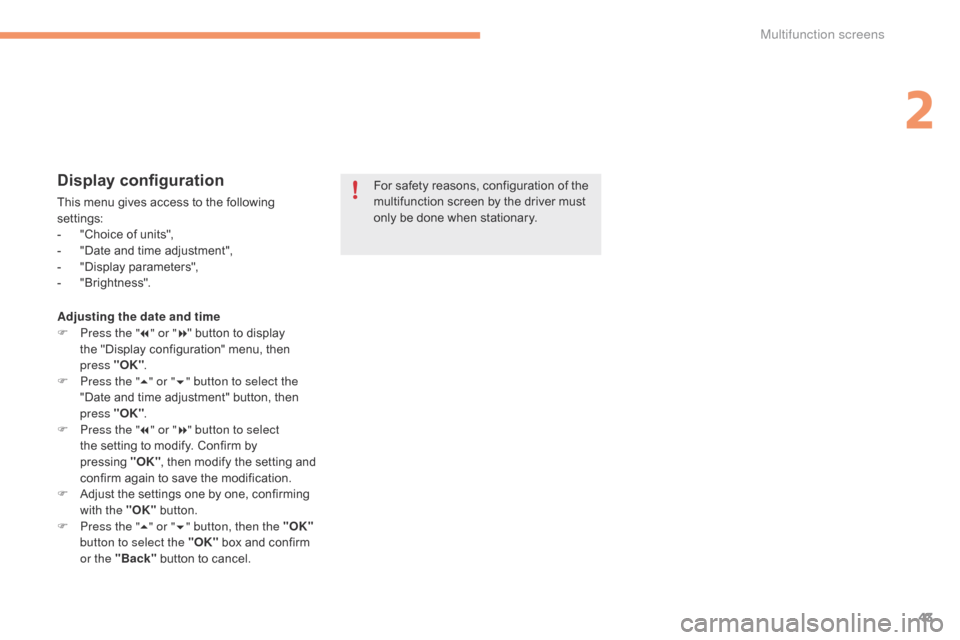
Adjusting the date and time
F
P
ress the " 7" or " 8"
button to display
t
he "Display configuration" menu, then
p
ress "OK".
F
P
ress the " 5" or " 6" button to select the
"Date
and time adjustment" button, then
p
ress "OK" .
F
P
ress the " 7" or " 8" button to select
the
setting to modify. Confirm by
p
ressing "OK",
then modify the setting and
c
onfirm again to save the modification.
F
A
djust the settings one by one, confirming
w
ith the "OK"
button.
F
P
ress the " 5" or " 6" button, then the "OK"
button to select the "OK"
box and confirm
o
r the "Back"
button to cancel.
2
Multifunction screens
Page 46 of 494

44
Touch screen tablet
General operation
Principles
Press the virtual buttons in the touch screen
tablet.
Each menu is displayed over one or two pages
(
primary page and secondary page).
For reasons of safety, the driver
should only carr y out operations
that require close attention, with the
vehicle stationary.
Some
functions
are
not
accessible
w
hen
d
riving.
This
system
gives
access
to:
-
m
enus
for
adjusting
settings
for
vehicle
f
unctions
and
systems,
-
a
udio
and
display
settings
menus,
-
a
udio
system
and
telephone
controls
and
t
he
display
of
associated
information,
-
t
he
display
of
alert
messages,
-
t
he
display
of
the
ambient
temperature
(a
blue
snowflake
appears
if
there
is
a
risk
o
f i c e),
-
t
he
display
of
the
trip
computer.
And,
depending
on
equipment,
it
also
allows:
-
t
he
display
of
visual
parking
sensors
i
nformation,
-
a
ccess
to
the
controls
for
the
navigation
s
ystem
and
Internet
services,
and
the
d
isplay
of
associated
information.
Recommendations
It is necessary to press firmly, particularly for " flick" gestures (scrolling through lists, moving
t
he
m
ap...).
A
light wipe is not enough.
The
screen does not recognise pressing with
m
ore than one finger.
This
technology allows use at all temperatures
a
nd when wearing gloves.
Do
not use pointed objects on the touch screen
t
ablet.
do n
ot touch the touch screen tablet with wet
hands.
Uses
a soft clean cloth to clean the touch
s
creen
t
ablet. Use
this button to go to the
s
econdary
pag
e.
After
a few moments with no action on
t
he secondary page, the primary page
i
s displayed automatically.
Use
this button to return to the
p
rimary
pag
e.
Use
this button for access to
a
dditional information and to the
s
ettings for certain functions.
Use
this button to confirm.
Use
this button to quit.
Multifunction screens