2014.5 Citroen BERLINGO wheel
[x] Cancel search: wheelPage 47 of 244

45
Berlingo-2-VU_en_Chap03_Pret-a-partir_ed02-2014
Moving off
- To start the engine, the gear selector must be in position N.
-
Press firmly on the brake pedal.
-
Operate the starter
.
-
When the engine is running, place
the gear selector on
R, A or M as
desired.
-
Release the brake pedal and
accelerate.
If the gear selector is not in position
N,
and/or if the brake pedal is not
pressed, the engine will not start.
Repeat the above procedure.
Reverse gear
Engaging reverse gear
Move the gear selector to R.
Only attempt to select reverse gear
when the vehicle is stationary.
Neutral Changing to neutral
Move the gear selector to N. If the
vehicle is moving, do not select this
position even momentarily.
6-SPEED ELECTRONIC GEARBOX
- automatic mode: gear selector in
position A.
-
manual mode: gear selector in
position
M.
For safety:
It is only possible to come out
of position N if the brake pedal is
pressed.
The change from position A (driving in
automatic mode) to position M (driving
in manual mode) or vice versa can be
made at any time. The warning lamp A
goes off in the instrument panel.
Mode selection
Gearbox and steering wheel
READY TO GO
3
Page 48 of 244

46
Berlingo-2-VU_en_Chap03_Pret-a-partir_ed02-2014
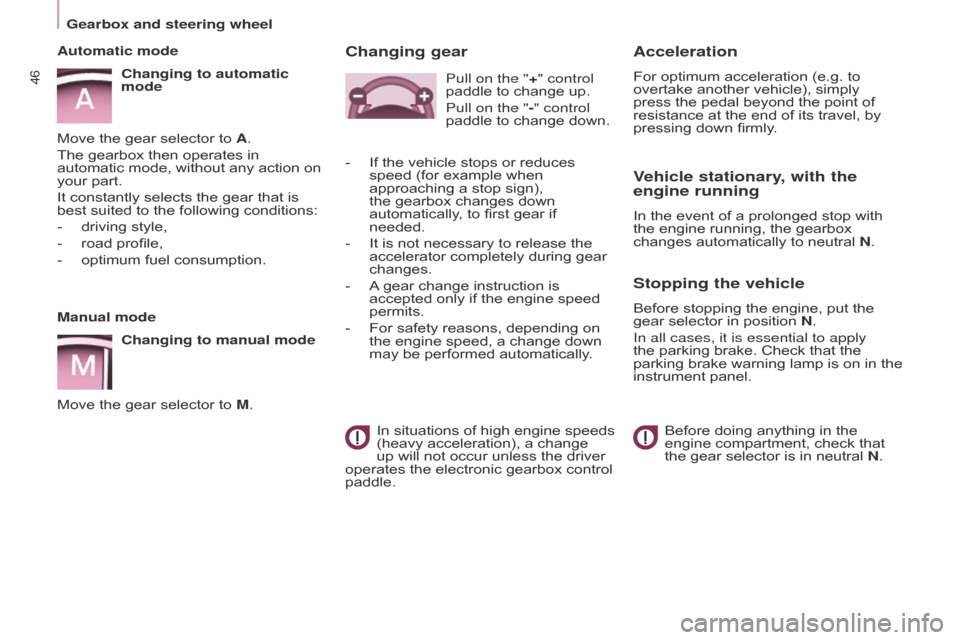
Manual modeChanging to manual mode
Move the gear selector to M.
Automatic mode
Changing to automatic
mode
Move the gear selector to A.
The gearbox then operates in
automatic mode, without any action on
your part.
It constantly selects the gear that is
best suited to the following conditions:
-
driving style,
-
road profile,
-
optimum fuel consumption.
Vehicle stationary, with the
engine running
In the event of a prolonged stop with
the engine running, the gearbox
changes automatically to neutral N.
Stopping the vehicle
Before stopping the engine, put the
gear selector in position N.
In all cases, it is essential to apply
the parking brake. Check that the
parking brake warning lamp is on in the
instrument panel.
Before doing anything in the
engine compartment, check that
the gear selector is in neutral N.
Acceleration
For optimum acceleration (e.g. to
overtake another vehicle), simply
press the pedal beyond the point of
resistance at the end of its travel, by
pressing down firmly.
Changing gear
In situations of high engine speeds
(heavy acceleration), a change
up will not occur unless the driver
operates the electronic gearbox control
paddle. Pull on the "+"
control
paddle to change up.
Pull on the "-" control
paddle to change down.
-
If the vehicle stops or reduces
speed (for example when
approaching a stop sign),
the gearbox changes down
automatically
, to first gear if
needed.
-
It is not necessary to release the
accelerator completely during gear
changes.
-
A
gear change instruction is
accepted only if the engine speed
permits.
-
For safety reasons, depending on
the engine speed, a change down
may be performed automatically
.
Gearbox and steering wheel
Page 52 of 244

50
Berlingo-2-VU_en_Chap03_Pret-a-partir_ed02-2014
Good practice when stopping Good practice when starting
Diesel pre-heating warning
lamp
If the temperature is high
enough, the warning lamp
comes on for less than
one second, you can start
without waiting.
In cold weather, wait for this warning
lamp to go off then operate the starter
(Starting position) until the engine
starts. Door or bonnet open
warning lamp
If this comes on, a door or the
bonnet is not closed correctly, check!
Minimise engine and gearbox wear
When switching off the ignition, let the
engine run for a few seconds to allow
the turbocharger (Diesel engine) to
return to idle.
d
o not press the accelerator when
switching off the ignition.
There is no need to engage a gear
after parking the vehicle.
STARTING AND STOPPING
Running and accessories position.
To unlock the steering, turn the
steering wheel gently while turning the
key, without forcing. In this position,
certain accessories can be used.
Starting position.
The starter is operated, the engine
turns over, release the key.
STOP position: steering lock.
The ignition is off. Turn the steering
wheel until the steering locks. Remove
the key.
Starting and stopping
Page 56 of 244

54
Berlingo-2-VU_en_Chap04_Ergonomie_ed02-2014
If the sunshine sensor does
not function correctly, the
lighting comes on accompanied
by the service warning lamp,
an audible signal and a
message in the screen.
Contact a CITROËN dealer or a
qualified workshop.
Guide-me-home lighting
Keeping the dipped beam headlamps
on temporarily with the ignition off,
makes the driver's exit easier when the
light is poor.
HEADLAMP BEAM
Depending on the load in your vehicle,
the beam setting must be adjusted.
0 -
No load.
1 -
Partial load.
2 -
A
verage load.
3 -
Maximum authorised load.
Manual operation
-
With the ignition of
f, "flash" the
headlamps within one minute after
switching off the ignition.
The guide-me-home lighting switches
off automatically after a set time.
Automatic operation
Refer to chapter 10, "Screen
menu map" section.
a
ctivate the function via the
vehicle configuration menu. Initial setting is position 0.
CORNERING LIGHTING
With dipped or main beam headlamps,
this function makes use of the beam
from a front foglamp to illuminate the
inside of a bend, when the vehicle
speed is below 25 mph (approximately
40 km/h) (urban driving, winding road,
intersections, parking manouevres...).
Switching on
This function starts:
-
when the corresponding direction
indicator is switched on,
or
-
from a certain angle of rotation
of the steering wheel.
Switching off
The system does not operate:
-
below a certain angle of rotation
of the steering wheel,
-
above 25 mph (40 km/h),
-
when reverse gear is engaged,
Programming
The system is activated or deactivated
in the vehicle configuration menu.
The system is activated by default. T
ravelling abroad
If using your vehicle in a country
that drives on the other side of the
road, the headlamps must be adjusted
to avoid dazzling on-coming drivers.
Contact a CITROËN dealer or a
qualified workshop.
Steering mounted controls
Page 76 of 244

74
Berlingo-2-VU_en_Chap04_Ergonomie_ed02-2014
FRONT FITTINGS1. Lower glove box
This may or may not be fitted with a lid.
Upper storage compartment
This is located on the dashboard,
behind the steering wheel.
A recess makes lifting of the lid easier
when opening. Guide it to its rest
position.
To close, guide the lid then press the
centre gently.
Any liquid which could spill risks
causing an electrical short circuit and
therefore a potential fire.
3. Side storage compartment
4. Bag hook
Only hang flexible bags which are not
too heavy on this hook.
2. Storage pocket and bottle
holder (1.5 L)
Practical information
Page 77 of 244

75
Berlingo-2-VU_en_Chap04_Ergonomie_ed02-2014
Overhead storage unit
This is located above the sun visors and
can accommodate various objects (a
jumper, file, gloves...).
The openings concealed by the sun visors
allow you to see and access the objects
stored in the overhead storage unit.
The maximum weight permitted in the
overhead storage unit is 5 Kg.
Do not place objects in this storage
unit which could present a risk to the
occupants.
Central storage console
This console offers an appreciable
additional storage area: it can be
removed and clips onto a base which
also incorporates two cup holders at
the rear.
Ensure that the object (bottle, can...)
placed in the cup holder is retained
securely and does not risk being
dislodged while driving.
Any liquid which could spill presents
a risk of damage on contact with the
instrument panel and centre console
controls.
Take care.
Sun visor
To prevent dazzle from ahead, fold the
sun visor down.
A pocket is provided in the driver's sun
visor for storing toll cards, tickets, ...
Storage compartments under seats
Storage compartments may be
provided in the floor under the front
seats.
Move the seat forward for easier
access to the storage compartment.
The vehicle's tools are located hereFor more information on these
tools, refer to chapter 9, "Changing
a wheel" section.
Practical information
EASE OF USE and COMFORT
4
Page 87 of 244

85
Berlingo-2-VU_en_Chap05_Securite_ed02-2014
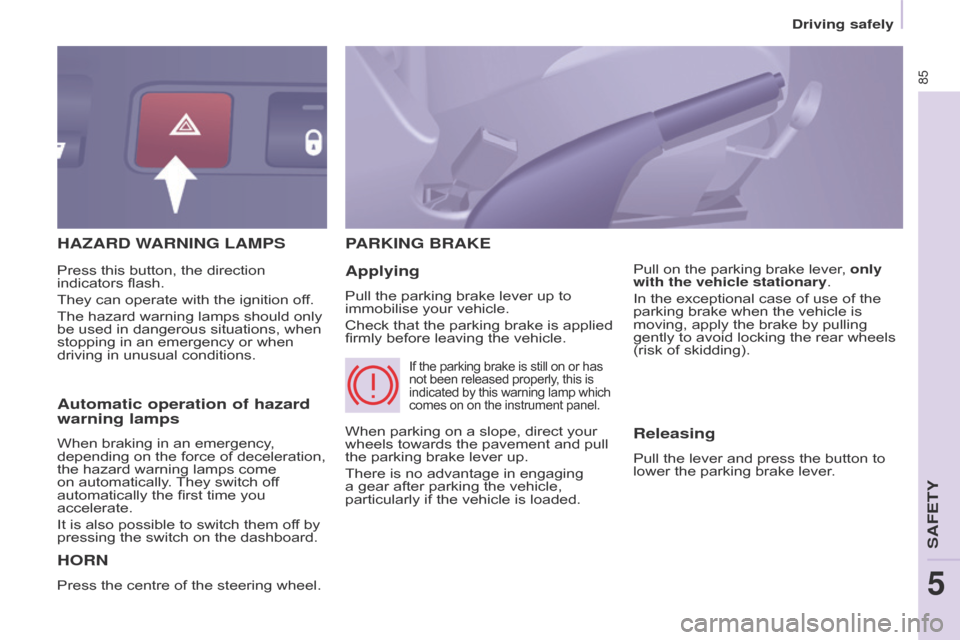
HAZARD WARNING LAMPS
HORN
Press the centre of the steering wheel.
PARKING BRAKE
Applying
Pull the parking brake lever up to
immobilise your vehicle.
Check that the parking brake is applied
firmly before leaving the vehicle.Pull on the parking brake lever, only
with the vehicle stationary.
In the exceptional case of use of the
parking brake when the vehicle is
moving, apply the brake by pulling
gently to avoid locking the rear wheels
(risk of skidding).
Press this button, the direction
indicators flash.
They can operate with the ignition off.
The hazard warning lamps should only
be used in dangerous situations, when
stopping in an emergency or when
driving in unusual conditions.
When parking on a slope, direct your
wheels towards the pavement and pull
the parking brake lever up.
There is no advantage in engaging
a gear after parking the vehicle,
particularly if the vehicle is loaded.
If the parking brake is still on or has
not been released properly, this is
indicated by this warning lamp which
comes on on the instrument panel.
Automatic operation of hazard
warning lamps
When braking in an emergency,
depending on the force of deceleration,
the hazard warning lamps come
on automatically. They switch off
automatically the first time you
accelerate.
It is also possible to switch them off by
pressing the switch on the dashboard.Releasing
Pull the lever and press the button to
lower the parking brake lever.
Driving safely
SAFETY
5
Page 90 of 244

ABS
ABS
88
Berlingo-2-VU_en_Chap05_Securite_ed02-2014
ANTI-LOCK BRAKING SYSTEM
(ABS - EBFD)
The ABS and EBFD (electronic brake
force distribution) systems improve the
stability and manoeuvrability of your
vehicle on braking, in particular on
poor or slippery surfaces.
The ABS prevents locking of the
wheels, the EBFD provides control of
the braking pressure wheel by wheel.If this warning lamp comes
on, accompanied by an
audible signal and a message
in the screen, it indicates a
malfunction of the ABS which
could result in a loss of control of the
vehicle on braking.
If this warning lamp comes
on, together with the brake
and STOP warning lamps,
accompanied by an audible
signal and a message in the
screen, it indicates a malfunction of
the electronic brake force distribution
which could result in a loss of control of
the vehicle on braking.
EMERGENCY BRAKING
ASSISTANCE SYSTEM (EBA)
In an emergency, this system enables
the optimum braking pressure to be
reached more quickly, press the pedal
firmly without releasing it.
It is triggered by the speed at which the
brake pedal is activated.
This alters the resistance of the brake
pedal under your foot.
To prolong the operation of the
emergency braking assistance system:
keep your foot on the brake pedal.
Good practice
The anti-lock braking system comes
into operation automatically when
there is a risk of wheel lock. It does not
reduce the braking distance.
o
n very slippery surfaces (ice,
oil,
etc...) the ABS may increase the
braking distance. When braking in
an emergency, do not hesitate to
press the brake pedal firmly, without
releasing the pressure, even on a
slippery surface, you will then be able
to continue to manoeuvre the vehicle
to avoid an obstacle.
Normal operation of the ABS may be
felt by slight vibration of the brake
pedal.
When changing wheels (tyres
and rims), ensure that these are
recommended by CITROËN. Stop as soon as it is safe to do so.
In both cases, contact a CITR
o Ë n
dealer or a qualified workshop.
driving safely