2013 YAMAHA SUPERJET fuel cap
[x] Cancel search: fuel capPage 6 of 78

Table of contents
Capsized watercraft ......................... 48
Beaching the watercraft ................... 49
Operating in weeded areas ............. 49
After removing the watercraft from the water ...................................... 49
Care and storage ............................. 50Post-operation care ...................... 50
Flushing the cooling water
passages ...................................... 50
Cleaning the watercraft ................... 51
Battery care ..................................... 51
Long-term storage ........................ 54
Cleaning .......................................... 54
Lubrication ....................................... 54
Rustproofing .................................... 55
Maintenance..................................... 56 Maintenance ................................. 56
Tool kit ............................................. 56
Adjusting the steering friction .......... 56
Adjusting the jet thrust nozzle
angle ............................................ 57
Periodic maintenance chart ............. 59
Checking the spark plugs ................ 60
Lubrication points ............................ 61
Checking the fuel filter ..................... 61
Adjusting the choke cable ............... 61
Adjusting the carburetor .................. 62
Specifications .................................. 63 Specifications ................................ 63
Trouble recovery ............................. 64 Troubleshooting ........................... 64
Troubleshooting chart ...................... 64
Emergency procedures ................ 66
Cleaning the jet intake and
impeller ........................................ 66
Jumping the battery ......................... 67
Replacing the fuse ........................... 67
Towing the watercraft ...................... 68
Submerged watercraft ..................... 68
UF2F75E0.book Page 2 Thursday, July 5, 2012 8:50 AM
Page 23 of 78
Description
17
EJU31011
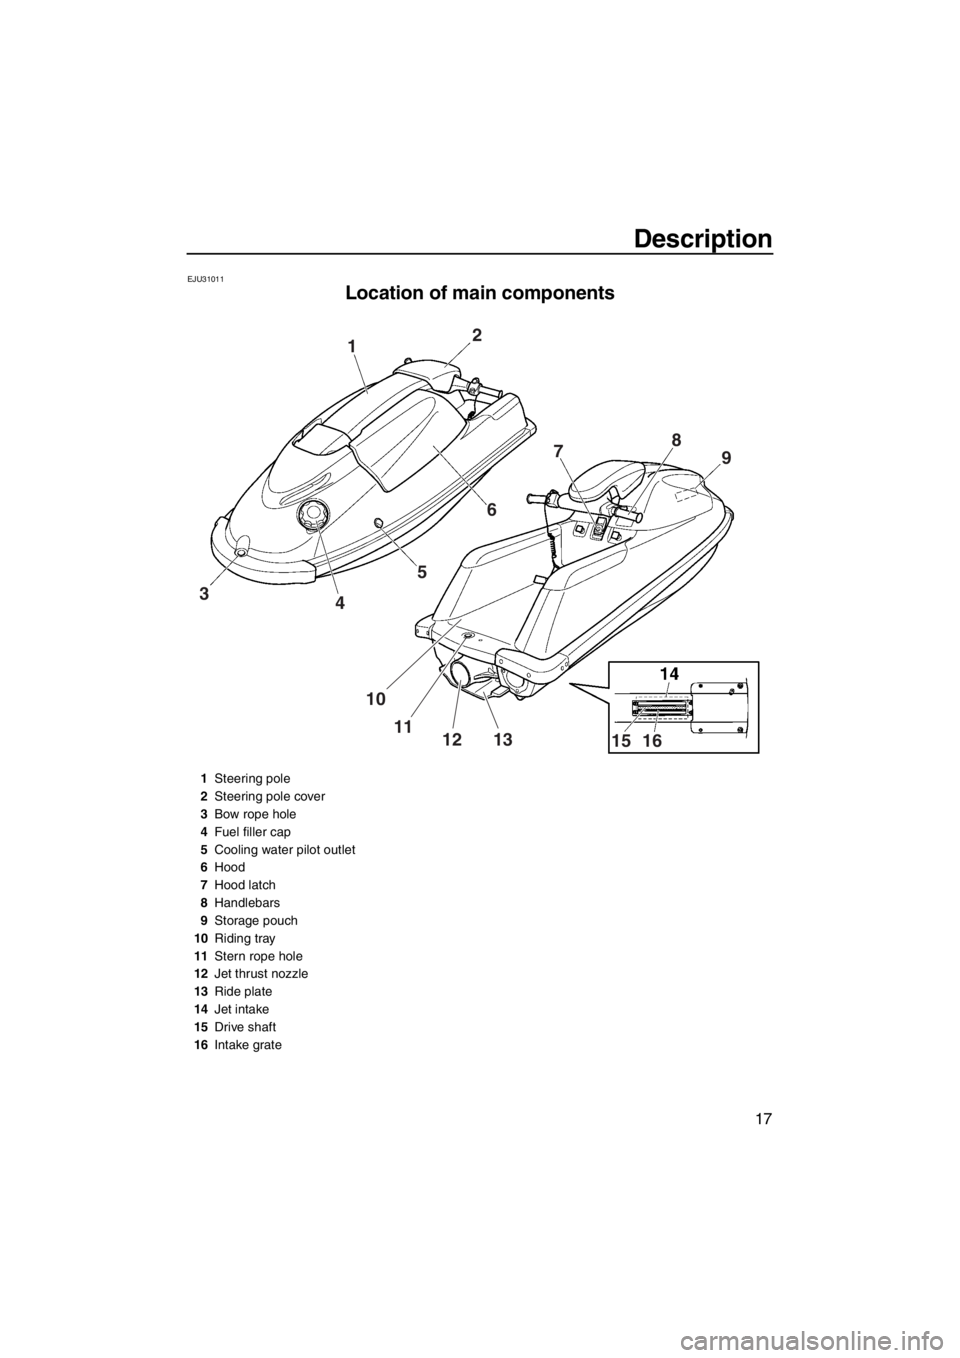
Location of main components
2
1
3 456
7
8
9
10 11 12 13 15 16
1Steering pole
2 Steering pole cover
3 Bow rope hole
4 Fuel filler cap
5 Cooling water pilot outlet
6 Hood
7 Hood latch
8 Handlebars
9 Storage pouch
10 Riding tray
11 Stern rope hole
12 Jet thrust nozzle
13 Ride plate
14 Jet intake
15 Drive shaft
16 Intake grate
UF2F75E0.book Page 17 Thursday, July 5, 2012 8:50 AM
Page 24 of 78
Description
18
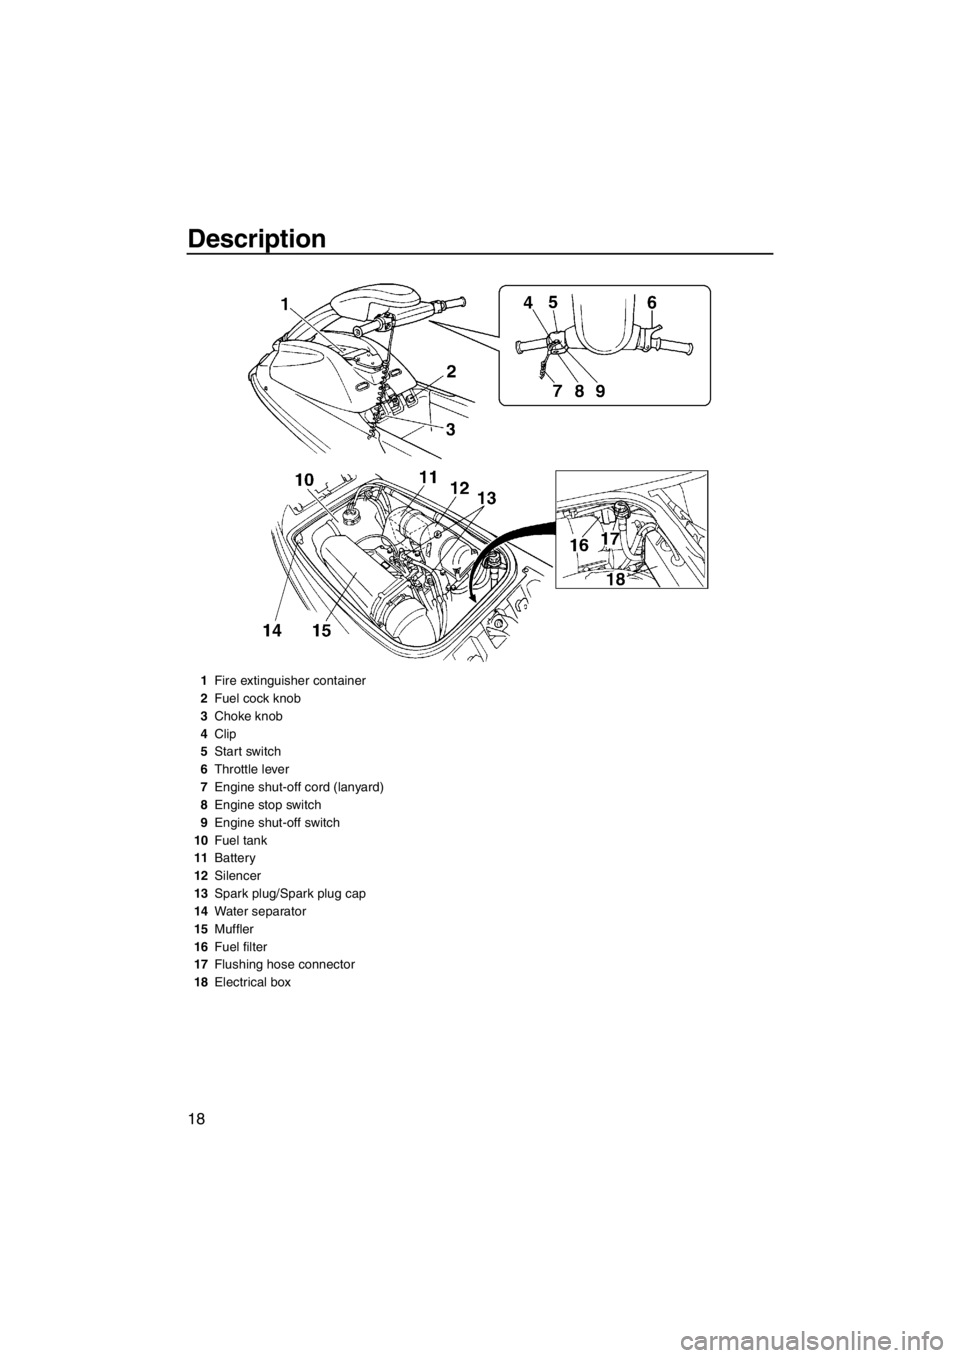
1Fire extinguisher container
2 Fuel cock knob
3 Choke knob
4 Clip
5 Start switch
6 Throttle lever
7 Engine shut-off cord (lanyard)
8 Engine stop switch
9 Engine shut-off switch
10 Fuel tank
11 Battery
12 Silencer
13 Spark plug/Spark plug cap
14 Water separator
15 Muffler
16 Fuel filter
17 Flushing hose connector
18 Electrical box
UF2F75E0.book Page 18 Thursday, July 5, 2012 8:50 AM
Page 28 of 78
Control function operation
22
that water is being discharged from the cool-
ing water pilot outlet. If water is not being dis-
charged from the outlet, stop the engine and
check the jet intake for clogging. (See page
66 for information on the jet intake.)
TIP:
●It will take about 20 seconds for the water to
reach the outlet after the engine is started.
●Water discharge may not be constant when
the engine is running at idling speed. If this
occurs, apply a little throttle to make sure
that water discharges properly.
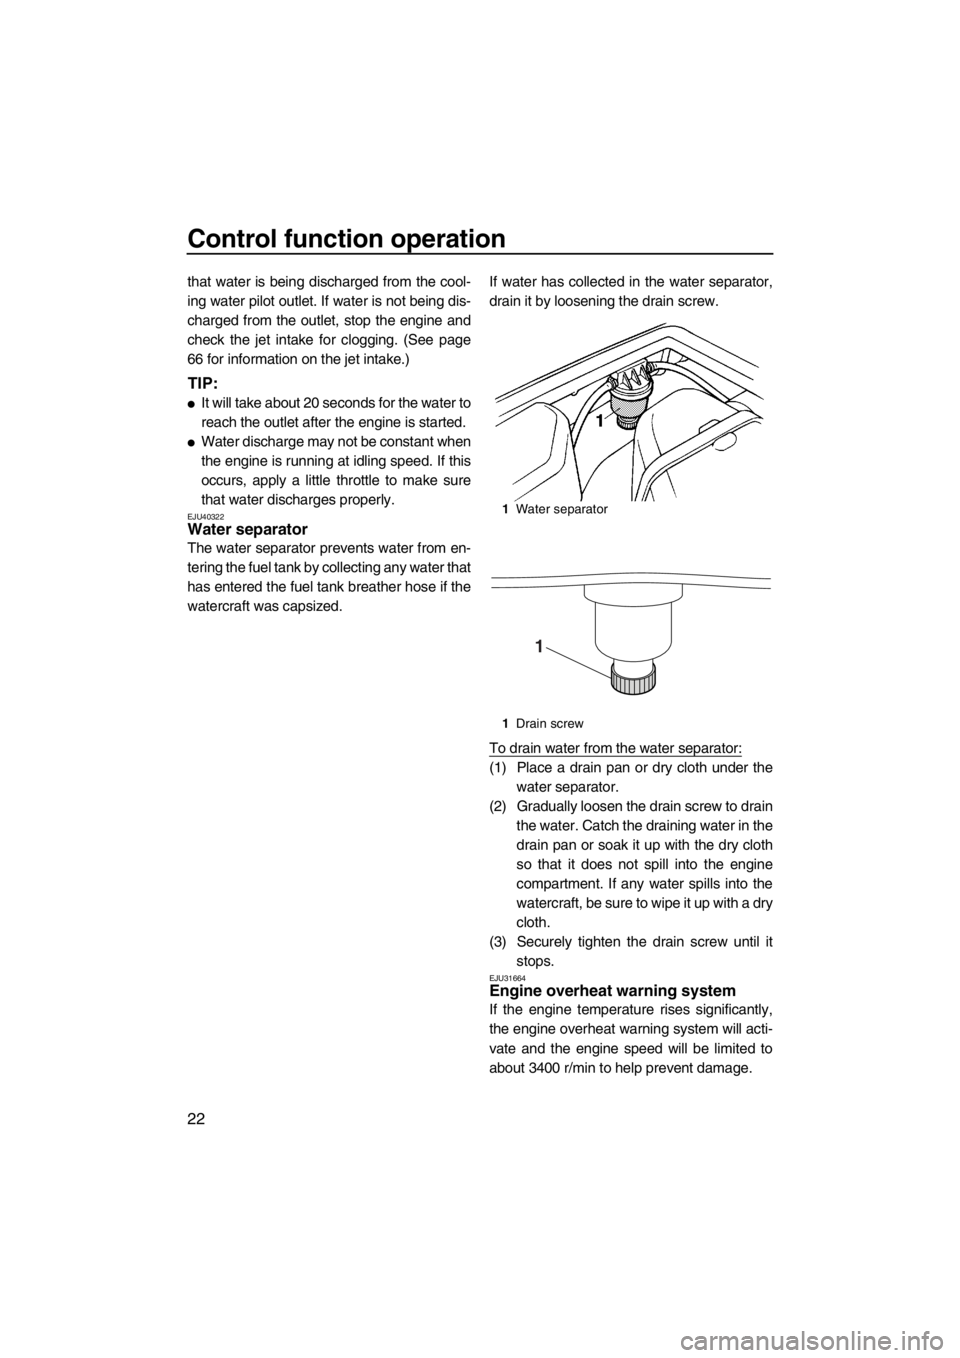
EJU40322Water separator
The water separator prevents water from en-
tering the fuel tank by collecting any water that
has entered the fuel tank breather hose if the
watercraft was capsized.If water has collected in the water separator,
drain it by loosening the drain screw.
To drain water from the water separator:
(1) Place a drain pan or dry cloth under the
water separator.
(2) Gradually loosen the drain screw to drain the water. Catch the draining water in the
drain pan or soak it up with the dry cloth
so that it does not spill into the engine
compartment. If any water spills into the
watercraft, be sure to wipe it up with a dry
cloth.
(3) Securely tighten the drain screw until it stops.
EJU31664Engine overheat warning system
If the engine temperature rises significantly,
the engine overheat warning system will acti-
vate and the engine speed will be limited to
about 3400 r/min to help prevent damage.
1Water separator
1 Drain screw
1
UF2F75E0.book Page 22 Thursday, July 5, 2012 8:50 AM
Page 35 of 78
Operation and handling requirements
29
(2) To mix them thoroughly, shake the con-tainer from side to side.
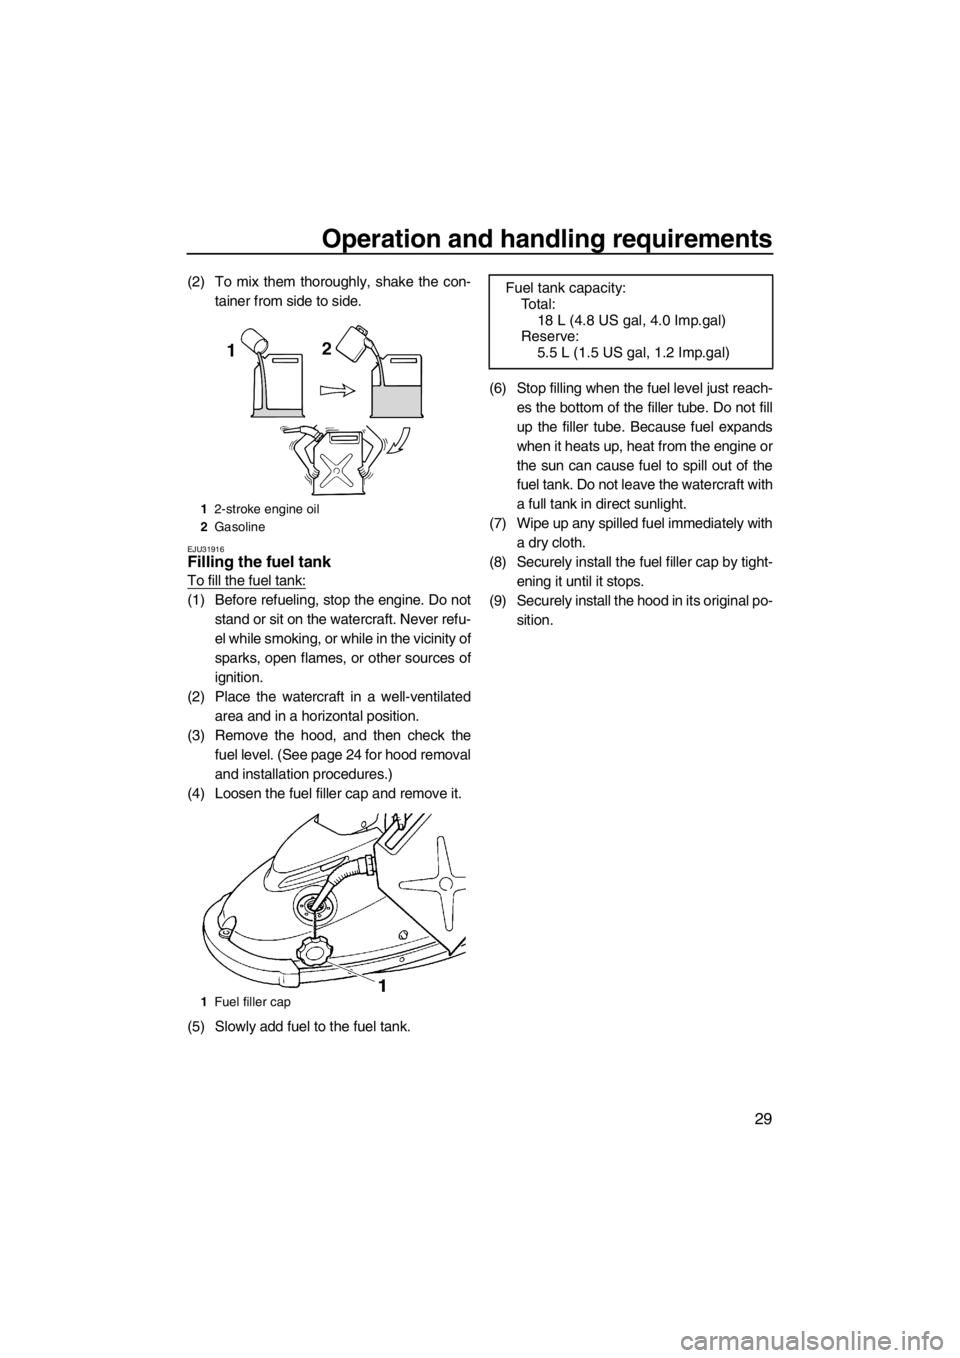
EJU31916Filling the fuel tank
To fill the fuel tank:
(1) Before refueling, stop the engine. Do notstand or sit on the watercraft. Never refu-
el while smoking, or while in the vicinity of
sparks, open flames, or other sources of
ignition.
(2) Place the watercraft in a well-ventilated area and in a horizontal position.
(3) Remove the hood, and then check the fuel level. (See page 24 for hood removal
and installation procedures.)
(4) Loosen the fuel filler cap and remove it.
(5) Slowly add fuel to the fuel tank. (6) Stop filling when the fuel level just reach-
es the bottom of the filler tube. Do not fill
up the filler tube. Because fuel expands
when it heats up, heat from the engine or
the sun can cause fuel to spill out of the
fuel tank. Do not leave the watercraft with
a full tank in direct sunlight.
(7) Wipe up any spilled fuel immediately with a dry cloth.
(8) Securely install the fuel filler cap by tight- ening it until it stops.
(9) Securely install the hood in its original po- sition.
12-stroke engine oil
2 Gasoline
1 Fuel filler cap
Fuel tank capacity:
To t a l :
18 L (4.8 US gal, 4.0 Imp.gal)
Reserve: 5.5 L (1.5 US gal, 1.2 Imp.gal)
UF2F75E0.book Page 29 Thursday, July 5, 2012 8:50 AM
Page 41 of 78
Pre-operation checks
35
EJU32281
Pre-operation check points EJU40685Pre-launch checks
Perform the pre-launch checks in the pre-op-
eration checklist while the watercraft is on
land.
To perform the pre-launch checks:
(1) Remove the hood. (See page 24 for hoodremoval and installation procedures.)
(2) Perform the checks and make sure that there are no malfunctioning items or oth-
er problems.
(3) After completing these checks, install the hood in its original position.
EJU32333Engine compartment check
WARNING
EWJ00461
Failure to ventilate the engine compart-
ment could result in a fire or explosion. Do
not start the engine if there is a fuel leak.
Ventilate the engine compartment. Leave the
engine compartment open for a few minutes
to allow any fuel vapors to escape.
Make sure that there is no damage inside the
engine compartment.
EJU34207Fuel system checks
WARNING
EWJ00381
Leaking fuel can result in fire or explosion.
●Check for fuel leakage regularly.
●If any fuel leakage is found, the fuel sys-
tem must be repaired by a qualified me-
chanic. Improper repairs can make the
watercraft unsafe to operate.
Make sure that there is no damage, leakage,
or other problem in the fuel system.
Check:
●Carburetor for leakage
●Fuel filler cap and seal for damage
●Fuel in fuel tank for water and dirt
●Fuel tank for damage and leakage
●Fuel hoses and joints for damage and leak-
age
●Fuel filter for leakage
●Fuel cock for leakage
●Fuel tank breather hose for damage and
leakage
Releasing the pressure in the fuel tank
Release the pressure in the fuel tank before
each use.
To release the pressure in the fuel tank:
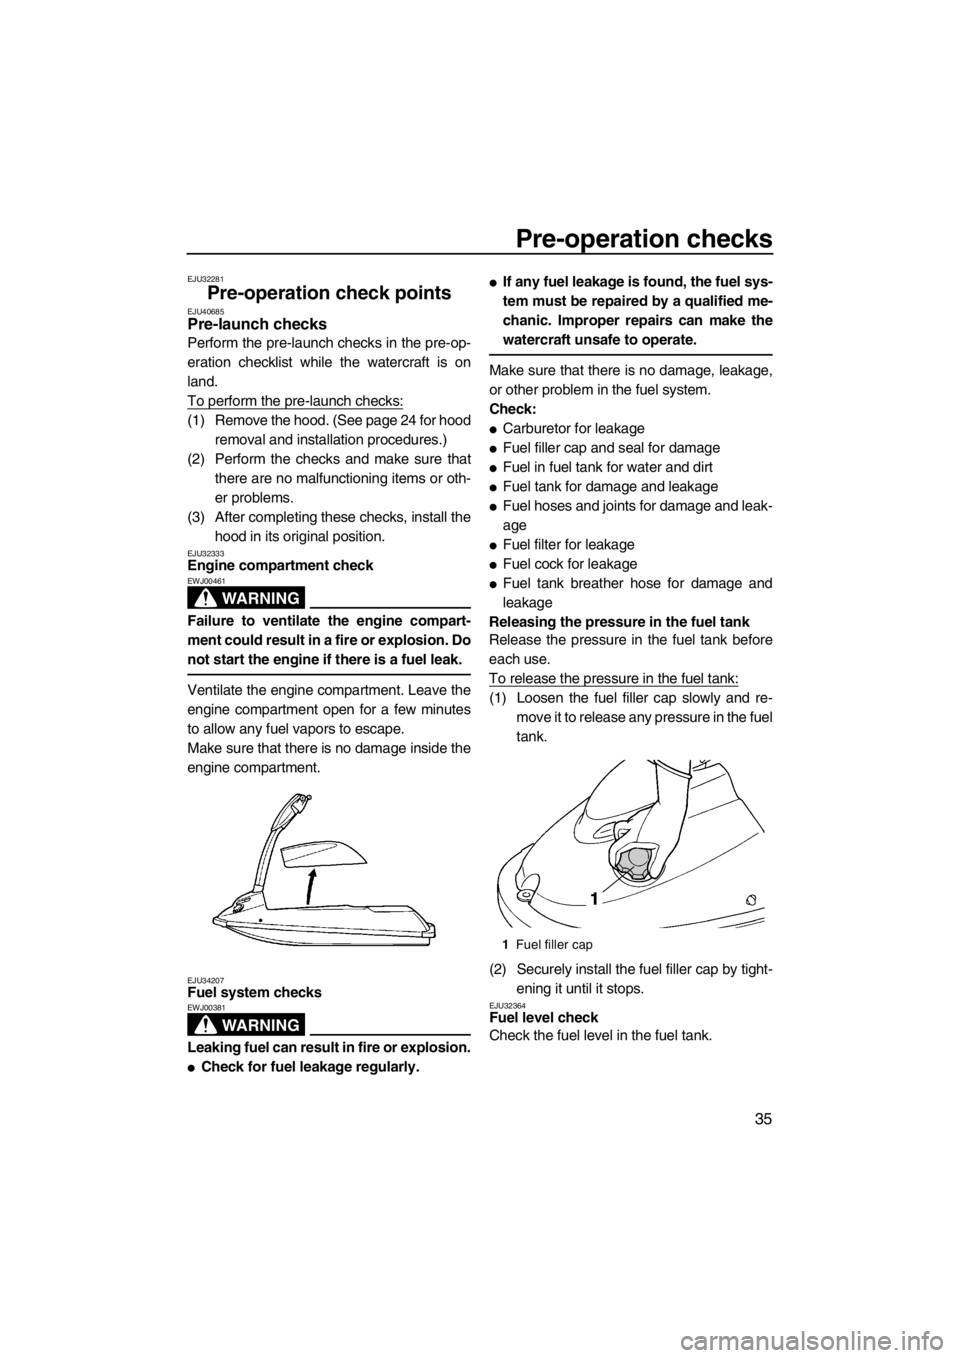
(1) Loosen the fuel filler cap slowly and re- move it to release any pressure in the fuel
tank.
(2) Securely install the fuel filler cap by tight- ening it until it stops.
EJU32364Fuel level check
Check the fuel level in the fuel tank.
1Fuel filler cap
UF2F75E0.book Page 35 Thursday, July 5, 2012 8:50 AM
Page 56 of 78
Care and storage
50
EJU41191
Post-operation care
WARNING
EWJ00320
Always turn the fuel cock knob to “OFF”
when storing the watercraft, otherwise
fuel could leak out into the engine or en-
gine compartment, which would create a
fire hazard.
After using the watercraft, always take it out of
the water, clean it, and store it. Leaving the
watercraft in the water for extended periods
will accelerate the rate of normal deterioration
of the jet pump and hull. Marine organisms
and corrosion are some of the conditions that
can shorten the life of many watercraft com-
ponents.
EJU33518Flushing the cooling water passages
NOTICE
ECJ01360
Do not run the engine for more than 15
seconds on land without supplying water,
otherwise the engine could overheat.
Flush the cooling water passages to prevent
them from clogging with salt, sand, or dirt.
(1) Place the watercraft in a horizontal posi-tion.
(2) Remove the hood. (See page 24 for hood removal and installation procedures.) (3) Connect the garden hose adapter to a
garden hose.
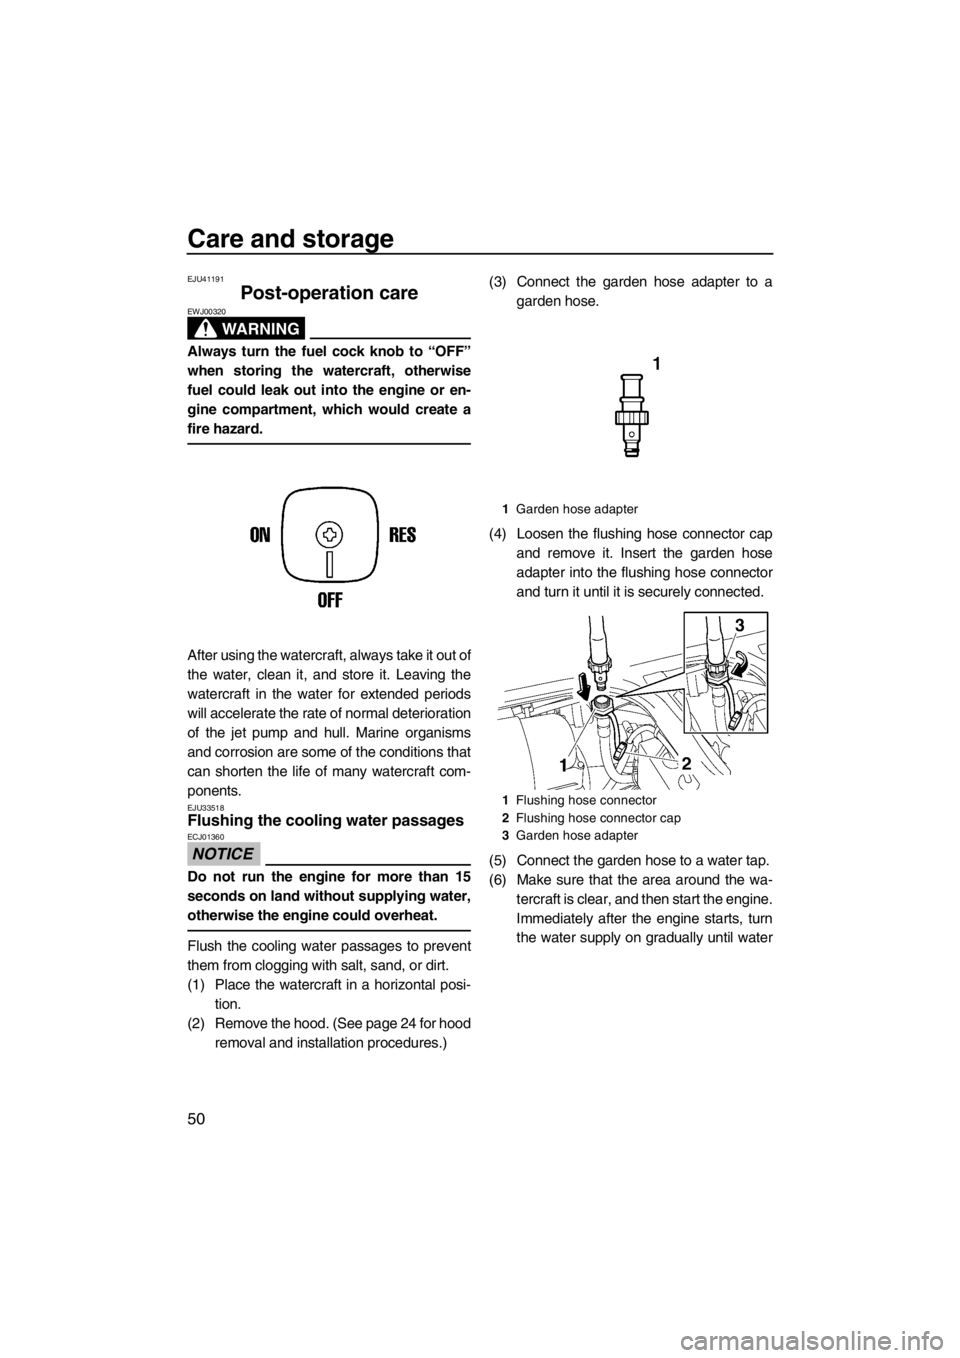
(4) Loosen the flushing hose connector cap and remove it. Insert the garden hose
adapter into the flushing hose connector
and turn it until it is securely connected.
(5) Connect the garden hose to a water tap.
(6) Make sure that the area around the wa- tercraft is clear, and then start the engine.
Immediately after the engine starts, turn
the water supply on gradually until water
1Garden hose adapter
1 Flushing hose connector
2 Flushing hose connector cap
3 Garden hose adapter
UF2F75E0.book Page 50 Thursday, July 5, 2012 8:50 AM
Page 67 of 78
Maintenance
61
the correct torque is 1/4 turn to 1/2 turn past
finger tight using the spark plug wrench in-
cluded in the tool kit. Have the spark plug ad-
justed to the correct torque with a torque
wrench as soon as possible.
(3) Wipe off any water or dirt inside the sparkplug cap.
(4) Install the spark plug cap by pushing it down until it is securely installed in its
original position.
(5) Securely install the hood in its original po- sition.
EJU41180Lubrication points
Lubricate moving parts with water-resistant
grease. (See page 54 for information on the
main lubrication points.)
Intermediate housing
Fill the intermediate housing with water-resis-
tant grease through the grease nipple using a
grease gun.
EJU34225Checking the fuel filter
Check the fuel filter. The fuel filter should be
replaced if water or dirt is found in the filter.
Have a Yamaha dealer replace the fuel filter if
necessary.
EJU34441Adjusting the choke cable
Check that the choke cable is properly adjust-
ed.
To adjust the choke cable:
(1) Pull the choke knob out until it stops, andthen release the knob. The knob should
not move.
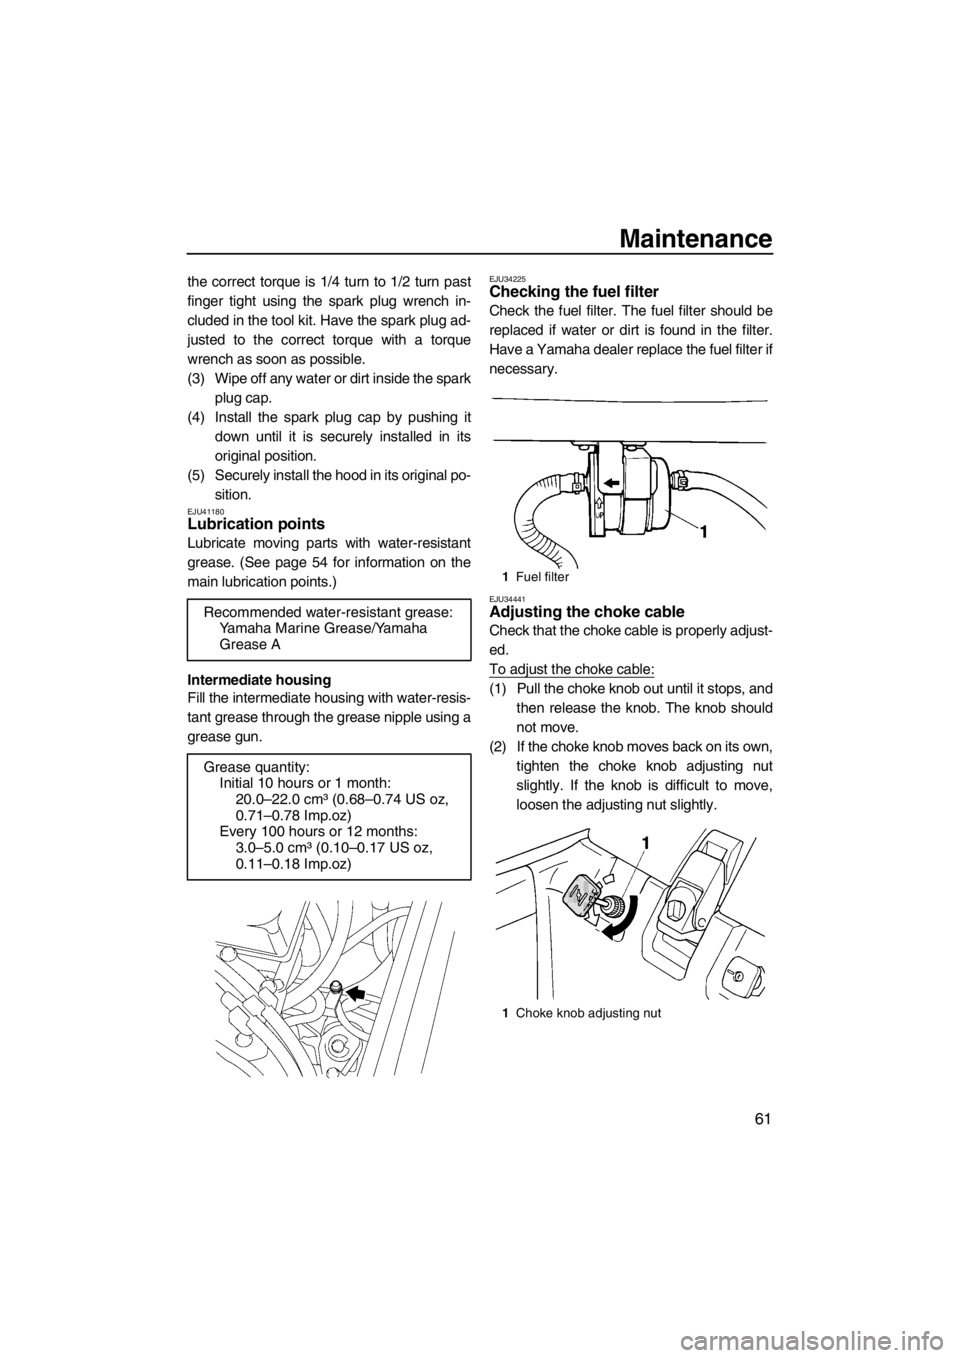
(2) If the choke knob moves back on its own, tighten the choke knob adjusting nut
slightly. If the knob is difficult to move,
loosen the adjusting nut slightly.
Recommended water-resistant grease:
Yamaha Marine Grease/Yamaha
Grease A
Grease quantity: Initial 10 hours or 1 month:
20.0–22.0 cm³ (0.68–0.74 US oz,
0.71–0.78 Imp.oz)
Every 100 hours or 12 months:
3.0–5.0 cm³ (0.10–0.17 US oz,
0.11–0.18 Imp.oz)
1Fuel filter
1 Choke knob adjusting nut
UF2F75E0.book Page 61 Thursday, July 5, 2012 8:50 AM