Page 116 of 174
8-25
8
TIPSkip steps 5–9 if the oil filter cartridge is not being
replaced.5. Remove panel F. (See page 8-10.)
6. Remove the oil filter cartridge with an oil filterwrench.TIPAn oil filter wrench is available at a nearby Yamaha
dealer.7. Apply a thin coat of engine oil to the O-ring ofthe new oil filter cartridge.
TIPMake sure that the O-ring is properly seated.8. Install the new oil filter cartridge with an oil fil-ter wrench, and then tighten it to the specified
torque with a torque wrench.
1. Oil filter cartridge
2. Oil filter wrench
1. O-ring
U1HP61E0.book Page 25 Thursday, April 5, 2012 3:33 PM
Page 117 of 174

8-26
8
9. Install panel F.
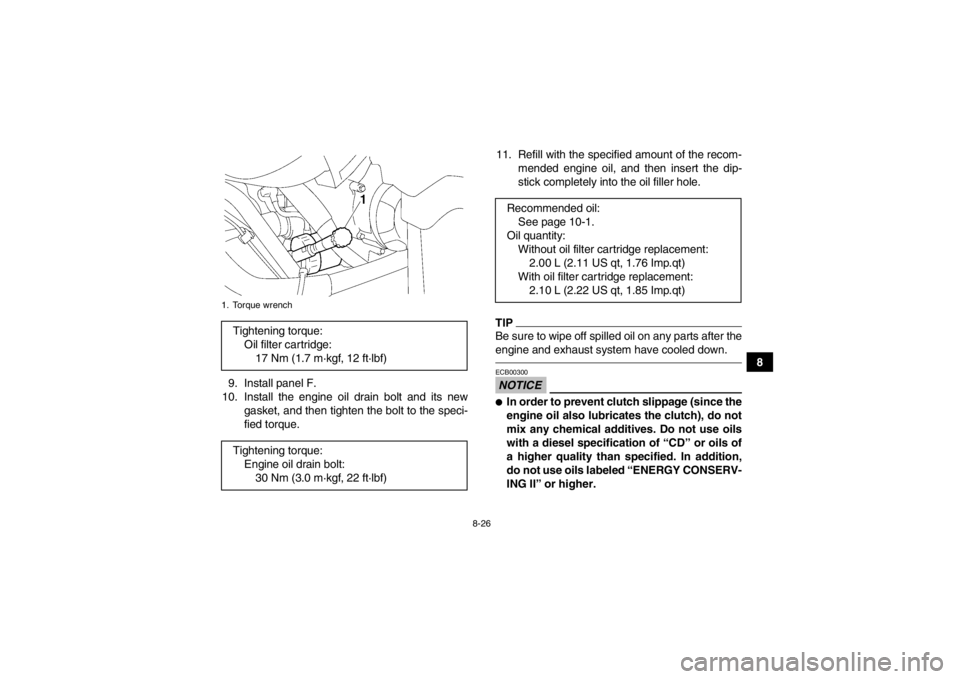
10. Install the engine oil drain bolt and its new gasket, and then tighten the bolt to the speci-
fied torque. 11. Refill with the specified amount of the recom-
mended engine oil, and then insert the dip-
stick completely into the oil filler hole.
TIPBe sure to wipe off spilled oil on any parts after the
engine and exhaust system have cooled down.NOTICEECB00300●In order to prevent clutch slippage (since the
engine oil also lubricates the clutch), do not
mix any chemical additives. Do not use oils
with a diesel specification of “CD” or oils of
a higher quality than specified. In addition,
do not use oils labeled “ENERGY CONSERV-
ING II” or higher.
1. Torque wrenchTightening torque:Oil filter cartridge:17 Nm (1.7 m·kgf, 12 ft·lbf)
Tightening torque: Engine oil drain bolt:30 Nm (3.0 m·kgf, 22 ft·lbf)
Recommended oil: See page 10-1.
Oil quantity: Without oil filter cartridge replacement:2.00 L (2.11 US qt, 1.76 Imp.qt)
With oil filter car tridge replacement: 2.10 L (2.22 US qt, 1.85 Imp.qt)
U1HP61E0.book Page 26 Thursday, April 5, 2012 3:33 PM
Page 118 of 174

8-27
8
●Make sure that no foreign material enters the
crankcase.12. Start the engine, and then let it idle for severalminutes while checking it for oil leakage. If oil
is leaking, immediately turn the engine off and
check for the cause.
13. Turn the engine off, wait at least ten minutes, and then check the oil level and correct it if
necessary.
14. Install the access cover by turning it clock- wise.EBU27306Final gear oil The final gear case must be checked for oil leak-
age before each ride. If any leakage is found, have
a Yamaha dealer check and repair the ATV. In ad-
dition, the final gear oil level must be checked and
the oil changed as follows at the intervals specified
in the periodic maintenance and lubrication chart.
To check the final gear oil level1. Place the ATV on a level surface. 2. Remove the final gear oil level check bolt and
its gasket, and then check the oil level in the
final gear case. The oil level should be at the
brim of the check hole.
3. If the oil is below the brim of the check hole, remove the final gear oil filler bolt and its gas-
ket, and then add sufficient oil of the recom-
mended type to raise it to the correct level.
1. Final gear oil
2. Gasket
3. Final gear oil level check bolt
4. Correct oil level
1
243
U1HP61E0.book Page 27 Thursday, April 5, 2012 3:33 PM
Page 123 of 174

8-32
8
8. Check the differential gear case for oil leak-
age. If oil is leaking, check for the cause.
EBU23470Coolant The coolant level should be checked before each
ride. In addition, the coolant must be changed at
the intervals specified in the periodic maintenance
and lubrication chart.EBU27126To check the coolant level1. Place the ATV on a level surface.TIPThe coolant level must be checked on a cold en-
gine since the level varies with engine tempera-
ture.2. Check the coolant level in the coolant reser- voir.TIPThe coolant should be between the minimum and
maximum level marks.
3. If the coolant is at or below the minimum levelmark, remove panel D to access the coolant
reservoir. (See page 8-10.)
4. Remove the coolant reservoir cap, add cool- ant or distilled water to the maximum level
mark, install the reservoir cap, and then install
the panel. NOTICE: If coolant is not avail-
able, use distilled water or soft tap water
instead. Do not use hard water or salt wa-
ter since they are harmful to the engine. If
water has been used instead of coolant, re-
place it with coolant as soon as possible,
otherwise the cooling system will not be1. Maximum level mark
2. Minimum level mark
U1HP61E0.book Page 32 Thursday, April 5, 2012 3:33 PM
Page 124 of 174

8-33
8protected against frost and corrosion. If
water has been added to the coolant, have
a Yamaha dealer check the antifreeze con-
tent of the coolant as soon as possible,
otherwise the effectiveness of the coolant
will be reduced.
[ECB01011]
TIP●The radiator fan is automatically switched on or
off according to the coolant temperature in the
radiator.●If the engine overheats, see page 8-68 for fur-
ther instructions.EBU27767To change the coolant
WARNING
EWB01890Wait for the engine and radiator to cool before
removing the radiator cap. You could be
burned by hot fluid and steam blown out under
pressure. Always place a thick rag over the cap
when opening. Allow any remaining pressure
to escape before completely removing the cap.1. Place the ATV on a level surface.
2. Remove panel D. (See page 8-10.)
3. Remove the footboard by removing the bolts
and nuts.
1. Coolant reservoir cap
2. Maximum level mark
3. Minimum level markCoolant reservoir capacity (up to the maxi-
mum level mark):0.24 L (0.25 US qt, 0.21 Imp.qt)
U1HP61E0.book Page 33 Thursday, April 5, 2012 3:33 PM
Page 125 of 174
8-34
8
4. Place a container under the engine, and then
remove the coolant drain bolt and its gasket.
(Use a trough or a similar object as shown to
prevent coolant from spilling on the engine
guard.)
5. Remove panel B. (See page 8-10.)
1. Footboard
2. Bolt and nut
3. Bolt
3
2
2
3
1
1. Coolant drain bolt
2. Gasket
1. Trough
1
2
1
U1HP61E0.book Page 34 Thursday, April 5, 2012 3:33 PM
Page 127 of 174

8-36
8
13. Pour the recommended coolant into the reser-
voir to the maximum level mark, and then in-
stall the reservoir cap. NOTICE: Mix
antifreeze with distilled water only. Howev-
er, if distilled water is not available, soft
water may be used for refilling. Do not use
hard water or salt water since they are
harmful to the engine.
[ECB00991]
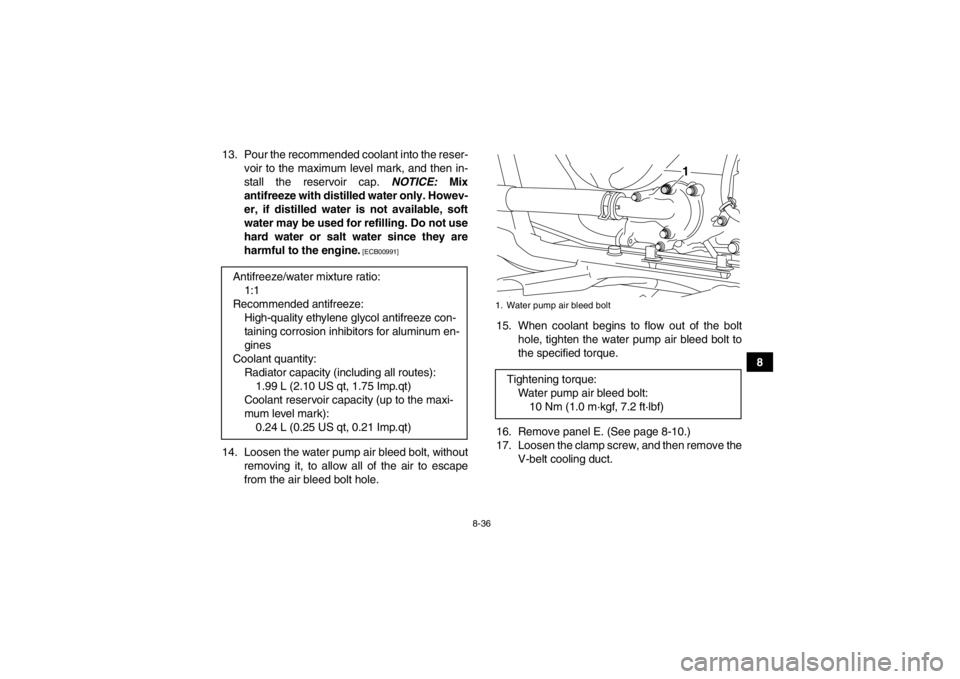
14. Loosen the water pump air bleed bolt, without removing it, to allow all of the air to escape
from the air bleed bolt hole. 15. When coolant begins to flow out of the bolt
hole, tighten the water pump air bleed bolt to
the specified torque.
16. Remove panel E. (See page 8-10.)
17. Loosen the clamp screw, and then remove the V-belt cooling duct.
Antifreeze/water mixture ratio:
1:1
Recommended antifreeze: High-quality ethylene glycol antifreeze con-
taining corrosion inhibitors for aluminum en-
gines
Coolant quantity: Radiator capacity (including all routes):1.99 L (2.10 US qt, 1.75 Imp.qt)
Coolant reservoir capacity (up to the maxi-
mum level mark): 0.24 L (0.25 US qt, 0.21 Imp.qt)
1. Water pump air bleed boltTightening torque: Water pump air bleed bolt:10 Nm (1.0 m·kgf, 7.2 ft·lbf)
1
U1HP61E0.book Page 36 Thursday, April 5, 2012 3:33 PM
Page 128 of 174
8-37
818. Loosen the cylinder head air bleed bolt, with-
out removing it, to allow all of the air to escape
from the air bleed bolt hole. 19. When coolant begins to flow out of the bolt
hole, tighten the cylinder head air bleed bolt to
the specified torque.
20. Start the engine and let it idle for ten minutes.
21. Rev the engine five times.
22. Pour the recommended coolant into the radia- tor until it is full.
1. V-belt cooling duct
2. Clamp screw
1. Cylinder head air bleed boltTightening torque:Cylinder head air bleed bolt:10 Nm (1.0 m·kgf, 7.2 ft·lbf)
U1HP61E0.book Page 37 Thursday, April 5, 2012 3:33 PM