2013 YAMAHA AEROX50 warning
[x] Cancel search: warningPage 33 of 74
OPERATION AND IMPORTANT RIDING POINTS
5-1
5
EAU15951
Read the Owner’s Manual carefully to
become familiar with all controls. If
there is a control or function you do not
understand, ask your Yamaha dealer.
WARNING
EWA10271
Failure to familiarize yourself with
the controls can lead to loss of con-
trol, which could cause an accident
or injury.
EAUM2760
Starting a cold engine NOTICE
ECA10250
See page 5-3 for engine break-in in-
structions prior to operating the ve-
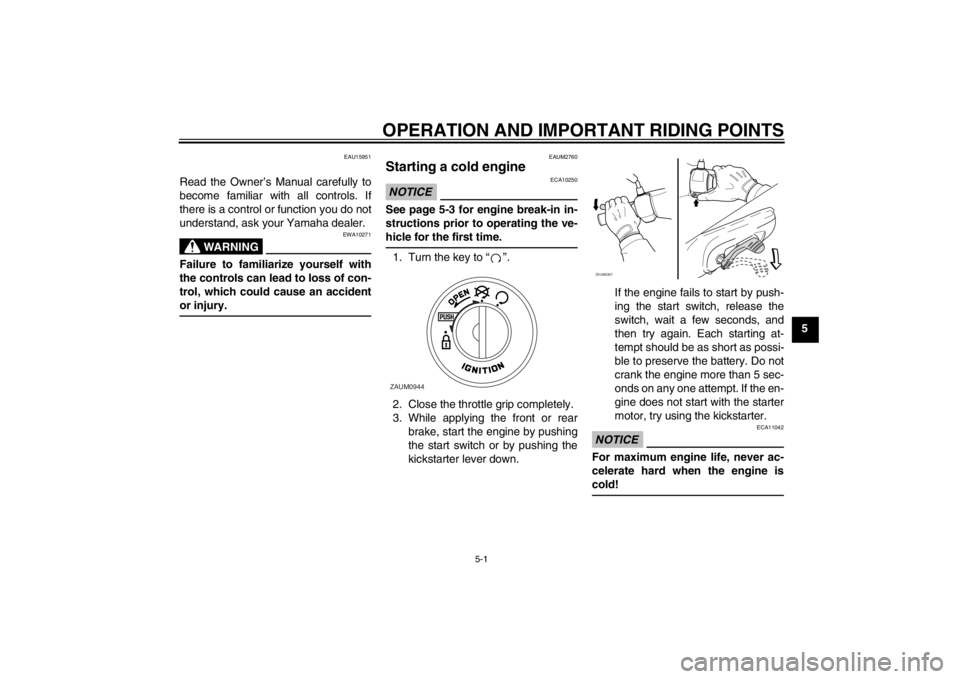
hicle for the first time.1. Turn the key to “ ”.
2. Close the throttle grip completely.
3. While applying the front or rear
brake, start the engine by pushing
the start switch or by pushing the
kickstarter lever down.If the engine fails to start by push-
ing the start switch, release the
switch, wait a few seconds, and
then try again. Each starting at-
tempt should be as short as possi-
ble to preserve the battery. Do not
crank the engine more than 5 sec-
onds on any one attempt. If the en-
gine does not start with the starter
motor, try using the kickstarter.
NOTICE
ECA11042
For maximum engine life, never ac-
celerate hard when the engine is
cold!
ZAUM0944
ZAUM0367
U1PHE0E0.book Page 1 Wednesday, August 29, 2012 4:42 PM
Page 34 of 74

OPERATION AND IMPORTANT RIDING POINTS
5-2
5
EAU16761
Starting off TIPBefore starting off, allow the engine to
warm up.1. While pulling the rear brake lever
with your left hand and holding the
grab bar with your right hand, push
the scooter off the centerstand.
2. Sit astride the seat, and then ad-
just the rear view mirrors.
3. Switch the turn signals on.
4. Check for oncoming traffic, and
then slowly turn the throttle grip (on
the right) in order to take off.
5. Switch the turn signals off.
EAU16780
Acceleration and deceleration The speed can be adjusted by opening
and closing the throttle. To increase the
speed, turn the throttle grip in direction
(a). To reduce the speed, turn the throt-
tle grip in direction (b).
EAU16793
Braking
WARNING
EWA10300
●
Avoid braking hard or suddenly
(especially when leaning over to
one side), otherwise the scooter
may skid or overturn.
●
Railroad crossings, streetcar
rails, iron plates on road con-
struction sites, and manhole
covers become extremely slip-
pery when wet. Therefore, slow
down when approaching such
areas and cross them with cau-
tion.
●
Keep in mind that braking on a
wet road is much more difficult.
●
Ride slowly down a hill, as brak-
ing downhill can be very diffi-
cult.
1. Close the throttle completely.
2. Apply both front and rear brakes
simultaneously while gradually in-
creasing the pressure.
ZAUM0614
(b)
(a)
ZAUM0199
U1PHE0E0.book Page 2 Wednesday, August 29, 2012 4:42 PM
Page 36 of 74
OPERATION AND IMPORTANT RIDING POINTS
5-4
51000 km (600 mi) and beyond
Avoid prolonged full throttle operation.
Vary speeds occasionally. NOTICE:
After 1000 km (600 mi) of operation,
the final transmission oil must be
changed.
[ECAM1071]
NOTICE
ECA10270
If any engine trouble should occur
during the engine break-in period,
immediately have a Yamaha dealer
check the vehicle.
EAU17213
Parking When parking, stop the engine, and
then remove the key from the main
switch.
WARNING
EWA10311
●
Since the engine and exhaust
system can become very hot,
park in a place where pedestri-
ans or children are not likely to
touch them and be burned.
●
Do not park on a slope or on soft
ground, otherwise the vehicle
may overturn, increasing the
risk of a fuel leak and fire.
●
Do not park near grass or other
flammable materials which
might catch fire.
U1PHE0E0.book Page 4 Wednesday, August 29, 2012 4:42 PM
Page 37 of 74
PERIODIC MAINTENANCE AND ADJUSTMENT
6-1
6
EAU17244
Periodic inspection, adjustment, and lu-
brication will keep your vehicle in the
safest and most efficient condition pos-
sible. Safety is an obligation of the vehi-
cle owner/operator. The most important
points of vehicle inspection, adjust-
ment, and lubrication are explained on
the following pages.
The intervals given in the periodic
maintenance charts should be simply
considered as a general guide under
normal riding conditions. However, de-
pending on the weather, terrain, geo-
graphical location, and individual use,
the maintenance intervals may need to
be shortened.
WARNING
EWA10321
Failure to properly maintain the ve-
hicle or performing maintenance ac-
tivities incorrectly may increase
your risk of injury or death during
service or while using the vehicle. If
you are not familiar with vehicle ser-
vice, have a Yamaha dealer perform
service.
WARNING
EWA15122
Turn off the engine when performing
maintenance unless otherwise
specified.●
A running engine has moving
parts that can catch on body
parts or clothing and electrical
parts that can cause shocks or
fires.
●
Running the engine while ser-
vicing can lead to eye injury,
burns, fire, or carbon monoxide
poisoning – possibly leading to
death. See page 1-3 for more in-
formation about carbon monox-
ide.WARNING
EWA15460
Brake discs, calipers, drums, and
linings can become very hot during
use. To avoid possible burns, let
brake components cool before
touching them.
U1PHE0E0.book Page 1 Wednesday, August 29, 2012 4:42 PM
Page 44 of 74
PERIODIC MAINTENANCE AND ADJUSTMENT
6-8
6
EAU20066
Final transmission oil The final transmission case must be
checked for oil leakage before each
ride. If any leakage is found, have a
Yamaha dealer check and repair the
scooter. In addition, the final transmis-
sion oil must be changed as follows at
the intervals specified in the periodic
maintenance and lubrication chart.
1. Start the engine, warm up the final
transmission oil by riding the
scooter for several minutes, and
then stop the engine.
2. Place the scooter on the center-
stand.
3. Place an oil pan under the final
transmission case to collect the
used oil.
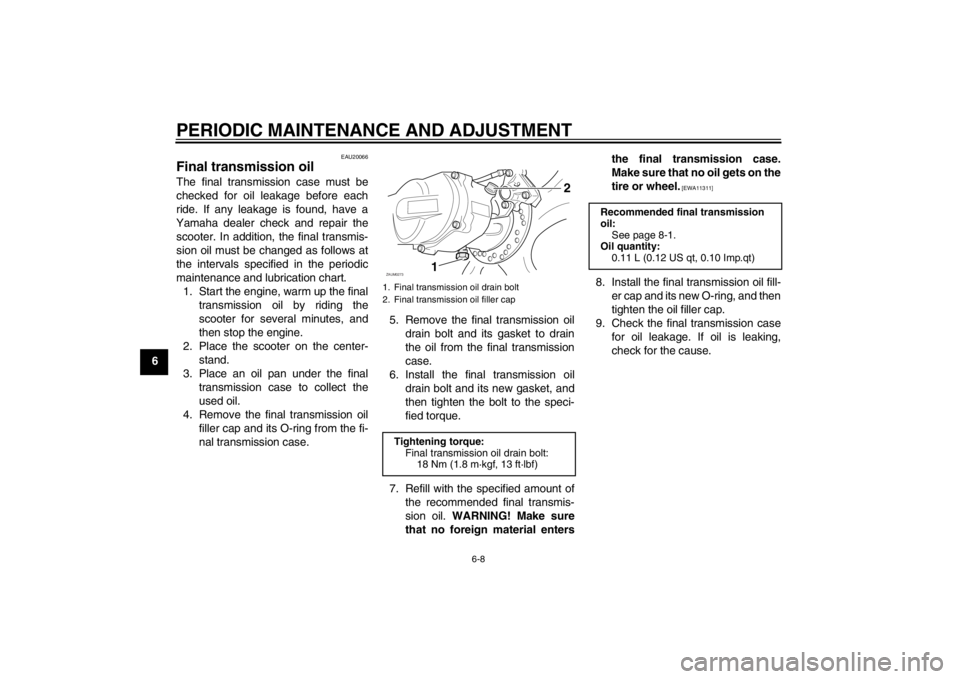
4. Remove the final transmission oil
filler cap and its O-ring from the fi-
nal transmission case.5. Remove the final transmission oil
drain bolt and its gasket to drain
the oil from the final transmission
case.
6. Install the final transmission oil
drain bolt and its new gasket, and
then tighten the bolt to the speci-
fied torque.
7. Refill with the specified amount of
the recommended final transmis-
sion oil. WARNING! Make sure
that no foreign material entersthe final transmission case.
Make sure that no oil gets on the
tire or wheel.
[EWA11311]
8. Install the final transmission oil fill-
er cap and its new O-ring, and then
tighten the oil filler cap.
9. Check the final transmission case
for oil leakage. If oil is leaking,
check for the cause.
1. Final transmission oil drain bolt
2. Final transmission oil filler capTightening torque:
Final transmission oil drain bolt:
18 Nm (1.8 m·kgf, 13 ft·lbf)
12
ZAUM0273
Recommended final transmission
oil:
See page 8-1.
Oil quantity:
0.11 L (0.12 US qt, 0.10 Imp.qt)
U1PHE0E0.book Page 8 Wednesday, August 29, 2012 4:42 PM
Page 45 of 74

PERIODIC MAINTENANCE AND ADJUSTMENT
6-9
6
EAU20070
Coolant The coolant level should be checked
before each ride. In addition, the cool-
ant must be changed at the intervals
specified in the periodic maintenance
and lubrication chart.
EAUM2102
To check the coolant level
1. Place the vehicle on a level sur-
face and hold it in an upright posi-
tion.TIP●
The coolant level must be checked
on a cold engine since the level
varies with engine temperature.
●
Make sure that the vehicle is posi-
tioned straight up when checking
the coolant level. A slight tilt to the
side can result in a false reading.
2. Check the coolant level through
the check window.TIPThe coolant should be between the
minimum and maximum level marks.
3. If the coolant is at or below the
minimum level mark, remove the
cowling A. (See page 6-6.)
4. Open the reservoir cap, and then
add coolant to the maximum level
mark. WARNING! Remove only
the coolant reservoir cap. Never
attempt to remove the radiator
cap when the engine is hot.
[EWA15161]
NOTICE: If coolant is not
available, use distilled water or
soft tap water instead. Do not
use hard water or salt water
since it is harmful to the engine.
If water has been used instead
of coolant, replace it with cool-
ant as soon as possible, other-wise the cooling system will not
be protected against frost and
corrosion. If water has been
added to the coolant, have a
Yamaha dealer check the anti-
freeze content of the coolant as
soon as possible, otherwise the
effectiveness of the coolant will
be reduced.
[ECA10472]
5. Close the reservoir cap, and then
install the cowling.
1. Maximum level mark
2. Minimum level mark
1
2
ZAUM0591
1. Coolant reservoir cap
Coolant reservoir capacity:
0.25 L (0.26 US qt, 0.22 Imp.qt)1ZAUM0274
U1PHE0E0.book Page 9 Wednesday, August 29, 2012 4:42 PM
Page 46 of 74
PERIODIC MAINTENANCE AND ADJUSTMENT
6-10
6
EAU33031
Changing the coolant
The coolant must be changed at the in-
tervals specified in the periodic mainte-
nance and lubrication chart. Have a
Yamaha dealer change the coolant.
WARNING! Never attempt to remove
the radiator cap when the engine is
hot.
[EWA10381]EAUM1642
Cleaning the air filter element The air filter element should be cleaned
at the intervals specified in the periodic
maintenance and lubrication chart.
Clean the air filter element more fre-
quently if you are riding in unusually
wet or dusty areas.
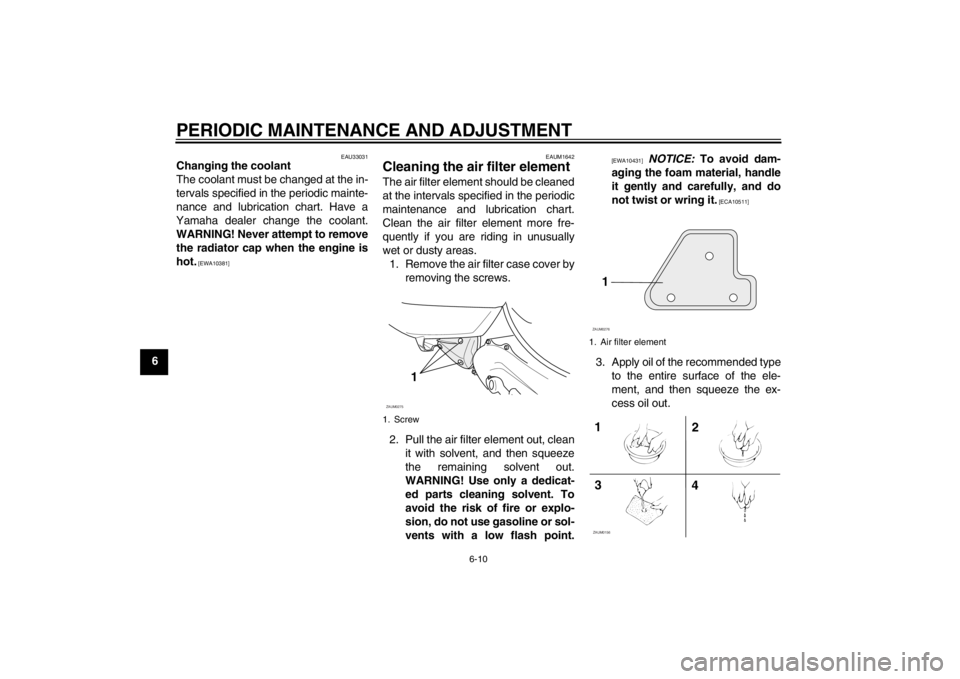
1. Remove the air filter case cover by
removing the screws.
2. Pull the air filter element out, clean
it with solvent, and then squeeze
the remaining solvent out.
WARNING! Use only a dedicat-
ed parts cleaning solvent. To
avoid the risk of fire or explo-
sion, do not use gasoline or sol-
vents with a low flash point.
[EWA10431]
NOTICE: To avoid dam-
aging the foam material, handle
it gently and carefully, and do
not twist or wring it.
[ECA10511]
3. Apply oil of the recommended type
to the entire surface of the ele-
ment, and then squeeze the ex-
cess oil out.
1. Screw
1
ZAUM0275
1. Air filter element
1ZAUM02761
4 32ZAUM0156
U1PHE0E0.book Page 10 Wednesday, August 29, 2012 4:42 PM
Page 48 of 74
PERIODIC MAINTENANCE AND ADJUSTMENT
6-12
6
EAU21876
Tires Tires are the only contact between the
vehicle and the road. Safety in all con-
ditions of riding depends on a relatively
small area of road contact. Therefore, it
is essential to maintain the tires in good
condition at all times and replace them
at the appropriate time with the speci-
fied tires.
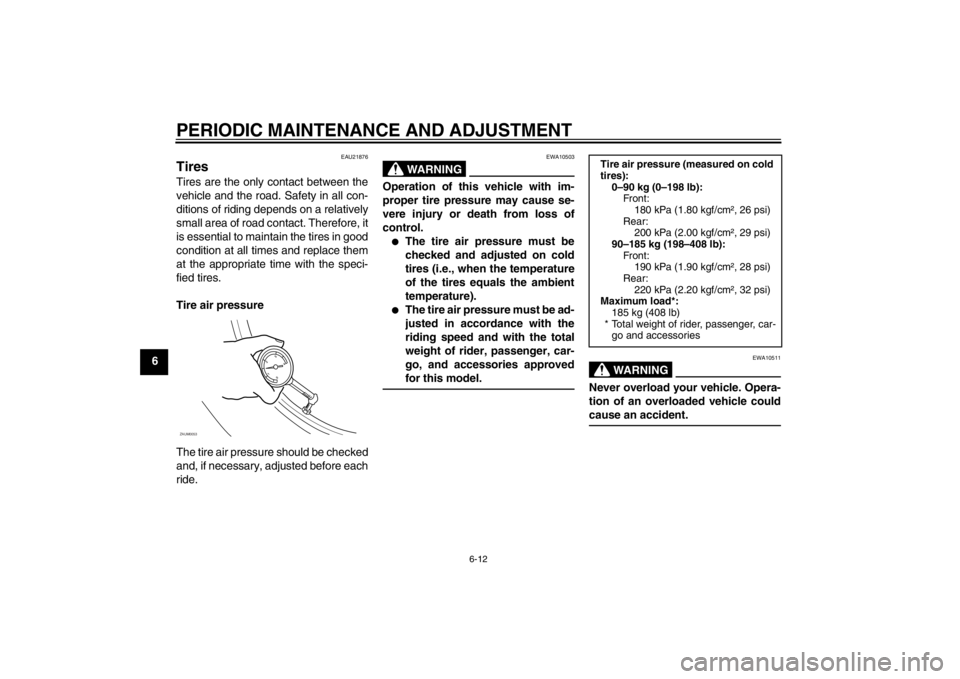
Tire air pressure
The tire air pressure should be checked
and, if necessary, adjusted before each
ride.
WARNING
EWA10503
Operation of this vehicle with im-
proper tire pressure may cause se-
vere injury or death from loss of
control.●
The tire air pressure must be
checked and adjusted on cold
tires (i.e., when the temperature
of the tires equals the ambient
temperature).
●
The tire air pressure must be ad-
justed in accordance with the
riding speed and with the total
weight of rider, passenger, car-
go, and accessories approved
for this model.
WARNING
EWA10511
Never overload your vehicle. Opera-
tion of an overloaded vehicle could
cause an accident.
ZAUM0053
Tire air pressure (measured on cold
tires):
0–90 kg (0–198 lb):
Front:
180 kPa (1.80 kgf/cm², 26 psi)
Rear:
200 kPa (2.00 kgf/cm², 29 psi)
90–185 kg (198–408 lb):
Front:
190 kPa (1.90 kgf/cm², 28 psi)
Rear:
220 kPa (2.20 kgf/cm², 32 psi)
Maximum load*:
185 kg (408 lb)
* Total weight of rider, passenger, car-
go and accessories
U1PHE0E0.book Page 12 Wednesday, August 29, 2012 4:42 PM